Billing > Looking up Bills, Write-Ups/Downs, and Payments > Using the Billing Index
 Using the Billing Index
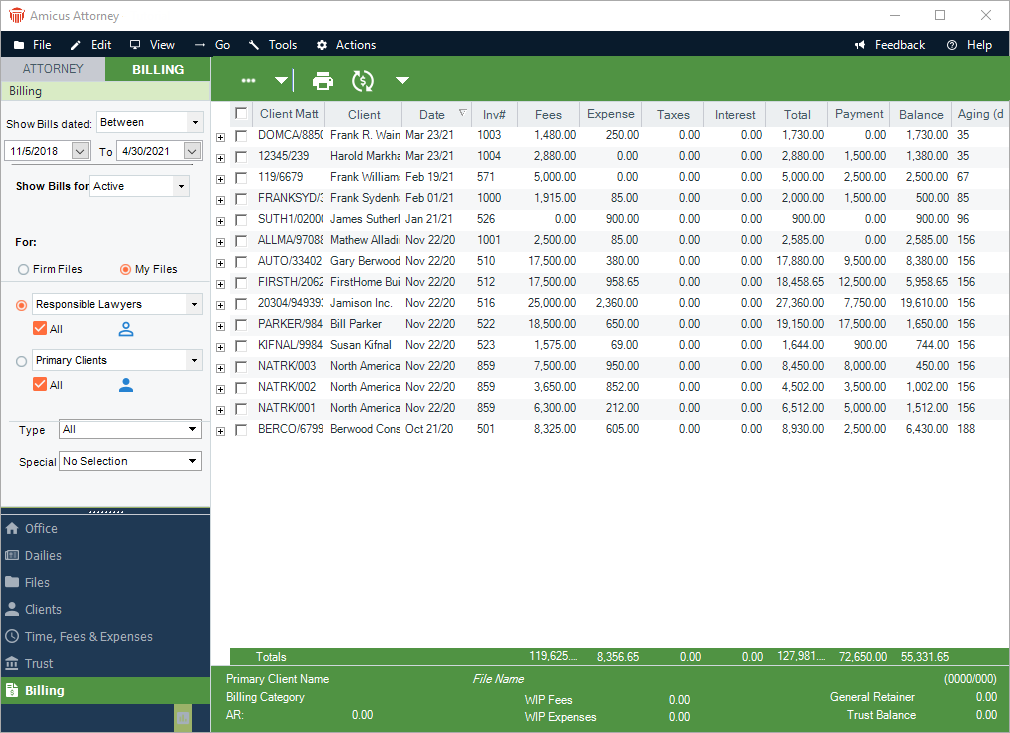
The Billing Index window appears when you open the Billing module. It shows a list of your Bills.
- To open the Billing Index, navigate to the Billing side of Amicus and then click the Billing button in the Navigation Pane.
-
The Billing list shows information for each Bill: the Client Matter ID, Primary Client Name, AR Date, Invoice Number, new charges (Fees, Expenses, Taxes, and total), amount paid, outstanding balance owed, and aging (for outstanding Bills, the number of days since the AR Date), and the Responsible Lawyer initials. At the bottom of the list, totals for the currency columns appear.
-
Files billed together in a Consolidated Bill for a Client are shown as separate Bills in the list. These Bills have the same Invoice Number.
-
Reminder Statements for interest posted to Accounts Receivable are listed as "Bills". They have a different Invoice Number than the original Bill(s) on which the Interest is charged.
-
A File Summary for the currently highlighted Bill is shown at the bottom of the Billing Index window.
-
You can scroll up and down in the list of Bills, and sort it by clicking the heading of the column you want it sorted by.
-
Transactions list for a Bill
Click the + icon for a Bill to expand the list, showing a sublist of the transactions on that Bill:
Original Bill (or Reminder Statement for Interest posted to Accounts Receivable)
Write-Ups and Write-Downs
Payments—Trust Transfers to AR Transfers done at the time of billing or later, General Retainers applied at the time of billing or later, and Receive Payments done after billing
The transactions are shown in date sequence from oldest to newest. For each transaction, the list shows the date, Invoice Number or reference number, amount, and resulting outstanding balance.

Showing particular sets of Bills
You may have a large number of Bills. Using options in the control panel, you can filter the list of Bills shown.
Bills dated—By default, Bills for all AR dates are shown. To limit the list differently, select one of the other options and specify the desired date(s).
For which Files—By default, Bills on all Open Files are shown, including Files that are also Inactive. To limit the list differently, select one of the following options instead:
All—This shows Bills on any File regardless of File status. Bills on Files that are Closed or Inactive are shown.
Active—This shows only Bills on Active Files. Bills on any File that is Inactive or Closed are hidden.
For your Files or all Files—By default, only the Bills on Files to which you are assigned are shown (My Files option). However, depending on your assigned Security Profile or Firm Member Designations, you can select the Firm Files option to show Bills on all Files regardless of who is assigned to them, select the Firm Files option.
For whose Files—To show only the Bills on Files to which particular Firm Members are assigned, select the type of Firm Member ("Responsible Lawyers", "Introducing Lawyers", or any "Firm Members") and then click the People icon to select one or more particular people.
Or, to show only the Bills on Files to which particular Primary Clients are assigned, select the type of Client ("Primary Clients") and click the People icon to select one or more particular Clients. To show only the Bills on Files to which a particular Client is assigned (regardless of whether or not they are the Primary Client on the File), select "Clients" and click the People icon to select a Client.
For what File Type—To show only Bills on Files of a particular File Type, such as "Corporate" or "Real Estate", select a type in the Type list box. Or, to include all Files regardless of File Type, select "All".
For what Special Status—To limit the list to Bills on Files assigned a specific Special Status, select that Special Status in the Special box. Or, select "No Selection" to include Files regardless of Special Status.
Paid/unpaid—To limit the list of Bills based on their current balance, select an option in the Show box at the bottom of the control panel: all Bills, only Bills with an outstanding balance, or only fully paid Bills.
Related Topics