|

Maintenance
Updates & Improvements
 |
Did
you know we have a SaaS platform in the CARET family
that could be a great fit for your firm?
You
love the reliability of Amicus Attorney, and we’ve built
CARET Legal to seamlessly inherit that functionality.
Think of it as your favorite software, completely re-engineered
for the modern cloud: better customization, enhanced
collaboration, and the freedom to work from any device,
anywhere.
Click here
to learn more.
|
This document announces new releases of Amicus Attorney, as
well as our complimentary products Amicus Billing, Amicus
Anywhere, Amicus Client Portal.
Amicus
Attorney
25.16 - January 2026
This
release focuses on system stability, performance improvements,
and usability enhancements to support reliability and easier
troubleshooting. No major new functionality introduced in
this update.
| - |
New
Login Status Tracking 
Improved
User Management makes it easier to track login data for
firm members and Client Portal users. |
| |
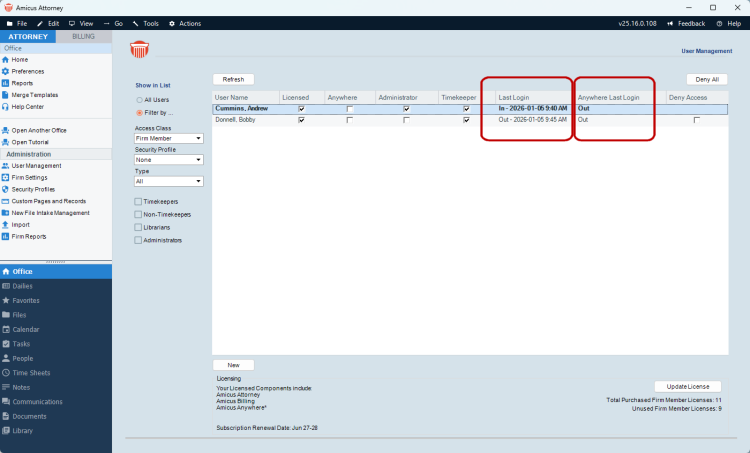 |
New
options have been added to make it easier
to track when users have been logging
into Amicus via the desktop application
or via Amicus Anywhere.
New
columns appear for "Last Login" and "Anywhere
Last Login" under User Management.
Firm
administrators will now get a more complete
view of the last time any user has been
in Amicus Attorney.
|
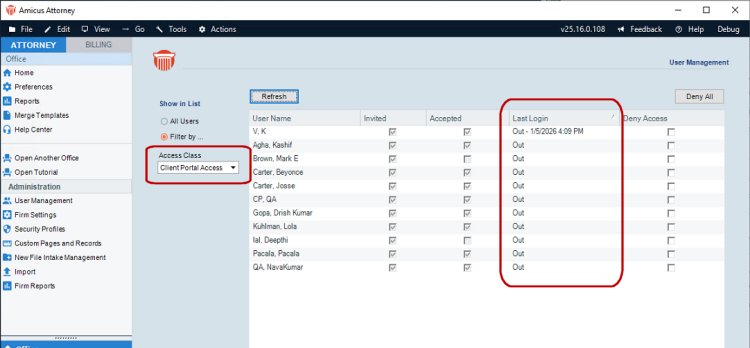 |
The status extends to Client Portal users
as well, so firms can get a better understanding
of when clients are checking in on their
client files.
Under
User Management, filter the Access Class
option to "Client Portal Access"
to display all client portal users. The
new "Last Login" column shows
the last time the client has logged into
the Portal.
|
|
|
| |
|
|
The
History tab on Events now includes the
original Start Date for new Tasks and
Appointments going forward.
This provides a more complete picture
regardless of whether any changes were
done manually or programmatically.
|
|
|
| |
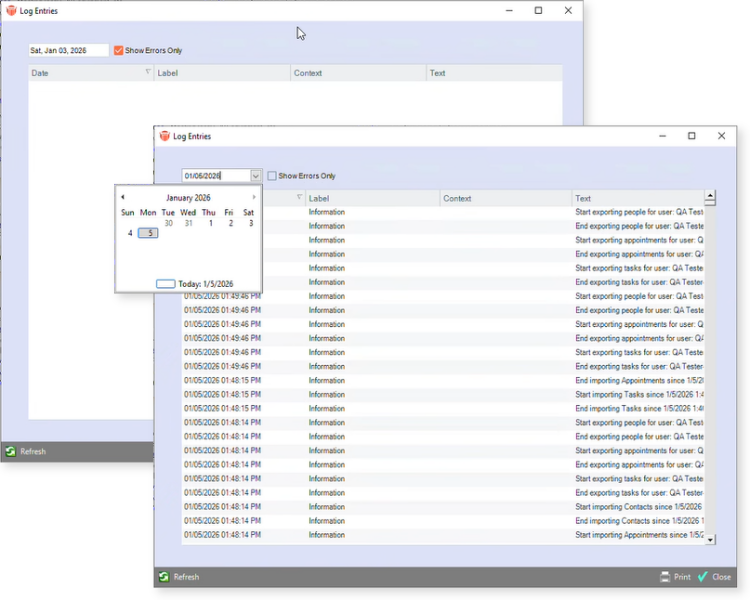 |
In
the event of an issue, support can help
diagnose even more quickly through improved
logging capabilities.
The
Outlook, Office365/Exchange and the Google
Calendar & Contact Sync Logs have been
reformatted to make it easier to identify
any issues. With new column sorting, refresh
options and now up to 7 days of data,
it is easier to find what you are looking
for. We've also added a new option to
toggle results to just error details rather
than all entries for even easier filtering.
|
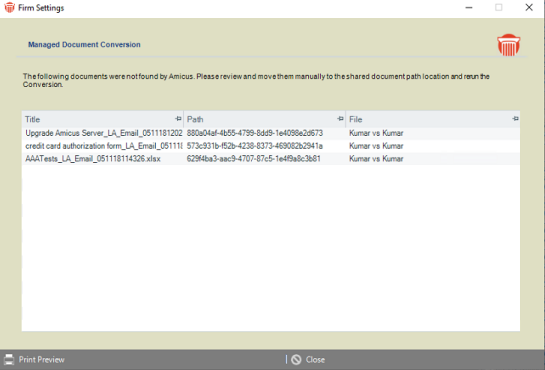 |
The
Document Management Change logs now show
failed document conversion details when
moving in either direction between Amicus
Managed and User Managed document modes.
|
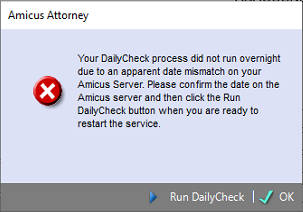 |
New alerts have also been added when Amicus
detects any major date/time discrepancies
since the last time it was run.
This
new capability is designed to prevent
disruption in the event of an unintended
date change at the server.
|
|
|
| |
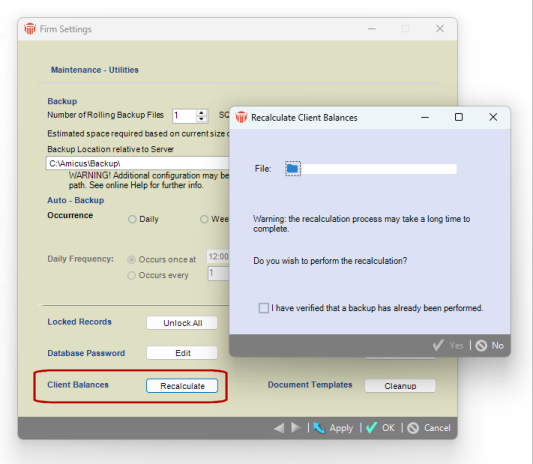 |
The
Recalculate Utility has been streamlined
to make it even easier to use. The utility
will now only attempt to recalculate one
client file at a time, with new directions
to ensure appropriate backups have been
performed prior to any use.
|
|
|
| |
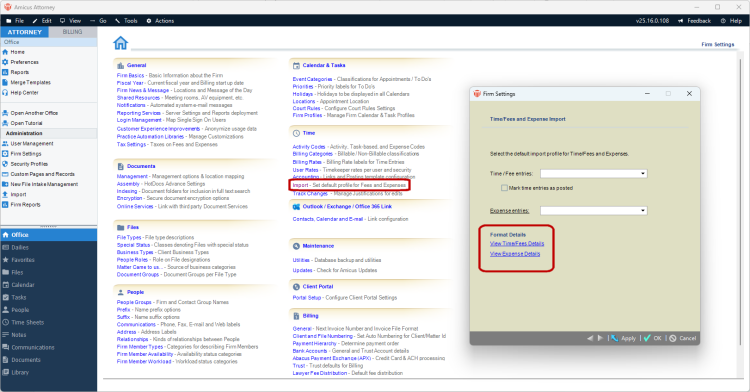 |
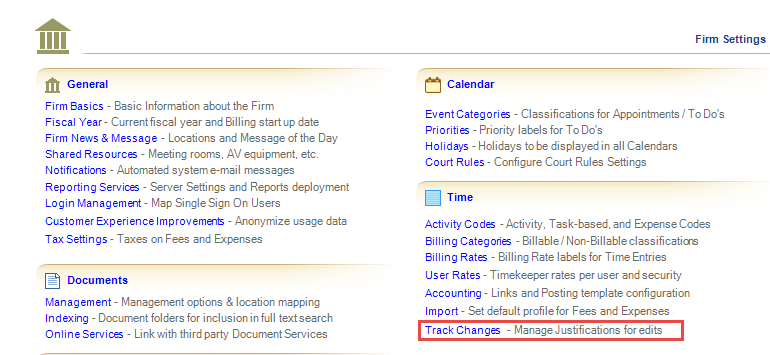
We've
added new format details to the Time/Fee
Import and the Expense Import templates
to make them even easier to use.
Accessible
under the Time section of Firm Settings,
the new links appear on the Time/Fee and
Expense Import window.
|
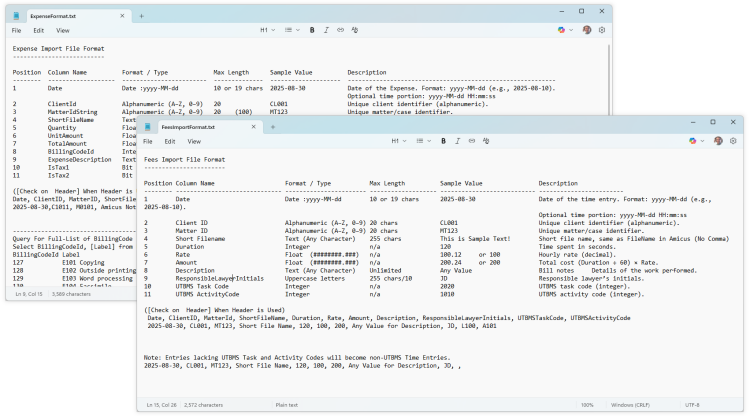 |
The
links open up separate help files with
complete information on the supported
formats for each data point that can be
imported.
Firm
Administrators now have easy access to
the information they need to begin importing
data.
|
|
|
Amicus
Attorney
25.15 - July 2025
This latest
update includes several new features and lots of usability
improvements. We've made it easier and faster to add People
on Files, improved many reports and added features to make
Amicus even more secure.
The update also includes a number of performance improvements
and changes to make it easier to help in the event you need
to call support for assistance.
| |
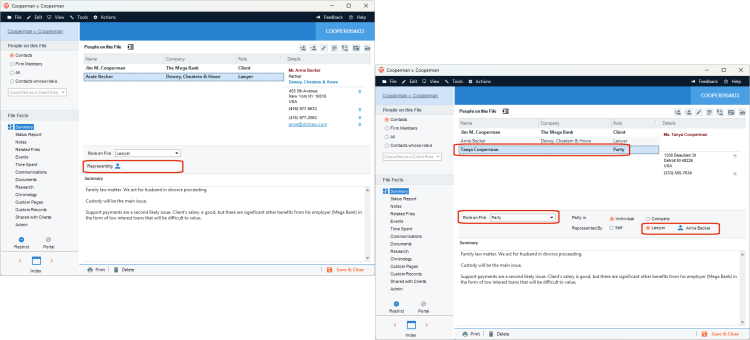 |
New
options have been added to make it even
easier to add People on Files. Our users
have asked for ways to reduce the number
of clicks to add Contacts, and we've delivered
with this new capability.
If
a Contact with the role of Lawyer already
exists on the Client File, then choosing
who they represent will automatically
add that Contact to the File (if they
are not already on the File) and show
their role as Party.
This
makes it faster to add People on Files
and makes sure they show their correct
role.
|
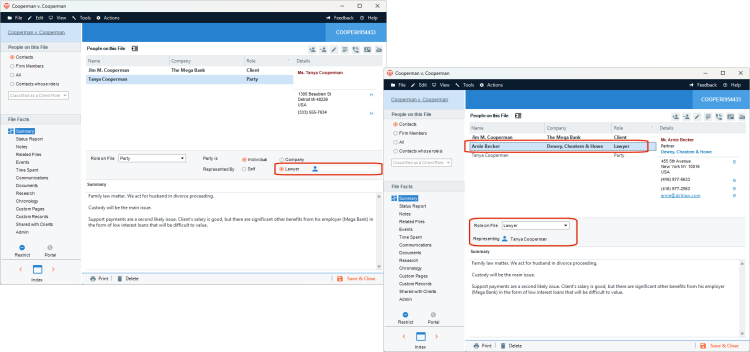 |
The
reverse is also true when a Contact with
the role of Party already exists on the
Client File. Selecting the Contact that
represents them will automatically add that
Contact to the File (if they are not already
on the file) and show their role as Lawyer.
|
|
|
| |
|
|
The
following Firm Reports have been updated
to include new parameter options:
- Time
Entries - All Timekeepers - Selected
Date Range
- Time
Entries - Selected Client and Date Range
- Time
Entries - Selected Files and Date Range
- Time
Entries - Selected Timekeepers and Date
Range - Specified Client
|
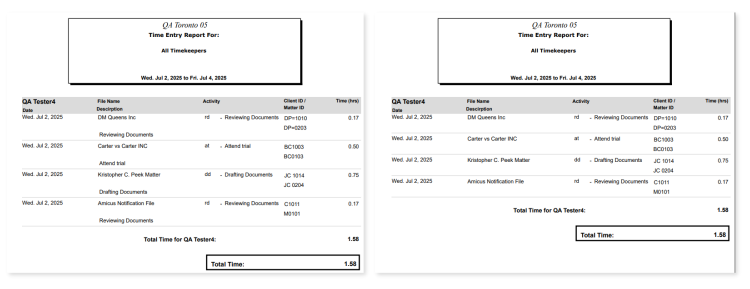 |
This
change is similar to one we pushed out
in a previous update that addressed firm
member reports. The change is especially
helpful when the firm uses Task-based
Billing. Since the Task and Activity Code
names can be appended to the activity
description, there can be some duplication.
By choosing to suppress the time entry
description in the report, users are able
to free up valuable real estate
|
|
|
| |
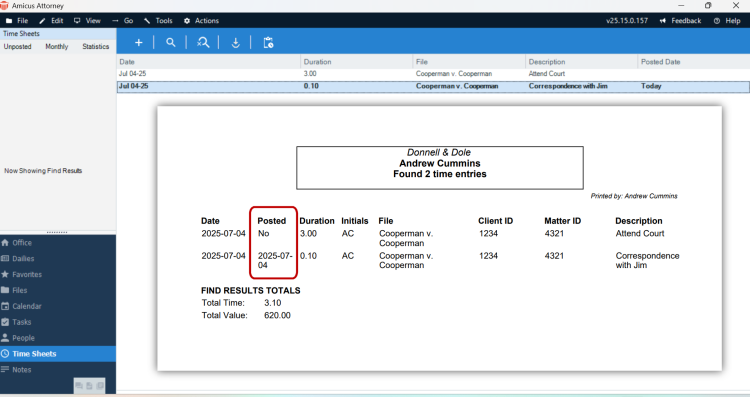 |
When
printing out a list of Time Entries, the
Posted column now shows the Posted Date
where applicable.
This
makes it easier to track when individual
time entries may have been posted to a
3rd party accounting program.
|
|
|
| |
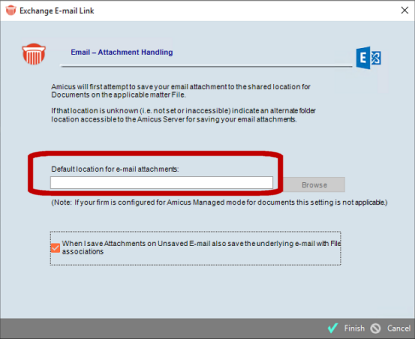 |
The
preference to manage the default location
for email attachments has been updated
to allow users to now type or select the
path using the browse button. Firms with
specific security settings may not allow
users to browse across the network, so
the new option to type allows those users
to specify the location manually. The
system will still verify the path is accessible
to the workstation when the user clicks
the finish button in the window.
|
|
|
| |
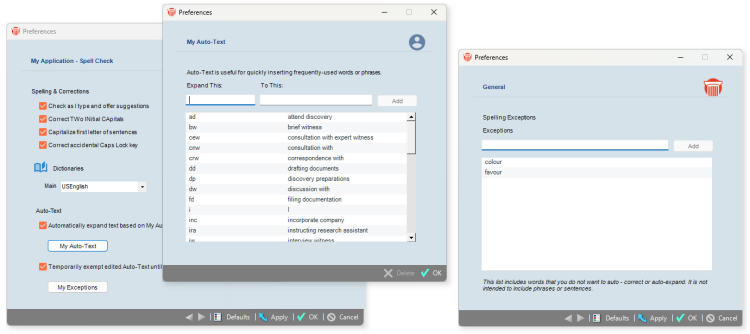 |
The
Auto-Text settings preference to automatically
expand text shortcuts has been refactored.
This capability is managed under the Spell
Check section.
The
Exception list now includes new contextual
instructions to make it more obvious to
users on the use cases. Additionally,
both the My Auto-Text and the Exceptions
lists have been expanded to show all rows.
|
|
|
| |
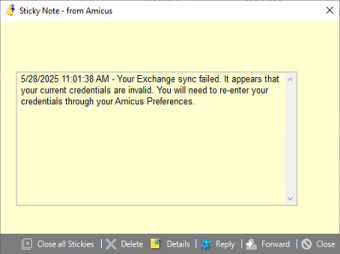 |
The
automated sticky notifications that provide
a heads up in the event of an Exchange
/ Office 365 sync failure now include
a date and time component. This helps
should troubleshooting be in order as
it allows for us to more quickly pinpoint
when the issue occurred. Additional refactoring
was also included to prevent unnecessary
alerts.
|
|
|
| |
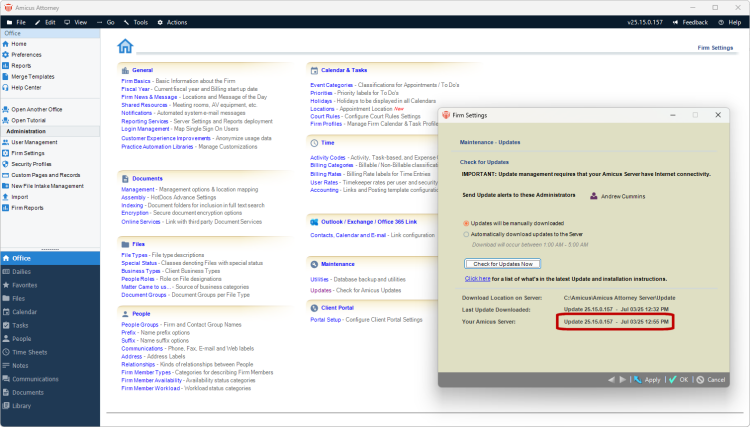 |
Firm
Administrators now have the ability to
quickly see when the last update was applied
to Amicus Attorney. This is also helpful
for the technical support team so they
can easily determine if a update may be
in order.
If
the Firm Administrator has already downloaded
a new version and they are preparing to
apply the update, the "Apply Now"
button would appear in place of the date.
This allows the admin to take advantage
of the auto-update capability to quickly
roll out updates to all workstations.
|
|
|
| |
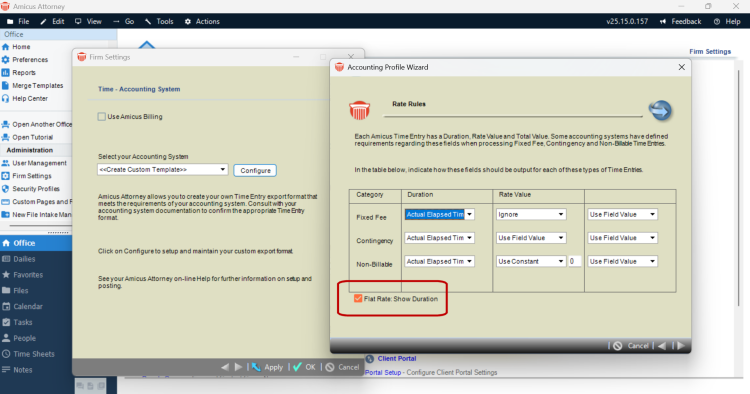 |
Firms
that wish to post their time entries to
a 3rd party accounting program can take
advantage of the Custom Accounting Template
wizard. This is where the Firm Administrator
can define exactly what they wish to have
included in the file that can be imported
by their accounting system. This update
includes a new parameter to define how
Flat Rate Time Entries should be output
to the text file. The new option allows
for the duration to be shown or hidden
in the output.
|
|
|
| - |
Improved
Daily Check Service 
Optimizations
to the service (that runs nightly) for larger firms and
new logging to help with troubleshooting. |
| |
 |
Each
night, a service called the Daily Check
runs to keep everything up to date. It
moves incomplete to dos forward, recalculates
dates and generally ensures optimal performance.
This
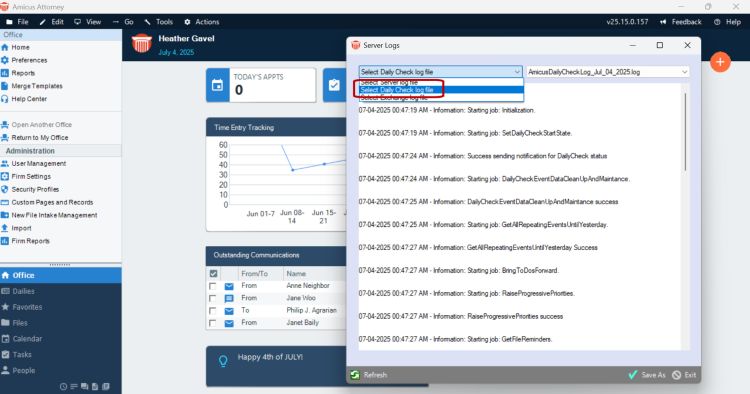
update includes an improved Daily Check
that has been further optimized for larger
firms. We’ve also made it easier to view
the new Daily Check log file in the event
troubleshooting is necessary.
The
new log is accessible from Help > Show
Logs.
|
|
|
| |
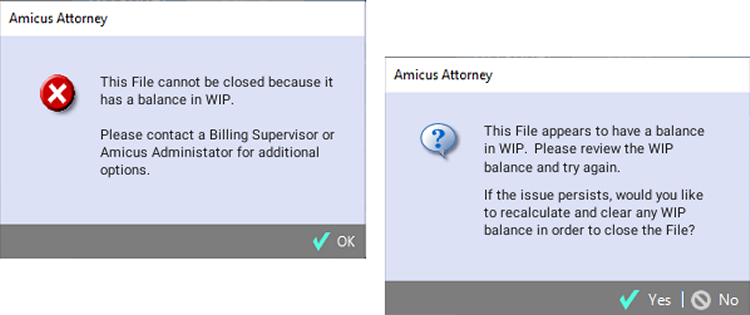 |
Amicus
generally prevents firm members from closing
any Files that have a balance in WIP.
This is to encourage firms to address
the WIP and perhaps put out a final invoice.
With
this update, a new override option has
been added for Billing Supervisors and
Administrators allowing them to force
a recalculation so they can close the
File.
Users attempting to close a file with
a balance in WIP are told they cannot
do so, and redirected to contact a Billing
Supervisor or Administrator for additional
options.
|
|
|
| |
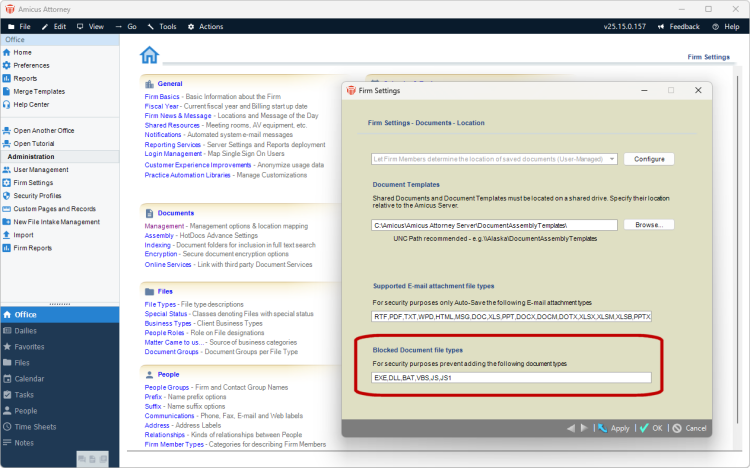 |
Firm
Administrators have a new setting to define
which file types users can add as documents
on Files. This security improvement adds
another layer to prevent unwanted files
from being added to the system.
The
restrictions apply to any documents being
added to Client File, whether via Client
Portal, Amicus Anywhere or at the workstation.
By default, the setting prevents executables
and other potentially harmful files from
being added. The firm administrator can
adjust the list of blocked file types
under Firm Settings > Documents.
|
|
|
Attorney
Attorney
24.14 - October 2024
This latest
update includes several new features and lots of usability
improvements. Users now have more control over layout of columns
that can be included in the File index, easier access to view
version information and lots of updates
to reports. The update also includes a number of performance
improvements and changes to make it easier to help in the
event you need to call support for assistance.
| |
|
|
Individual
users can now choose to display up to
13 different fields in the Files Index.
New
fields include:
- Opened
Date
- Closed
Date
- Special
Status
- Business
Type
- Source
(aka Matter Came to us Because)
- Billing
Category (aka File Billing Category)
- Billing
Status (aka File Billing Status)
-
IL (aka Introducing Lawyer)
|
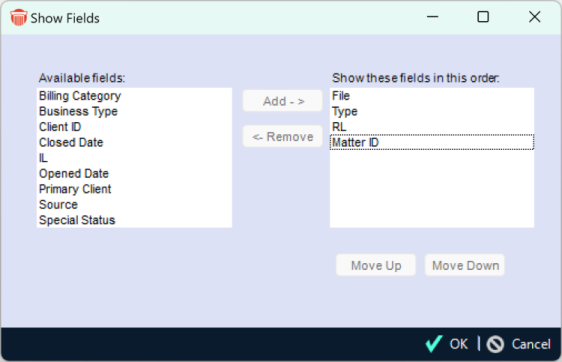 |
Simply
right-click anywhere in the Files index
and click "Show Fields". Then
select the specific fields you want to
display. This option is controlled at
the user level, so every firm member can
control their own layout.
Once
the columns have been added, you can drag
and drop to reorder and drag to expand
or compress the width of each column.
The settings are saved to the database
so any layout changes you make will persist.
Given
the size of modern screens, it was high
time that we allowed users to take advantage
of more screen real estate.
|
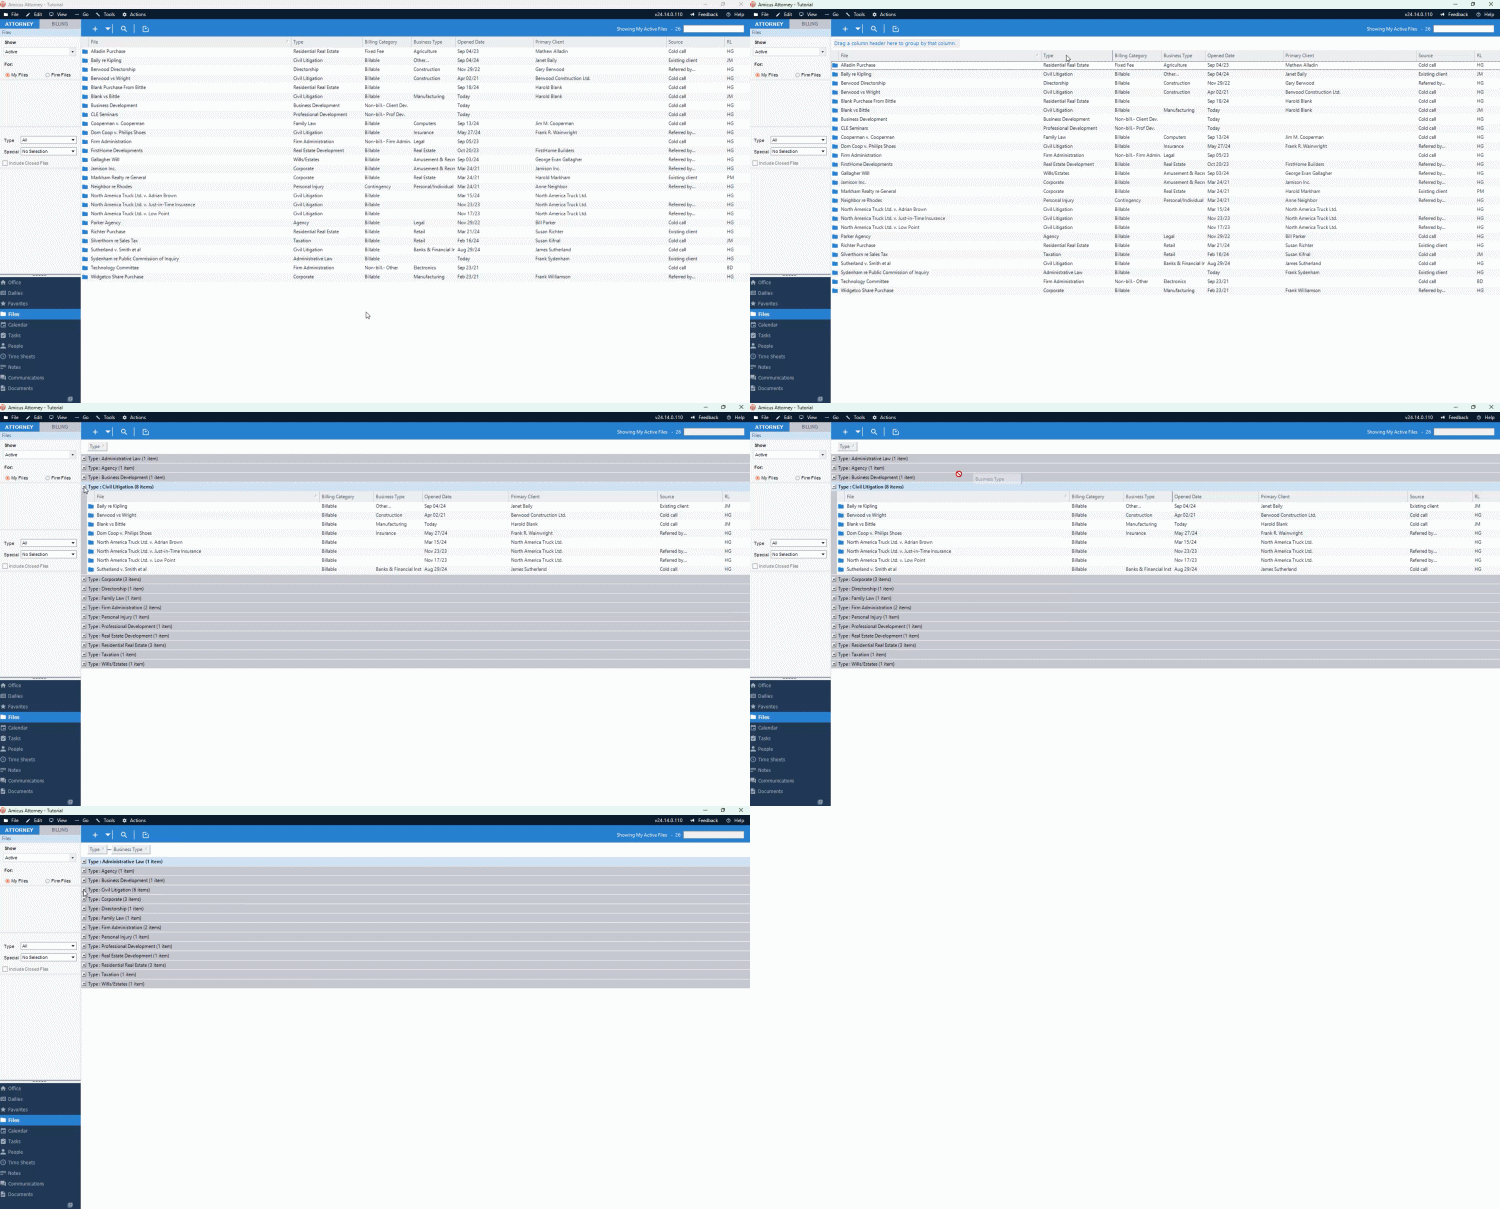 |
The
addition of these new columns also makes
the "Group By" option in the
File module much more powerful. You can
choose to Group By any of the new columns
to create customizable views. Slice and
dice your File details to gain new insights
into your practice.
Simply
right-click in the File index and choose
the "Show Group By" option.
Then drag any of the columns to the new
header bar to organize by that column.
Drag additional columns to the header
to get even more granular details.
To
return to the normal view, simply drag
the columns back out of the Group By drag
and drop zone.
|
|
|
| |
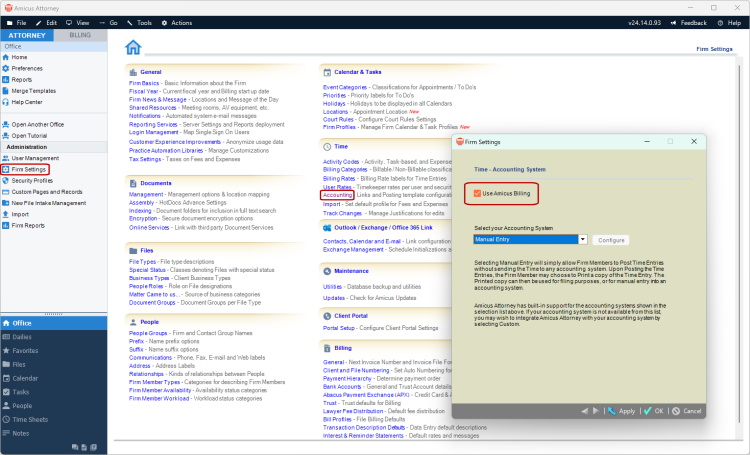 |
With
this change, Amicus Administrators can
now enable the integrated billing capabilities
with a simple check of a box. This capability
is no longer limited by subscription settings,
and can now be controlled by firm admins
without needing to contact the sales team.
Enabling
the integrated billing unlocks your ability
to leverage APX for secure credit card
and ACH payment processing
for US-based firms.
Note:
Enabling the integrated billing capabilities
will disable any existing 3rd party accounting
links like Timeslips or PCLaw.
|
|
|
| |
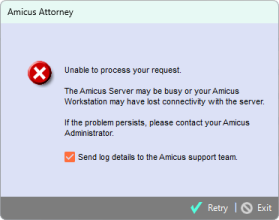 |
We've
updated several prompts that could appear
in the event of an issue. As part of the
new prompts, we've added the ability to
send in related log files directly to
support, so they can better understand
the context of the error.
The
goal here is to provide even more prompt
attention in the event you need to reach
out to support.
|
|
|
| |
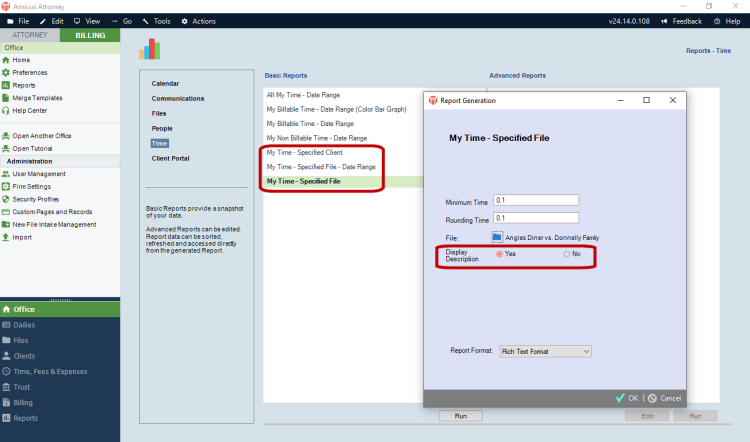 |
The
new parameters added to three of the My
Time reports allow users to show or hide
the time entry description in the report
output. Feedback from users showed that
firms who do eBilling do not need to see
the Time Entry Description in their reports.
Since the activity and task codes can
be appended to the time entry description,
including the description in the report
results in duplication of data, and clutters
the output. Users can opt to include or
exclude the description every time they
run the reports.
|
|
|
| |
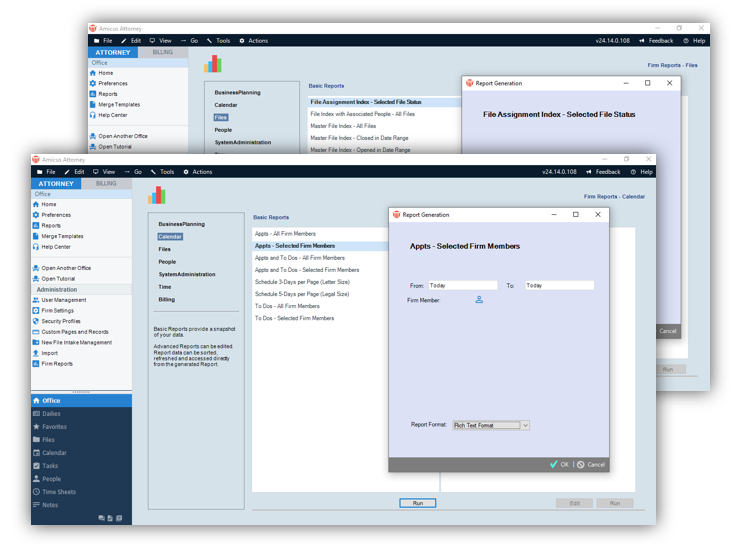 |
The
following firm reports (accessible to
Amicus Administrators) have been updated
for improved performance:
- Files:
File Assignment Index - Selected File
Status
- Calendar:
Apps - All Firm Members
- Calendar:
Apps - Selected Firm Members
|
|
|
| - |
Improved
Logging 
Now
even easier for support to help troubleshoot in the event
you need to reach out for assistance. |
| |
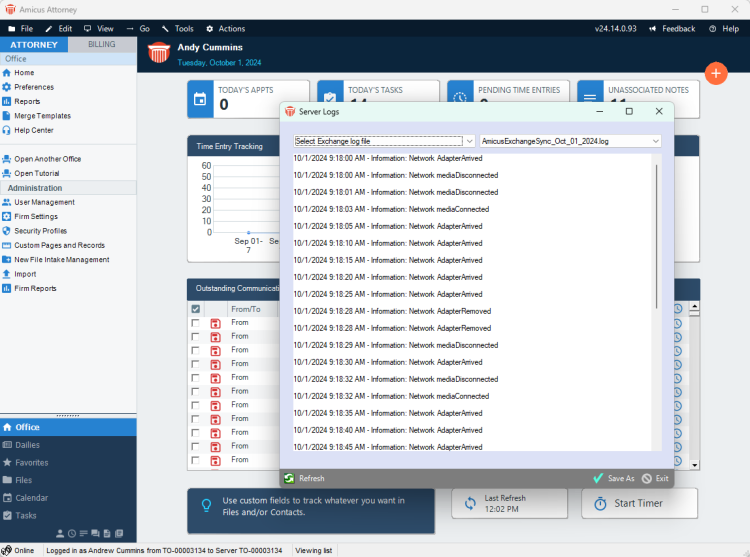 |
While
our hope is you should never have to look
at any log files in Amicus Attorney, we
do want to provide the necessary tools
to quickly help resolve any problem in
the event you need to contact support.
To
that end, we've made a concerted effort
in this update to make all of our logging
more robust across the application. This
includes adding more detail in multiple
areas along with the removal of unnecessary
information that was not providing value.
|
|
|
| |
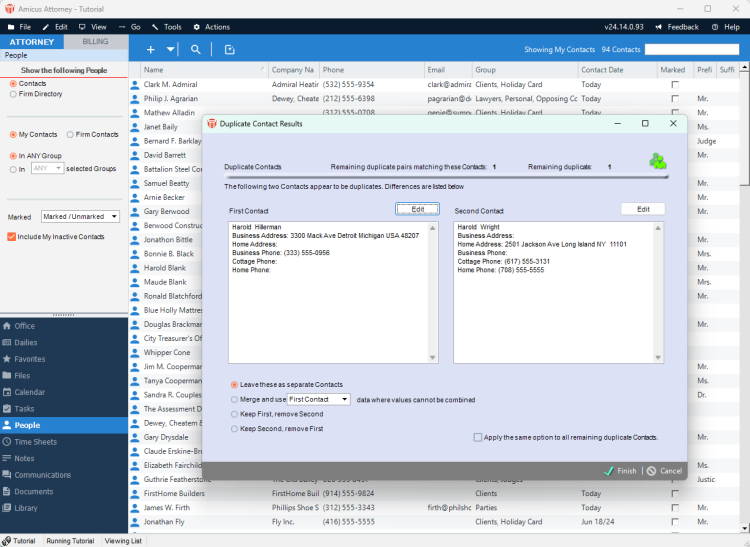 |
The
Duplicate Check capability allows users
to quickly merge duplicate contacts across
the organization. With this update, the
mass-merge capability can now support
more than 1,000 contacts for large scale
cleanups.
|
|
|
| |
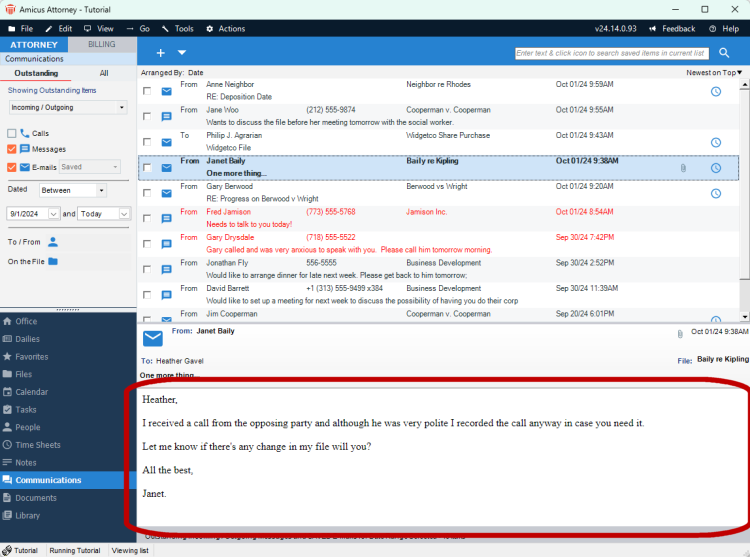 |
The
improvements to the embedded browser make
it even easier to view email messages
and rich text throughout the application.
These changes will ensure optimal performance
when viewing large volumes of email messages
over the course of the day.
The same embedded browser components are
used in the Dailies and Contacts modules
and the communications views on Matters
and Contacts.
|
|
|
Amicus
Attorney 20.13 - April 2024
This
latest update includes several new features and improvements
to our UI. Users can now make mass changes to appointment
assignments, manage firm calendar and task profiles. There
is now an updated re-initialization warning. Additionally,
a new Locations item appears in Firm Settings
and a corresponding Location icon in the Event Details
dialog. Finally, new sticky notifications appear during
Daily Checks.
| |
|
Mass
Changes is now enabled for Appointments
in List Views.
|
 |
| Select
Change Assignment from the Actions
menu to display a Select People dialog. |
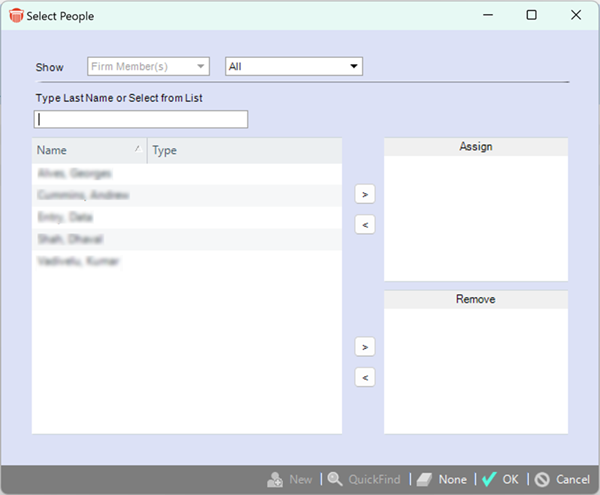 |
| Contacts
associated with the appointments you would
like to support can then be moved to the
Assign textbox using the right arrow,
then click OK. |
|
|
| |
| Select
Firm Settings from the left navigation
bar, then click Firm Profiles under
Calendar & Tasks. |
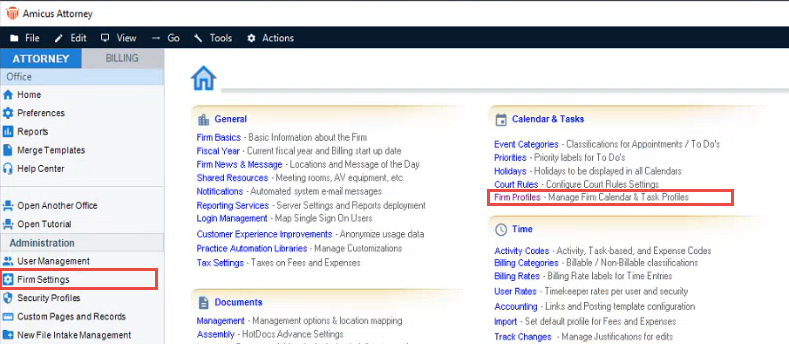 |
| The
list of various Calendar & Tasks
- Firm Profiles to be shared across
the firm displays. |
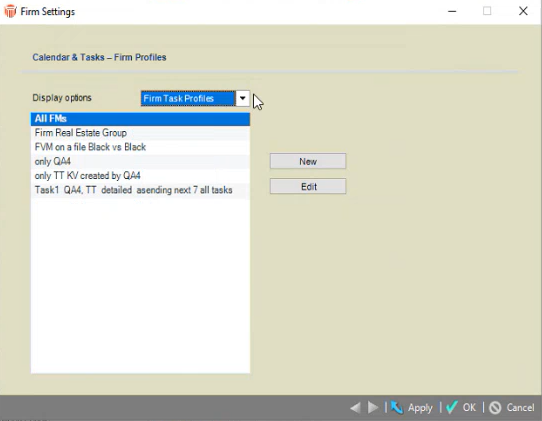
| Select
Firm Task Profiles from the drop-down
list under the Display options
field to view the shared task profiles. |
 |
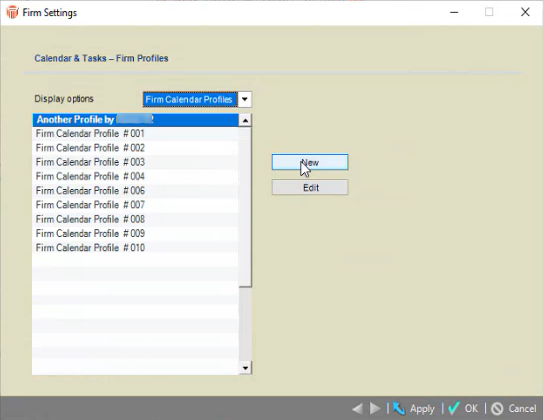
| Select
Firm Calendar Profiles from the drop-down
list under the Display options field
to view the list of shared calendar profiles. |
 |
| Select
New to create a new profile just like
within the Calendar module with unnecessary
items removed. |
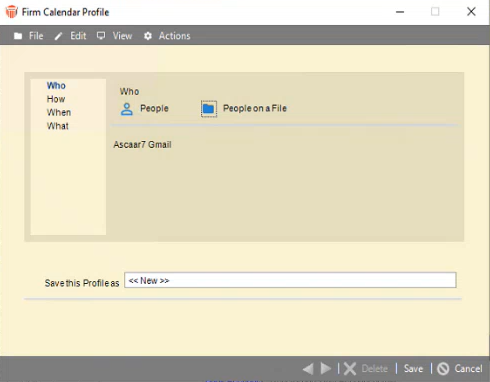 |
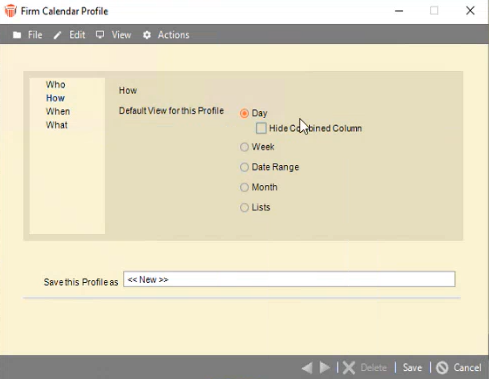
| Select
the people Who you want associated
with the profile, then click How
to select the Day, Week, Date Range,
Month or Lists view. |
 |
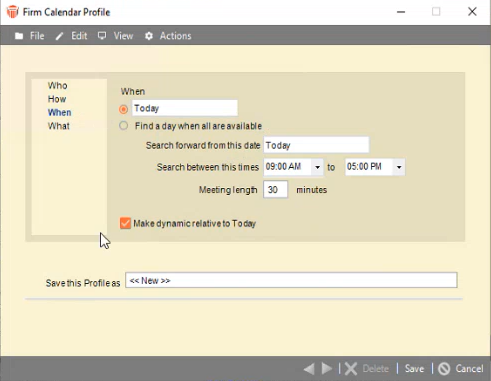
| Click
When to find a day when all the people
associated with the profile are available. |
 |
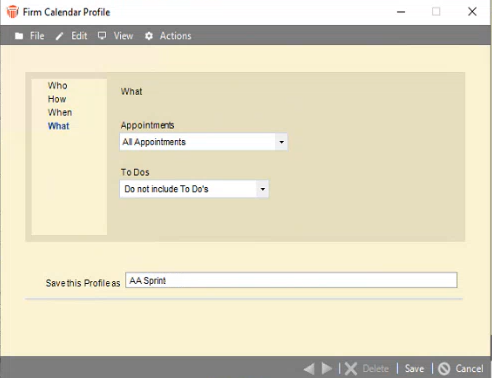
| Click
What, then select the items to show
from the Appointments or To Dos
drop-down menus. |
 |
| Enter
a name for the new profile in the Save
this Profile as textbox, then click
Save. |
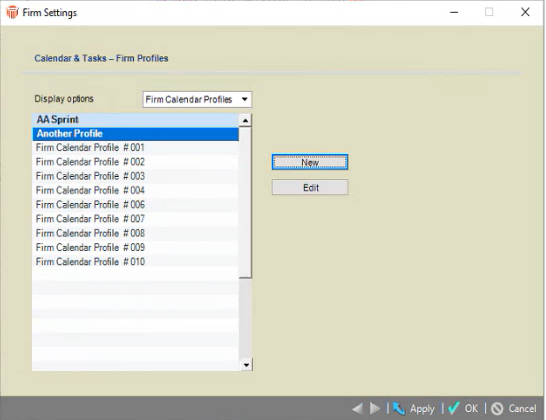
| The
new profile is automatically sorted by name,
so it is easily found. Click Edit to
update or delete the profile. |
 |
|
|
| - |
Using
Firm Profiles 
After
the various Calendar & Tasks - Firm Profiles
have been created by an Administrator, other firm
members can now log in and use these profiles. |
| |
| After
the various Calendar & Tasks - Firm
Profiles have been created by an Administrator,
other firm members can now log in and use
these profiles. |
| Firm
profiles are identified with a leading asterisk. |
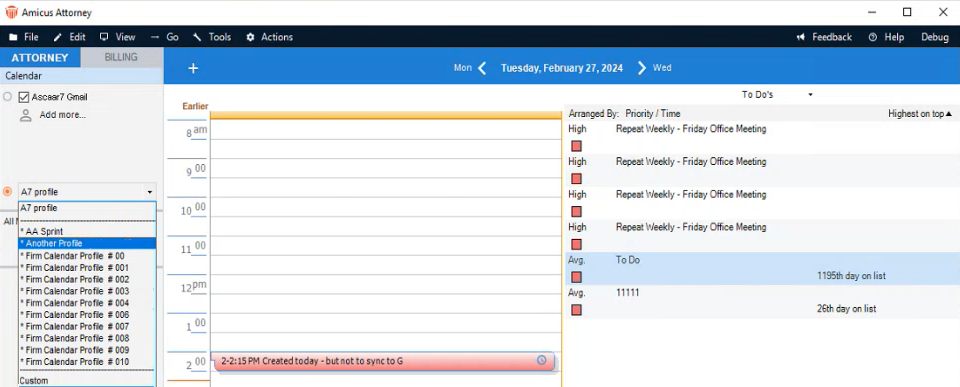 |
| A
separator appears between firm profiles
and custom profiles. |
 Note: Firm profiles can only
be edited in Firm Settings by an
Administrator.
 |
|
|
| |
| The
updated re-initialization warning message
makes it clear what is being done as some
users may not understand the ramifications
of constant reinitializations. |
| Resynchronizing
should only be done under the direction
of a member of the Support Team. |
| When
Calendar & Contacts is selected
under Link Preferences the Calendar
and Contacts Integrations dialog displays
with an option in Step 2 to configure
your personal link options and request initialization. |
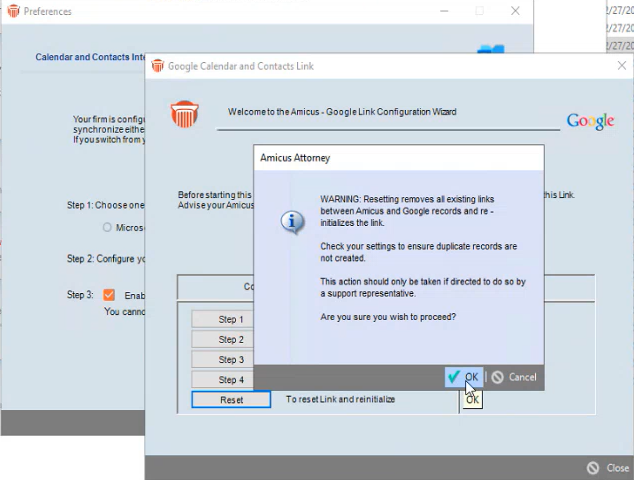
| If
Configure is selected a Warning
displays. |
 |
| Click
OK to proceed. New options appear
in the drop-down lists of the Reset Contacts
and Reset Appointments fields to
reset the link. |
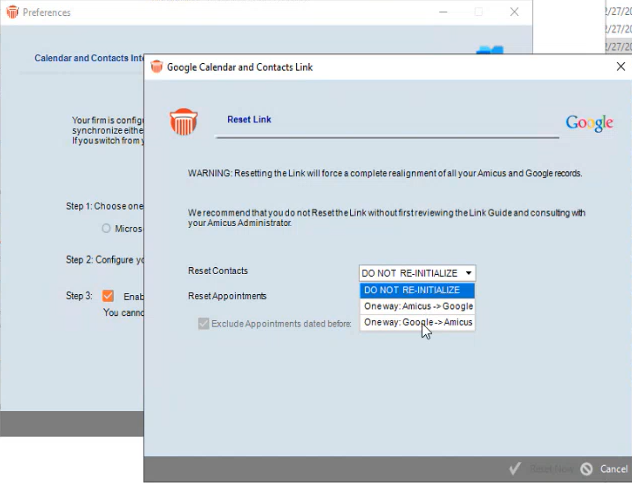 |
| The
default is "DO NOT RE-INITIALIZE"
so the user needs to choose exactly what
they want to reset. |
| The
drop-down list also contains options to
reset One way:Amicus->Google and
One way:Google->Amicus. |
| Once
a selection has been made the user clicks
"Send Sticky" to notify their
Administrator that they are ready to be
scheduled for a reset of their data. |
| Resetting
data is an off-hours process which can be
lengthy depending on the amount of data.
The Reset Now button is only enabled
if one or more of the options is selected
to be reset. |
|
|
| |
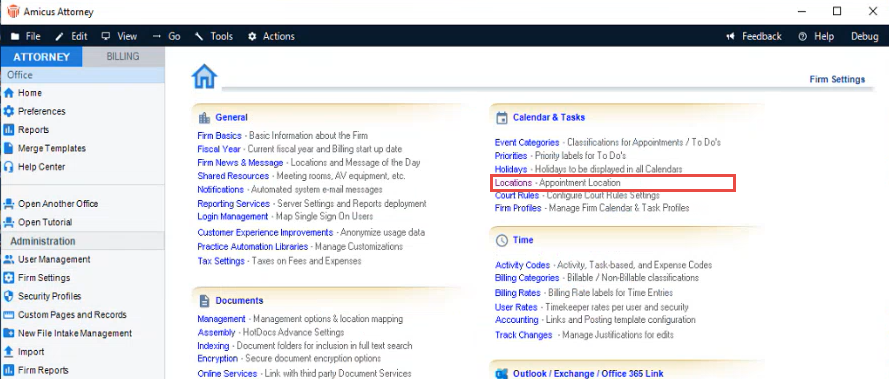
| Select
Firm Settings from the left navigation
menu and click the new Locations item
that appears under Calendar & Tasks. |
 |
|
The Calendar - Locations dialog
displays. |
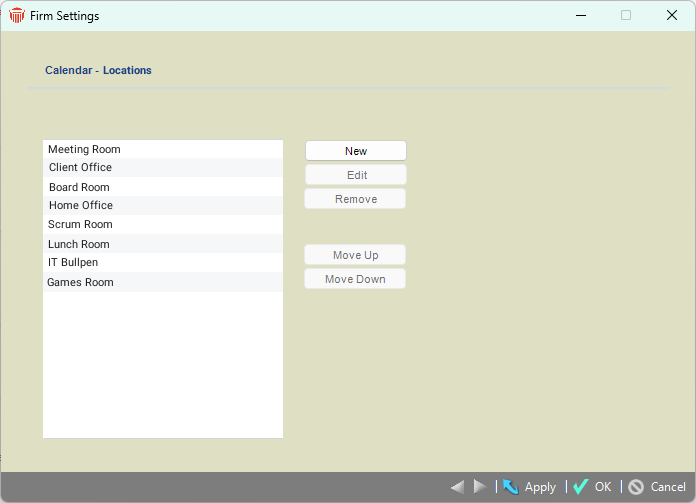 |
| The
items can be edited, removed, and moved
up or down in this list. You can also click
New to add new locations to this list.
|
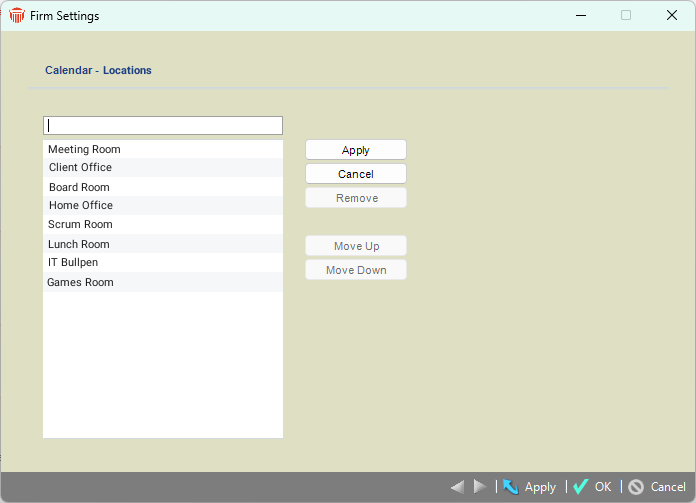 |
| Enter
the name of the new location in the text
field that appears and click Apply. |
|
|
| - |
New
Location icon in Event Details 
Appointment
Locations defined in Firm Settings in the Calendar-Locations
dialog can be retrieved by firm members in the Event
Details dialog. |
| |
| There
are 3 wasy to display the Event Details
dialog. |
- Select
File > New > Event from the
main menu.
- Double-click
on an existing event in the calendar.
- Select
the event in a list, then right-click
and select Open from the shortcut
menu that appears.
|
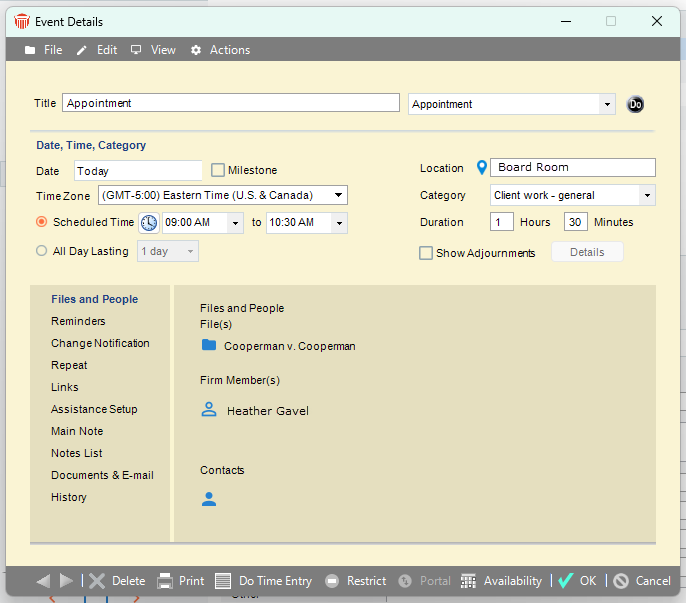
| The
new Location icon now displays to
the left of the Location field in
the Date, Time, Category section.
This is not visible for Tasks. |
 |
| Click
the Location icon to display
the list of your firms pre-defined locations. |
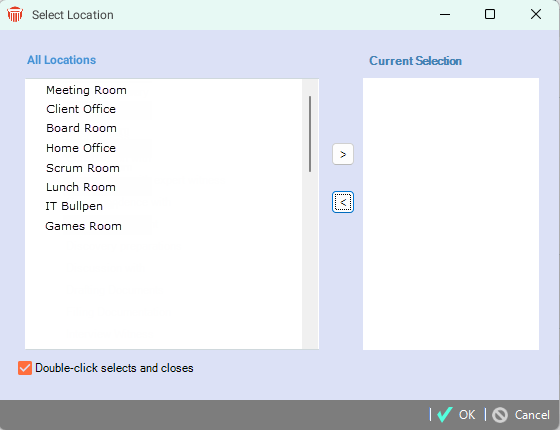 |
| Select
a location from the All Locations
column, then select the right arrow to move
it to the Current Selection and click
OK. |
|
| Your
selection now appears in the Location
field of the Event Details dialog.
|
| After
selecting a location, the user can choose
to make further edits to the Location
field. For example, they may modify "Board
Room" to "Board Room 2". |
 Note: Locations can still
be entered manually in the Location field.
 |
|
|
| - |
New
Sticky Notifications 
During
Daily Checks, new Stickies appear if there
is a time discrepancy that could affect a third-party
link, especially APX and if an Event or multiple events
fail to process. |
| |
| As
part of the nightly Daily Checks,
a new validation is performed to compare
the Amicus server time with real-time. |
| A
Sticky is immediately sent if the
time is off by 1 minute or more as this
discrepancy could impact integrations with
some 3rd party links. |
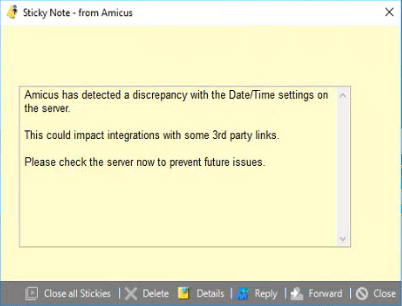 |
| The
Daily Check will send out this sticky
every day until the time is fixed. |
| In
Date & time, you can choose to let
Windows 10 set your time and time zone automatically,
or you can set them manually. |
| Under
the Start menu, select Settings > Time
& language > Date & time. |
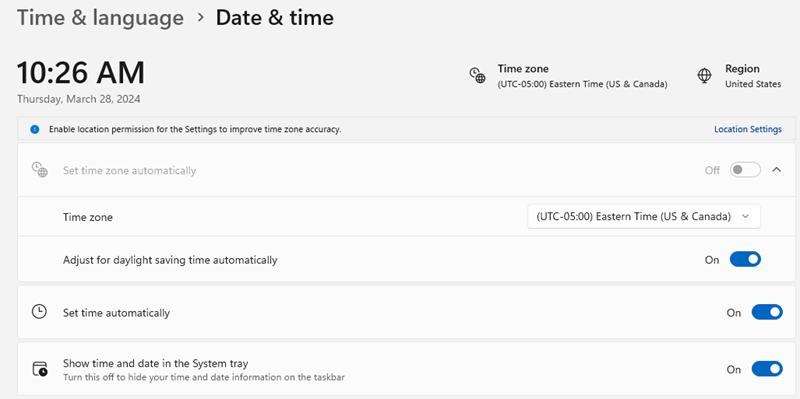 |
| Slide
the toggle beside Set time automatically
to the right to enable this option. |
| Another
sticky is sent out during Daily Checks
when an Event or multiple Events
assigned to firm members fail to process
during the regular Daily Check procedures.
|
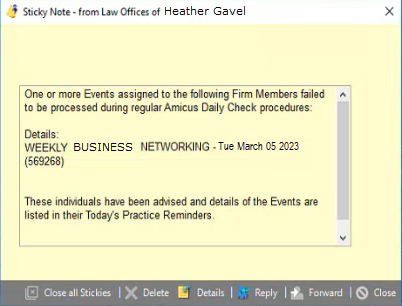 |
| The
Details of the event comprising of the
Name, Date and ID Number are
included in the Sticky so that Firm Administrators
can easily identify the issue for the Support
Team to troubleshoot it. |
|
|
| - |
New
Confirmation prompt 
This
appears when attempting to remove all Contacts
from a file, preventing them from being accidentally removed. |
| |
| If
a Primary Client has not been listed,
clicking None in the footer of the
Select People dialog removes all
contacts. However, if the Matter
has a Primary Client, nothing will
happen. |
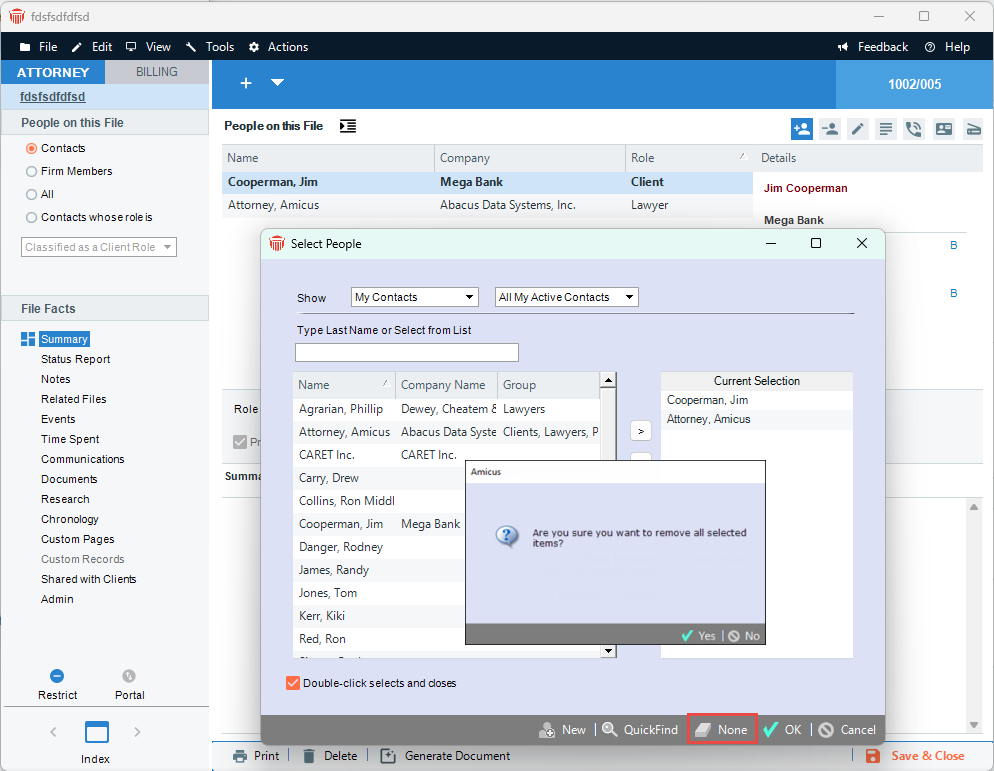 |
| To
keep the Select People dialog open,
click No, and proceed to make the
necessary selection. |
|
|
| |
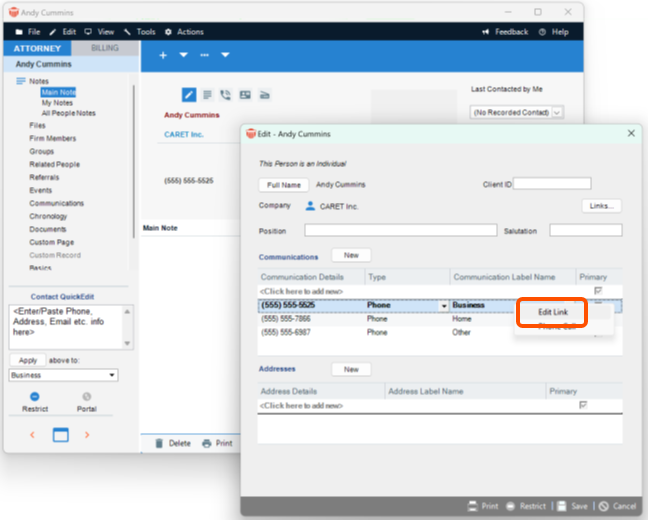
| When
a Contact's information orginates from a
linked contact the Delete and
Open items are disabled from the pop-up
menu that appears when the Contact is selected,
and the right button is clicked. |
 |
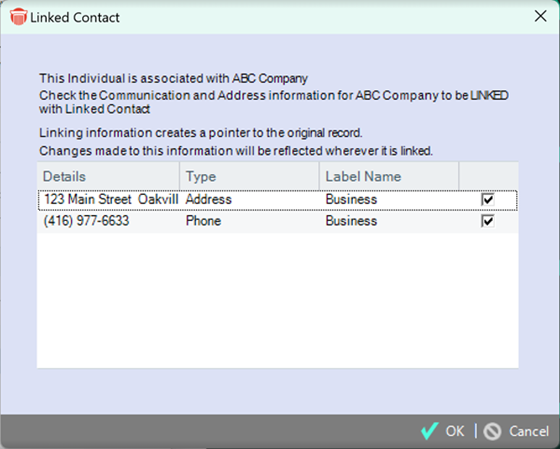
| The
new Edit Link option displays the
Linked Contact window where the information
contained in the contact can be edited or
removed. |
 |
|
|
| |
| Click
on Reports > System Administration
to access the Deleted Items Report
dialog. |
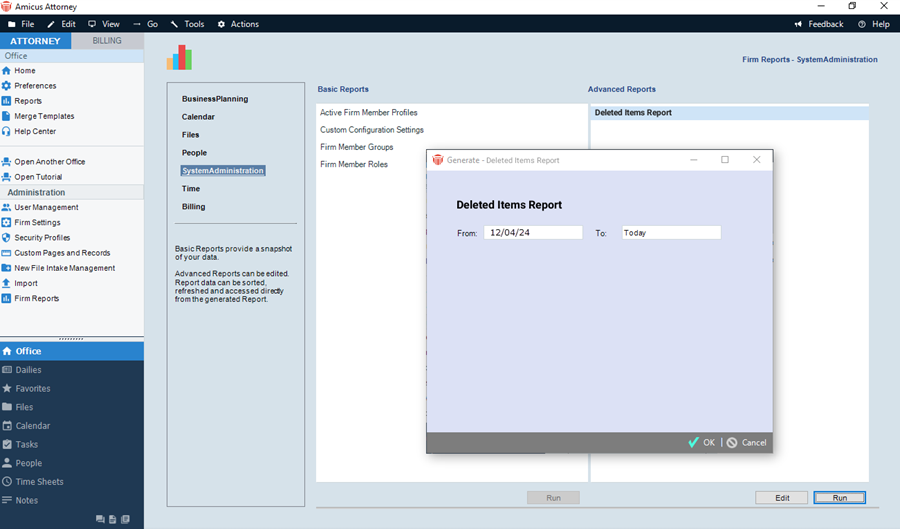 |
| Enter
From and To dates to specify
the date range. |
| Click
OK to generate the report. |
|
|
Amicus
Attorney 20.12 - January 2024
With
this release we have improved the general usability within
Amicus with sophisticated prompts and quick access to the
Tasks Module. We have also added more Document Assembly
and filter options, improved the HotDocs Advance setup, added
a new E-Billing classification and made some Administration
improvements and much more.
| |
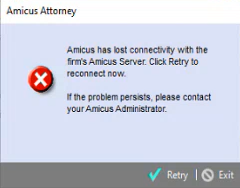
| A
prompt now appears when the Server Service
is not available with a Retry option
in the event the service is back up, or
the user can try again later. |
|
| Clicking
Retry speeds up the process of connecting
back into Amicus. |
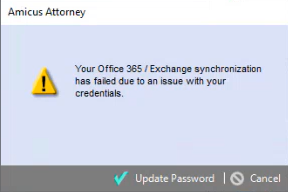
| If
your Office 365 / Exchange synchronization
has failed due to an issue with your credentials
the following prompt appears. |
 |
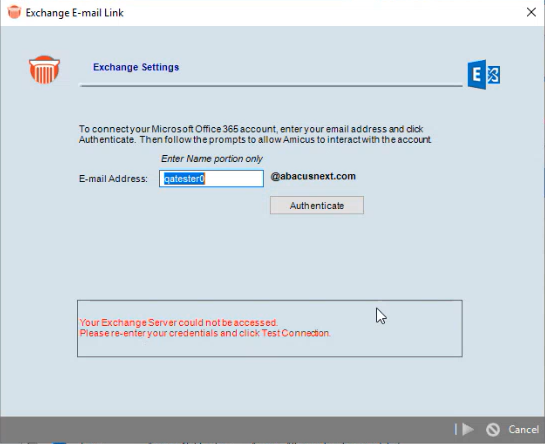
| Clicking
Update Password takes the user directly
to the Exchange Settings dialog where
they can Authenticate their credentials. |
 |
| This
speeds up re-entry of the Office 365 / Exchange
credentials. |
|
|
| |
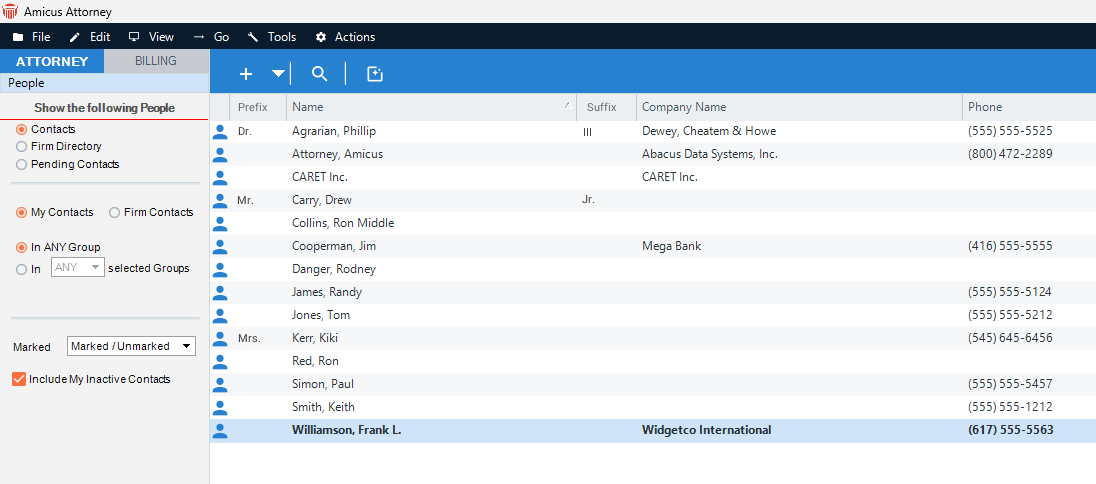
| Prefixes
are typically Dr., Mr., Mrs, Ms.,
and suffixes for example may be Jr.
or Sr. |
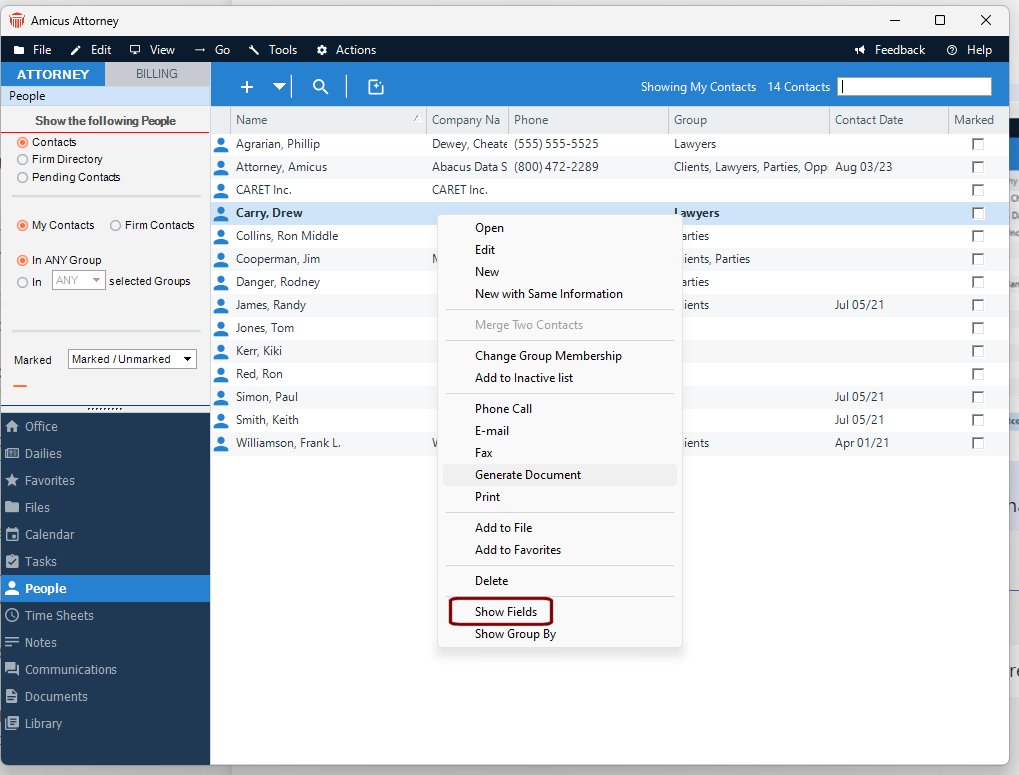
| To
display these new columns right-click in
the list view of the People module
to display a pop-up menu, then select
Show Fields. |
 |
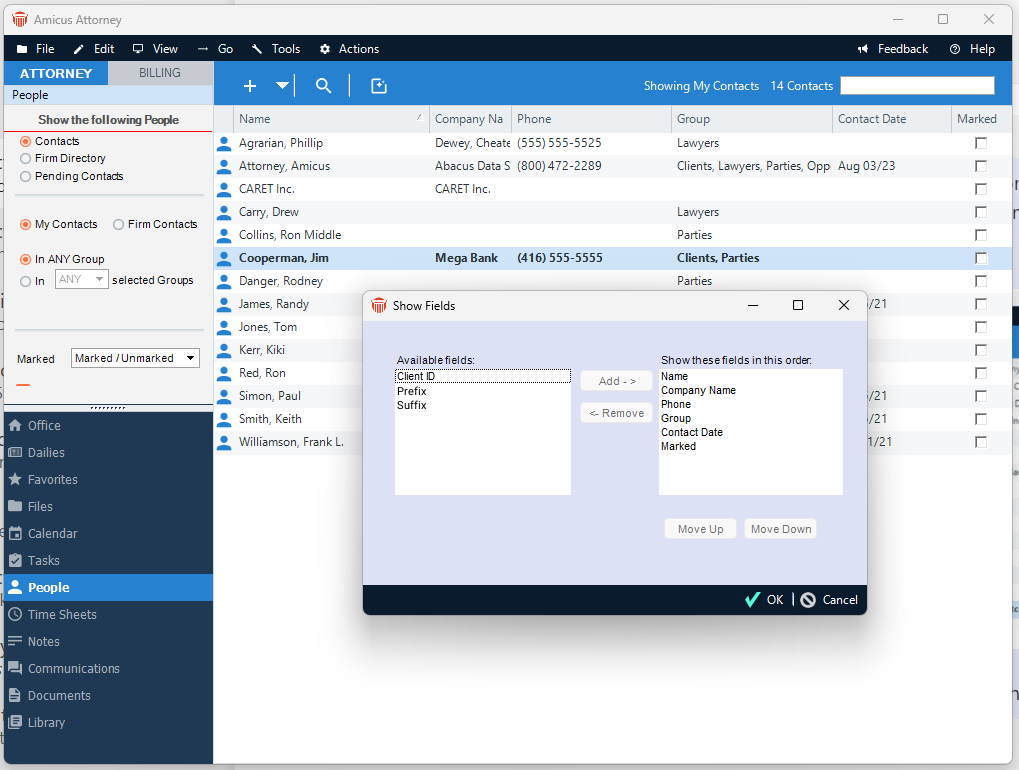
| A
Show Fields dialog displays. |
- Select
Prefix from the Available fields
window, then click Add - >
to move it to the Show these fields
in this order window.
- Repeat
this process to move Suffix to
the Show these fields in this order
window.
- Use
the Move Up and Move Down
buttons to move Prefix before
and Suffix after the Name
column.
|
 |
| The
list view of the People module now
displays with a Prefix column before
and a Suffix column after the
Name column. |
 |
|
|
| |
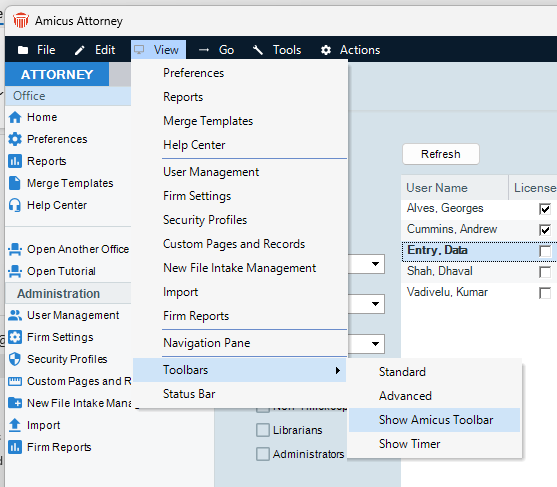
| The
Tasks icon has been added to the right of
the Calendar module option in the Amicus
Floating Toolbar. |
 |
| To
enable this option, click View and
select Toolbars > Show Amicus Toolbar
from the drop-down menus. |
|
|
|
| |
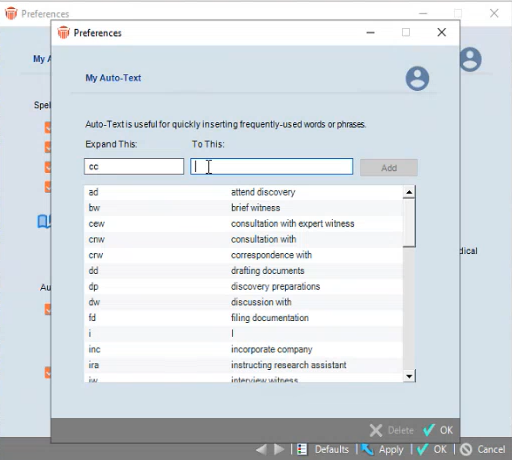
| Navigate
to the My Auto-Text dialog under
Preferences to view the reformatted
layout of Spell Check Preferences. |
|
Enter
abbreviations in the Expand This:
field and the expanded text in the To
This: field. Click Add to add
the abbreviation with the expanded text
to the list in the My Auto-Text
dialog.
|
|
This
allows you to quickly insert frequently-used
words or phrases.
|
 |
|
Navigate
to My Application - Spell Check
dialog under Preferences and select
the checkbox next to Temporarily exempt
edited Auto-Text until next login.
|
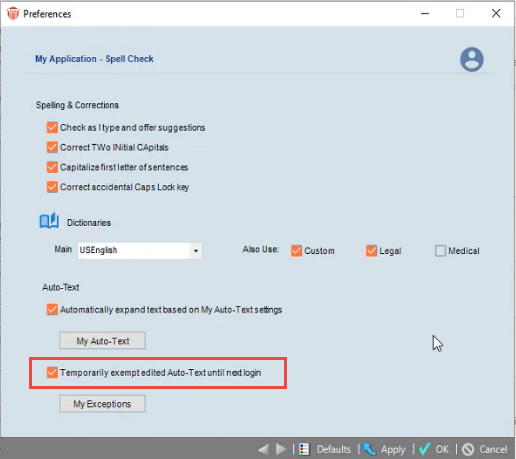 |
| When
this option is selected newly added exceptions
found in the Auto-text list are exempted
from displaying until the user logs out
and logs back into Amicus. |
|
|
| |
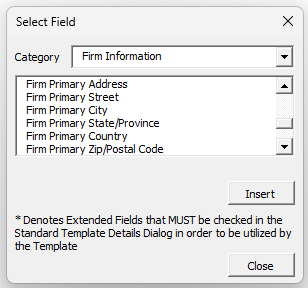
| This
is especially helpful when attempting to
include addresses for satelite offices in
assembled documents. |
| Now
in addition to the existing options for
the firm's Primary Address details,
users can now include the full addresses
for Home, Office and Other. |
|
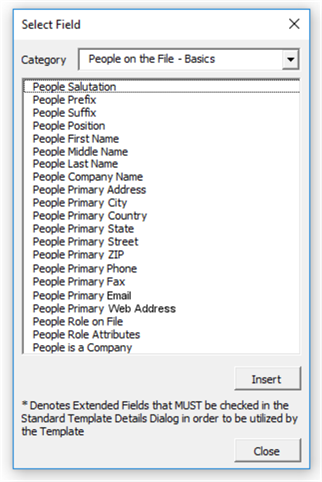
Merge
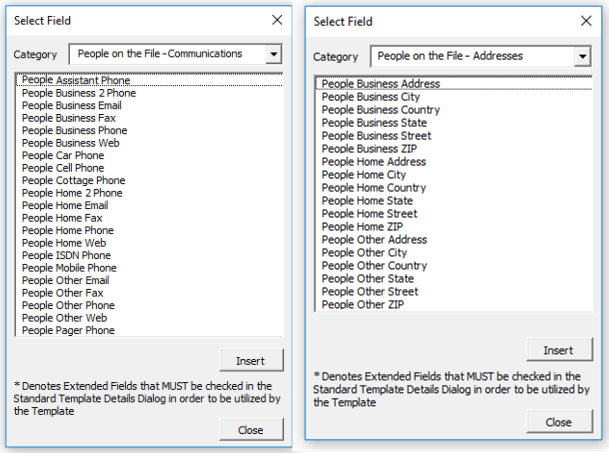
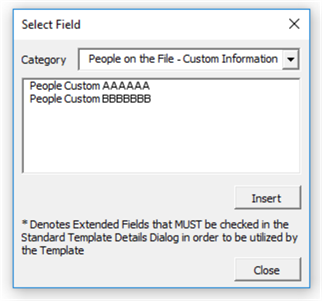
fields added are:
- Firm
Business Address
- Firm
Business Street
- Firm
Business City
- Firm
Business State/Province
- Firm
Business Country
- Firm
Business Zip/Postal Code
- Firm
Home Address
- Firm
Home Street
- Firm
Home City
- Firm
Home State/Province
- Firm
Home Country
- Firm
Home Zip/Postal Code
- Other
Home Address
- Other
Home Street
- Other
Home City
- Other
Home State/Province
- Other
Home Country
- Other
Home Zip/Postal Code
|
|
|
| |
| A
new "Include Closed Files" checkbox
displays beside the "Show" field
in the Select Files window as closed files
are not included when "All Files"
is chosen from the drop-down list in the
"Show" field. |
| This
mean "All Files" can include all
Open and Closed files if this option is
selected. Generally closed files are omitted
from most lists to remove clutter. |
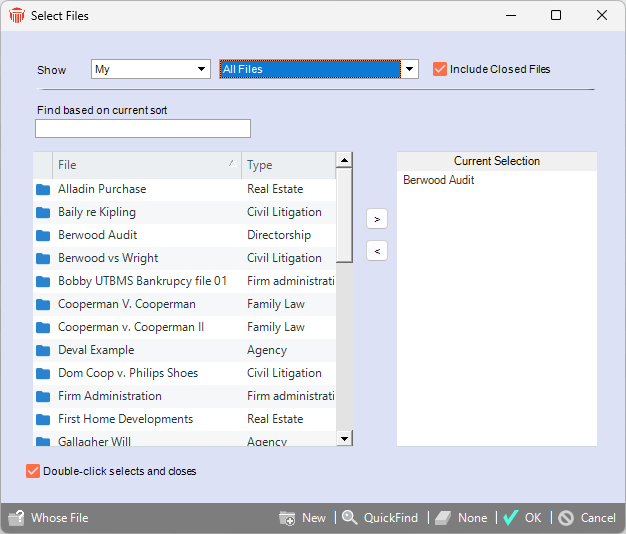
|
| The
checkbox is hidden when it is not appropriate.
For example, when "Active Files"
is chosen from the drop-down list in the
"Show" field. |
| The
default filter settings are controlled via
the Preferences. Navigate to Preferences
> Files > Display to make adjustments. |
|
|
| |
| A
new Posted field has been added in
the Find Time Entries dialog allowing
users to select a date or date range. |
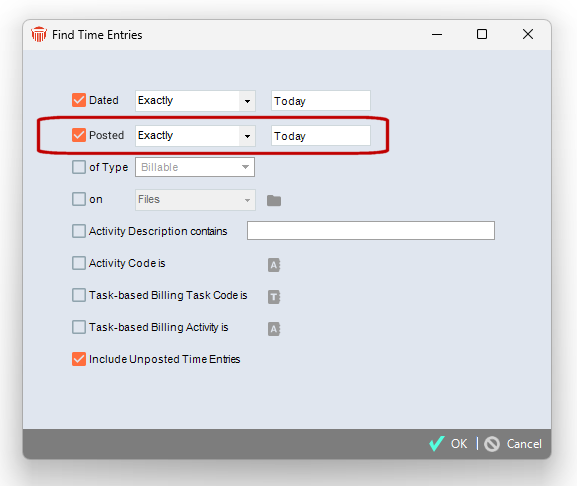
|
| After
clicking OK the results will include
a Posted Date column. |
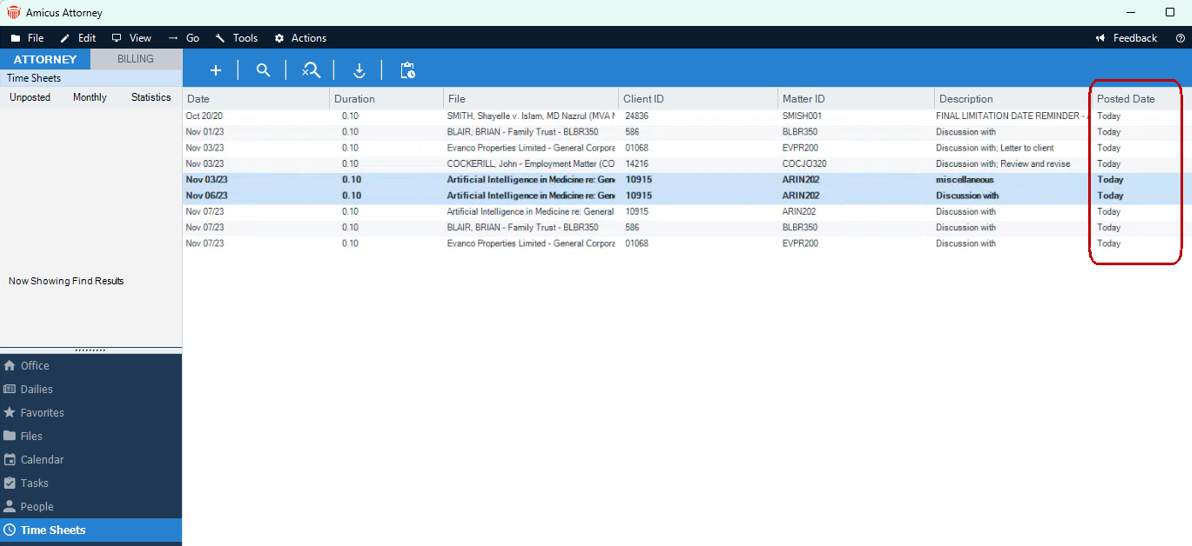
|
|
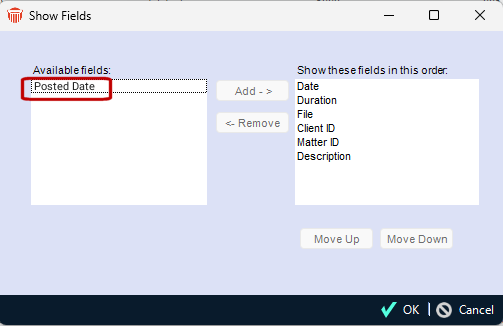
This column can be easily added or removed
in the Show Fields window. |
 |
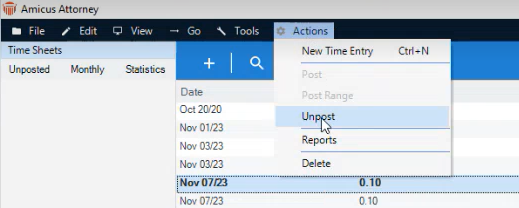
| The
only way to unpost an entry is to select
Actions > Unpost. |
 |
|
|
| |
| Additional
Time Entry tracking in the database allows
for reporting on when time entries are posted,
unposted or batch posted.. |
| These
columns are available to support when
they need to troubleshoot questions regarding
Time Entries. |
 |
|
|
| |
| Every
month a new log appears under your AmicusLogs
called "TimePosting_ Month_Year". |
| Stored
in the same folder as the server log. |
 |
| The
log behaves as the email log and includes
the following columns - Action/ TimeKeeper/
Date / Time Entry Date / Time Entry Id /
Short File Name / Duration / Rate. |
 |
|
|
| |
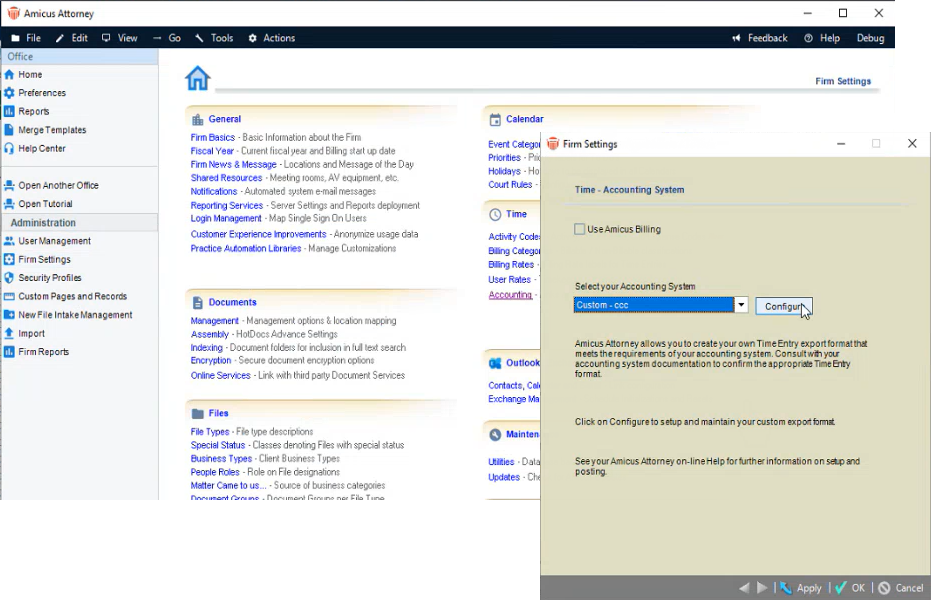
| Click
Accounting under the Time section
in your Firm Settings to display
the Time-Accounting System dialog,
then select Custom from the Select your
Accounting System drop-down list. |
 |
|
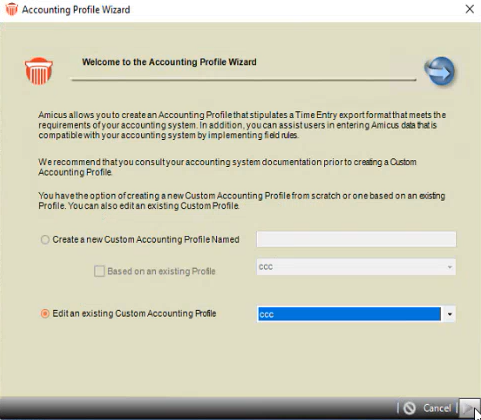
Click Configure to open the Accounting
Profile Wizard. |
 |
| Click
the Next arrows in the footer until
you reach the Posting File Options
window. |
| Two
options now appear under the Consolidated
Posting section. |
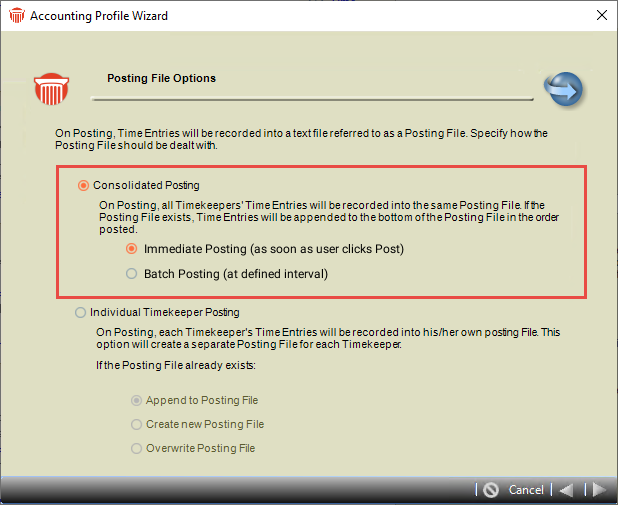 |
- If
the Immediate Posting radio button
is selected, Time Entries are
posted to the text file when Post
is clicked.
(Previously Time Entries were always
posted this way.)
- If
the Batch Posting radio button
is selected, Time Entries are
posted at a defined interval.
|
| Click
the Next arrow until you reach the
Posting File Name and Location window,
where the Posting Interval is defined. |
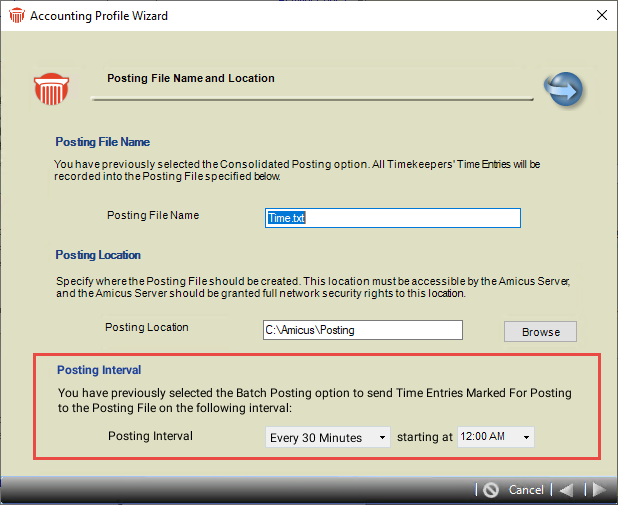 |
| The
interval shows a frequency of every 30 minutes
started each day at midnight. |
|
If the Batch Posting radio button
was selected, and then later disabled, items
posted by the user beforehand will not get
posted. |
| Click
the Next arrow in the footer until
you reach the Custom Template Field Layout
and Details window. |
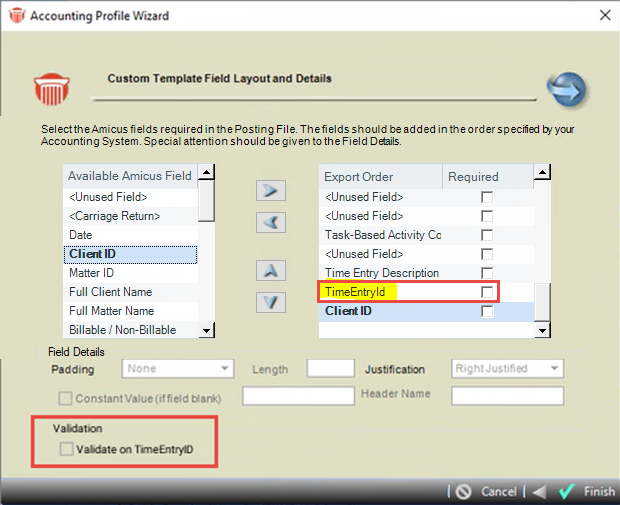 |
| A
new TimeEntryId field now displays
that can be added to the Export text
file by clicking the right arrow in the
middle of the two columns. |
| A
Validation section displays below
the columns if Batch Posting was
selected in the Posting File Options
window |
| Select
the Validate on TimeEntryID checkbox
to ensure that unexpected entries are not
present in the exported text file. If there
is an issue detected during the validation
process an email is sent to the Administrators
who are set to receive the Communications. |
At
the interval preset in the Posting File
Name and Location window, any Time Entries
"Marked for Posting" will be written to
the Export text file.
If a Time Export text file already
exists, the Time Entries will be
appended to it. |
|
|
| |
| Some
bills could be rejected when the word "Assistant"
was present in the text file forcing firms
to manually edit each file. A new option
was added to the list to resolve this issue. |
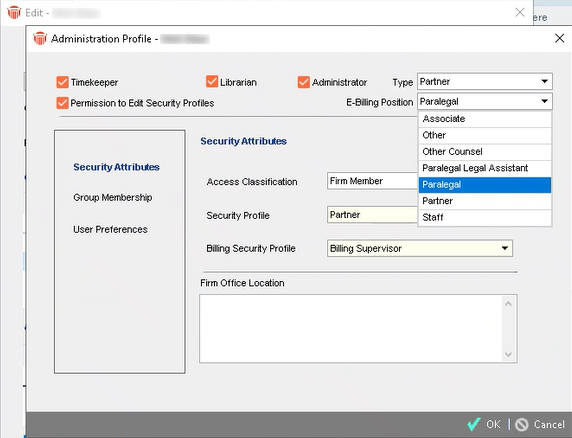
| Select
a firm member from the User Management
screen, then click Admin to display
the Administration Profile dialog. |
| The
"Paralegal" E-Billing classification
is now included in the E-Billing Position
drop-down list. |
 |
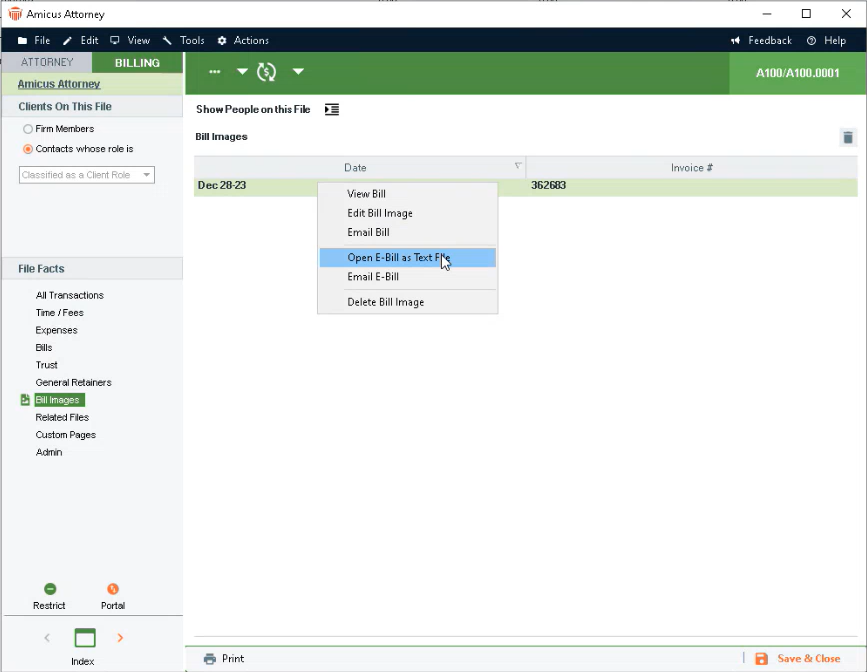
| To
view an E-Bill, click Bill Images
in the left menu bar, then right-click on
the bill and select Open E-Bill as Text
File from the pop-up menu. |
 |
| When
an E-Bill is created using the "Paralegal"
classification, a new E-Billing code "PL"
appears after the Firm Member's name in
the text file. |
 |
| Text
files are sent to the Client for E-Billing.
Previously a firm members would manually
change the E-Billing Classification code
to "PL" if this was needed in
the Billing text file. |
|
|
| - |
Improvements
to the Referral Report 
A new
option in the Generate - Referral Report dialog
allows Clients to view a report that only
includes Matters where an option was chosen in
the Referred by field during creation. |
| |
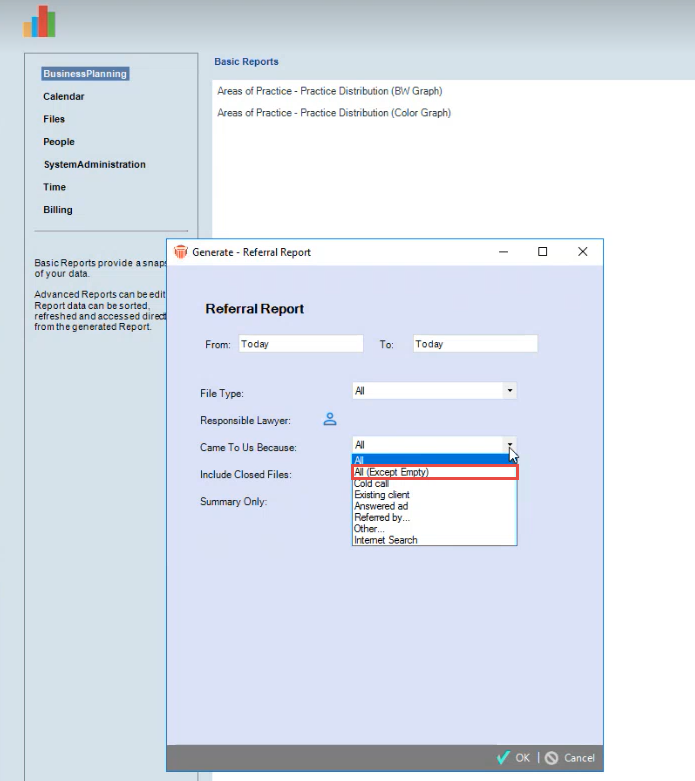
| The
Referral Report now includes the
option All (Except Empty) in the
drop-down menu under the Came To Us Because
field. |
 |
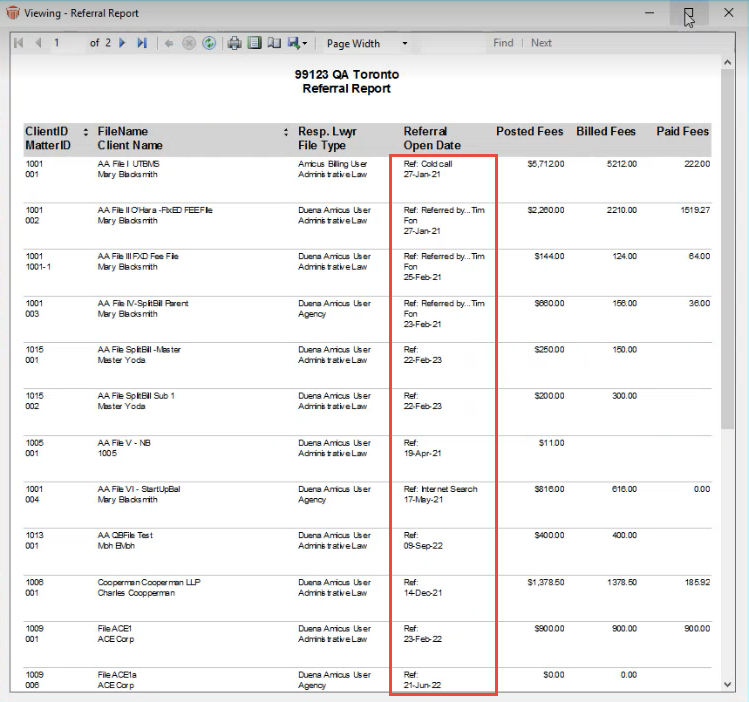
| The
drop-down menu in the Came To Us Because
field defaults to All, which includes
Matters where the Referred by field
was left blank when the Matter was
created. |
 |
| Clients
often want to see a report which includes
the various Referral Types such as
Cold call, Referred by ..., Internet
Search etc., but they do not want to
generate a list that includes Matters
where the Referred By field was left
blank when the Matter was created. |
| When
the new option, All (Except Empty)
is selected in the Came to Us Because
field, Matters will not display
if the Referred By field was left
empty when the Referral Report is
run. |
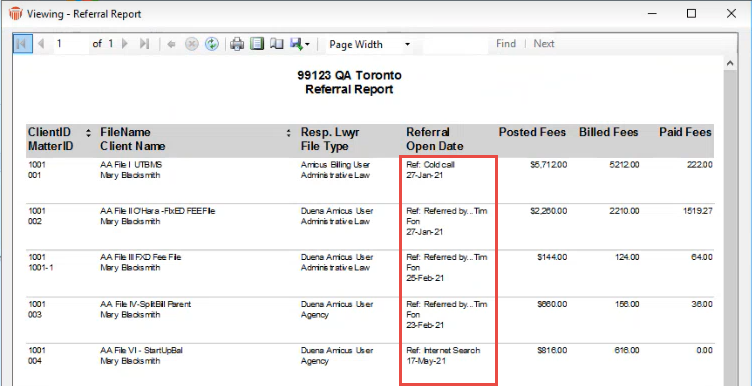 |
| The
new list is shorter and contains only relevant
Matters. |
|
|
| |
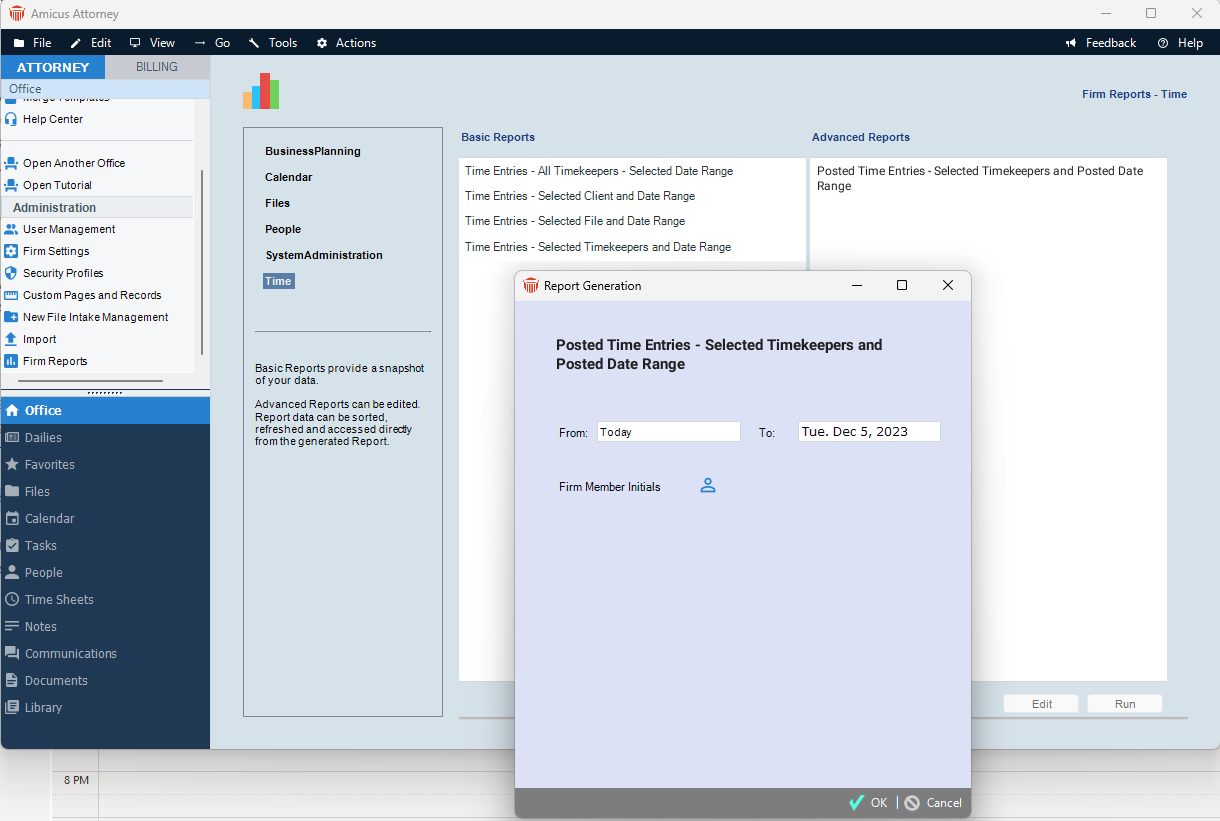
| This
allows users to quickly generate a report
on any Time Entries posted in a date
range and optionally limit by the Timekeeper. |
| Select
Posted Time Entries - Selected Timekeepers
and Posted Date Range from the Advanced
Reports column, then enter the From
and To dates in the Report Generation
window. |
|
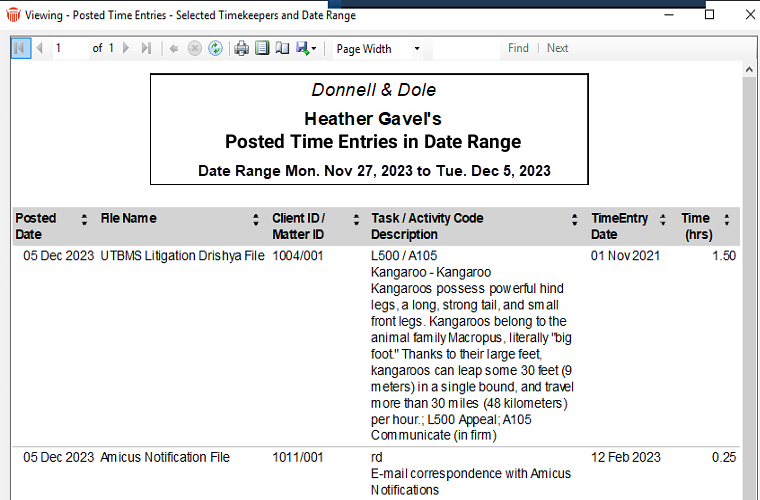
| Click
OK to generate your report. |
 |
|
|
| |
| Unposting
a Time Entry could possibly result
in potential duplicates as once unposted
it shows up as Postable and may be
posted again by another Firm Member. |
| To
view the new prompt: |
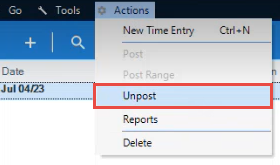
| Conduct
a Search or go to the Matter
containing the Time Entry you would
like to upost, then select Unpost
from the Actions menu. |
 |
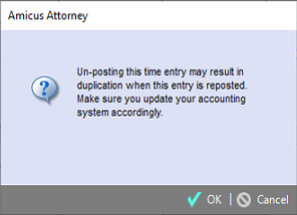
| A
prompt displays informing you that unposting
this time entry may result in duplication
when this entry is reposted and asks you
to update your accounting system accordingly. |
 |
| Select
Cancel to abort the procedure or
click OK to unpost the Time Entry
and proceed to update your Accounting
System. |
|
|
| |
| An
SQL Compatibility check is now included
when using Auto-Update to push updates to
all workstations. |
| If
your version of Microsoft SQL is not supported
you will not be able to update Amicus. |
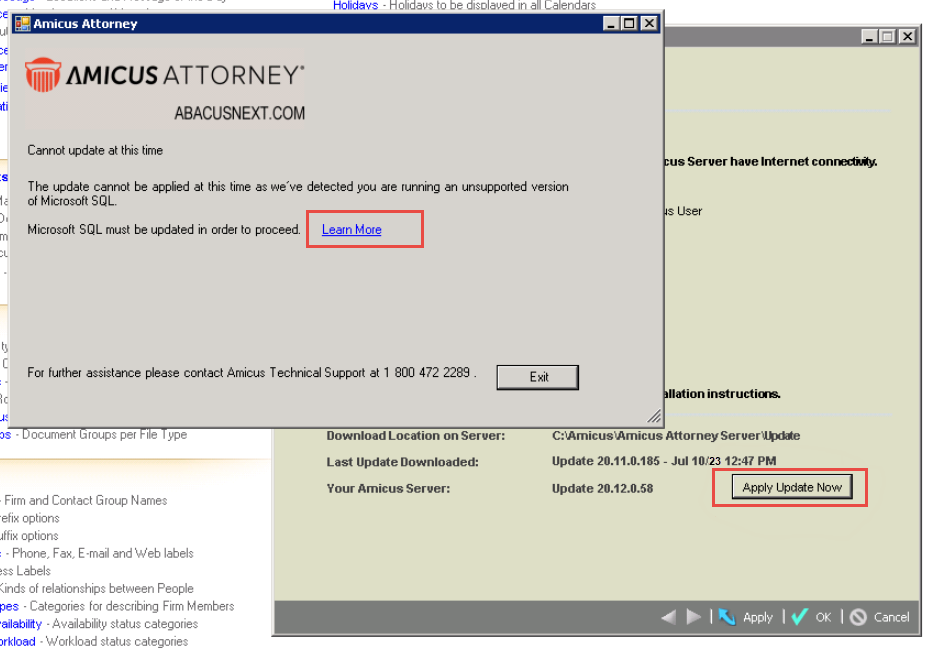 |
| The
Apply Update Now button under Firm
Settings checks that you are running
a supported version of Microsoft SQL. |
|
|
| - |
Improved
HotDocs Advance Setup 
The
integration with HotDocs Advance has been optimized to
ease the setup process and help with troubleshooting in
the event of an issue. |
| |
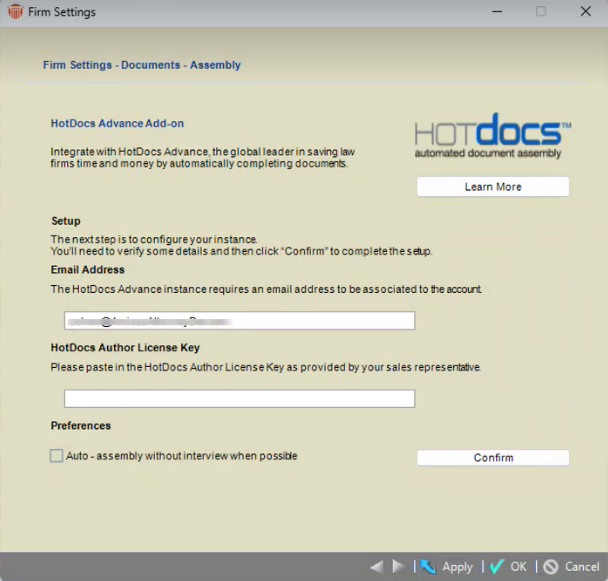
| HotDocs
Advance Setup has now been broken up into
two distinct parts. |
| The
first screen asks for the email address
to be associated to the account and the
HotDocs Author License Key. |
 |
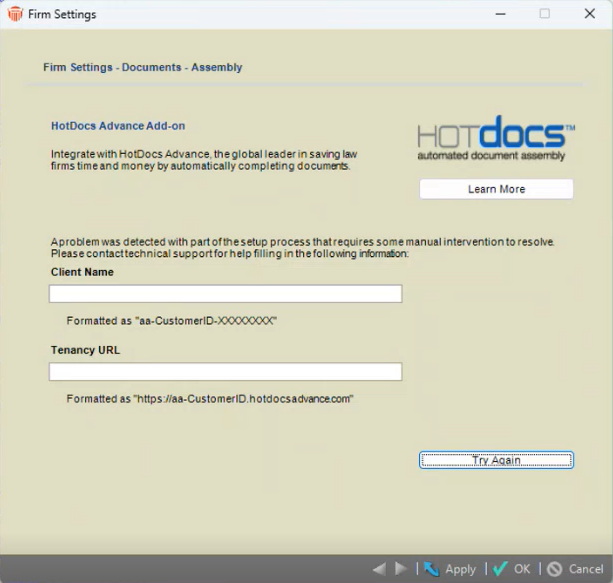 |
| Enter
the Client Name and Tenancy URL,
then proceed with the setup by clicking
Try Again. |
|
|
Amicus
Attorney 20.11 - June 2023
With
this release we have optimized and improved many features
within Amicus Attorney. Third Party Links now include an enhanced
Office 365 / Exchange Sync. There is now upgraded security
and support.
We recommend upgrading to SQL 2022 to reap the many performance
benefits. We have also created additional Task-Based Billing
Codes and added New Filters to the User Management list.
| |
| After
the Daily Check is complete, the
Exchange Service is programatically
being restarted every night to clear any
sync operations that have become stuck. |

|
|
|
| |
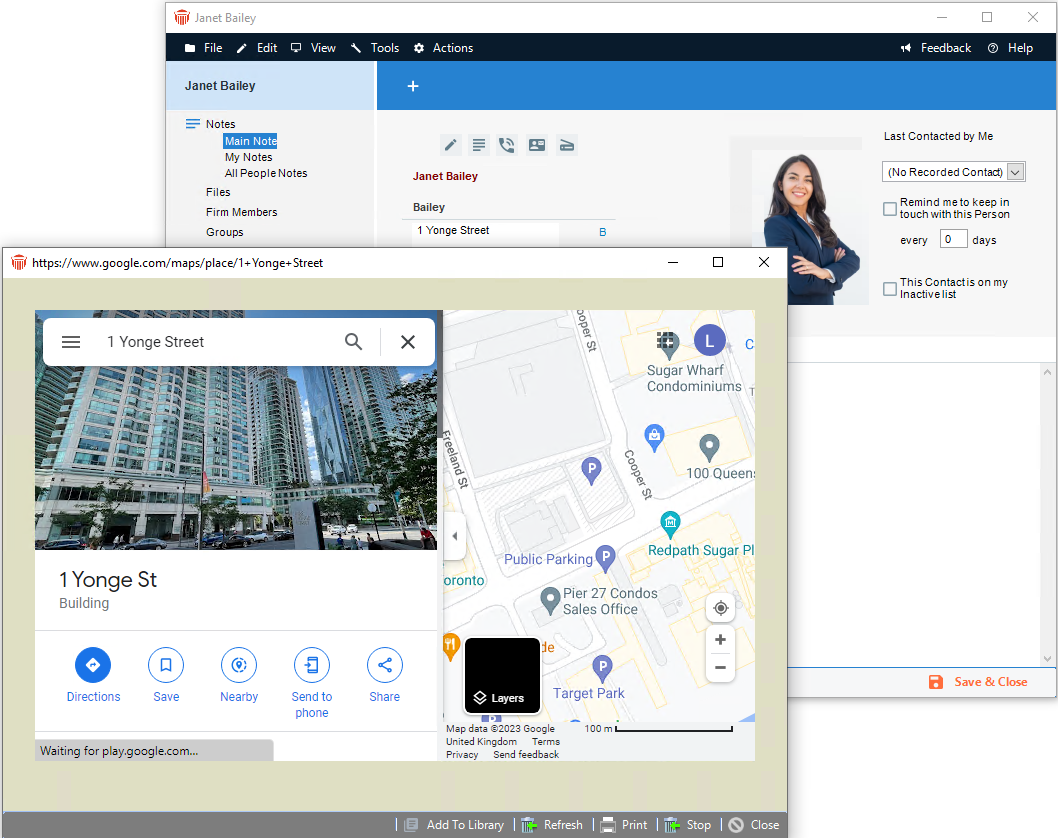
| Amicus
includes an all-new embedded browser control
to handle how HTML or rich text is displayed
throughout the application. |
| This
new change is especially helpful when using
the email reading pane to preview saved
email messages. The new modern controls
render content much better for an improved
experience. |
| The
improved controls also impact the Marketing
Announcements page, any Dailies pages
that show external contacts and features
such as the Contact Map option. |
|
|
|
| |
| The
following new message displays when the
File Summary is being deleted to ensure
that the deletion was intentional. It appears
when the user clicks Save & Close,
Next or the Previous arrows to
move to another file. |
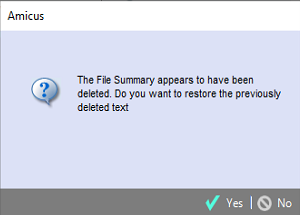 |
| Click
Yes to restore previously deleted
text. |
|
|
| |
| To
avoid accidental changes to a Matter:
|
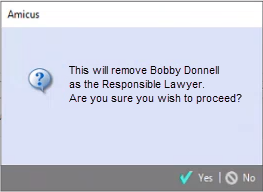
| When
the Responsible Lawyer on a Matter
is changed the following prompt message
displays. |
|
| Click
Yes to proceed or No to cancel. |
| When
the Introducing Lawyer is changed
the following prompt message displays. |
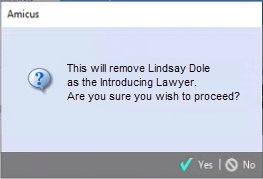 |
| Click
Yes to proceed or No to cancel.
|
|
|
| |
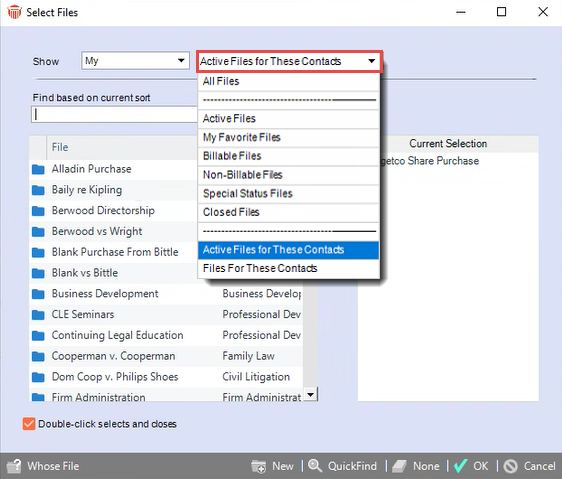
| Simply
select the appropriate Firm Member(s)
on the Matter, then choose to
Generate a Document. |
|
|
|
| |
| It
is now easier than ever to manage Firm
Group memberships. Firm Administrators
no longer need to rely on Reports
to view firm member assignments. |
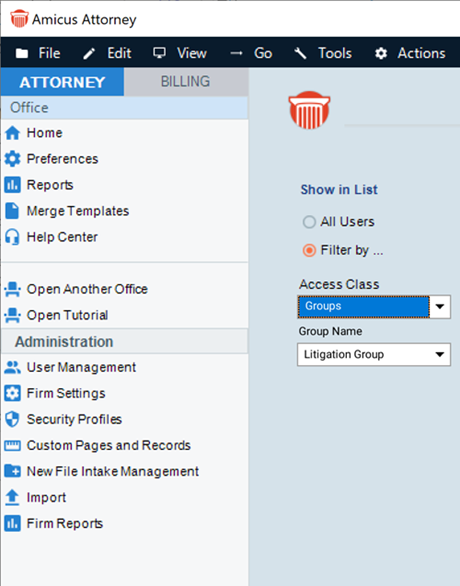
| A
new Groups option has been added
to the drop-down list found under the Access
Class field. |
 |
| When
Groups is selected under Access
Class a new Group Name field
displays listing all firm members groups. |
 |
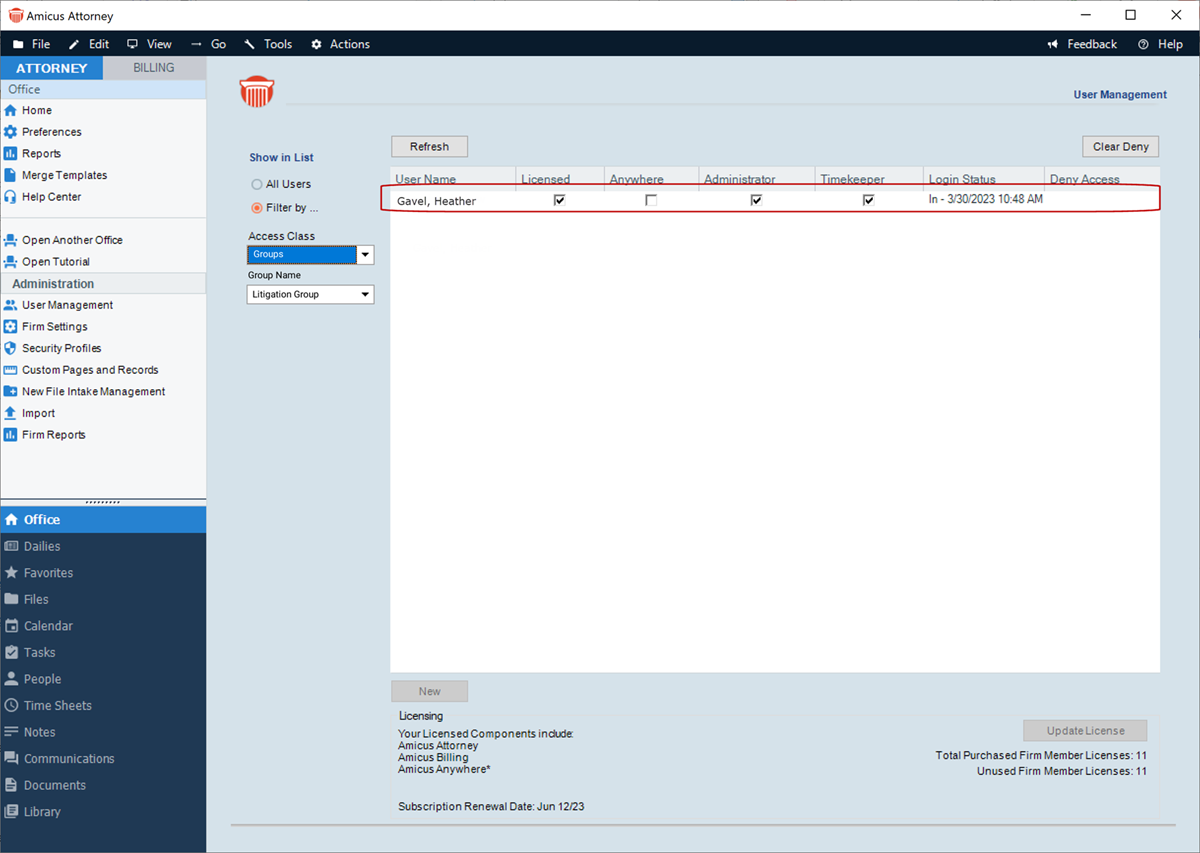
| All
firm members in a group are displayed when
a specific group name is selected from the
Group Name drop-down list. |
| Firm
Administrators can right-click on any firm
member and manage their Group Memberships.
|
| However,
new firm members cannot be added to a Group
from a list view. |
 |
|
|
| |
| Firm
Administrators can now open the Contact
details for any Client Portal user
in the User Management list. |
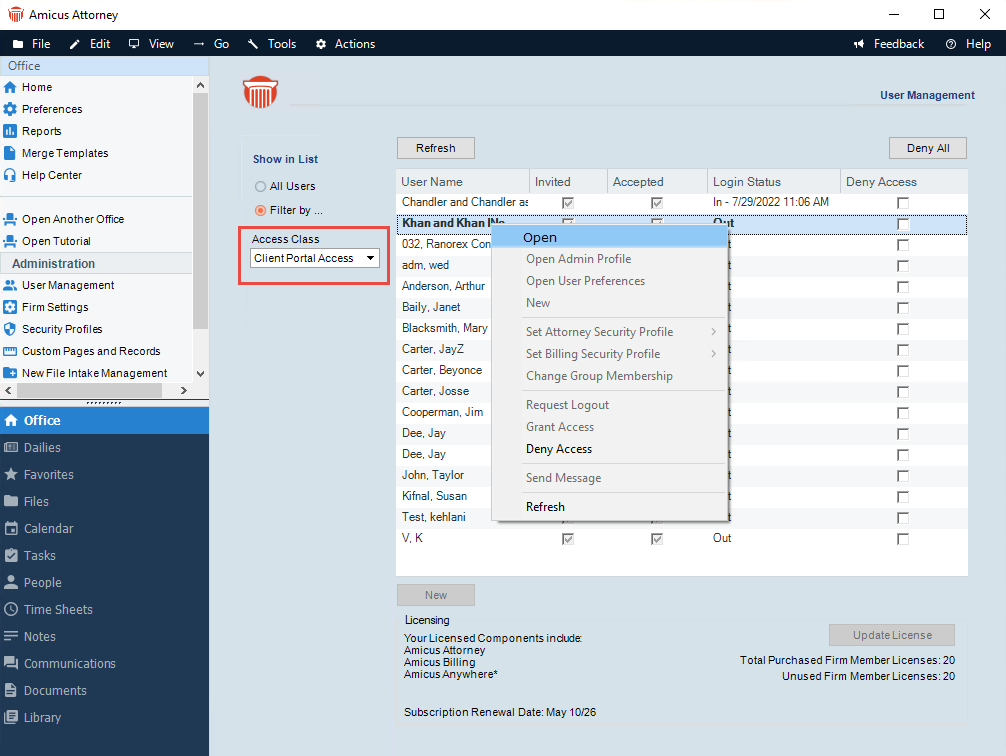 |
| This
allows them to easily display the Contact
details by clicking on a Client Portal
user and selecting Open from
the drop-down list to make any changes. |
|
|
| |
| A
new field has been added to the Time
- New Entries Preferences dialog to
control whether or not a prompt appears
for the file selection after clicking Save
& New to create a new file. |
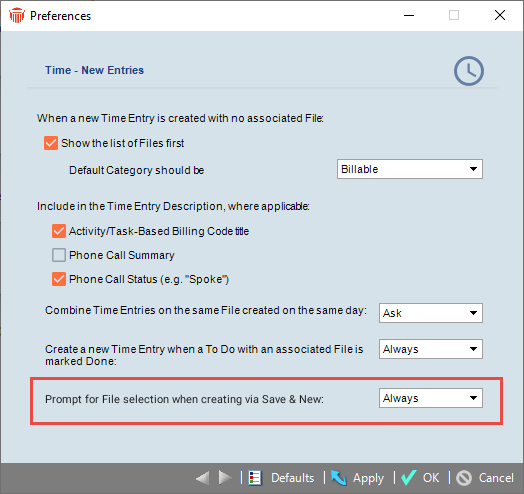 |
| Select
Always from the drop-down list in the
Prompt for File selection when creating
via Save & New field, then click
Apply or OK. |
|
Later when you create a Time Entry
from within a file you will be prompted
to select the file again after the fields
are completed to ensure that the file information
you are currently working in is retained. |
|
|
| |
| You
now have control over the formatting of
appointments for other firm members in
Calendar views when looking at another
firm member's events. |
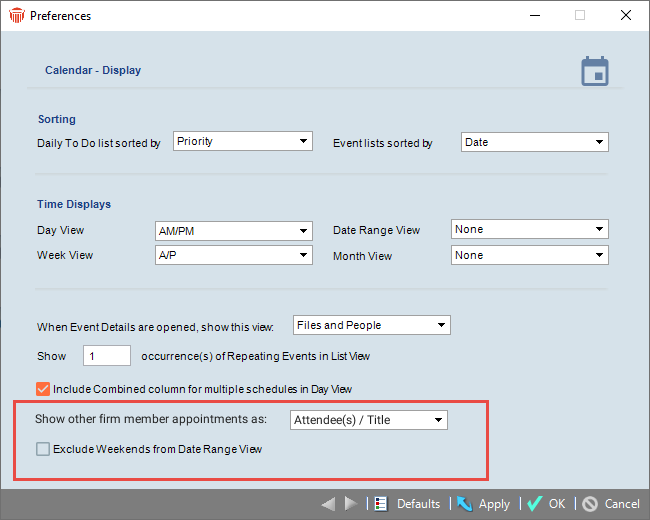 |
| A
new Show other firm member appointments
as field containing a drop-down list.
with options to show as Attendee(s) /
Title or Title / Attendee(s)
has beeen added to the Preferences dialog
|
- Attendee(s)
/ Title
- Title
/ Attendee(s)
|
 |
|
|
| |
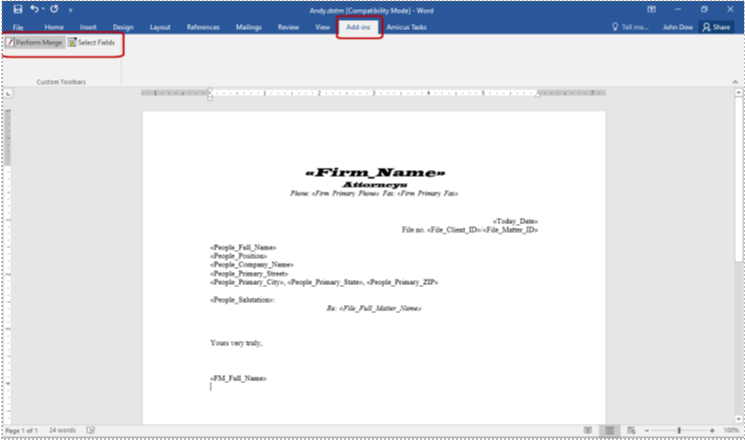
| This
update allows for the first phase of support
for Document Assembly in 32-bit and 64-bit
versions of Microsoft Word. |
| The
Perform Merge and Select Fields
buttons under the Add-in heading
in Word now support both versions. |
 |
 The
Amicus Tasks toolbar does not yet support
64-bit versions of Word so we continue to
recommend 32-bit versions of Word. The
Amicus Tasks toolbar does not yet support
64-bit versions of Word so we continue to
recommend 32-bit versions of Word. |
|
|
| |
| The
Uniform Task-Based Management System
(UTBMS) is a group of codes that were
created to standardize billing categories. |
| Although
Amicus Attorney comes with a series or codes
used to classify legal services you may
want to create custom Task-Based Billing
Codes. |
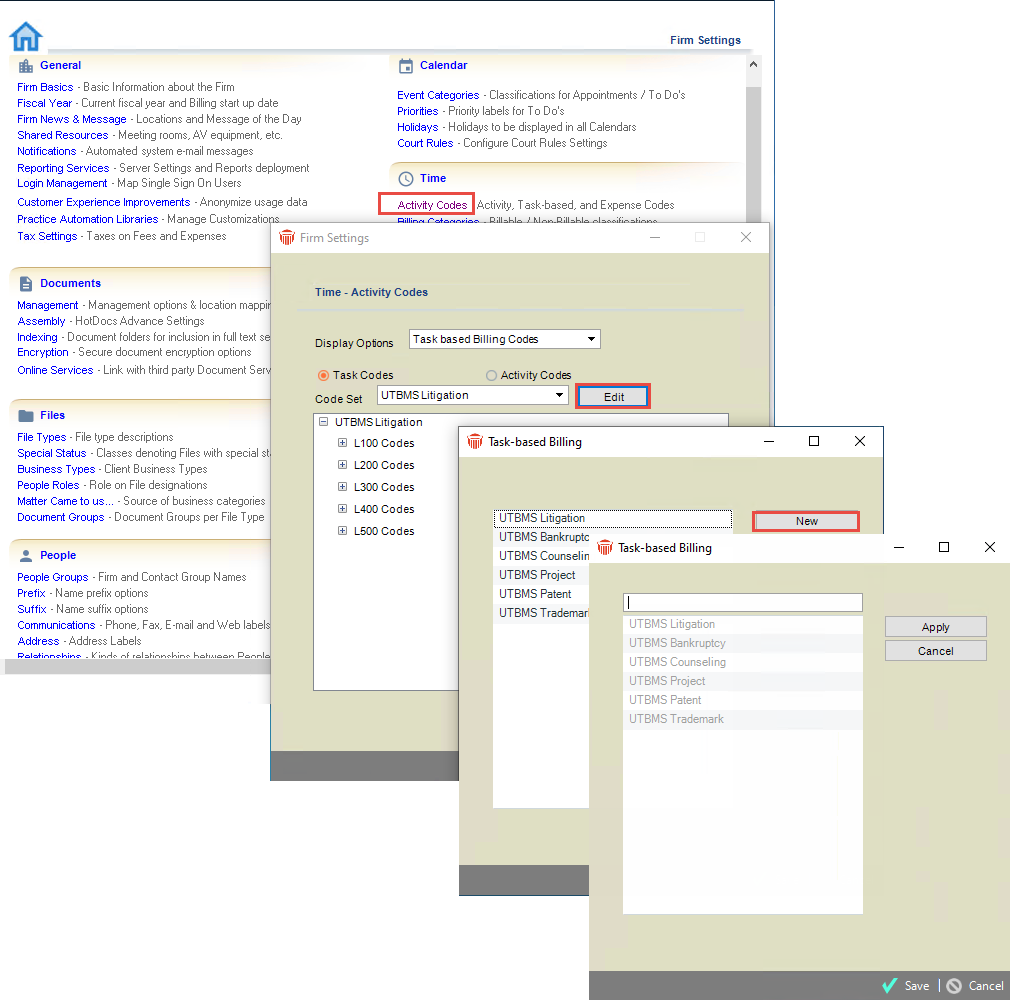
| To
create additional Task-Based Billing Codes
go to Firm Settings and select Activity
Codes under the Time section.
A Time - Activity Codes dialog displays.
|
|
Select Task Based Billing Codes from
the drop-down menu in the Display Options
field. Then click Edit beside the
Code Set field. |
|
A
new Task-based Billing dialog displays
containing the code categories. Click
New and enter a name in the field that
becomes available. |
 |
|
Click Save to add the new code to
the Task-Based Billing Codes. |
|
|
| |
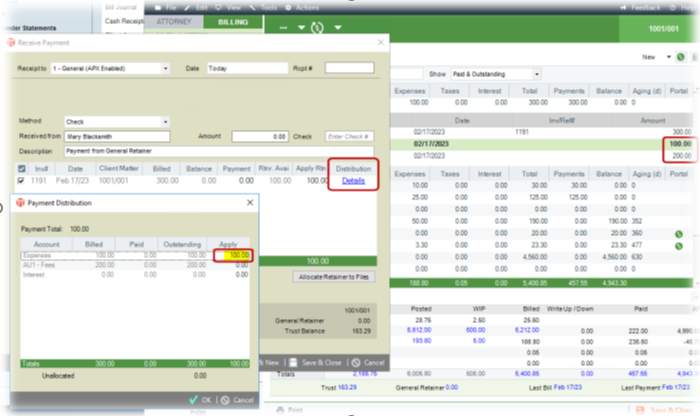
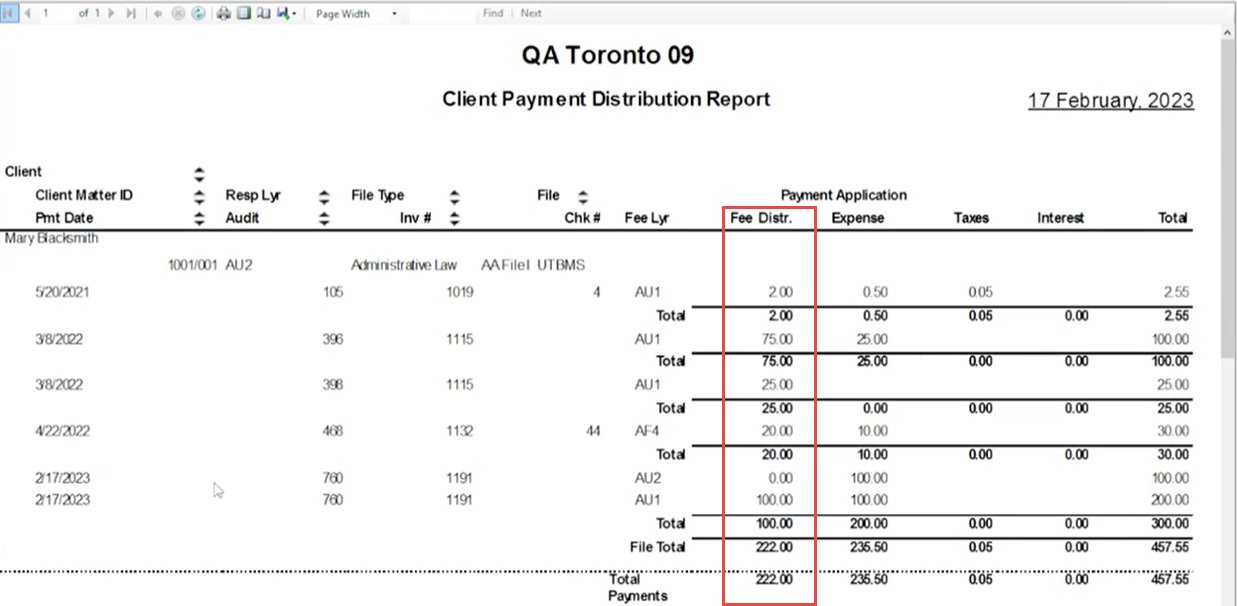
| Amicus
now supports payments via General Retainer
from Multiple Bank Accounts. |
 |
|
|
|
| |
|
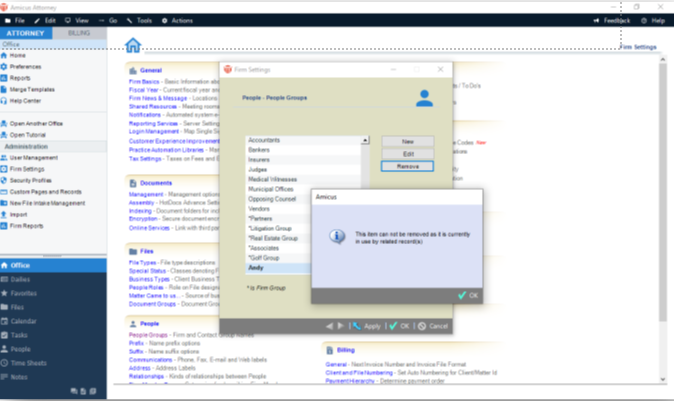
When an attempt is made to remove an item
that is currently being used by related
record(s), a warning message displays informing
you that the item cannot be removed. |
 |
|
|
| |
| What's
New now appears under the Support
Section in the Help Center. This
links to an HTML page featuring all the
latest updates in this release and past
releases. |
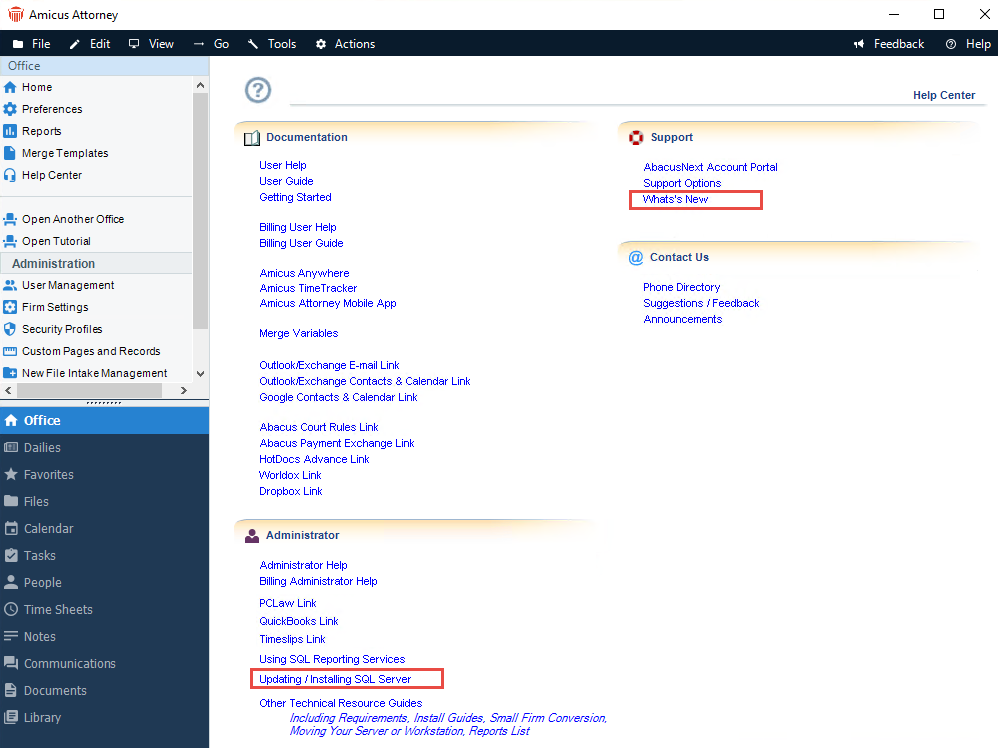 |
| There
is now a new link under Administrator
to make it easy for your Firm Administrator
to update to a newer version of Microsoft
SQL. |
|
|
Amicus
Attorney 20.10 - February 2023
In
this release we are pleased to be incorporating the following
options requested by you, our valuable customers into Amicus.
| |
| Toggle
between Show People on this File / People
on this File in the File Details taskbar
to show or hide people associated with a
file. |
 |
| Clicking
on the icon displays a tooltip Show /
Hide this Business Card. |
 |
|
The newly updated icon has also been moved
closer to the heading so that it is now
easier to find. |
|
|
| |
| When
the APX Payment Methods List report
is generated all payment methods for selected
client(s) are included in the list. When
no specific client is selected, the report
is run for all clients. |
| Go
to Firm Settings and click on APX
under the Billing section to
display the following dialog. |
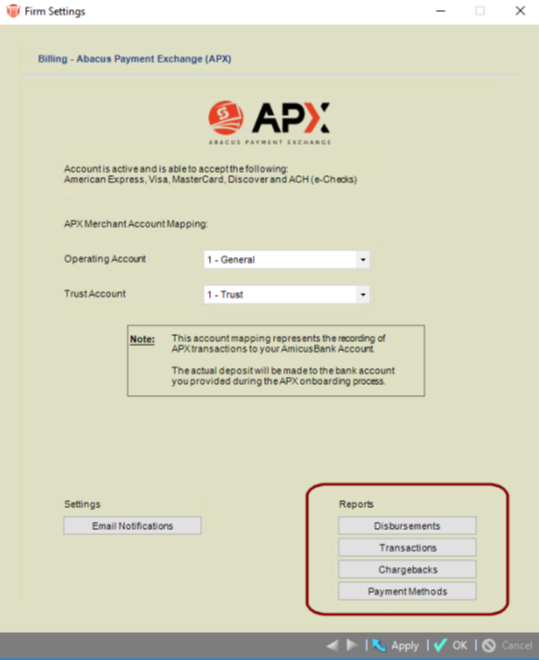 |
| Click
on Payment Methods under Reports
to display the Payment Methods List
Report. |

|
|
|
| |
|
If
you belong to a firm with multiple Administrators
and you begin the process of configuring
the Office 365 and Exchange links a strong
warning will display if the links have
already been configured. This lets you
know that the process has already been
completed, and warns you that if you continue
all users in your firm will be disabled.
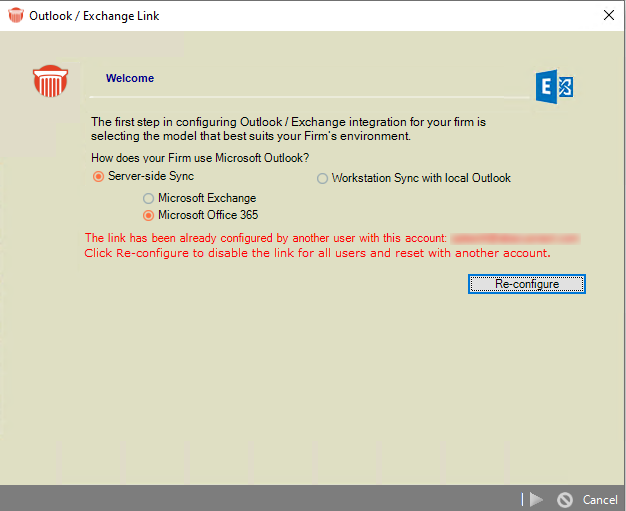
To
view the warning message select Contacts,
Calendar and Email - Link configuration
under the Outlook / Exchange / Office
365 Link in Firm Settings,
then click Configure to
display the Welcome screen with
a strong warning message. The Configure
button is also replaced by a Re-configure
button.
|
 |
| If
you choose to click Re-configure, a
prompt displays informing you that if you
continue with the reconfiguration the link
will be disabled for all users. |
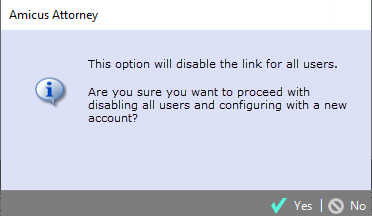 |
| If
you still wish to configure a new account,
click Yes to proceed or No to
return to the Welcome screen without
making any changes. |
|
|
| |
| If
you or another Firm Member switches to a
new high-resolution monitor then Amicus
can automatically apply settings to ensure
an optimal viewing experience. |
| The
following prompt displays at login if a
4K monitor is detected. |
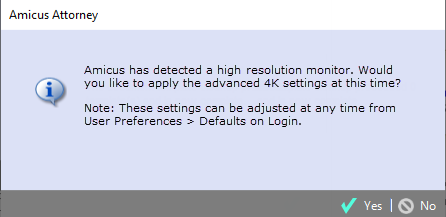 |
| Click
Yes to apply the advanced 4K settings
at this time or No to keep the settings
as is. If you click No the prompt
will not display again unless you get a
new monitor. |
| If
Yes was clicked, the next time you
log into Amicus Attorney you will notice
that the 4K resolution has been enabled
at your workstation. |
| The
settings can be disabled anytime in User
Preferences > Defaults on Login. |
|
|
| |
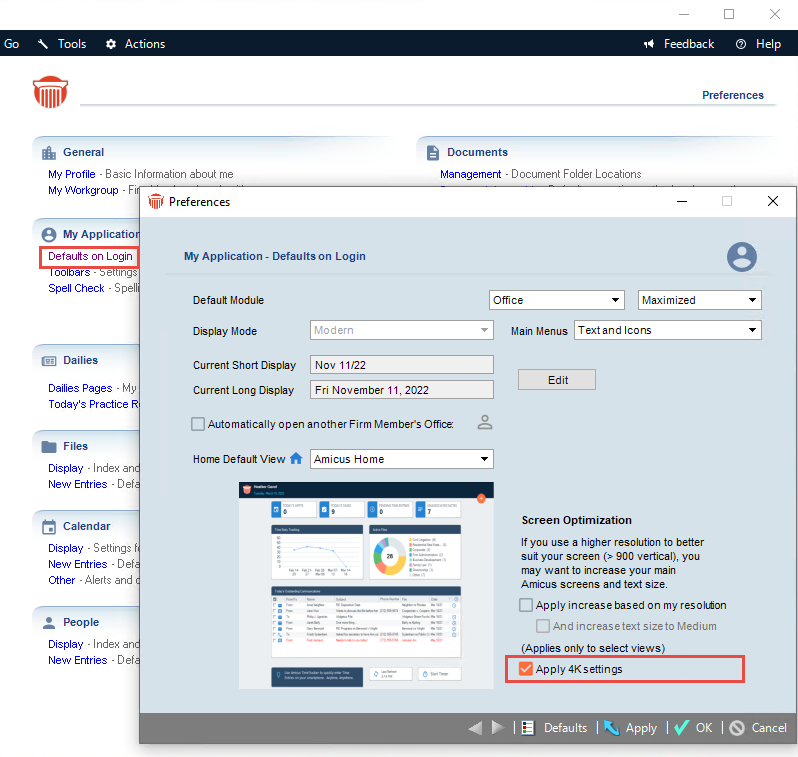
| Select
Defaults on Login under the My
Application section in the Preferences
window to display My Application - Defaults
on Login window. |
 |
| Select
Defaults on Login under the My
Application section in the Preferences
window to display My Application - Defaults
on Login window. |
| Select
the Apply 4K setting checkbox under
the Screen Optimization section to
enable 4K resolution for your firm members. |
|
|
| - |
Rebuilding
Outlook Columns 
This
new utility allows for historical data that may have been
lost from Outlook to be recreated from Amicus. |
| |
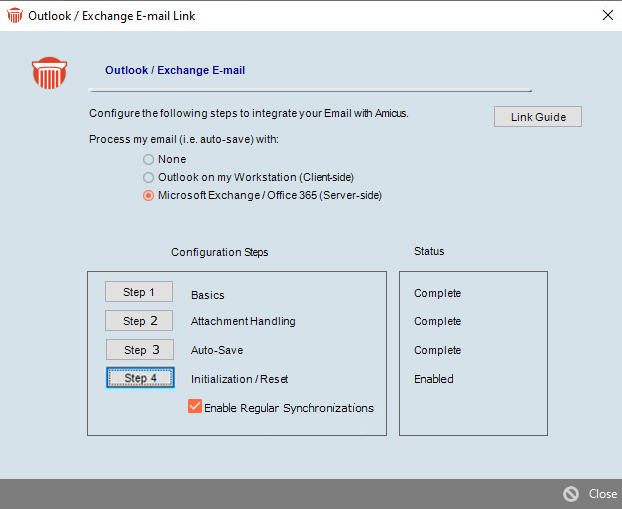
| Click
Email under the Links section in
Preferences to display the Outlook /
Exchange E-mail window. |
 |
|
Ensure that the Enable Regular Synchronizations
checkbox is selected and click Step 4
Initialization / Reset. |
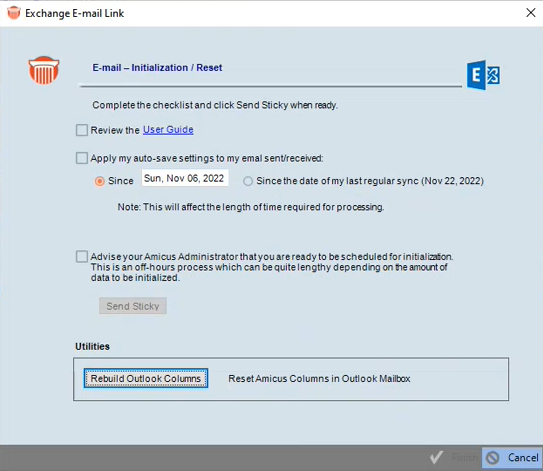
| Click
the Rebuild Outlook Columns button
which only displays if regular synchronization
is enabled. |
 |
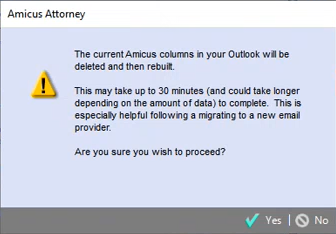
| A
message displays informing you the current
Amicus columns in your Outlook will be deleted
and then rebuilt. |
 |
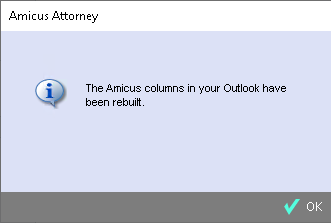
| Click
Yes to begin the process of rebuilding
Outlook columns. You will receive another
message when the Amicus Columns have been
rebuilt. |
 |
| Historical
data is recreated if it was lost when moving
email providers. |
|
|
| |
| Amicus
makes it easy to package documents on a
Client File to a Folder or a ZIP file for
easy sharing by selecting Package Documents
from the Actions menu. |
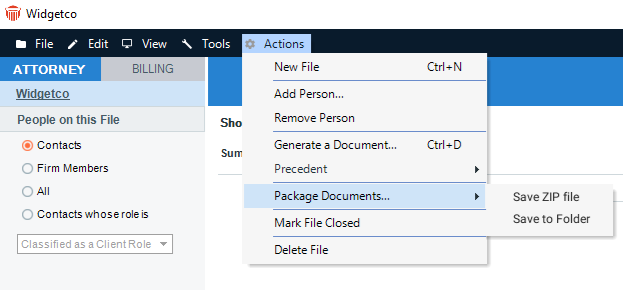 |
| Save
ZIP file compresses the files while
maintaining the folder structure, so the
recipient can see the layout as intended. |
| Save
to Folder saves the files to a designated
folder in one click. |
|
|
| |
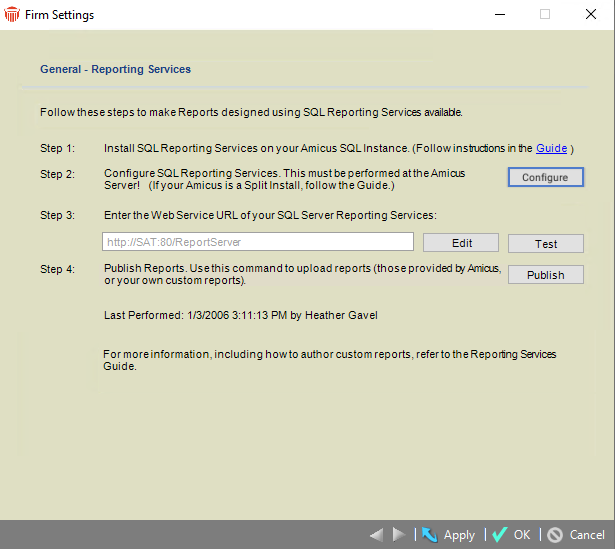
| A
new Configure button guides you through
launching the external SSRS setup utility. |
| Select
Reporting Services under the General
section of the Firm Settings
to display the General-Reporting Services
window, then select Configure. |
 |
| A
prompt displays directing you to the folder
where the SSRS Configuration can be accessed. |
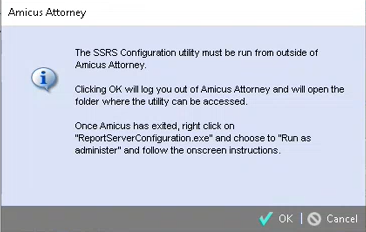 |
| Click
OK closes the prompt, logs you out
of Amicus Attorney and opens the Utility
folder. |
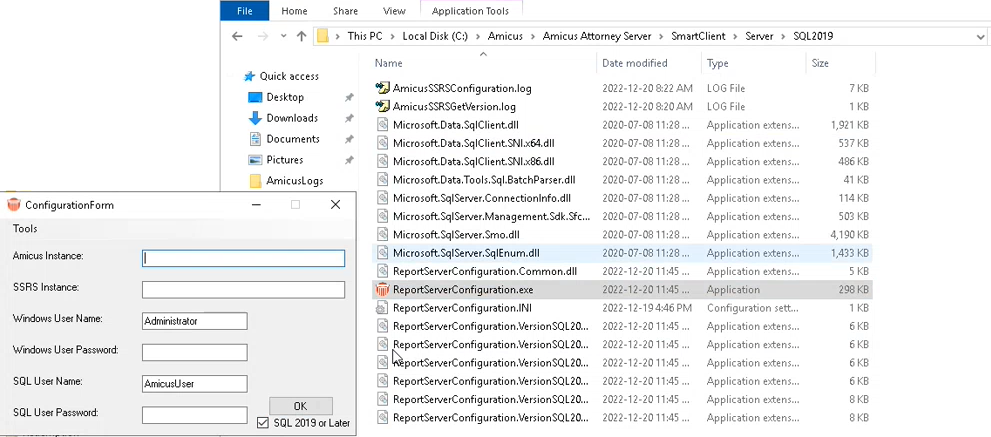 |
| Right-click
on ReportServerConfiguration.exe to
launch the utility. |
| Select
the SQL 2019 or Later checkbox if
you are using SQL 2019 or a new version
of SQL. |
| Follow
the setup instructions. Right-click on ReportServerConfiguration.INI
to launch the INI file. You can fill
in the details of the Configuration Form
here so you do not have to enter it every
time. |
|
Click OK and log back into Amicus
Attorney to do the Test Connection. |
|
|
| |
| Balances
in Client and File Account Overviews and
Indexes may need updating if new transactions
or changes to transactions fail to update
them under certain circumstances, such as
after using the mass time entry change tool. |
| Ensure
that all other Firm Members have logged
out of Amicus Attorney before refreshing
balances. |
 Note: We recommend that you backup
the Amicus database.
 |
| Choose
Office > Firm Settings and select
Utilities under the Maintenance
heading. |
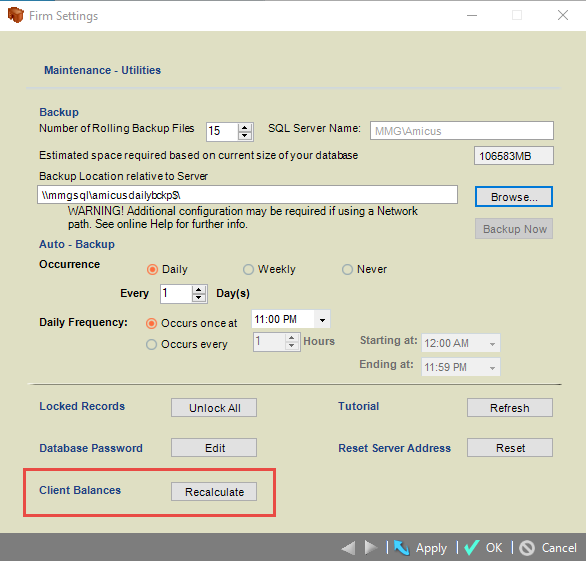 |
| Next
to Client Balances, click Recalculate.
To recalculate Client Balances, click
the radio buttons that apply in the Recalculate
Client Balances dialog. |
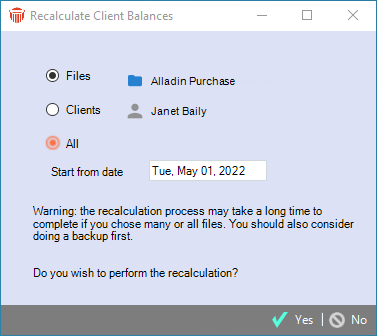 |
| The
File and Person icons become
active when their corresponding radio button
is selected. |
| Clicking
on the File icon displays the File
Selector window and clicking on the
Person icon displays the Select
People window. |
| Make
your selections from the lists and click
OK. You are returned to the Recalculate
Client Balances dialog where the selections
display in their corresponding textbox fields. |
| Click
the All radio button to recalculate
all of the Files and Clients in Amicus.
Files will be processed even if they do
not have Firm File and Firm Contact
security rights. |
| Use
the Calendar Controls to enter a Start
from date. |
| A
Warning message displays on the Recalculate
Client Balances dialog informing you
that the recalculation process may take
a long time to complete if many records
were selected. |
| You
are also prompted to consider doing a backup
first. |
| Click
No to cancel the process or Yes
to perform the recalculation. The following
prompt displays if the number of Files and
Clients records exceeds 300. |
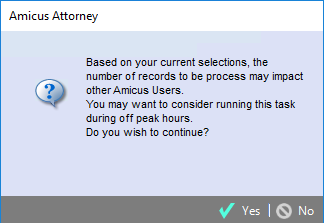 |
| You
are informed that processing such a huge
amount of records will impact other Amicus
Users and are asked to consider running
this task during off peak hours. |
| Click
Yes to continue with the process
of recalculating your client balances or
click No to cancel the process. |
|
|
| |
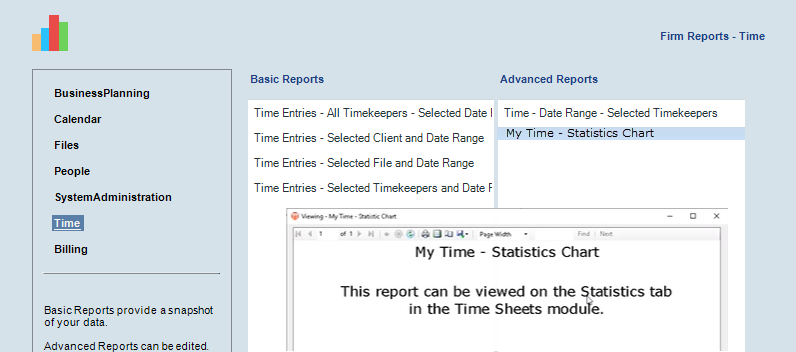
| When
a user clicks on "My Time - Statistics"
report under Firm Member reports
a message displays redirecting them
to the Statistics tab in the Time
Sheets module. |
 |
|
|
| |
| Previously
when a Master Event was deleted from a Precedent
template the entire Precedent Workflow was
broken. |
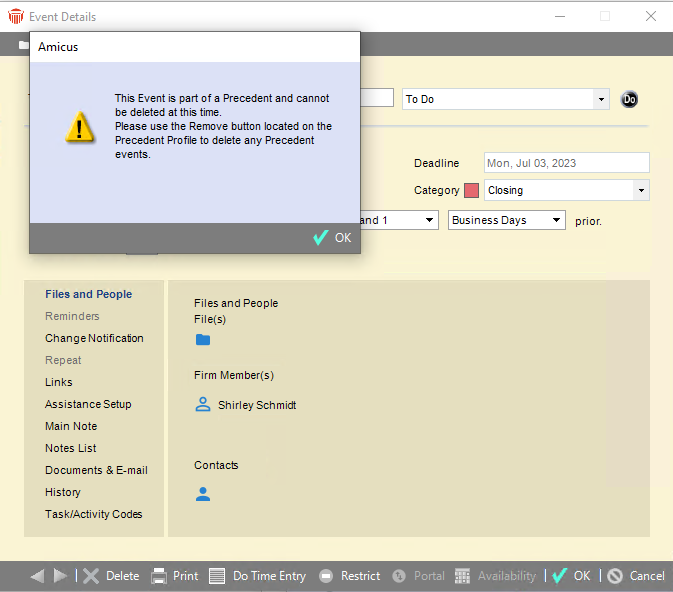
| The
following error message displays if a user
clicks Delete in the footer of an
Event Details window that is part of
a Precedent template.. |
 |
| To
remove an item from a Precedent Template,
go to Events in the left navigation
bar of a File Details window and
select Use Precedent from the dropdown
menu in the taskbar. |
 |
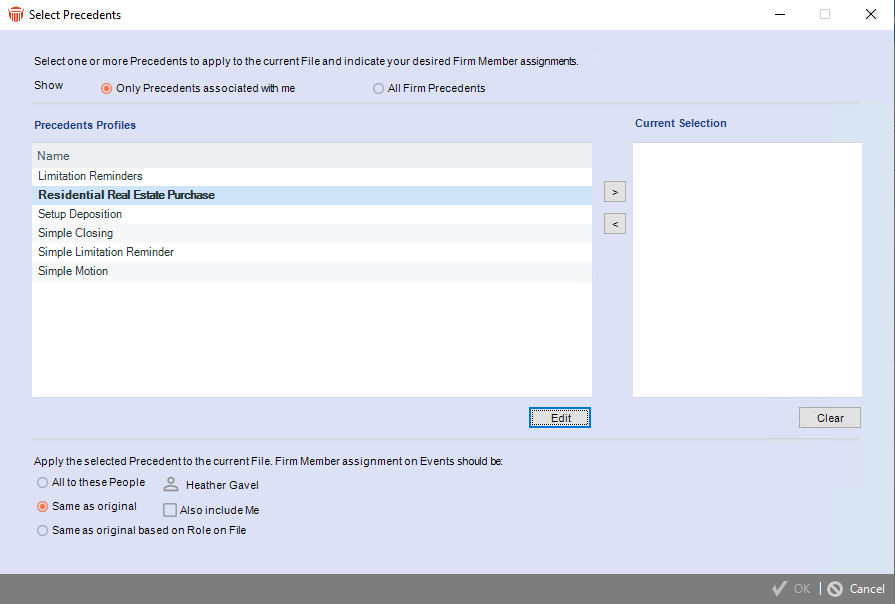
| Select
a precedent template from the Select
Precedents dialog that appears and click
Edit. |
 |
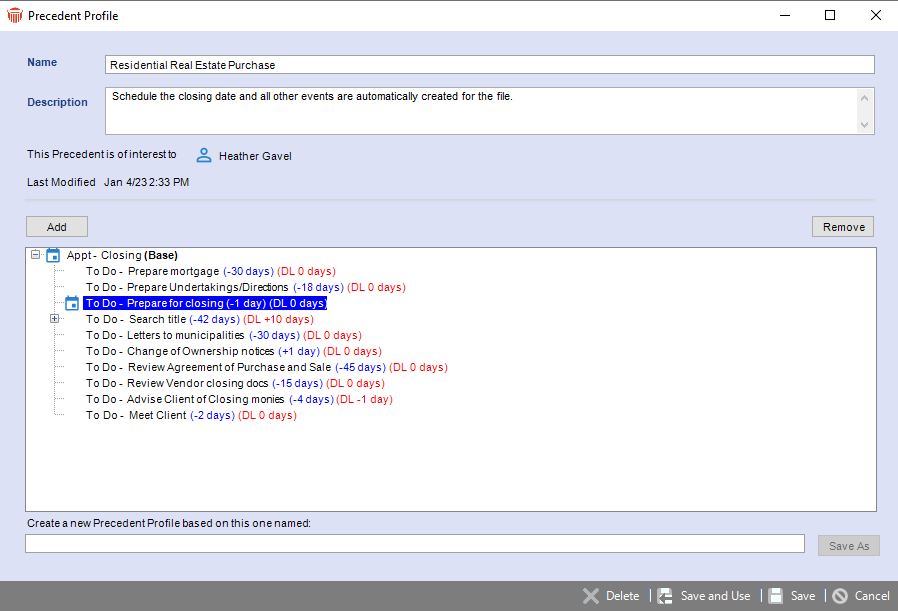
| Select
an item from the main window in the Precedent
Profile dialog that appears, then click
Remove above the window. |
 |
| Click
Save to remove the item from the
Precedent template or click Cancel
to return to the Select Precedents dialog
without any changes. |
| If
you try to delete the Master Event
the following message displays. |
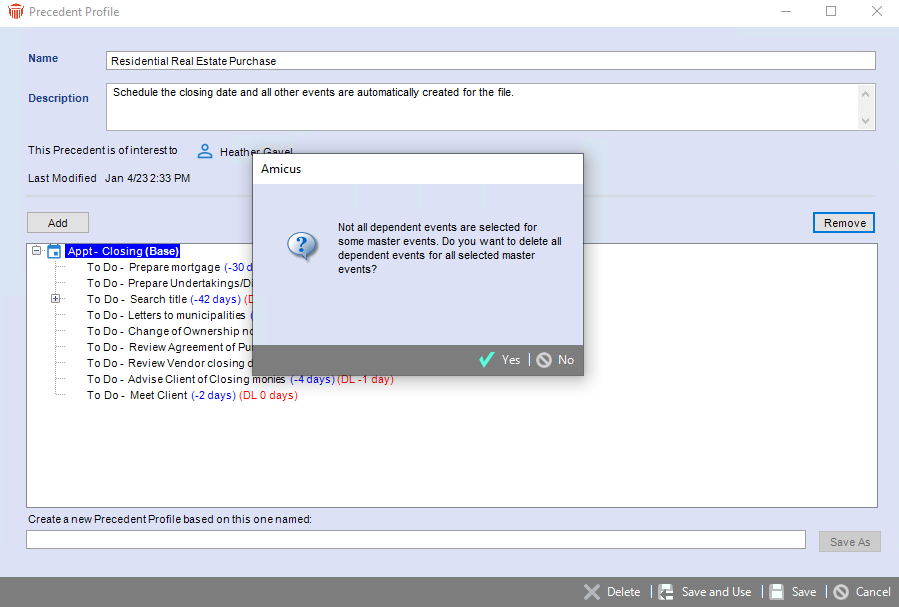 |
| Click
Yes to delete the entire Precedent
template or click No to return to
the Precedent Profile dialog without
making any changes to the template. |
|
|
| |
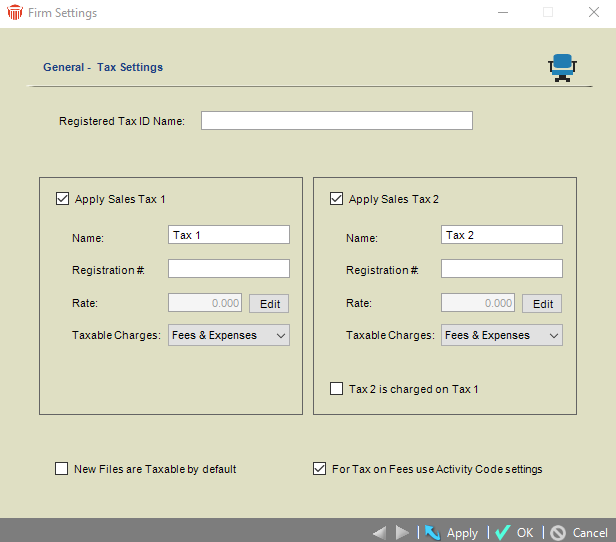
| Select
Tax Settings under the General
section in Firm Settings to display
the General - Tax Settings dialog. |
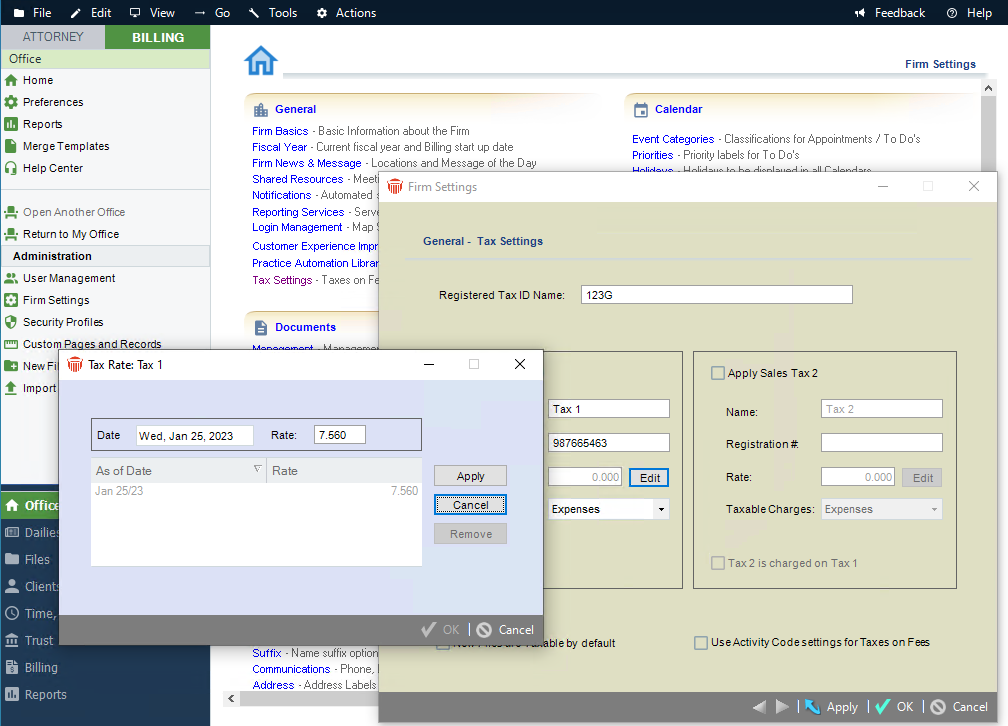
|
| Click
Edit beside the Rate field to
display the Tax Rate dialog. Make
necessary changes to the Rate field.
Amounts up to 3 decimal places are accepted. |
|
|
Amicus
Attorney 20.9 - August 2022
This release focuses on Customer Satisfaction.
There have been a lot of improvements to existing functionalities.
We have introduced greater self-serve options in APX, and
a new Disbursement Report. There are also new automated backup
options, and a utility to clean up document templates. Additionally,
this release also includes a handy new feature – Email Notifications,
which allows firms to send clients Email Notifications for
settled payments, recurring payments, PayNow notices, and
even Refund and Void transactions.
| |
|
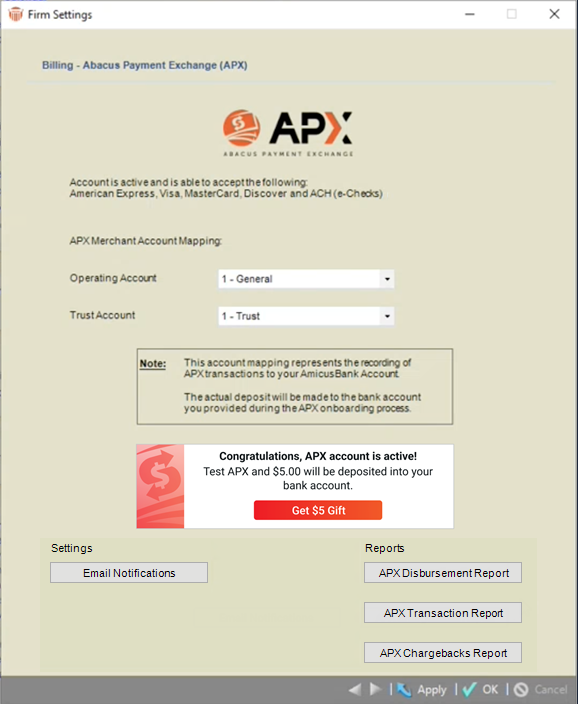
When
you onboard to APX a Congratulatory message
displays notifying you that your APX account
is Active.
|
| Click
Get $5 Gift to get started testing
the APX workflow. |
 |
| An
APX intake form displays. Ensure that the
details are correct and add email(s) in
the We will send a transaction details
to this email(s) field if you wish. |
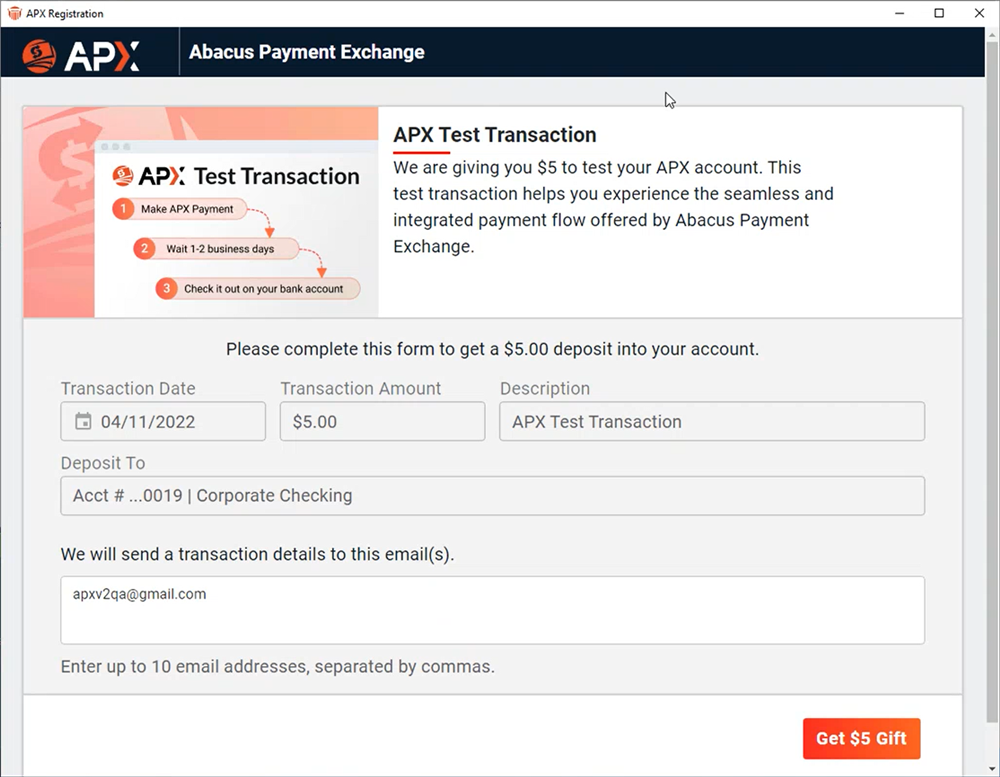 |
| Click
Get $5 Gift to complete the transaction. |
|
|
| |
| The
option to pay invoices 24/7 via the Client
Portal is beneficial to your firm, as well
as your clients. |
|
Selecting a previously saved credit card
or ACH account option from the drop-down
list in the Payment Method field,
then clicking Remove to the right
of the field quickly cleans up the list
of payment methods in the Payment dialog.
|
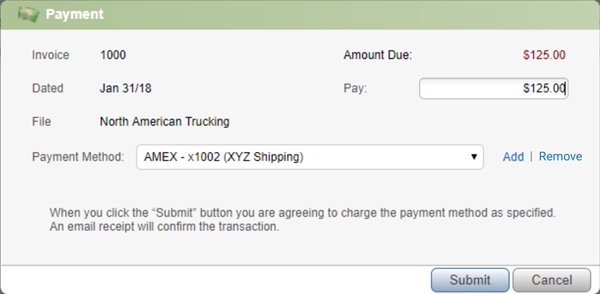 |
| The
Remove button is disabled if a payment
method does not exist. |
 Note: APX does not allow a payment
method to be deleted if it is tied to an
active recurring payment schedule.
 |
|
Attempting to delete a payment method that
is being used by a recurring payment schedule
displays a prompt informing the user that
the deletion is not possible. |
|
|
| |
| Providing
a Pay Now link with emailed invoices
allows clients to simply click the link
to pay their bill by credit card or ACH
account. This is beneficial for the firm
as clients are more likely to pay faster
and sooner. |
| Occasionally
it is a good idea to clean up the Payment
Method list to remove payment methods
that are no longer being used by the firm. |
|
The Delete icon to the right of
a payment method is enabled when a payment
method isn't being currently used. Simply
click on it to remove the payment method.
|
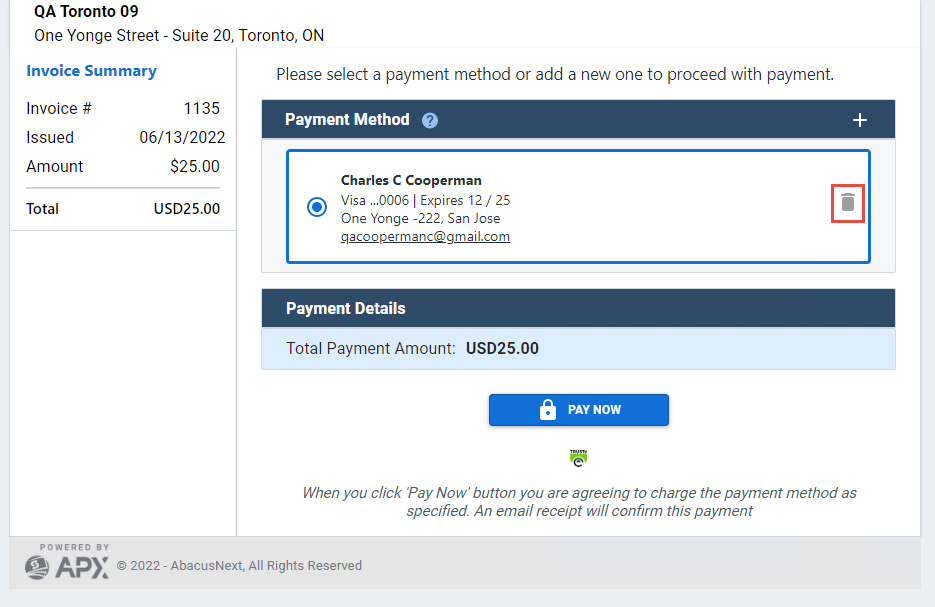 |
 Note:
Clients are prevented from deleting
payment methods associated with a recurring
payment schedule. Note:
Clients are prevented from deleting
payment methods associated with a recurring
payment schedule. |
|
|
| |
| Former
firm members will no longer appear in lists
when opening an Office. This avoids the
possibility of a former firm member being
assigned to a file or being added to a group. |
|
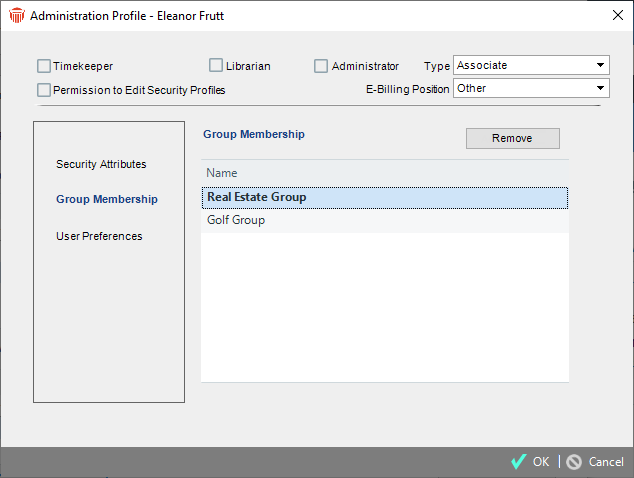
There
is also a new option to Remove
Group memberships from anyone marked as
a Former Firm Member.
|
 |
|
|
| |
| Some
older Document Assembly Templates could
include MSXML setttings that have been identified
as potential security vulnerabilities. |
| A
new Utility allows firms to scan and fix
any issues for all templates. |
| To
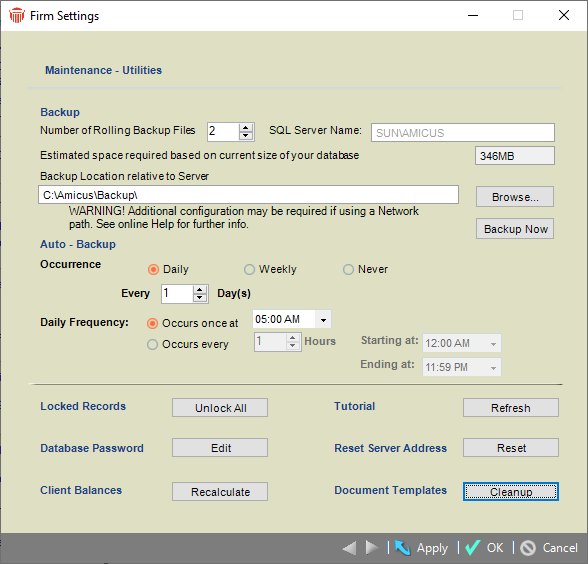
begin the process, select Utilities
under the Maintenance section in
Firm Settings to display the following
dialog. |
| Click
the Cleanup button at the bottom. |
 |
| A
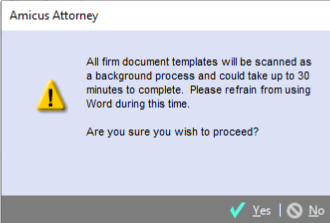
prompt message appears informing you that
all firm document templates will be scanned.
Click Yes if you wish to proceed. |
| This
takes a few minutes. As this is a background
process it does not affect your firm members.
|
 |
| The
templates in your database are scanned one
by one and all MSXML references are removed
and saved. |
| A
copy of the original template is kept under
your Templates folder. |
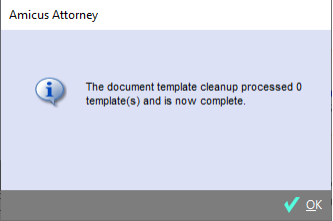
| A
message displays informing you when the
document template cleanup process is complete.
|
 |
| This
can be run by any administrator and adjusts
all firm templates. |
|
|
| - |
Updated
Document Preview 
The
Document Preview capability has been updated to support
additional characters and document formatting. |
| |
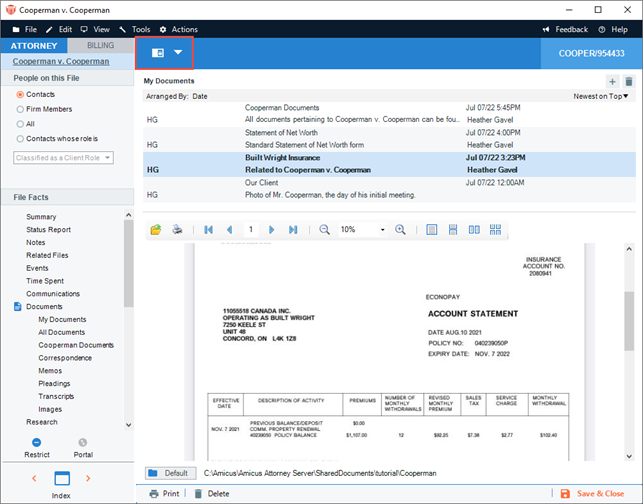
| Previewing
documents associated to a Client file has
been optimized so that it is now faster
and more reliable than ever. |
| Selecting
On from the drop-down menu next to
the Preview icon enables the preview
pane. The preview pane stays enabled until
you disable it. |
| After
the preview pane has been enabled, simply
click on an item from the document list
and a preview of the fle's contents opens
immediately. |
 |
 Note:
Not every document type will
preview. For example, Wordperfect documents
will not preview. Note:
Not every document type will
preview. For example, Wordperfect documents
will not preview. |
| You
can adjust the length of the preview pane
by dragging the borders to the desired size. |
|
|
| |
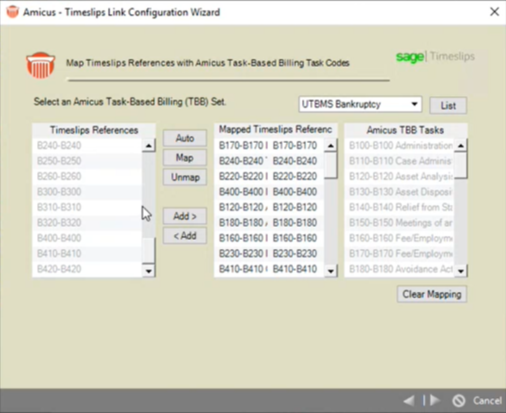
| Amicus
supports Uniformed Task-Based Management
System (UTBMS) for time entries and expenses. |
| When
choosing to link to Timeshlips for invoicing,
it is important that these codes are mapped
correctly between the two systems. |
| This
update includes improvements to streamline
the mapping process for firms setting up
the Timeslips link for the first time. |
 |
|
|
| |
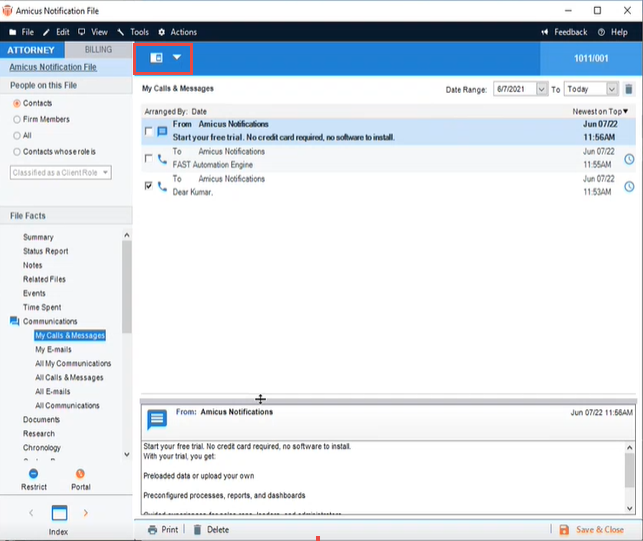
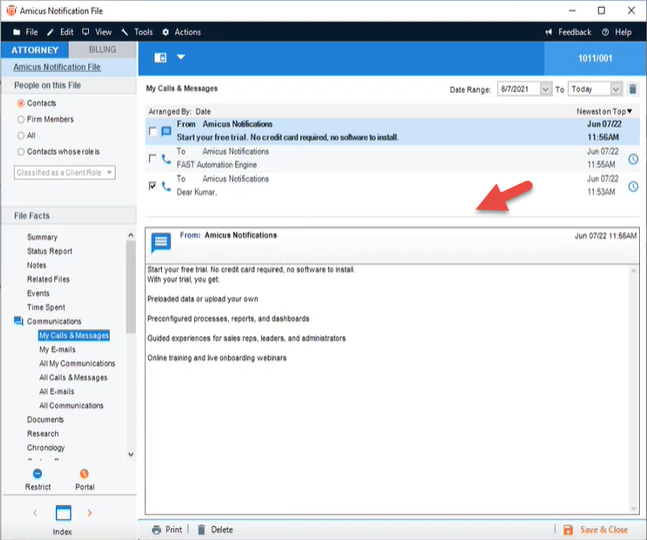
| Selecting
the Preview button on the taskbar
offers a way to preview your records without
opening them. |
 |
| You
can now drag the scroll bar up to increase
the size of the preview pane and down to
decrease the size. This is especially helpful
when previewing longer records. |
 |
|
Adjusting the size of the preview pane
saves it to your Preferences.
|
| This
means that the size of the preview pane
remains the same when you click on other
Communications on a file or log in and log
back in. |
| This
functionality is user-specific and does
not affect other firm members. |
|
|
| |
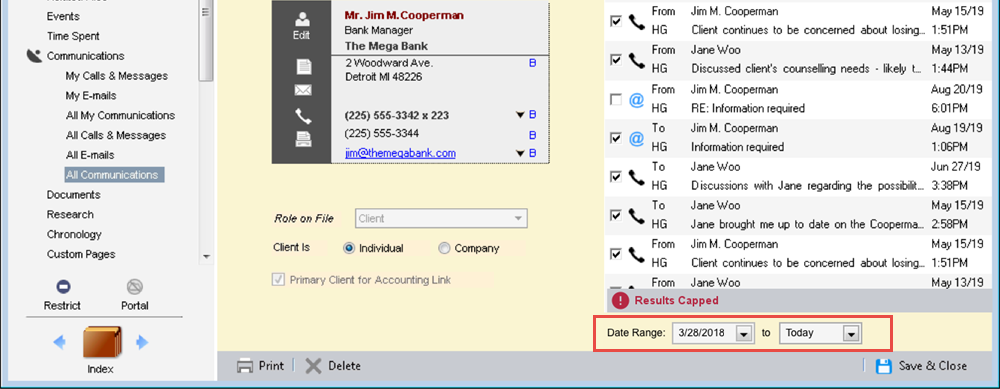
| For
optimal performance and improved launch
times, lists of communication records are
capped at 1,000 items. |
| This
cap has little impact on most client files,
but for some longer running matters or ones
with many emails, phone calls and phone
messages, the list may appear truncated. |
| At
the top of all communications is an updated
date selector visible in all communications
tabs on files, which allows you to filter
your lists. |
 |
| As
communications play a pivotal role in the
success of your firm, it is important to
know when the Communications lists are not
displaying complete details. |
| In
the event there are more than 1,000 records,
an updated alert now appears next the Date
Range filter making it clearer to users
that some communications records may not
be visible in the list. |
 |
|
Mouse over the alert and the Results
Capped alert displays indicating the
date range selector should be used to filter
the list. |
 Note:
The cap of 1,000 records can
also be adjusted by Technical Support if
a firm prefers to raise or lower the bar. Note:
The cap of 1,000 records can
also be adjusted by Technical Support if
a firm prefers to raise or lower the bar. |
|
|
| |
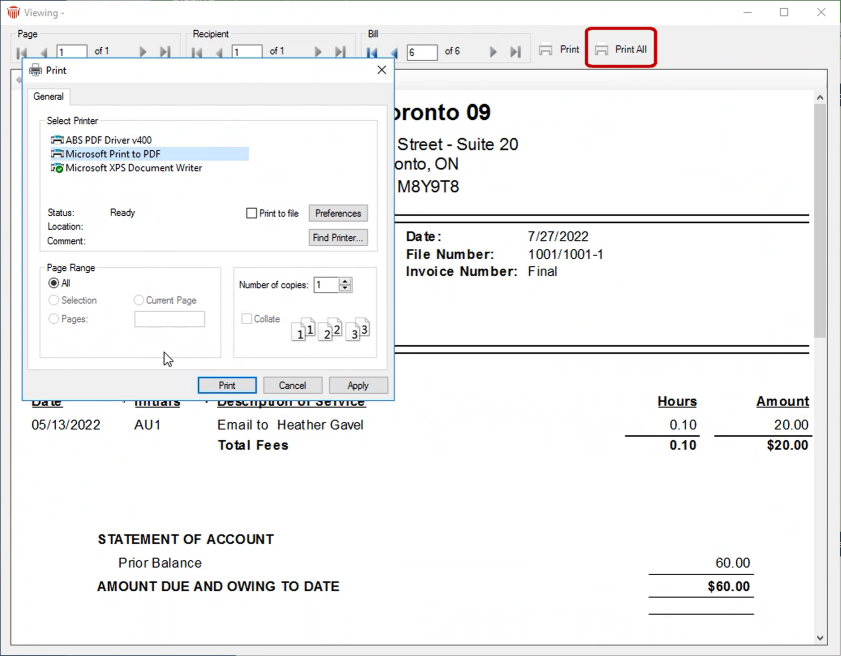
| Previously
bills only printed one by one. |
| Saving
multiple bills to a single pdf file helps
ensures that your bills are easy to share,
review and paid on time. |
 |
|
|
| |
| The
Exchange Health Check alerts are designed
to give a heads up to Firm Administrators
whenever a problem is detected with the
Exchange Contact & Calendar Synchronization. |
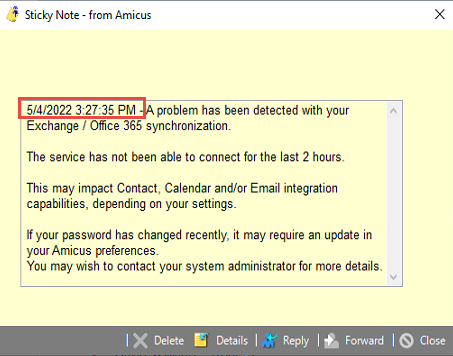
| Sticky
notifications have been updated to include
the Date and Time. when an
incident occurs so that the Firm Administrator
knows when the issue occurred, and is able
to take action. |
 |
|
 Note:
The system has also been further
optimized preventing unnecessary alerts
if a Firm's synchronization cycle takes
more than 1 hour to complete. Note:
The system has also been further
optimized preventing unnecessary alerts
if a Firm's synchronization cycle takes
more than 1 hour to complete.
|
|
|
| |
| Previously
this feature was limited to SQL 2014 and
earlier versions. |
| The
Rolling backup capability allows the Firm
Administrator to set the specific number
of backups that they wish to retain. |
| The
system automically removes previous backups
when that number is reached preventing storage
bloating. |
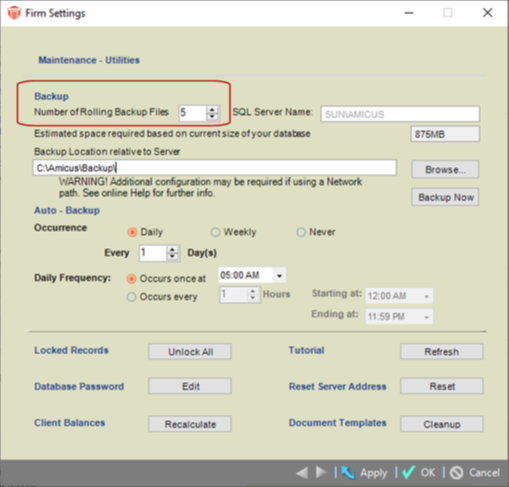 |
| After
updating to Amicus 20.9, go to the Maintenance
- Utilities dialog under Firm Settings
and reset the number spinner and click
Apply. |
 Note:
Retaining years of daily backups
could lead to unexpected storage limitations
that might otherwise go unnoticed. Note:
Retaining years of daily backups
could lead to unexpected storage limitations
that might otherwise go unnoticed. |
|
|
| |
|
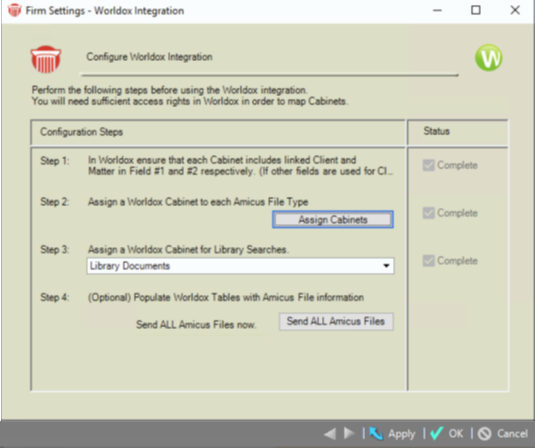
Previous
versions of Worldox referred to a form
used to profile documents as a Profile
Group.
|
| This
term has been replaced with Cabinet in
Worldox GX4. |
 |
|
|
| |
|
Deleting
or rescheduling an instance of a repeating
event is now synchronized between Amicus
and Google Calendar.
|
 |
|
|
| |
|
You
can now use sample data provided in the
Tutorial Office to create bills and run
most reports.
|
 |
|
|
| |
| When
you update to Amicus Attorney 20.9 the server
and workstations automatically check for
.NET 4.8 on each machine. |
| If
.NET 4.8 is not installed, the Amicus update
process automatically configures .NET 4.8
as necessary. This is performed via a silent
or manual update. |
|
A
restart may be required at the end of
the update process before you can log
back into Amicus. This is dependent on
your environment.
|
 |
| .NET
Framework 4.8 is the latest version of .NET
Framework. For the most part, the framework
is completely transparent to users, and
silent updates at workstations may not notice
any differences in the process. |
| The
update to Amicus 2.9 will only commence
after all services are started. Then the
update will continue as normal. |
|
|
| |
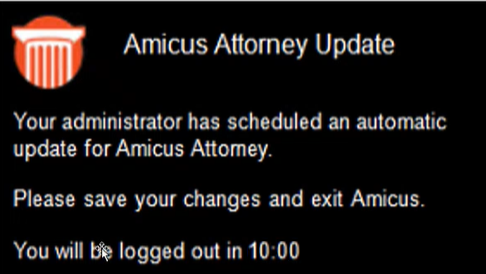
| The
Toast message that pops up when the update
is kicked off by the Firm Administrator
informs the user that they have 10 minutes
to logout or they will be booted out of
the system. |
 |
| The
server is updated after the 10 minute countdown. |
| A
Toast message pops ups after the server
is updated to inform the user that the workstation
update has commenced. |
|
There
are no notices at the workstation while
the update is in progress.
|
| Another
Toast message pops up when the workstation
update is complete. |
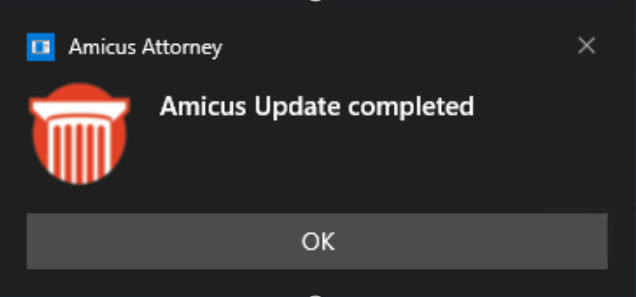 |
| Toast
messages do not interfere with a user's
current activity and disappear on their
own. |
|
|
Amicus
Attorney 20.8 - February 2022
With this release we are excited to introduce
Abacus Payment Exchange (APX) 2.0, which takes secure credit
card and ACH payment processing to another level. Firms already
using APX will appreciate the significant improvements. New
and current users will benefit from the accelerated onboarding
and key improvements to the look and feel of the APX platform.
A new APX Portal allows you to track payments and monitor
trends. Our consolidated APX Transaction Report makes reconciliation
easier. You will also be able to use our completely secure
online Recurring Payment solution. By leveraging the
power of HotDocs Advance you will be able to create customized
documentation and designated firm member(s) will be able to
view the Pending Contacts in the People Module. A Google Contact
& Calendar Sync is also supported. Layouts of custom pages
can be easily converted and we have optimized the Exchange
Health Check.
| |
|
APX
2.0 streamlines your billing and collections
by taking care of your credit card and
ACH payment processing needs allowing
you to focus more energy on your practice.
Designed for law firms, APX handles both
operating and trust account transactions
and ensures trust deposits remain whole.
There is never any duplicate entries of
information into multipe systems.
|
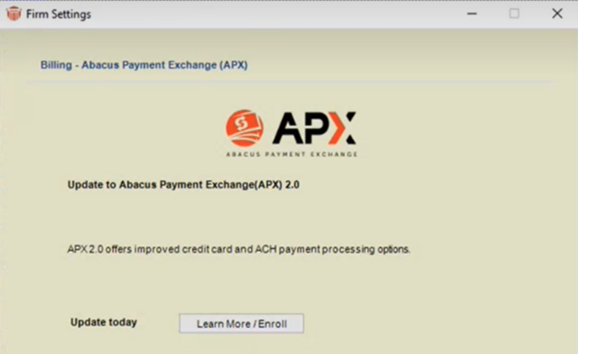
| Administrators
of firms that are already using APX 1.0
will be prompted that APX. 2.0 is available
for Onboarding. |
 |
WebView
2 is required to update to APX 2.0.
This is installed automatically with the
Amicus Attorney 20.8 update.
.NET
4.7.1 or
higher (at workstation) is required by
WebView2 and a prompt will display if
it is not detected.
Processing
is paused while Onboarding is underway.
However, payment methods are moved automatically.
Existing
APX 1.0 PayNow requests become invalid.
They are visible after onboarding is complete
and outstanding PayNow requests can be
re-sent by an Administrator.
Emails
will go to the Outlook Draft folder where
they can be easily reviewed before sending.
Clients will get a new PayNow link.
|
|
|
| - |
Updated
Interface 
Key
improvements have been introduced to the look and feel
of the APX 2.0 platform. |
| |
|
New
payment forms for entering credit card
and banking information have an improved
usability for both firm members using
Amicus Attorney and clients using the
Client Portal.
|
| Clients
who receive a PayNow request email
will appreciate the improved experience.
Clients can view the details about their
invoices and outstanding payments, and easily
add new credit card or ACH details to pay
their bills. They can also save card or
account details for use on future payments
to speed up transactions. |
|
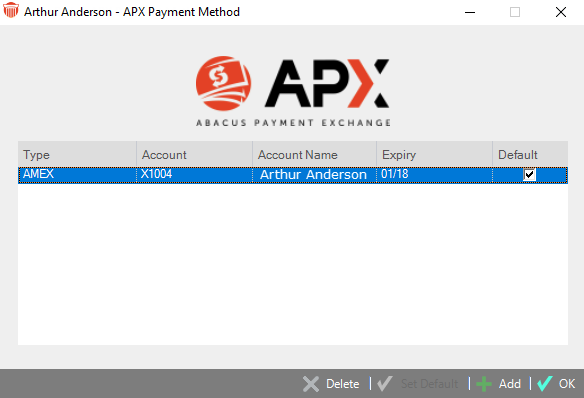
In
Amicus Attorney, click Actions >
Manage APX Payment Methods from the
Navigation bar of a Contact Card to display
a list of APX Payment Methods for
the contact. Click Add to add an
APX Payment method.
|
 |
The
Payment Method dialog displays
with information retrieved from the client
card.
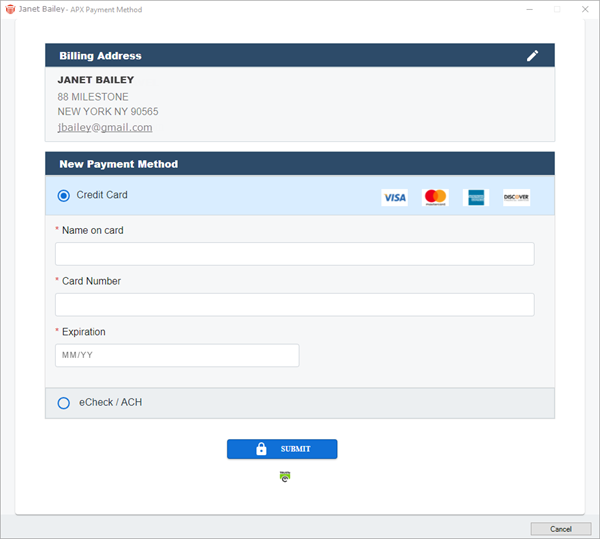
Click
the Credit Card radio button on
the right side to enter Credit Card Information.
Some
of the fields are populated with information
retrieved from the client card. Click
into the fields to edit or enter new information.
|
| Scroll
down to complete the Billing Address
section. |
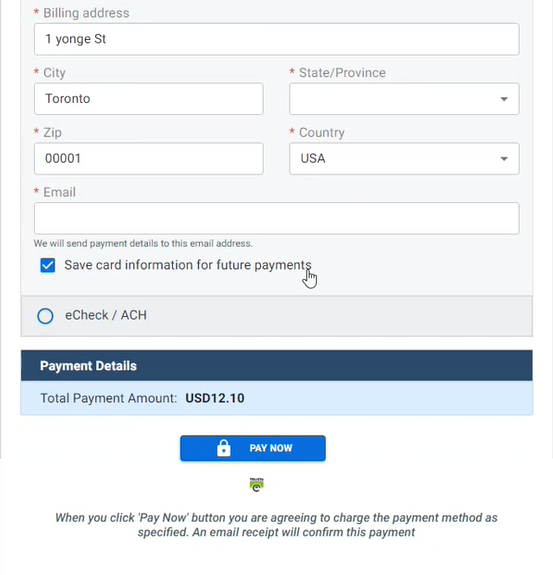 |
Select
the checkbox beside Save card information
for future payments if you would like
Amicus to remember this information.
Then
click SAVE. You are returned to
the list of APX Payment Methods.
|
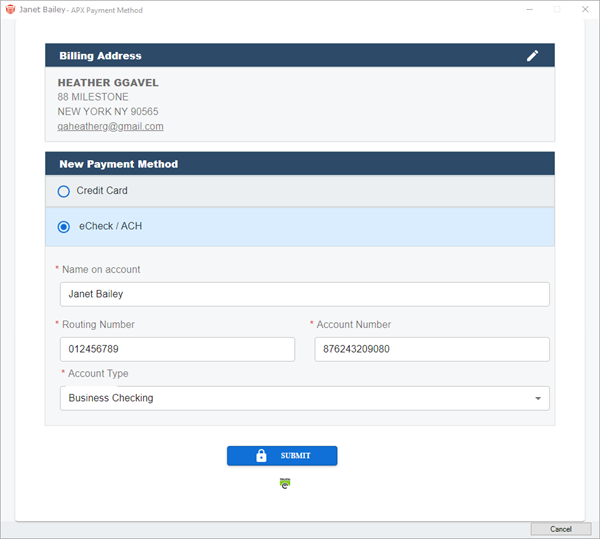 |
Click
the eCheck / ACH radio button to
add an E-Check / ACH Payment Method.
Click
in the fields to edit or enter new information.
Click
SUBMIT to return to the list of
APX Payment Methods where the new
information has been added.
You
can continue to add APX Payment Methods.
|
 APX
Payments are not editable. It is recommended
that you Delete an existing Payment
Method and add a new APX Payment if you
need to change details. APX
Payments are not editable. It is recommended
that you Delete an existing Payment
Method and add a new APX Payment if you
need to change details. |
|
|
| |
|
The
Pay Now capability lets you email payment
links with your invoices to clients so
they can quickly pay their bills. This
feature substantially reduces the collection
time for firms.
|
| The
elegant new design is great right out of
the box, but firms can also customize the
look and feel of the payment request template
with any HTML editor before sending PayNow
links to their clients. |
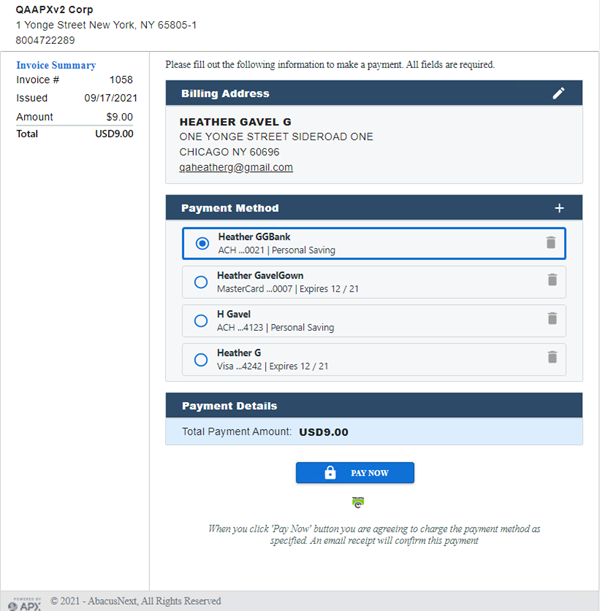 |
Select
the appropriate radio button under the
Payment Method section or click
the + plus icon to add a new APX
Payment Method.
After
the Payment Method is selected click PAY
NOW.
A
Payment Successful window displays
after the payment is processed.
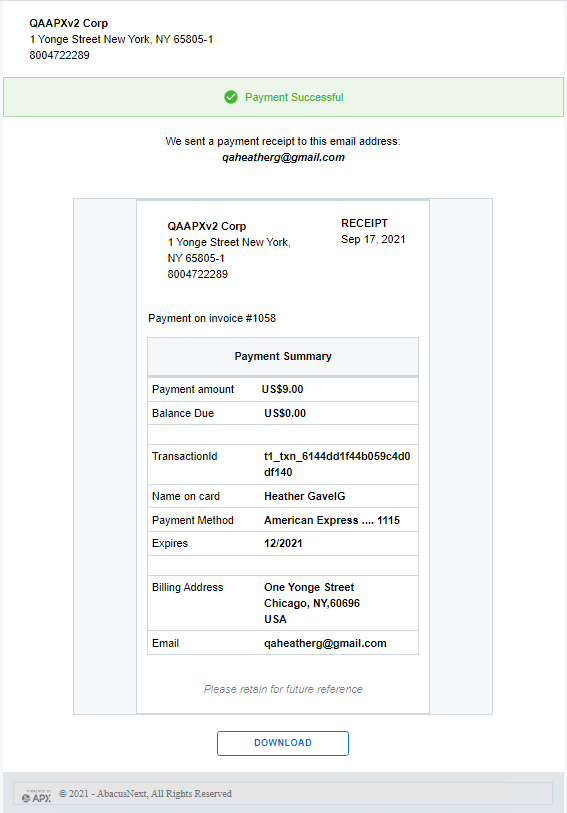
|
| A
link to DOWNLOAD the receipt displays at
the bottom of the Payment Success window.
APX also sends an email notification to
the client. |
|
|
| |
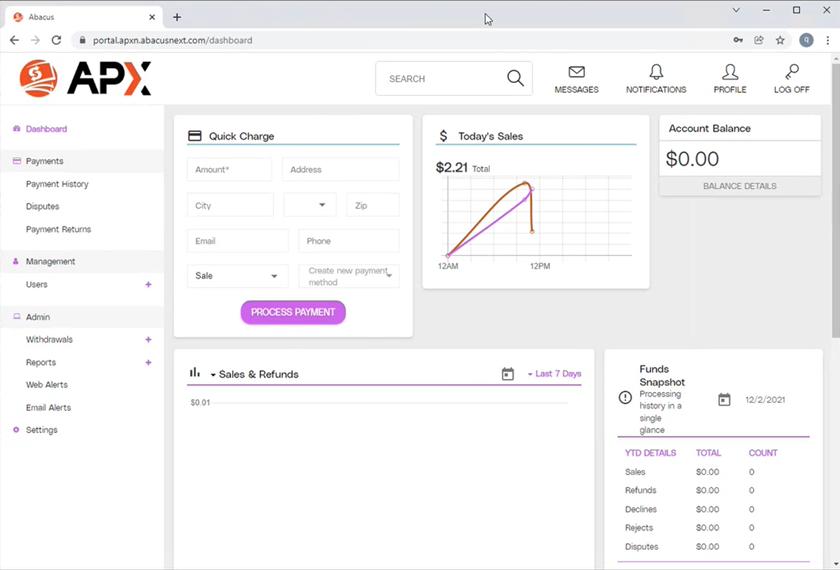
| APX
2.0 includes access to the new APX Portal
where firms can get an even greater insight
into their payment processing. New reports,
charts and graphs allow you to track payments
and monitor trends from an elegant dashboard
with options to drill down for more details. |
 |
You
will receive a link to the Account
Portal in an email to get you started
using the new APX Portal.
Afterwards,
you can log into the Account Portal
and drill down to see information about
your payment processing, as well as any
chargebacks.
|
|
|
| |
|
The
Client Name, Matter ID and File Name are
now referenced in the newly revised APX
Transaction Report.
|
 |
| There
is no need to run reports from multiple
sources. All the information you need is
now contained in the APX transaction report,
and available at your fingertips! |
|
|
| |
| Onboarding |
| The
Onboarding wizard has been completely updated
with many prefilled fields to help get your
firm up and running with APX as fast as
possible! Click Abacus Payment Exchange
(APX) under the Billing heading
in Firm Settings to get started.
Click the Learn More / Enroll button
to display the first screen of the Onboarding
wizard. |
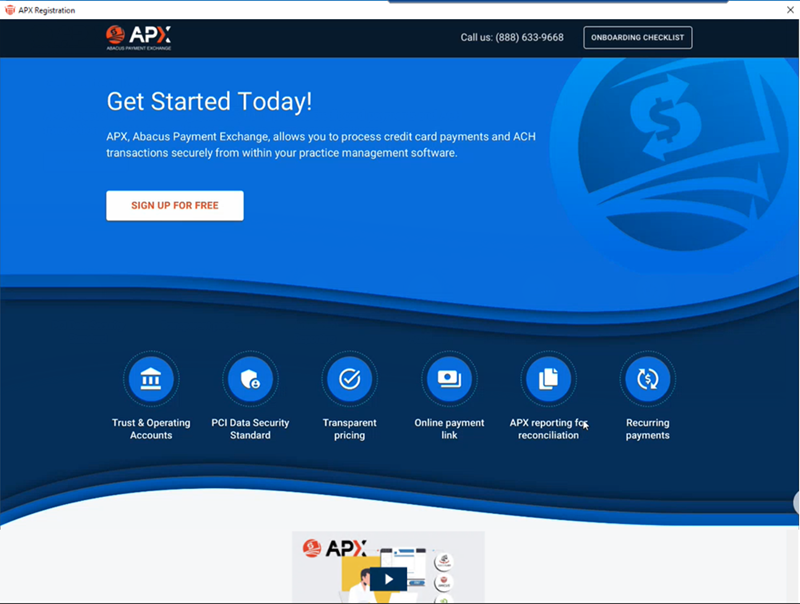 |
Click
LEARN MORE ABOUT APX or the video
Start Button  to watch a short video about the APX integrated
payment processing system. Click SIGN
UP FOR FREE to begin the Onboarding
wizard.
 |
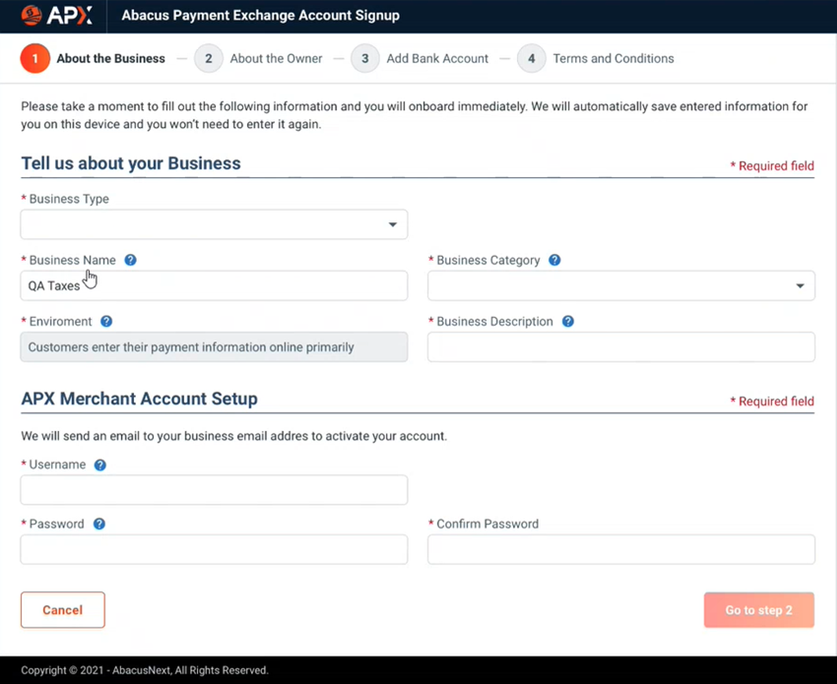 |
The
first step, About the Business
section displays. You will notice that
some fields are populated with information
retrieved from the client contact card
to speed up your signup process. Scroll
down and click in the fields to edit or
enter new information.
Click
the Help  icon to display information about the
field.
Click
the down  arrow to select an option from the drop-down
menu that displays.
Fields
with asterick *
are Required.
In
the APX Merchant Account Setup you
are setting up the Portal Access. Enter
a unique name in the Username field
and a Password.
|
| Click
Go to step 2 to move to the About
the Owner section in the wizard. |
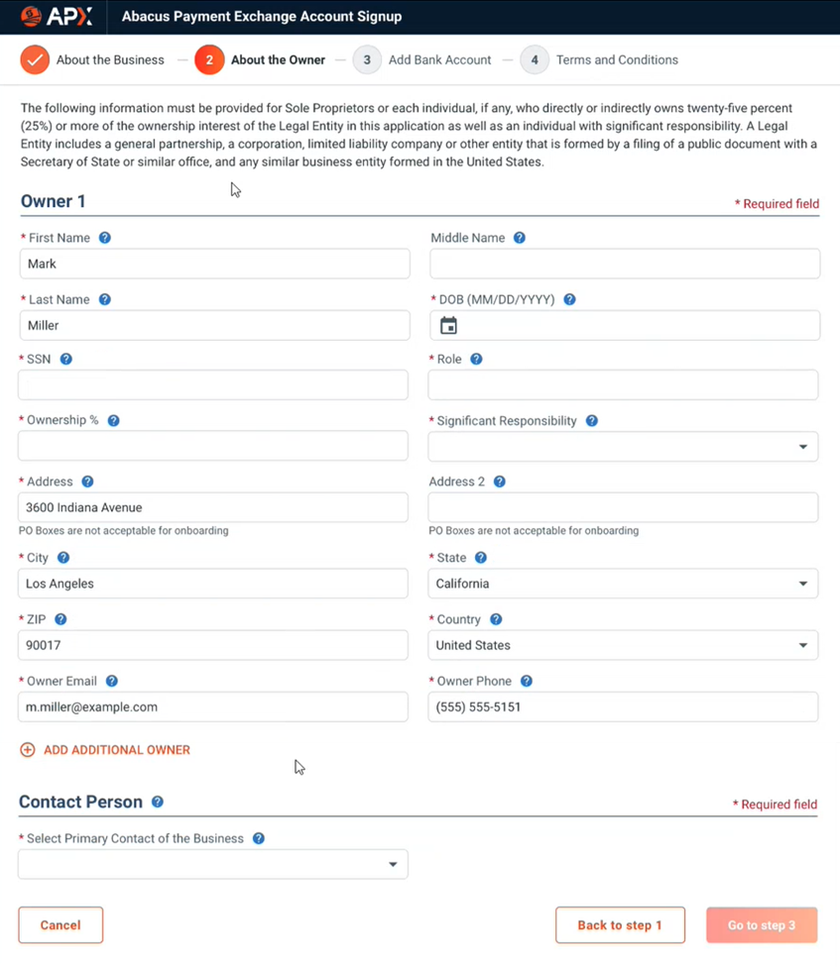 |
Click
in the fields to enter or edit new information
about Owner 1.
Click ADD ADDITIONAL OWNER to add
multiple owners and complete the fields.
|
| Click
Go to step 3 to display the Add
Bank Account section. You can connect
to your bank account using PLAID
or Manually. |
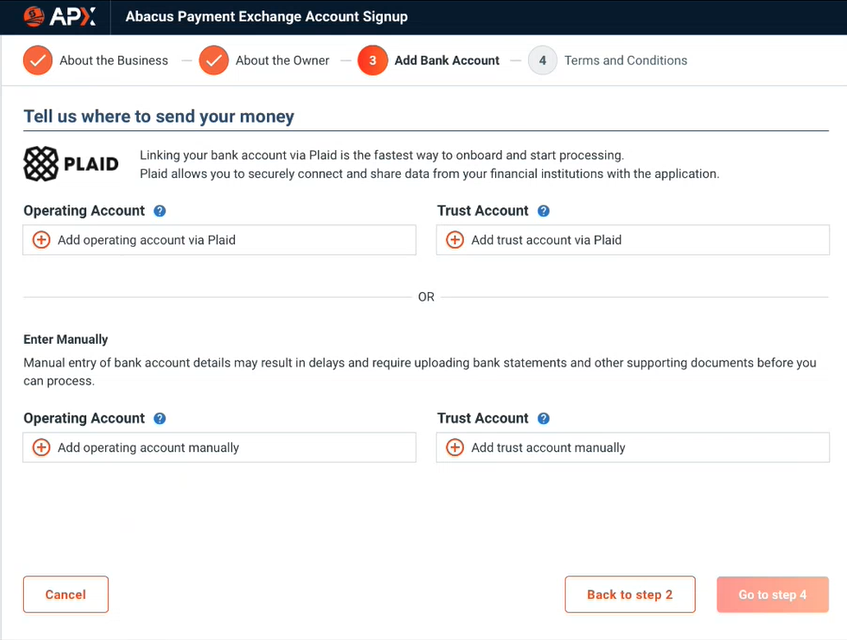 |
We
have partnered with PLAID to make
it easier to complete the onboarding.
PLAID
Verifications allow you to connect directly
to your bank account, while Manual
Verifications will require you to upload
an image such as a blank check or a bank
statement.
Click
the  icon
under the Plaid fields to Add
accounts via Plaid for the Operating
and Trust Accounts. icon
under the Plaid fields to Add
accounts via Plaid for the Operating
and Trust Accounts.
Or,
click the  icon under the Manually fields to Add
accounts manually for these accounts.
Plaid
is a technology platform that allows
you to securely connect to your financial
institution in seconds.
If
you use Plaid to link to your
bank the following screen displays.
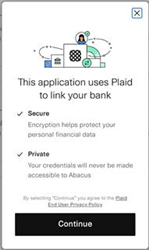 Click Continue to add a bank account.
A
prompt displays informing you that a Bank
account has been successfully added!
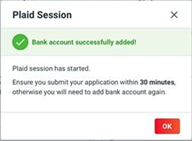 Click
OK to add the bank account.
|
| If
you choose to add your bank account Manually,
the following dialog displays. |
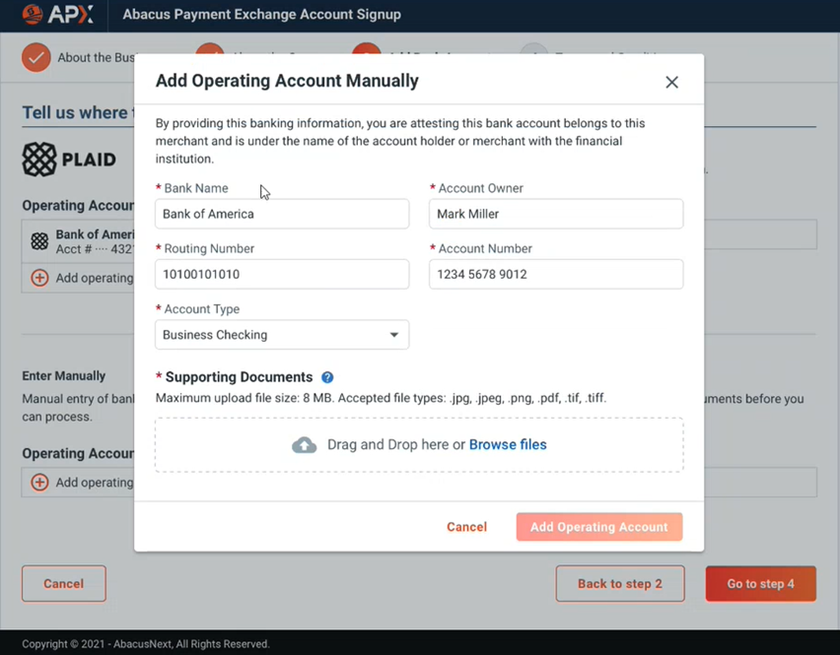 |
Complete
the fields, then drag and drop or browse
to add Supporting Documents. This
can be a void check or a Bank Statement.
Select
the Document Type from the drop
down menu and include a Note if
you wish.
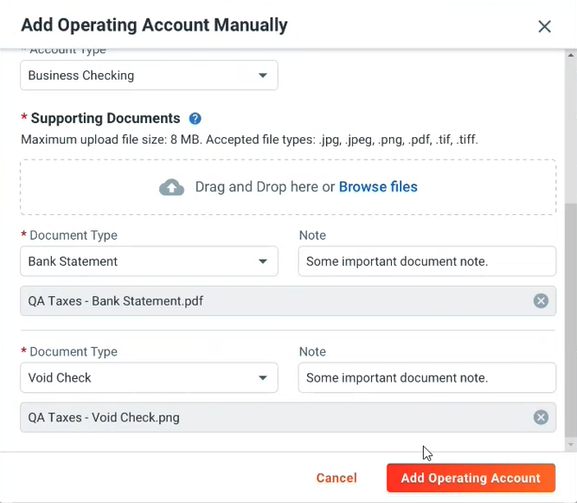
Click Add Operating Account to
complete the process.
|
| Click
Go to step 4 to display the Terms
and Conditions section. |
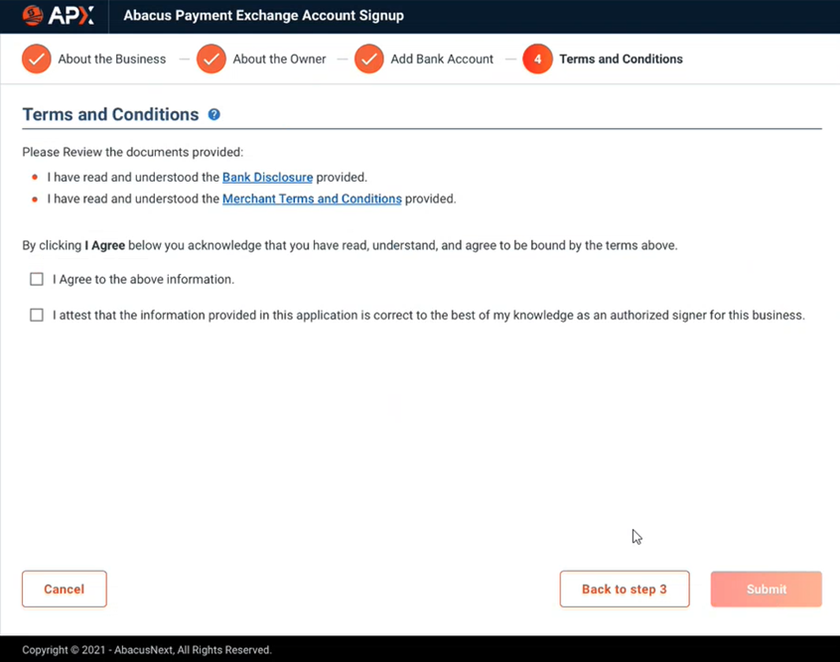 |
Click
the links to learn important information
about Bank Disclosures and Merchant
Terms and Conditions.
Scroll
to the bottom of the screen, then return
to the Terms and Conditions screen
and click the I Agree checkboxes
to acknowledge that you have read, understood,
and agree to the terms outlined in the
screens.
|
| Click
Submit to complete your APX Application. |
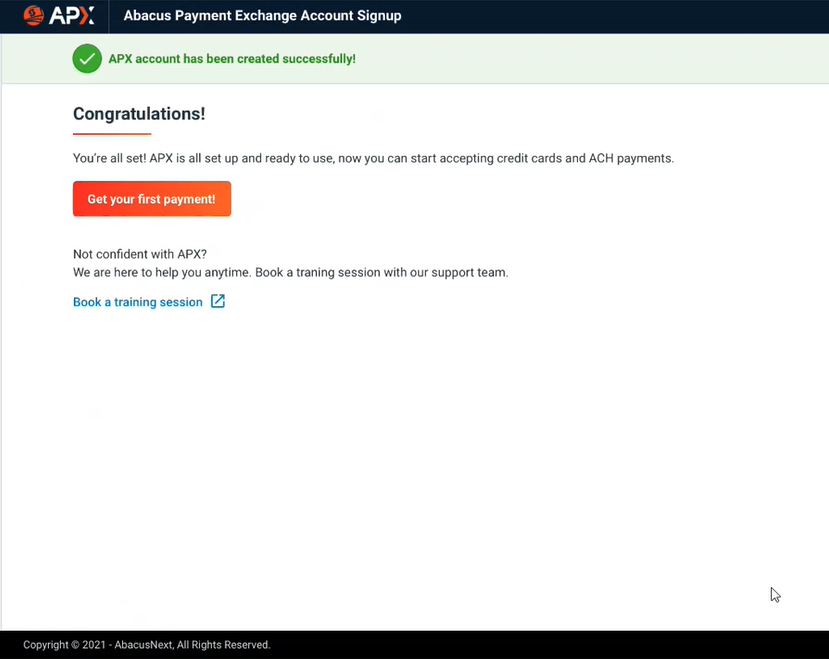 |
Your
APX account is created successfully in
a few minutes. You do not have to wait
for approval!
You
will receive a confirmation email congratulating
you on your approval and the details of
how to log into the Account Portal.
Your
firm can start processing payments immediately
after signup.
Click Book
a training session if you want
to learn more or return to the Firm
Settings screen.
|
|
|
| - |
New
Recurring Payments 
Amicus
now leverages the power of APX 2.0 to support recurring
payment optionss that schedule payment processing. |
| |
|
Weekly,
bi-weekly, monthly and quarterly options
allow you to be in control of when payments
are made. Multiple payment schedules can
also be created for the same file. You
can even do one-off scheduled payments
for a later date. Payments can be made
to operating or trust accounts as needed.
|
| Billing
Supervisors will have full access to
APX Recurring Payments and a Billing
User's access will be based on the user's
access to Receive Payment and Trust Receipt. |
| Recurring
Payments can be easily accessed from
the Action menu or the Recurring
Payment Schedule icon on the File
Details, and Billing and Trust
modules. They are automatically updated
to the file/matter associated with the schedule
and an email notification is sent to the
firm's member's email address listed on
the schedule. |
| Payments
are first applied to any outstanding invoices
at the time of the payment for Recurring
Payments to the General Bank Account,
and any remaining payments are allocated
to the General Retainer. A trust
receipt is recorded on the file/matter associated
with the Recurring Payment schedule for
Recurring Payments to the Trust
Account. |
| Creating
a New Payment Schedule |
| Select
Recurring Payments from the Action
menu, or click on the Recurring Payment
Icon on the File Details or Billing
Module or Trust Module. |
 |
 Note:
The Recurring Payment schedule
associated with the current file displays
from the File Details. The Billing
and Trust modules will list Recurring
Payment schedules for all files. Note:
The Recurring Payment schedule
associated with the current file displays
from the File Details. The Billing
and Trust modules will list Recurring
Payment schedules for all files. |
| A
Create Recurring Payment window displays.
Select a file to display in the File
field and Next to display the New
Recurring Payment Schedule. |
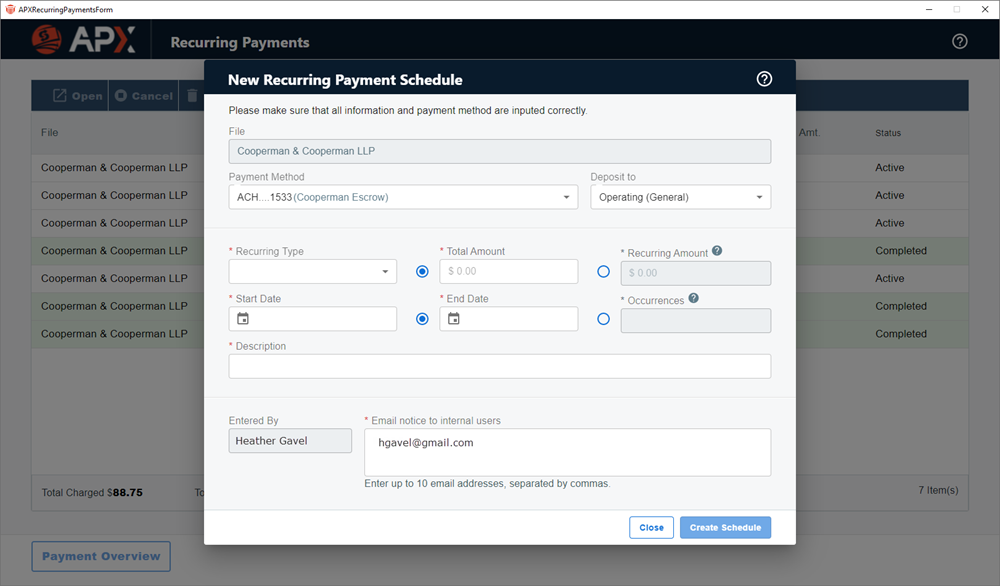 |
| You
cannot change the File name. Complete
the rest of the fields by entering an amount
in the Total Amount field or the
Recurring Amount field. APX will calculate
the amount for the other field. Select either
General or Trust from the
drop down menu in the Deposit to
field, then use the calendar control to
enter a Start Date. Select the
End Date or a value in the Occurrences
field. APX will calculate the value for
the other field. |
| Enter
a Description. The Entered By
and Email notice to internal users
fields are populated with the name of the
firm member creating the New Recurring
Payment Schedule. You can enter up to
10 email addresses, separated by commas.
Click Create Schedule to display
the newly created payment schedule. |
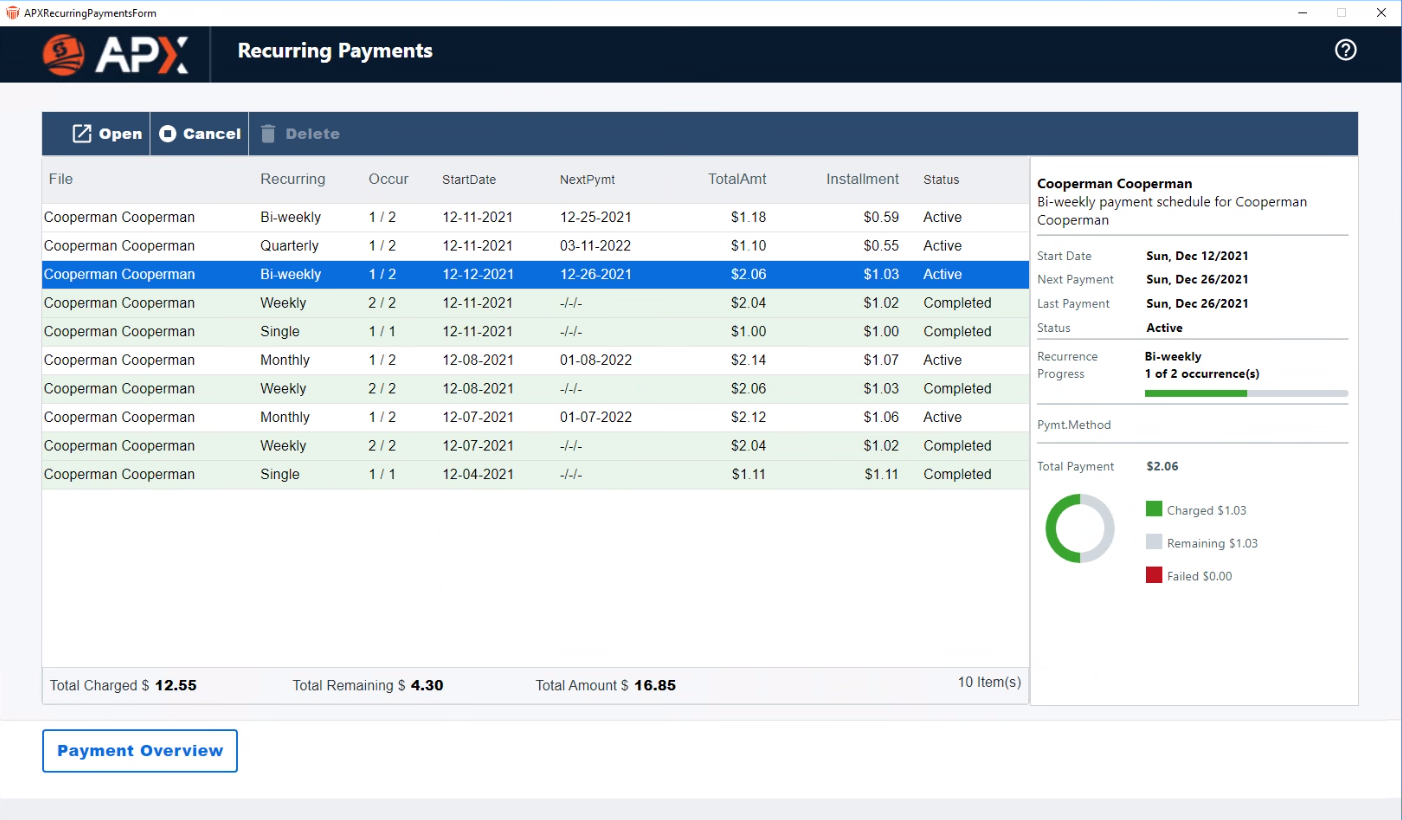 |
| Editing
an APX Recurring Payment |
| You
can open an APX Recurring Payment schedule
dialog and change the description, payment
method and email address. |
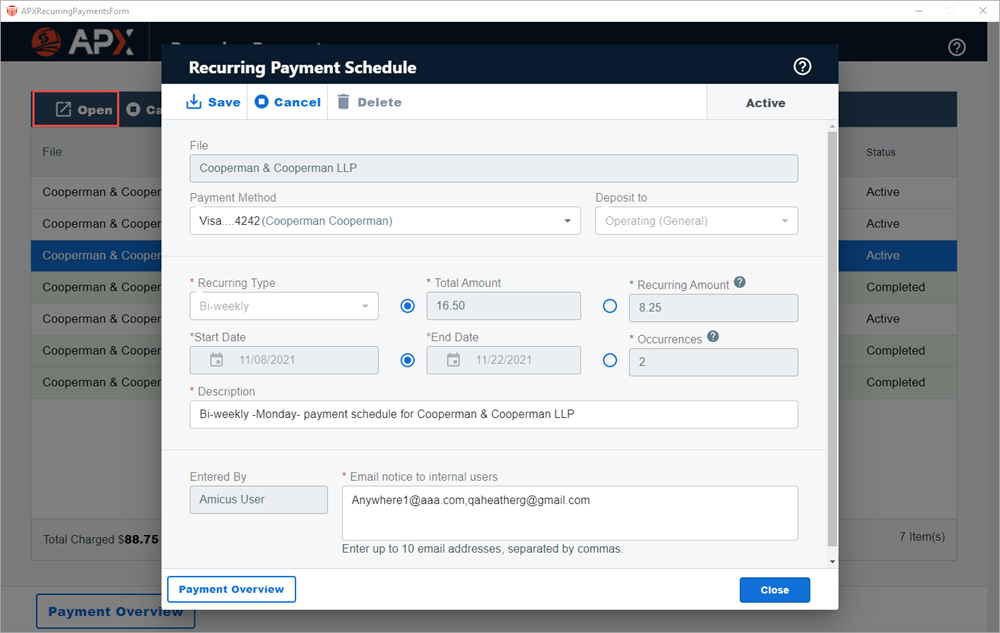 |
| Make
the necessary changes or click on Payment
Overview in the footer to view your
Recurring Payments for the selected file. |
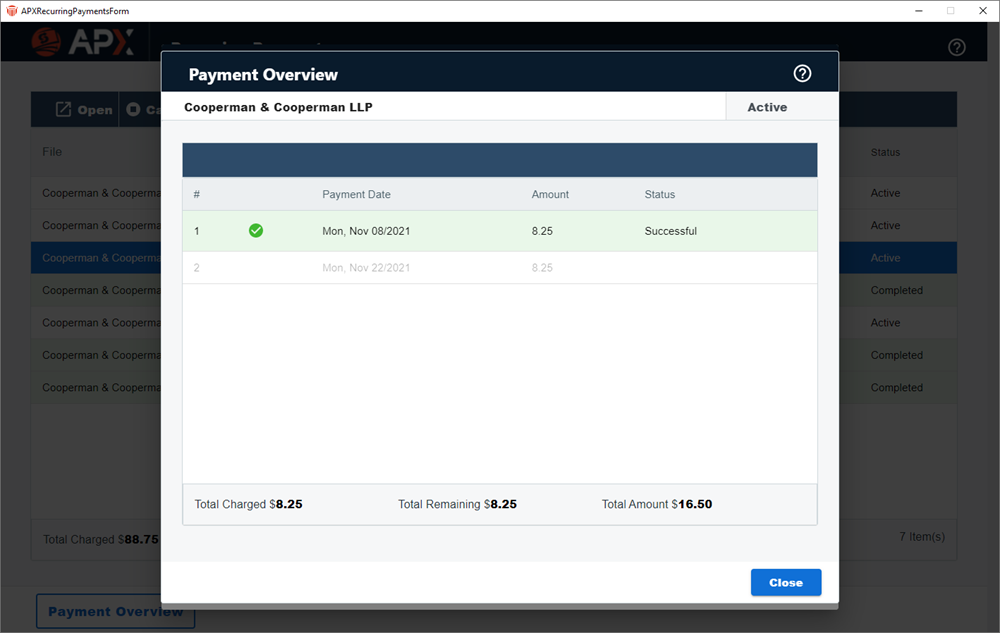 |
| Canceling
an APX Recurring Payment Schedule |
| You
can cancel an APX Recurring Payment schedule
up until the day before the process date.
Open the schedule and click Cancel
from the taskbar. |
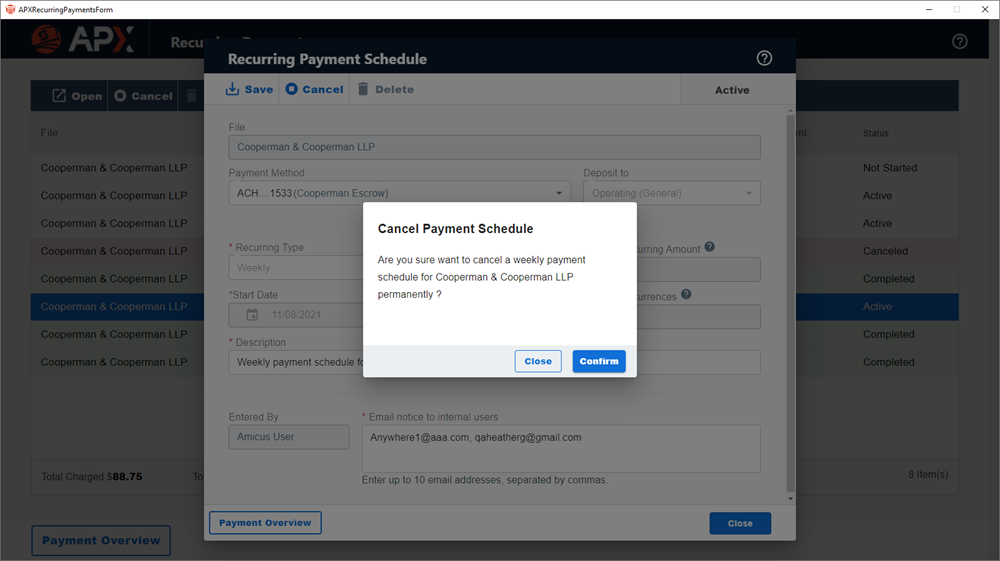 |
| Click
Close to return to the Recurring
Payments window or Confirm to
cancel the payment schedule. |
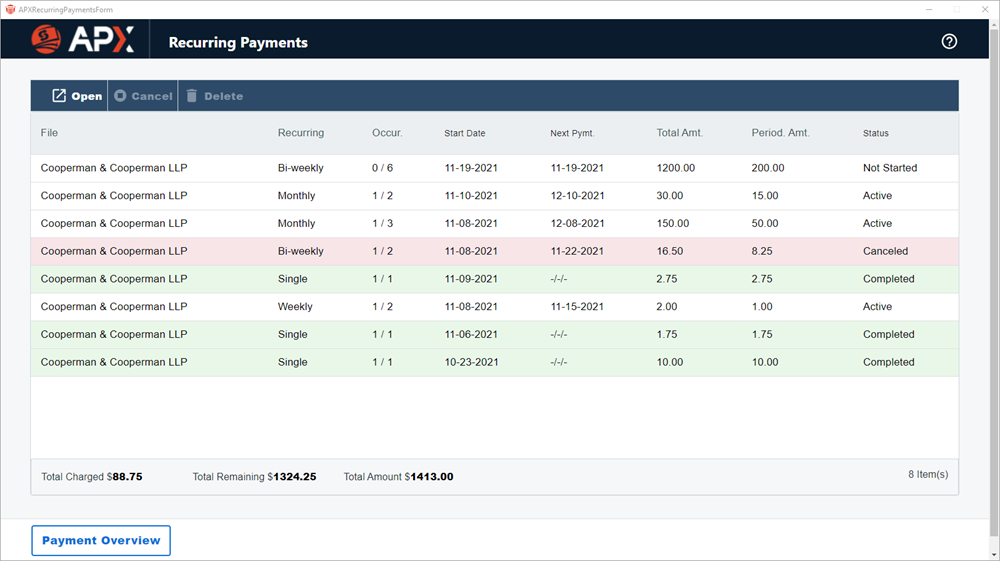 |
 Note:
The payment schedule is permanently
canceled. To resume a payment schedule you
must Create a New Payment Schedule. Note:
The payment schedule is permanently
canceled. To resume a payment schedule you
must Create a New Payment Schedule. |
| Deleting
an APX Recurring Payment |
| Select
the Recurring Payment schedule you
wish to delete from the Recurring Payment
window and click Delete in the taskbar. |
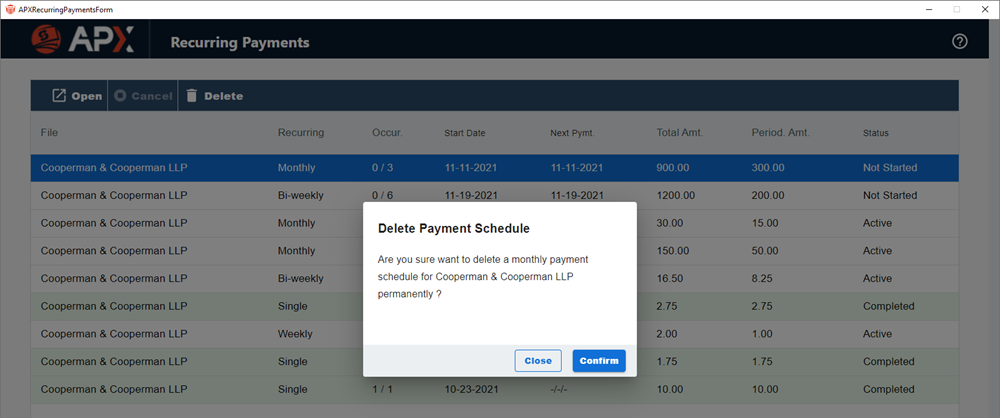 |
| When
a prompt displays, click Close to
to cancel the deletion and return to the
Recurring Payments window or Confirm
to delete the payment schedule from the
list of current Recurring Payments. |
| Viewing
an APX Recurring Payment |
| Payments
from a Recurring Payment Schedule
are posted to the associated files/matters
as an APX payment. Recurring payments posted
to the General Bank Account are recorded
as Receive Payment (If the payment was applied
to invoice(s)) |
| Recurring
payments posted to the General Bank
Account are recorded as Receive Payment
(If the payment was applied to invoice(s))
or as a General Retainer if it was
not applied to an invoice. If they are posted
to the Trust Bank Account they are
recorded as Trust Receipts. Double-click
the transaction to open it and view the
Recurring Payment. |
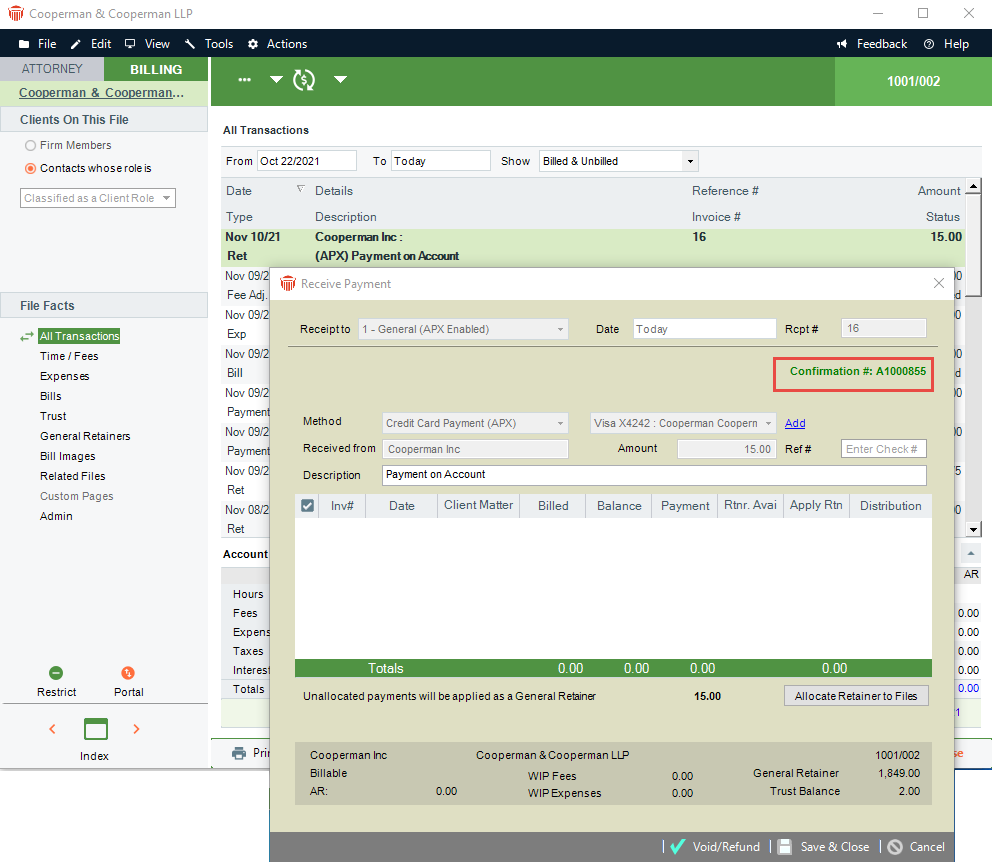 |
| The
APX payment transaction is displayed with
the confirmation number of the APX payment.
This Recurring Payment is an APX
transaction and can be Voided or
Refunded. |
| Email
Notifications after receipt of payment |
| After
receipt of payment, an Email Notification
is sent to the customer's email that contains
receipt of payment. An email is also sent
to the firm member after the final payment
of Recurring Credit Card Payments
is received. |
|
|
| |
| By
publishing HotDocs Advance Public Interviews,
firms can present web-facing client intake
options in Amicus Attorney. Firms can post
the link on their website and invite prospects
to fill in their own contact details freeing
up firm members to work on other priorities.
|
| New
default Client Intake templates are included
in Amicus Attorney 20.8 when HotDocs
Advance Integration is enabled. |
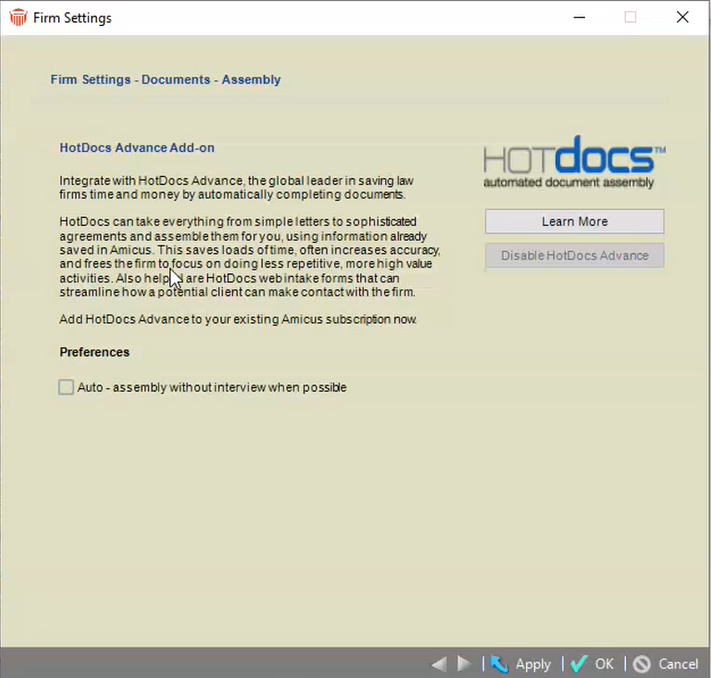 |
HotDocs
Advance is controlled through Firm
Settings.
Click
Assembly under the Documents
section to display the HotDocs Advance
settings.
Click
Learn More if you want to learn
more about the HotDocs Advance Add-on.
If
your firm does not have HotDocs Advance
enabled, you are able to check your license.
If your firm is entitled to HotDocs
Advance, the creation of the Add-on
is kicked-off.
If
the HotDocs Advance Add-on is not
included in a firm's license click Pay.
|
| Once
you have upgraded your license to include
HotDocs Advance, the templates can
be accessed by clicking Merge Templates
in the left Navigation bar to display the
Template Management window. |
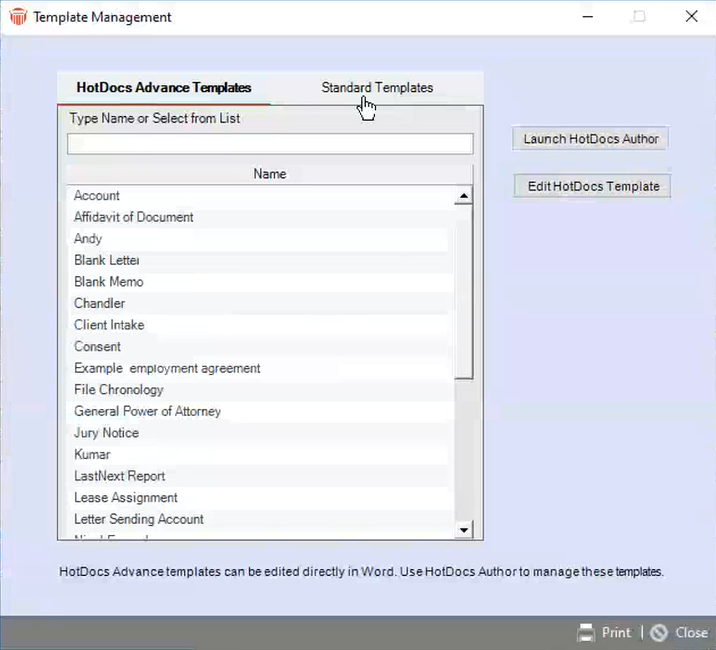 |
The
Data Dictionary is accessible for
any fields in Amicus Attorney including
custom fields so they can be available
in templates.
When
HotDocs Advance is enabled, default
templates are pushed.
|
| Click
Edit HotDocs Template to display
the HotDocs Author Templates - Workspace
Explorer window. |
 |
| Select
a template from the list and click Edit
to launch the Intake Form in Word. |
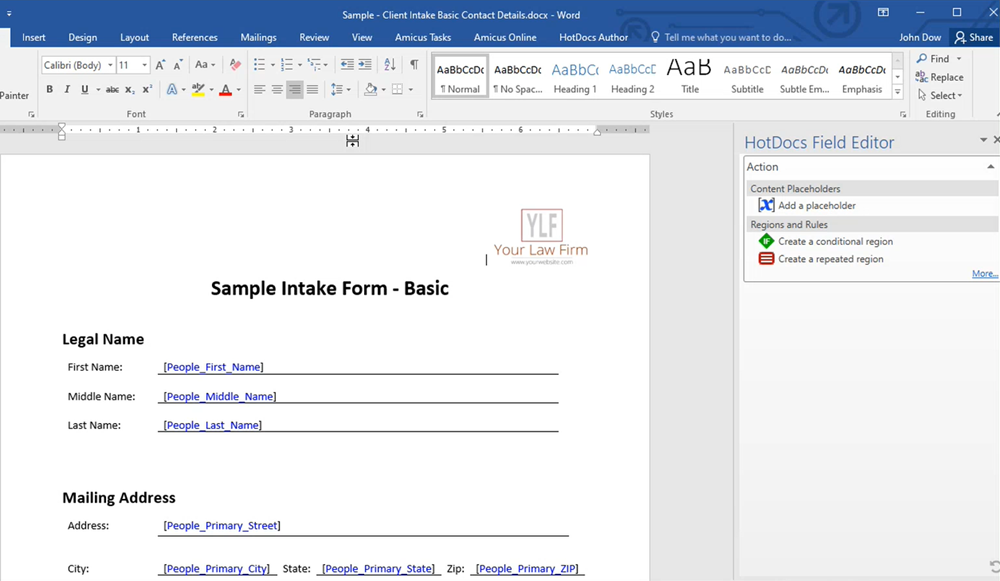 |
| The
Sample Templates displays with placeholders.
The Data Dictionary displays in the
HotDocs Field Editor on the right-hand
side. Make any changes you wish and exit
Word. |
| Click
Upload in the menu bar the HotDocs
Author Templates - Workspace Explorer
window.to upload the templates with changes. |
|
| Click
Public Interview links under Administration
in the navIgation bar to convert the Template. |
 |
| Complete
the fields in the Create public interview
link dialog and click Save. |
 |
| A
list of Public Interview links displays.
You can copy the Link and place it
on a website. |
 |
| Your
firm can post a link on their website to
Public Interviews where potential
clients can click on the link and fill in
the details. They will appear as a Pending
Contact in Amicus Attorney. |
 |
|
|
| - |
Pending
Contact Approval Security Profiles 
New
options in the Contacts module allow one or more
firm members to be granted access to review Client Intake
submissions created via a Client Interview and
either Approve or Reject/Delete them as
new contacts. |
| |
| The
new security profiles allow designated firm
members to view the new Pending Contacts
in the People module, and review their answers,
conduct a duplicate check and a conflict
search. |
| To
enable these options select Security
Profiles under Administration and
click People in the ATTORNEY navigation
bar to expand the option, then click View.
Check Display Pending Contact Lists from
Client Intake Forms.. |
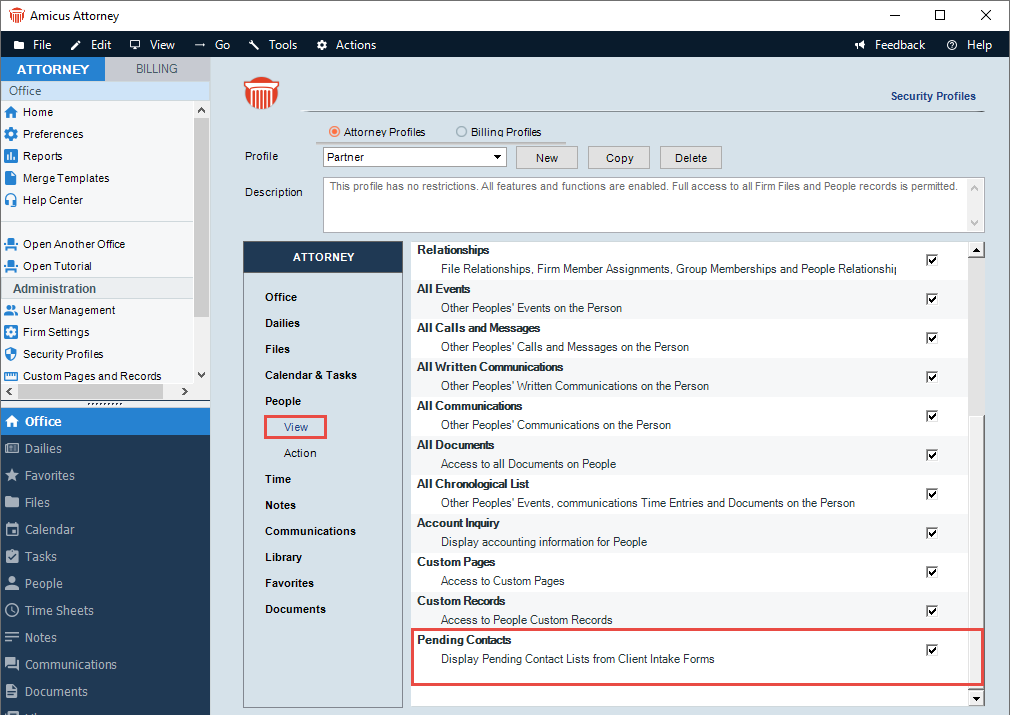 |
 When
a firm member does not have a security profile
assigned, these two new options are not
available. When
a firm member does not have a security profile
assigned, these two new options are not
available. |
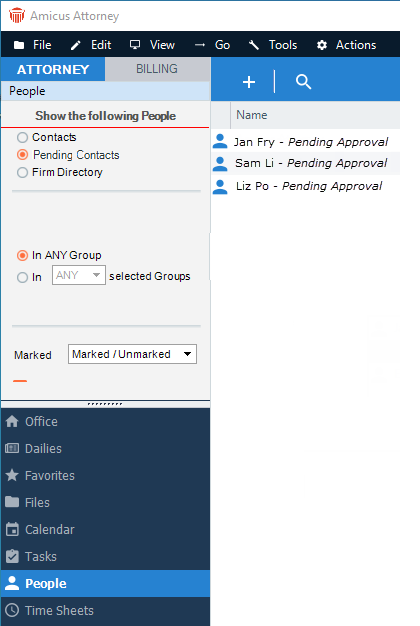 |
Select
the Pending Contacts radio button
in the People module.
The
pending contacts display with Pending
Approval next to their name in the
list.
The
Firm Member with the security profile
assigned verifies the information collected
in an interview.
|
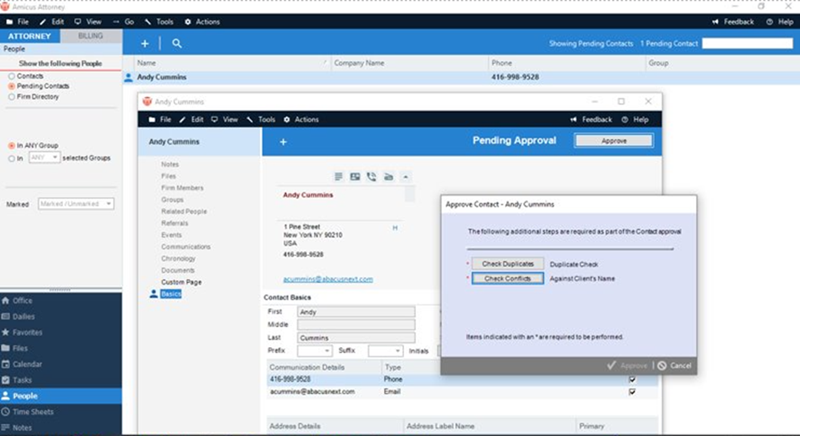 |
Right-click
on a Pending Contact in the list
to display the details.
Click the Approve button in the
header to approve the contact.
|
|
|
| - |
Google
Contact and Calendar Sync Update 
Amicus
Attorney supports a Google Contact & Calendar Sync
that allows for sharing of events and contacts between
the two systems so that there are no more double bookings. |
| |
| Google
is introducing some changes that are now
supported in Amicus Attorney 20.8. Firms
may be required to re-authenticate under
the new system in order for Google to continue
to synchronize with Amicus Attorney. |
| To
enable the Google Sync link go to the Preferences
screen and click on Calendar & Contacts
under the LInks section. |
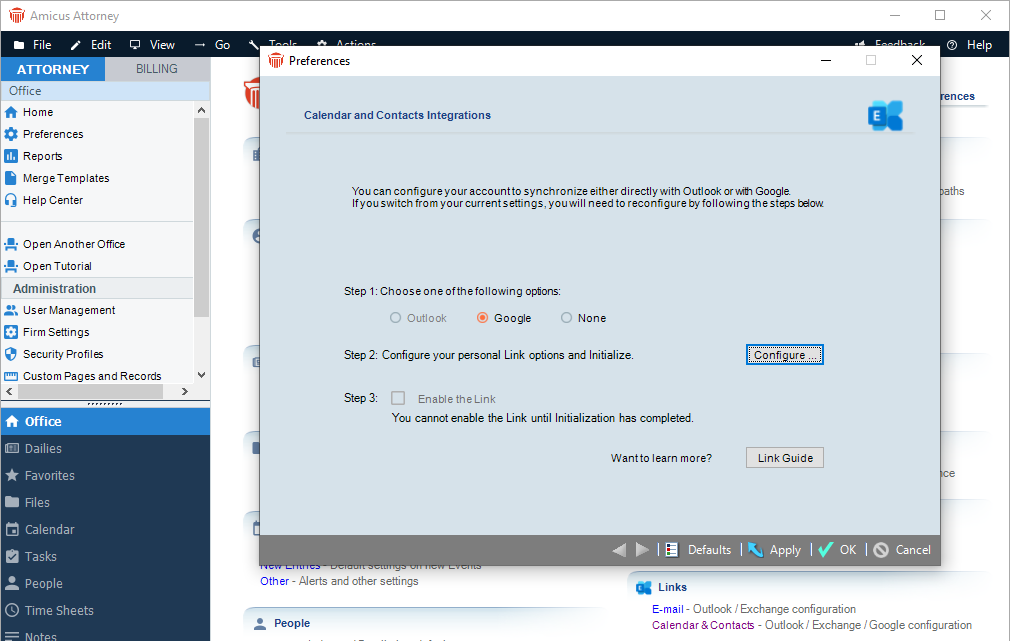 |
| Google
Settings |
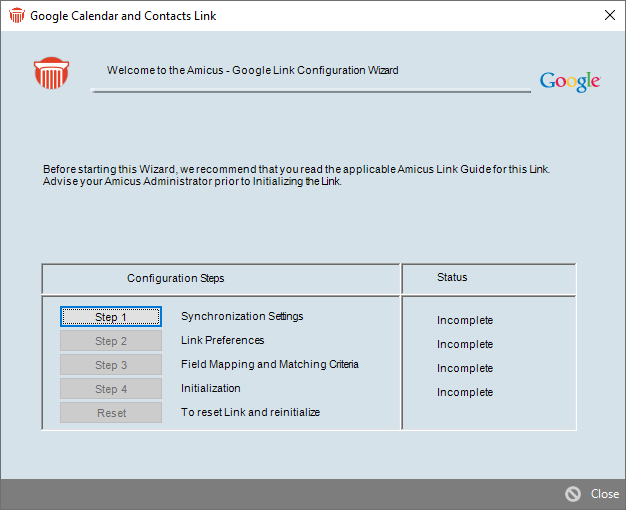 |
Select
the Google radio button under Step
1 and click Configure to display
the Google Link Configuration Wizard.
Click
Step 1 to display the Google Settings
window.
|
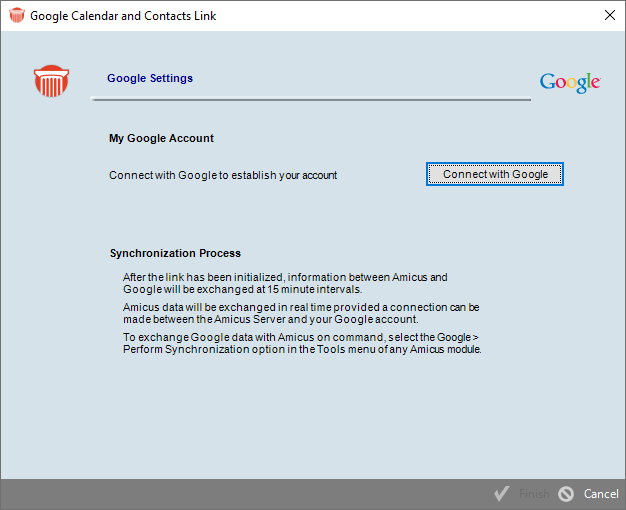 |
Then
click Connect with Google and enter
your Email or Phone
in the fields provided in the Sign
In window.
|
 |
A
message displays Amicus Attorney wants
to access your Google Account.
Click Allow and wait for a Connection
successful prompt message.
Click
OK.
Click
Finish in the Google Settings
window. You are returned to the Google
Link Configuration Wizard.
|
| Enable
Google Sync |
| Click
Step 2 to display the Link Preferences
- Contacts window, then select the
Using Amicus data radio button and click
the Next arrow. |
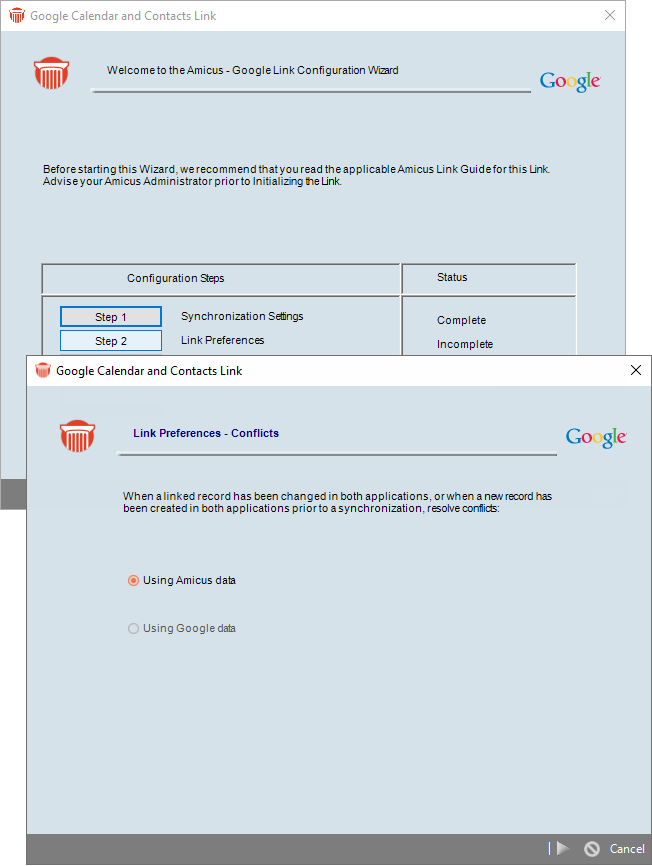 |
| Select
Yes under Enable support for synchronizing
Contacts? to enable the sections. |
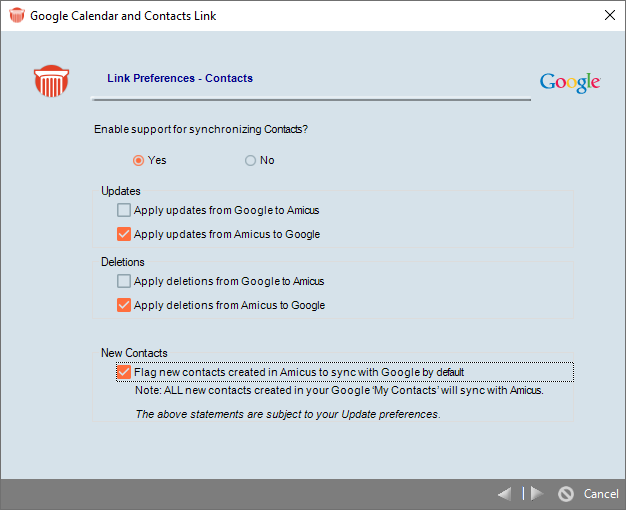 |
- Under
the Updates section, click Apply
updates from Google to Amicus.
- Under
the Deletions section, check
Apply updates from Google to Amicus.
- Under
the New Contacts section, check
Flag new contacts created in Amicus
to sync with Google by default.
|
| The
Link Preferences - Contacts window displays,
click the Next arrow to display the
Link Preferences - Appointments window. |
| Select
Yes under Enable support for synchronizing
Appointments? to enable the sections. |
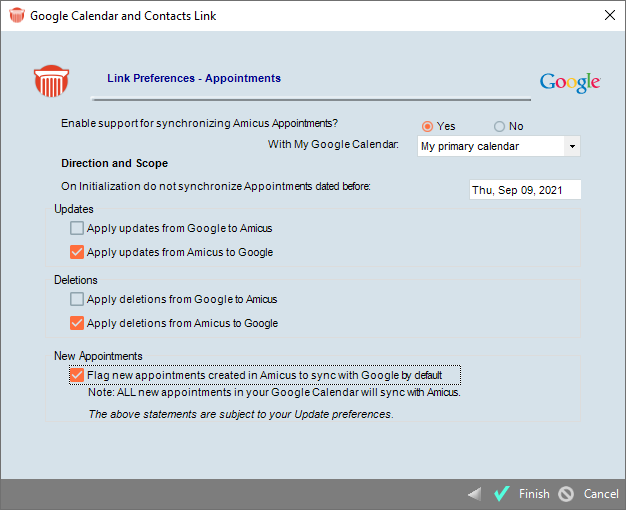 |
- Under
the Updates section, click Apply
updates from Google to Amicus.
- Under
the Deletions section, check
Apply updates from Google to Amicus.
- Under
the New Appointments section,
check Flag new appointments created
in Amicus to sync with Google by default.
|
| Click
Finish to return to the Google
Link Configuration Wizard. |
| Field
Mapping |
| Click
Step 3 to display the Field Mapping
- Contacts window, then click the Next
arrow to display the Field Mapping -
Appointments window. |
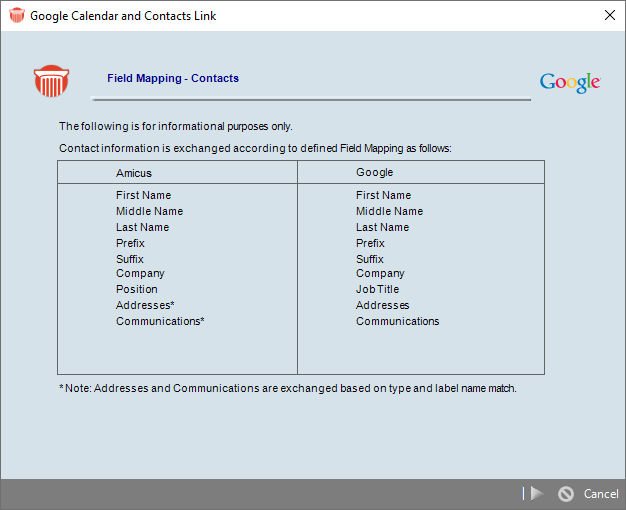 |
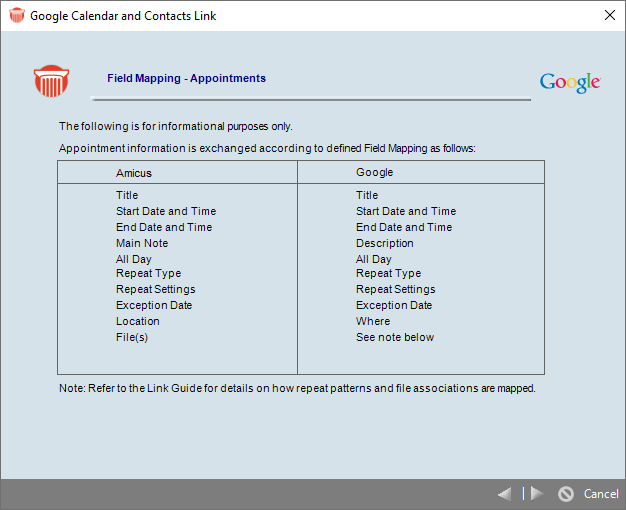 |
| Click
the Next arrow again to display the
Match Criteria window. |
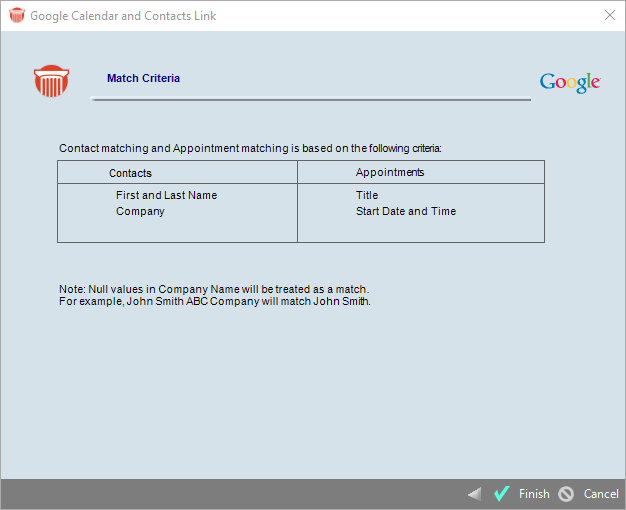 |
Then
click Finish to return to the Google
Link Configuration Wizard. |
| Initialization |
| Click
Step 4 to display Your Initialization
Checklist window. |
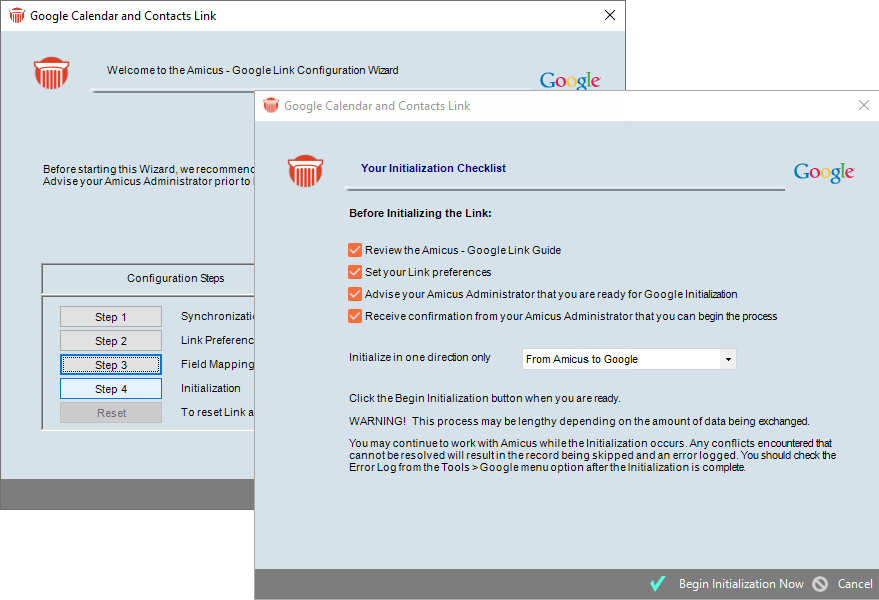
|
| Under
Before Initializing the Link click
the following checkboxes: |
- Review
the Amicus - Google Link Guide.
- Set
your Link preferences.
- Advise
your Amicus Administrator that you are
ready for Google Initialization.
- Receive
confirmation from your Amicus Administrator.
|
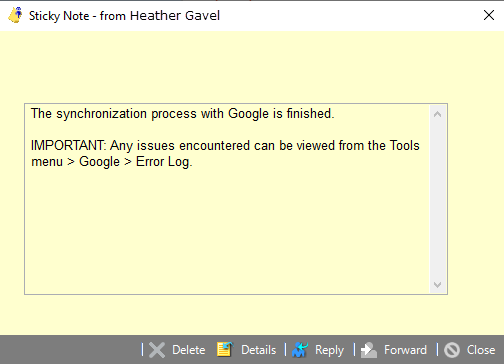 |
Click
Begin Initialization
Now
in the footer.
A
message prompt displays The synchronization
process with Google is finished.
Click
Close.
|
|
|
| - |
Convert
Custom Pages 
A new
dropdown menu in the Custom Page editor window allows
for an easy conversion from a Half-page layout to a Full
page.. |
| |
| User
Interface changes in Amicus Attorney 20.7
resulted in Half Page custom pages
with a horizontal layout. |
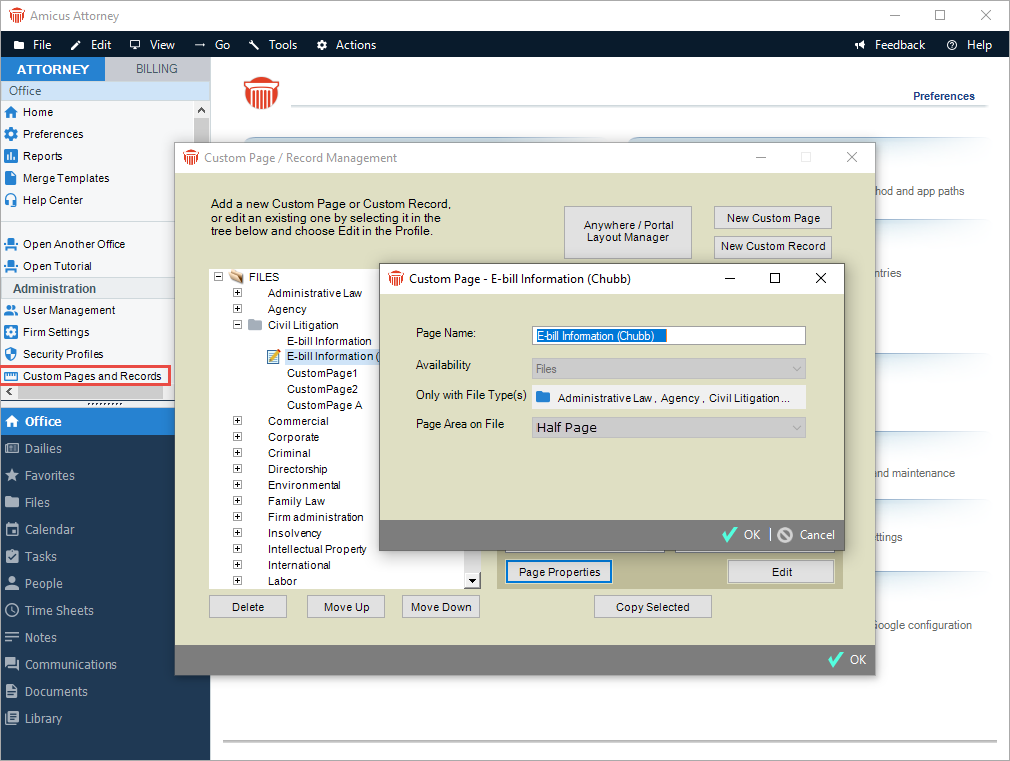 |
Selecting
Full Page from the drop down list
in the Page Area on File field
easily converts the layout of a Half
Page custom page.
This
feature means firms means no reformatting
is required.
|
|
|
| |
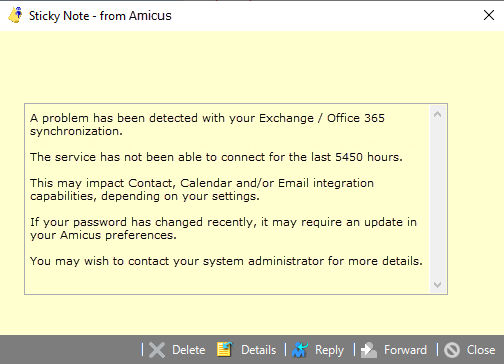 |
This
feature has been further optimized based
on feedback from users.
After-hours
maintenance will no longer be attempted
if it could conflict with other maintenance
and trigger false alerts.
|
|
|
| |
| A
simple search/filter option now included
in the various Contact list views prevents
some unnecessary performance degradation
when attempting to display lists of more
than 10,000 contacts. |
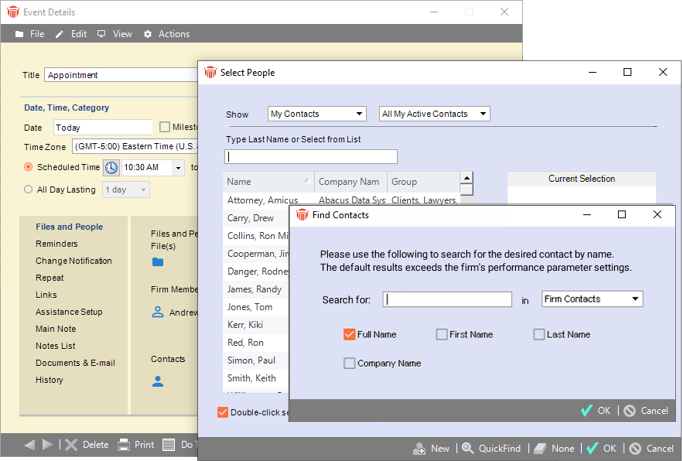 |
A
new Find Contacts prompt displays
in place of the previous list view when
a request for a list of more than 10,000
contacts is detected by the system.
This
allows for an even faster retrieval of
contacts.
The
default performance parameter threshold
is for contact lists greater than 10,000
names. Firms can contact support to increase
or decrease the limit as necessary.
|
|
|
Amicus
Attorney 20.7 - June 2021
We are pleased to announce the rollout of
our new User Interface (UI) for Amicus 20.7. While the new
UI has an updated look and feel with updated icons, colors
and eye-catching dashboards, it also incorporates
new features and functionality that result in an enhanced
user experience.
| - |
New
Interface 
The
design for our modern new UI was motivated by our commitment
to continuous improvement. |
| |
| The
same great workflows, features and functionality
that Amicus users have been accustomed to
have been maintained in the updated UI and
Navigation. |
| The
ATTORNEY-side and BILLING-side Home screens
give you an up-to-date summary of the various
aspects of your practice. |
Mouseover
a tile at the top of the screen to see more
information,
For example, mouseover TODAY'S APPTS to
view details of your next appointment. |
 |
 |
| Click
on a tile, dashboard or icon to go directly
to the corresponding module or dialog. |
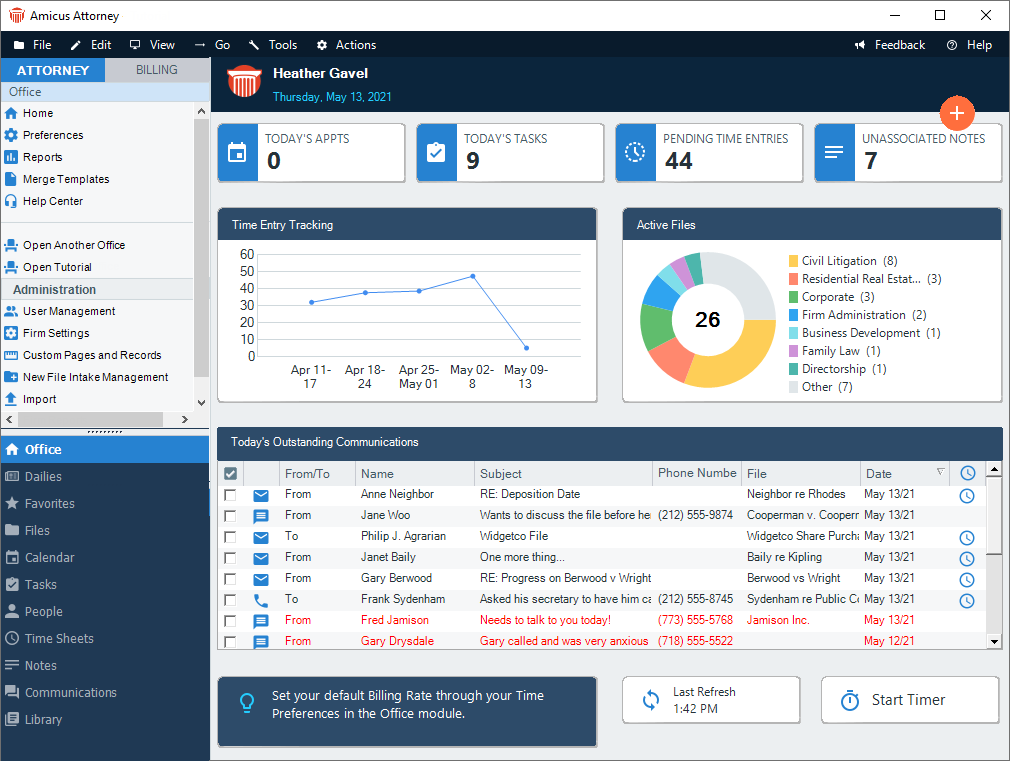 |
| Click
on the Tip of the Day to go directly
to the Help Item. Click Last Refresh
for an up to the minute refresh. Click
Start Timer to start the Amicus Timer. |
|
|
| - |
Dashboards

Our
initial focus when working on the Dashboards was to improve
the visibility of the core features of your practice that
you use every day. |
| |
| The
dashboards on the ATTORNEY-side Home
screen make it easy to see your
Time Entry Tracking and Active
Files at a glance. |
| Clicking
on these dashboards takes you directly to
the corresponding modules (Time Sheets
and Files) where you can choose to
filter your data. |
| ATTORNEY-side
Home screen |
 |
| BILLING-side
Home screen |
| The
dashboards on the BILLING-side Home screen
provide a WIP (Work In Progress) Breakdown,
AR (Accounts Receivable) Aging and numerous
shortcuts to Billing dialogs. |
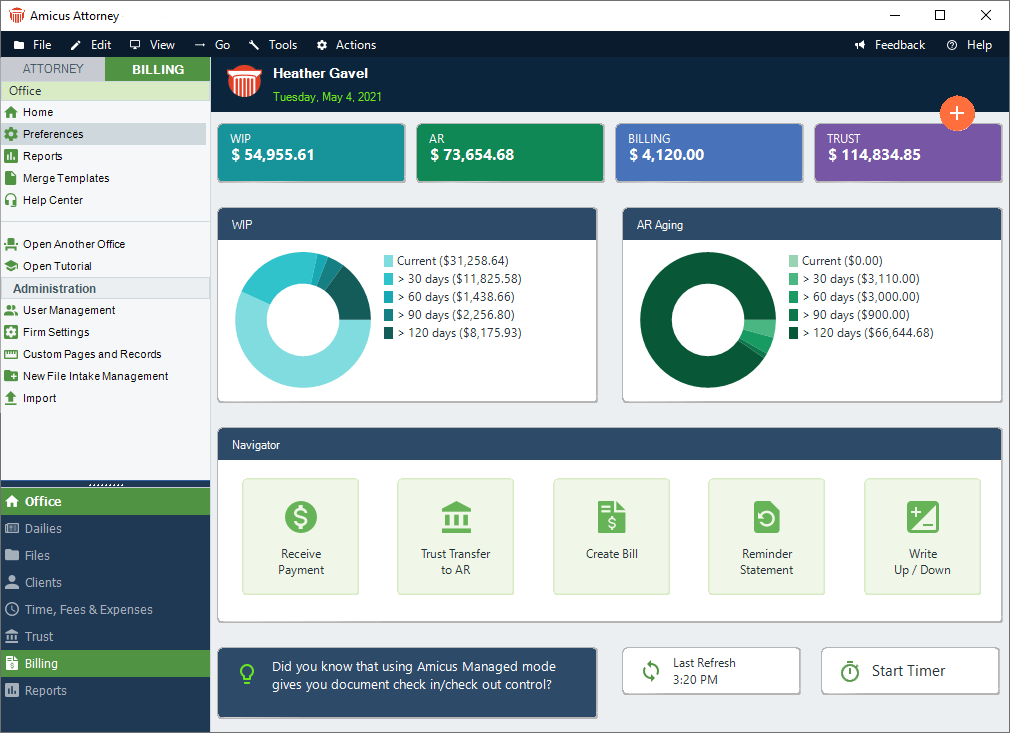 |
| The
new Amicus Home screen featuring the dashboard
displays by default when you log into Amicus.
However, you can easily change this in the
Defaults On Login dialog by selecting
an alternative photo from the Home Default
View drop down list or selecting Other
and clicking Upload to browse to
a photo you would like as your home screen..
|
|
|
| |
| Connectivity |
| New
alerting system notifies users if network
issues are impacting Amicus. |
 |
|
|
| - |
More
dynamic File Details 
The
updated UI takes full advantage of the entire screen real
estate in our File Details dialogs. |
| |
| Leveraging
the screen real estate means that you can
explore more of your data on a file without
scrolling. |
| File
Details |
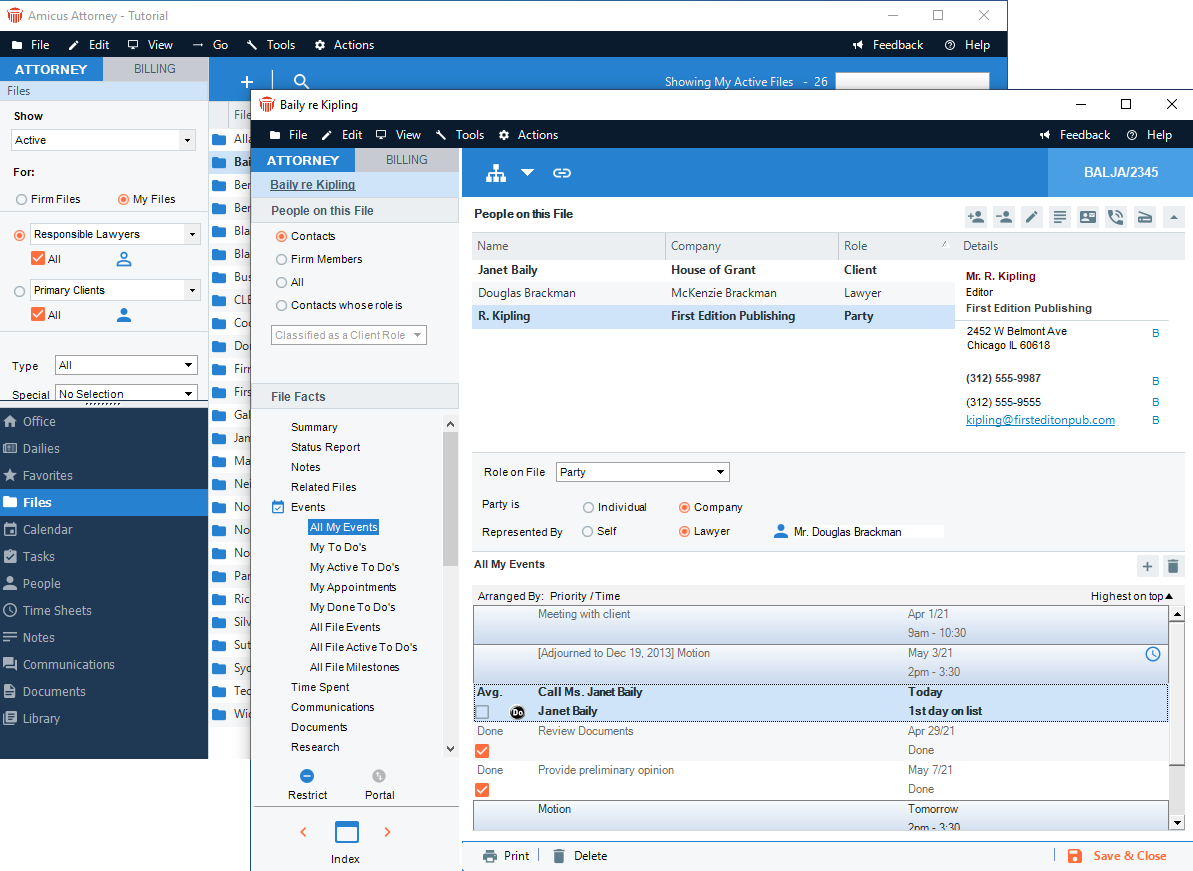 |
| We
have improved the reading panes, hidden
"People on File", and switched from vertical
layouts to horizontal layouts. This allows
for fewer clicks to see more details. |
|
|
| - |
Clear
Search Tool 
A new
Clear Search tool displays in the Amicus taskbar
after a search has been completed in select modules. |
| |
| After
conducting a search using the Search
tool in the Amicus taskbar a Clear Search
tool displays in the taskbar making it easy
to clear your search results. |
| ATTORNEY-side |
| This
tool can be found in the Files, People,
Time Sheets and Notes modules. |
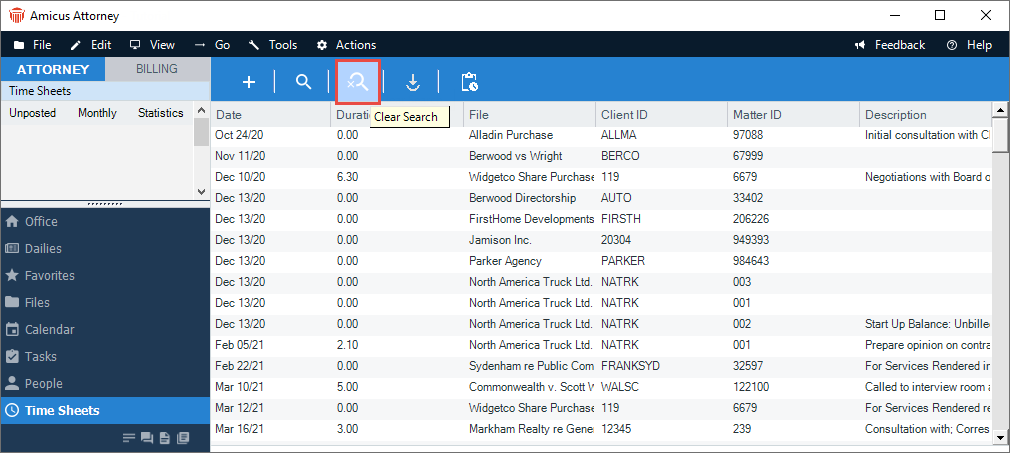 |
| BILLING-side |
| This
tool can be found in the Files, Time
and Fees & Expenses modules. |
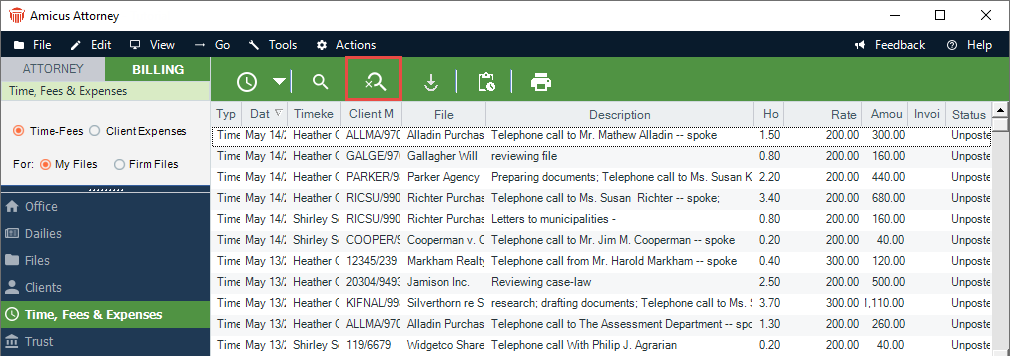 |
|
|
| - |
Enhanced
Security 
Our
enhanced security for Exchange / Office 365 Connections
tracks Contact, Calendar & Email Integrations
and improves performance. |
| |
| Amicus
now allows for Token-based authentication,
although users can still continue to connect
using their Username and Password. |
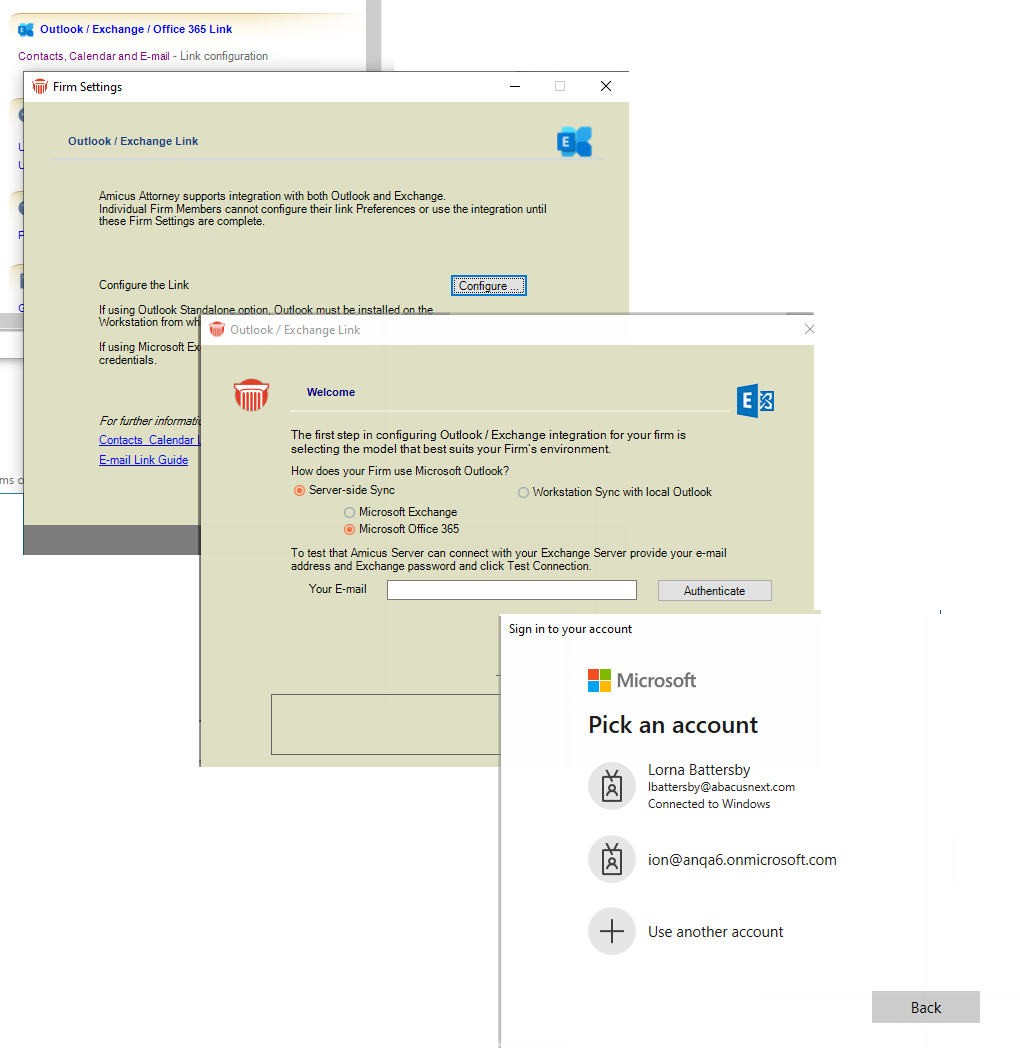 |
 |
There
is now a nightly service that runs in the
background to keep Amicus humming and a
RefreshEventCache can pick back up where
it left off. |
 |
The
XML manipulation API's have been replaced
with Microsoft XML Core Services (MSXLM). |
 |
Exchange
2019 requires at least Transport Layer Security
(TLS) 1.2. |
|
|
| - |
Optimizations

Amicus
20.7 has now optimized its resources to handle the increased
load due to increased virtual private network (VPN) usage.
|
| |
|
The result is that Amicus can now better
handle auto-updates via your VPN. Subsequent
updates will benefit from this change. |
 |
|
|
| - |
BILLING-side
Improvements 
If
you have access to the BILLING-side, along with the dashboard
found on the Home screen, you will notice improvements
to our reports and new printing options. |
| |
| Reports |
| There
have been numerous customer issue fixes
and improvements to our reports.
|
| Printing
Options |
| It
is now easy to print copies of emailed bills.
|
| Select
the Print icon from the Amicus taskbar
in the Billing Module to display
the Output To dialog and select a
printing option(s). Click OK.
|
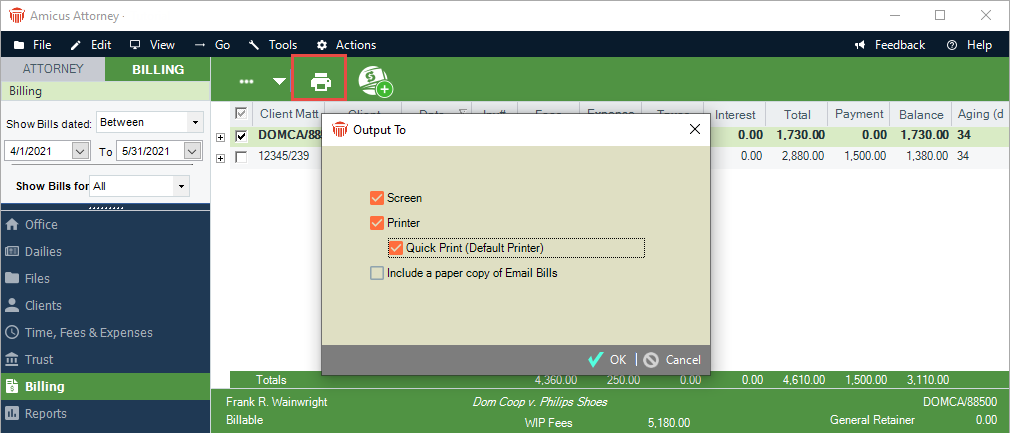 |
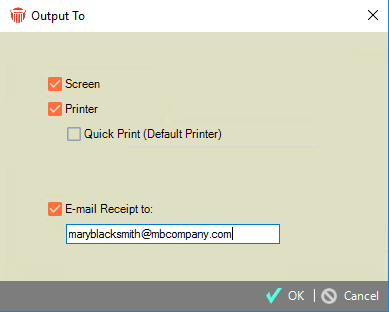 |
Enter
an email address in the E-mail Receipt
to: dialog. |
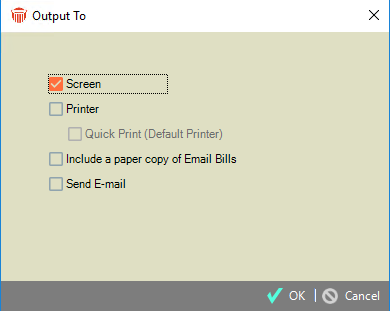 |
Select
Screen to print a Reminder Statement.
|
|
|
Amicus
Attorney 20.6 - November 2020
We are
excited to announce that we are introducing Practice Automation
Libraries (PALs) to automatically customize Amicus Attorney
for your firm's area(s) of practice.
This release also includes new document encryption technologies
and we've also made it even easier to start using APX for
secure credit card and ACH payment processing.
To top it off we are also introducing our new and improved
mobile app!
| - |
Mobile
App V2 
Designed
for those on the go, the new version of Amicus Attorney
mobile app is now available to anyone who has an Amicus
Anywhere account. |
| |
 |
The
Amicus Attorney Mobile App has been completely
rebuilt from the ground up to provide
a much better all-around user experience.
Amicus
Attorney Mobile App V2 has a brand new
"more intuitive" interface. We have added
some great new features that our users
have been asking for such as a full Calendar
view.
The
mobile app provides you the convenience
and freedom to use Amicus Attorney when
you are on the move and away from your
computer, making sure nothing slips through
the cracks.
Friendly prompts help you record the details
of your Calls and make sure you
remember to do Time entries for
your Calls, Email and Text
Messages.
You
can even work offline with automatic synchronization
when you reconnect to the internet. Amicus
mobile app keeps you connected to every
aspect of your practice - anytime, anywhere.
|
- Full
view of your Calendar (tasks,
appointments, deadlines).
- Full
view of Contacts.
- Ability
to create new Files, Contacts,
Appointments and To do's
in the mobile app.
- The
Time module captures every billable
moment from phone calls, emails, notes
and text messages
|
 |
New
Calendar
You
now have full access to your Amicus calendar
right from your mobile device. So, when
you are on the go, not only do you have
easy access to your appointments, but
you can also edit and add new ones at
any time. Since it is your Amicus calendar,
you can of course associate all new appointments
with their respective contacts and client
files.
The
calendar includes a 1-day, 3-day,
Monthly and Agenda view
so you have the flexibility to view the
information the way you want.
|
 |
Files
The
new mobile app makes it easier to work
with your client files. The card view
makes it easy to find the file you are
looking for, and the new panes lets you
drill down to see more details.
Quickly
view the basic details, then swipe to
the calendar view to see associated
appointments.
You
can then move over to view all contacts
and their role on the matter.
The
Activities pane shows phone calls,
tasks and notes, so you can
always get a good handle on the status
of the file
|
 |
Contacts
The
mobile app gives you better access to
your Amicus Contacts. With just a tap,
you can quickly send an email, make a
call or send a text.
The
app also helps to make sure you keep a
record of the communication and even prompts
you to do a time entry. It even
makes it easy get directions to their
location so you never get lost.
Not
only can you view contact details, but
it is also easy to make changes on the
go so that they are automatically updated
back at the office.
Adding
new contacts is a snap too, so you don't
need to worry about where you put that
business card.
|
 |
Activities
The
new Activities pane shows phone
calls, phone messages, notes
and tasks, so you can always
see what's coming up and what you have
completed recently. It's your new go-to
to get work done!
|
 |
Time
The
app makes it easy to stay on top of your
billable time. You can see Today's
time entries, you can also filter This
Week, Last 7 Days, This
Month, and Last 30 Days.
It
gives you running totals and its easy
to track all your time. The mobile app
also helps you to create new time entries
as you work. After you finish that client
call, follow the prompt to create a new
time entry.
|
|
|
| |
|
These
Practice Automation Libraries or PALs,
allow you to apply preset customizations
that make Amicus Attorney even easier
to use from the first day that you use
them.
Your
Administrator can Apply available
PALS to immediately update your system.
If
your subscription doesn't already include
access, your Administrator can just click
Request or contact the sales team
for assistance.
|
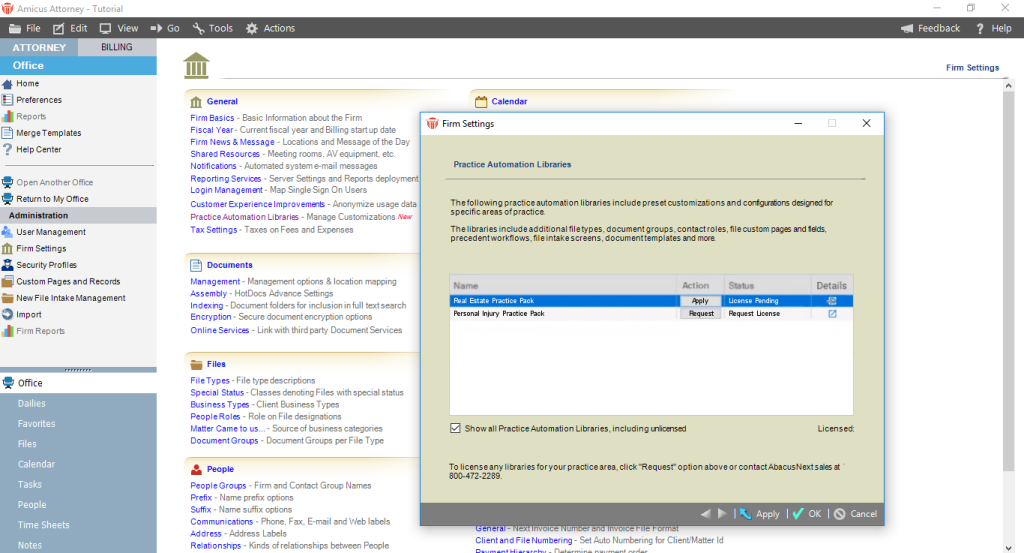
|
| Custom
Page Example |
| For
example, by applying the Real Estate
PALS firms will get the new File
Types tailored to Real Estate cases.
For each of the new File Types, we have
included new Custom Pages and fields to
track all pertinent information. |
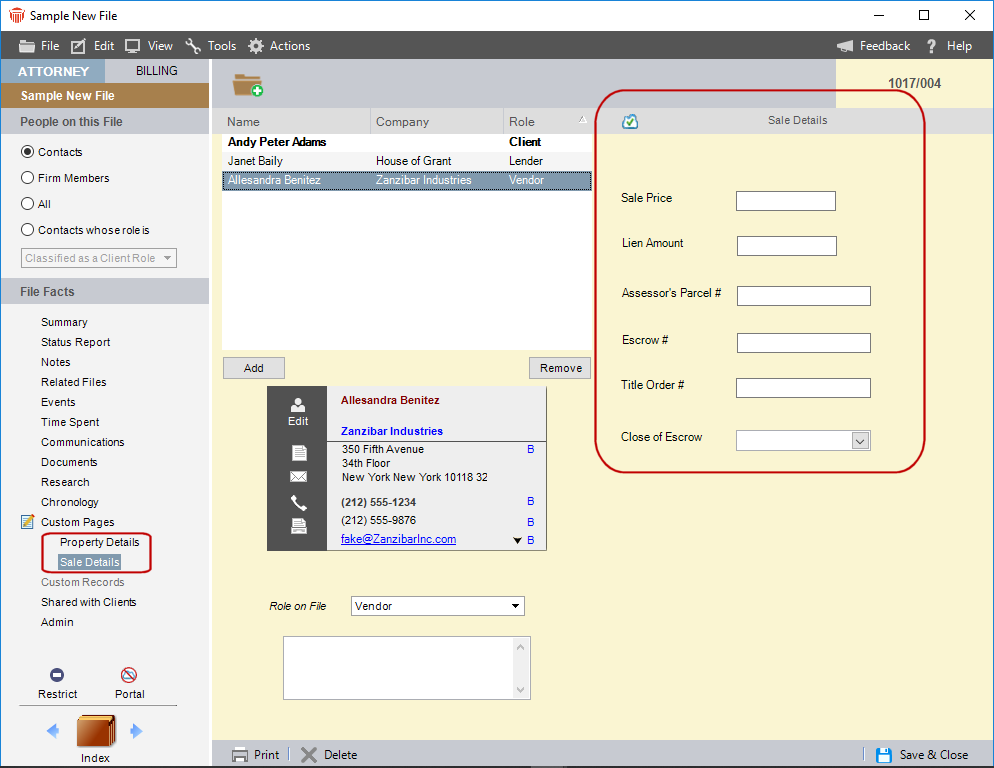 |
| File
Intake Example |
|
The
PALs also includes File Intake
pages for each of the new File Types.
This helps a firm standardize the intake
process and ensure uniformity.
The
firm can further tailor the file intake
process to include additional information
as necessary.
|
|
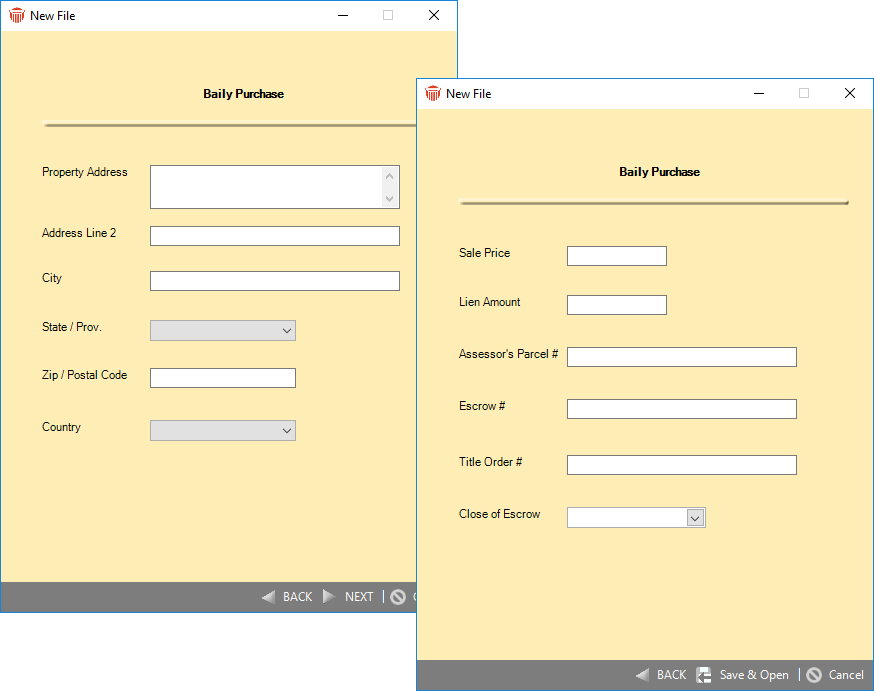
|
| Document
Templates |
| The
PALs come with a variety of sample document
templates that can be further tailored to
the firm's specific needs.. |
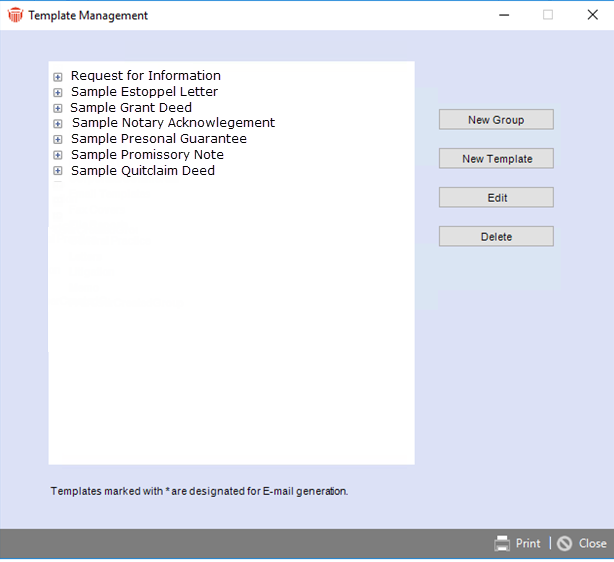 |
| Document
Groups and People Roles |
| To
ensure consistent tracking of information
PALs also comes with predefined Document
Groups to help categorize all documents
for the new File Types. |
| Additional
People Roles are also included to allow
for more precise tracking of all people
related to the new types of matter. |
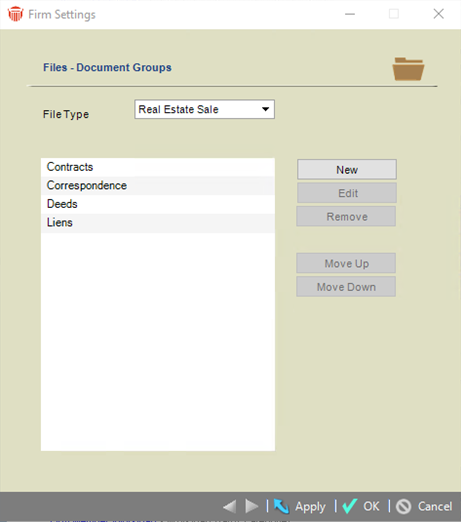 |
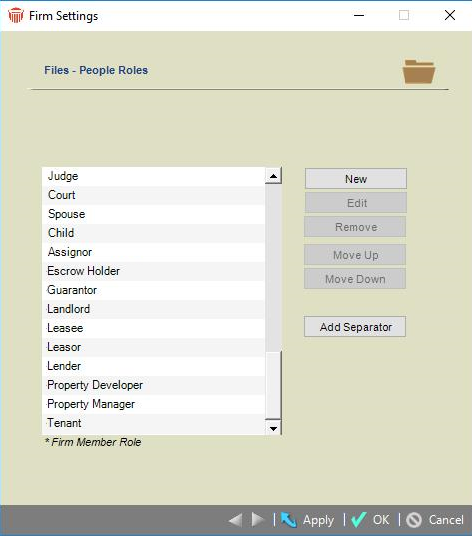
|
| Precedent
Workflows |
| The
Practice Automation Libraries are made even
more powerful with the inclusion of Precedent
Profiles for common Real Estate workflows. |
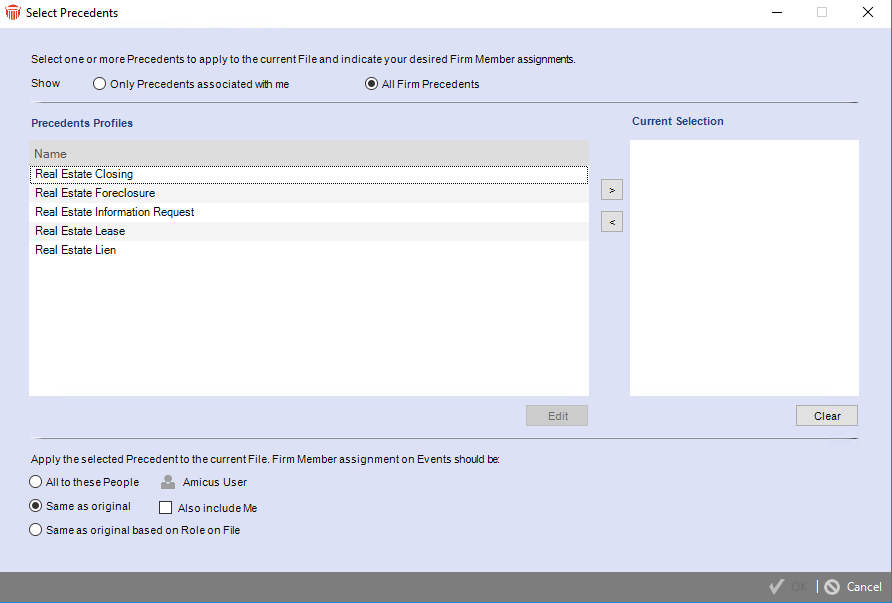 |
| More
Customizations |
| The
PALs content can be further tailored to
your firm's needs. Your firm Administrator
can edit all of the content, and can add
or remove fields as necessary. |
|
|
| - |
Document
Encryption 
Amicus
Attorney 20.6 now includes new options to store your documents
even more securely with bank-grade encryption. |
| |
| Enabling
Document Encryption |
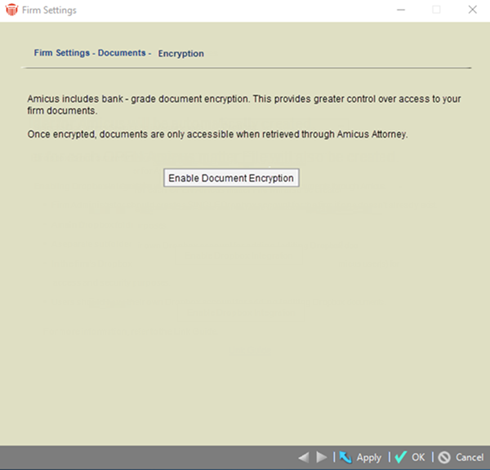 |
When
you enable the advanced document management
capabilities afforded with Amicus-Managed
documents, you can now choose to encrypt
all of your documents.
Amicus
Attorney handles the encryption/decryption
of all documents as you use the system.
Each
new document added to the system is automatically
encrypted for total security.
|
| Encryption
Key |
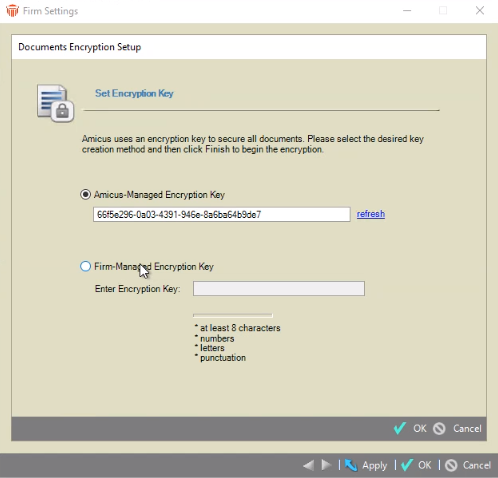 |
As
a part of the setup, your firm can use
an Amicus-Managed Encryption Key
or opt to use one of their own choosing.
Firms
can enable or disable the encryption as
necessary.
You
can rest assured your documents are safely
stored and encrypted through Amicus Attorney.
Even
if someone was able to access the repository,
they would not be able to get into any
of the firm’s documents.
With
the AES 256-bit encryption you can sleep
better at night!
|
| Administrator
Tools |
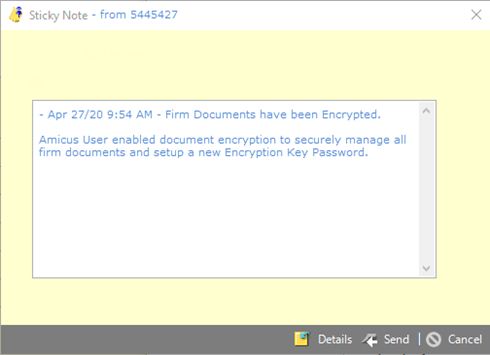 |
Encryption
settings can be adjusted by a Firm Administrator.
We
have enabled additional notifications,
so all Administrators are notified when
any changes are made to the firm’s encryption
settings.
|
| What
else do you get with Amicus-Managed Documents? |
| Enabling
Amicus-Managed documents creates a central
repository on your firm server to host all
documents. |
|
The central repository stores all documents
so they can be accessed by firm members
through Amicus Attorney. |
| The
system allows for check-ins and check-outs
to ensure control and includes full document
versioning. |
|
|
| - |
Easier
to sign up for APX 
It
is now easier to sign up for APX (Abacus Payment Exchange)
with the addition of a Get Paid Faster - Accept Credit
Cards link.. |
| |
 Learn
by Video - Get Paid Faster - Accept
Credit Cards Link
 |
| In
the Billing Navigator, click on Receive
Payment under BILLING or Trust Receipt
under TRUST to display the corresponding
dialog. |
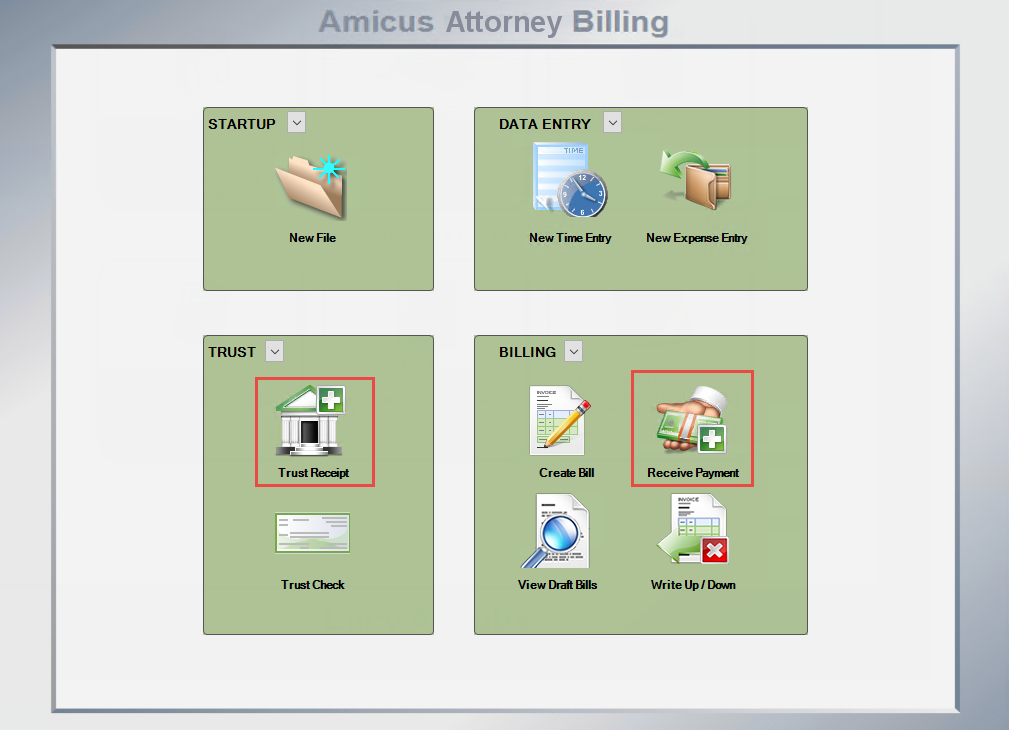 |
| These
dialogs can also be accessed from the
Clients module by selecting a client
and right-clicking to display a pop up menu.
Select either the Trust Receipt or
Receive Payment option. |
| If
a firm is not already APX Enabled (approved)
a link Get Paid Faster - Accept Credit
Cards displays in the corresponding
dialog. |
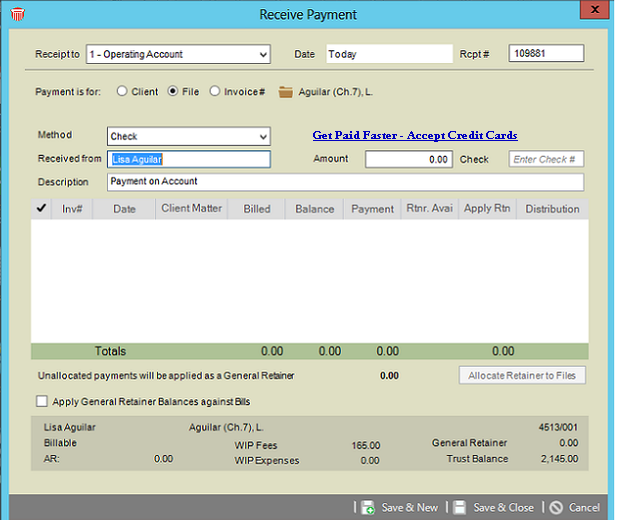 |
| If
you are the Administrator for your firm,
the Billing - Abacus Payment Exchange
(APX) screen displays. |
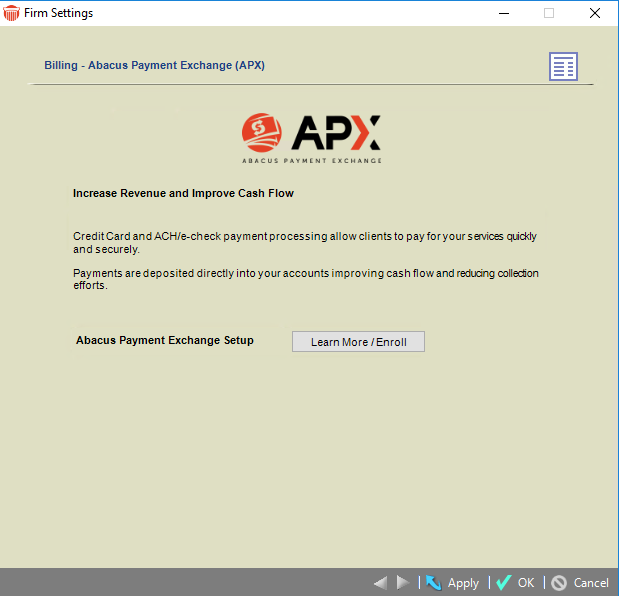 |
| This
is the same as if you had clicked Abacus
Payment Exchange (APX) under Billing
in the Firm Settings. |
| Click
the Learn More / Enroll button to
display the first screen of the Onboarding
wizard for APX. |
| If
you are not the Administrator for your firm
clicking the Get Paid Faster - Accept
Credit Cards link opens the
APX Guide. |
|
|
| |
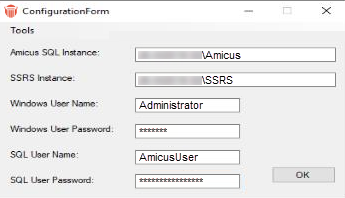
|
|
Firms
can now leverage the latest advances from
Microsoft to get even more out of Amicus
Attorney.
The
updates also includes support for all
custom reporting options in SQL Server
Reporting Services for SQL 2019.
Contact
Technical Support or Professional Services
for more information on making the change.
|
|
|
Amicus
Attorney 20.5 - March 2020
Today, we are happy to announce the release of
Amicus Attorney 20.5. This release contains a significant
number of stability and performance improvements. We have
resolved many customer issues including faster Communication
and Billing related processing. This release also has some
powerful new features. The Integration of HotDocs Advance
within Amicus being the most significant!
| |
| Templates
are created in HotDocs Author, then
uploaded to HotDocs Advance for use
in Amicus Attorney. |
| Once
the user completes the interview, the HotDocs
fields (placeholders) in the template
are replaced with variables found within
Amicus Attorney or an Interview is
launched to gather data (answers) to assemble
a final, customized document for your client. |
 Note: It is recommended that you
select the option to Auto-assembly without
interview when possible in Firm Settings
- Document - Assembly.
 |
 |
| What
you need |
| Integration
with Amicus Attorney requires your firm
to obtain a subscription for HotDocs
Advance, then enable it and launch/install
HotDocs Author. Contact the sales
team today at 800-726-3339 to get
started. |
| Enabling
HotDocs Advance |
| To
enable HotDocs Advance: |
| Go
to Office > Firm Settings and
click Assembly under the Documents
section to display the Firm Settings
– Documents – Assembly window. |
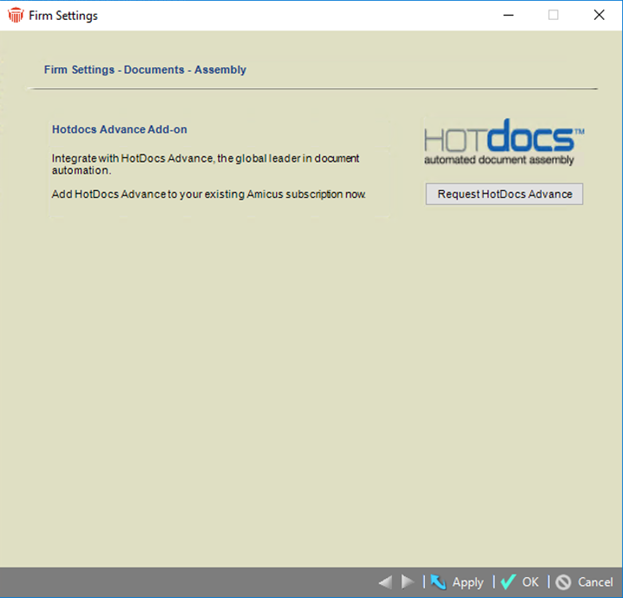
|
| Click
Request HotDocs Advance. |
 Note: If your subscription does not
have the HotDocs Advance Add-in,
a prompt displays and a notification is
sent to sales. Click OK.
 |
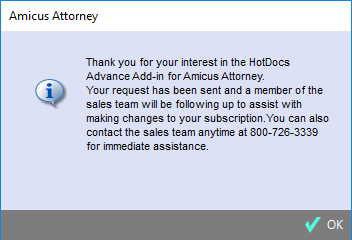 |
| The
button changes to Enable HotDocs Advance. |
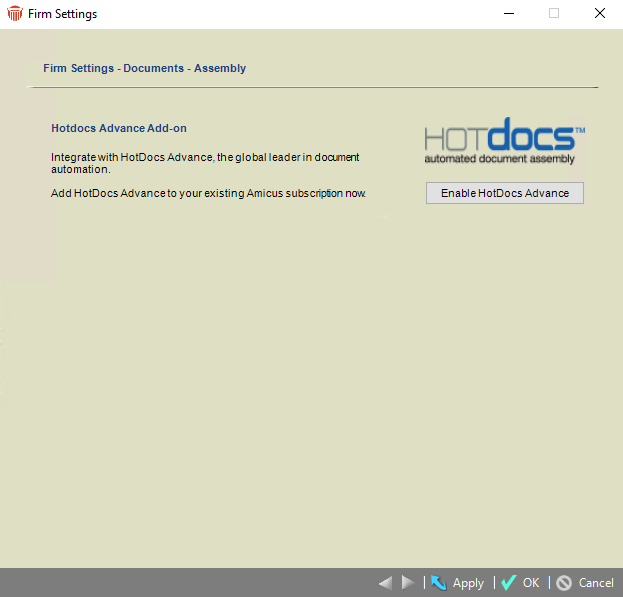 |
| Click
Enable HotDocs Advance to display
the Hotdocs Advance Add-on dialog. |
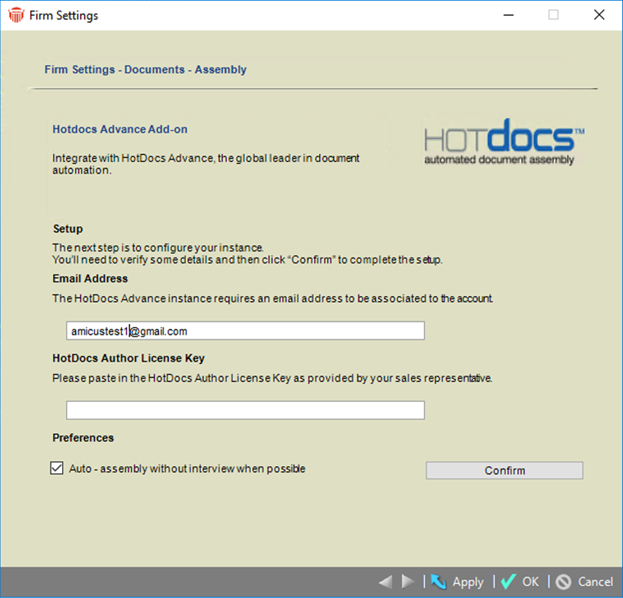 |
| Confirm
the Initial User Email and paste
in the Author License Key which you
received via email. |
| Check
Auto-assembly without interview when
possible to speed up the assemble of
a document when all variables can be found
within Amicus Attorney. This means you will
not be required to complete a HotDocs
Interview. |
 Tip: Your Author License Key
is emailed automatically once your subscription
is updated.
 |
| Click
Confirm and a progress bar displays
when the license check is being performed.
|
 |
| A
HotDocs login window displays where
you will enter a new strong password for
your account. |
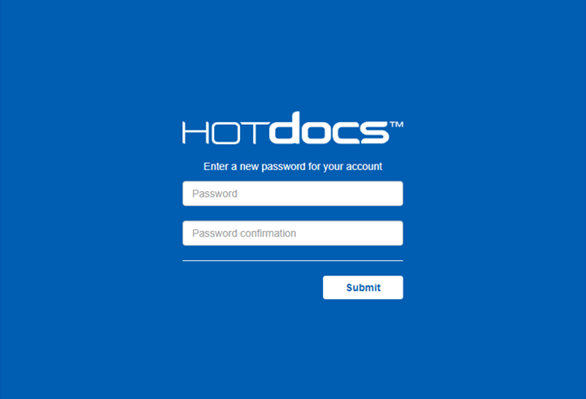 |
| A
prompt displays notifying you when your
password has been accepted. |
 |
| After
the process is completed the EnableHotDocs
Advance button no longer displays in
the Firm Settings – Documents – Assembly
window. |
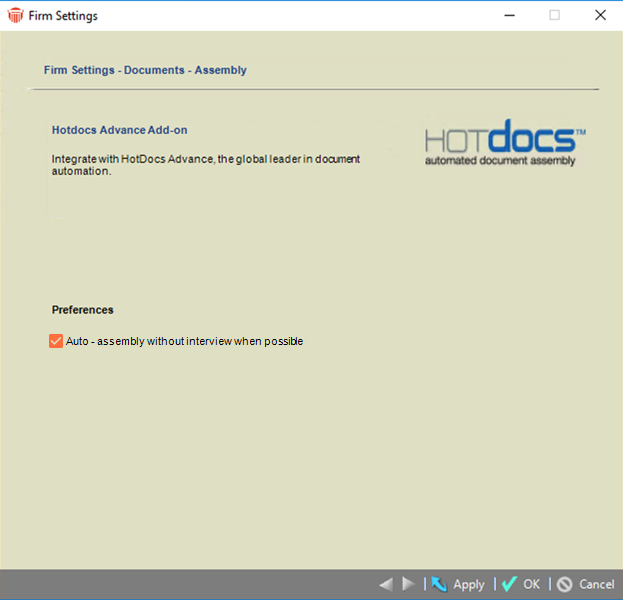 |
| You
have one more opportunity to select the
Auto-assembly without interview when
possible checkbox. |
|
|
| - |
Using
HotDocs Author 
Create
user-friendly templates, then upload them to HotDocs
Advance for use in Amicus Attorney. |
| |
 Note: This is only necessary if you
wish to author templates. Amicus Attorney
comes with several sample HotDocs Advance
templates.
 |
| HotDocs
Author allows you to transform existing
Word, PDF, and plain text documents into
user-friendly templates and create new ones. |
| With
HotDocs Author you can format data to
your specifications, create conditional
text regions, create interactive data-gathering
HotDocs Interviews and access Component
Studio. |
| Launching
HotDocs Author |
| Go
to Office > Merge Templates to
display the Template Management window.
The HotDocs Advance Templates display
in a tab. |
| Click
Install HotDocs Author on the right-hand
side. A progress bar displays. |
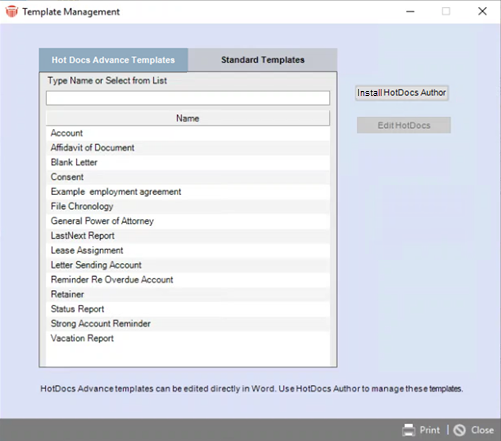 |
| After
the installation is complete, the Install
HotDocs Author button changes to Launch
HotDocs Author. |
| Click
Launch HotDocs Author on the right-hand
side to launch Workspace Explorer. |
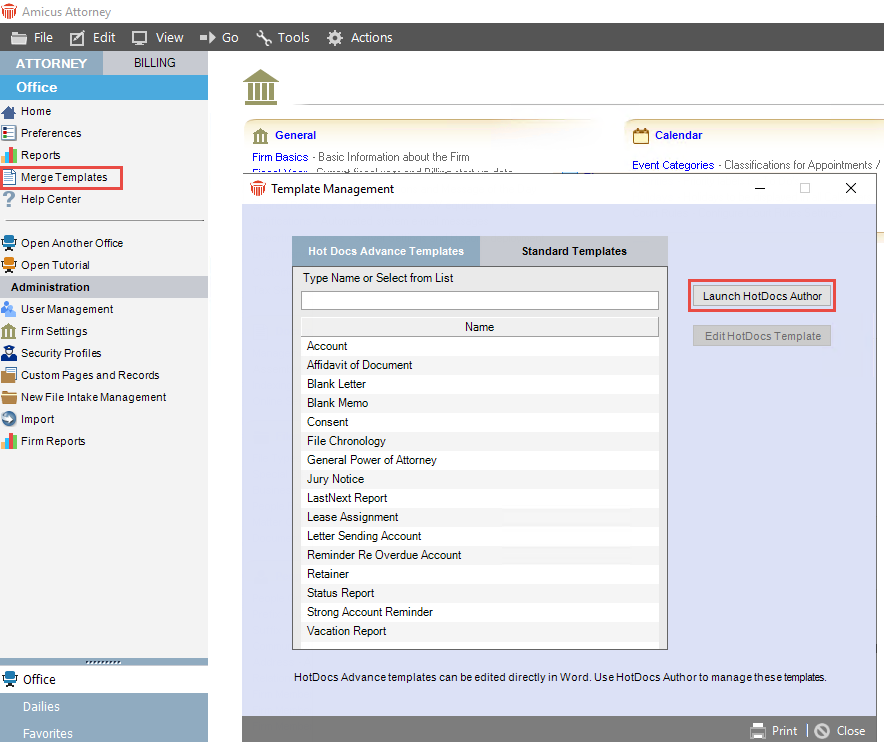 |
| Workspace
Explorer |
| In
Workspace Explorer you can A.
Create a New Template, B.
Search and open (to Edit) existing
templates, C. Edit Template Properties,
D. Open another Workspace,
E. Import templates and files from
other sources, F. Upload your templates
to HotDocs Advance and G.
Access Component Studio. |
 |
| Click
New Template or select an existing
template in the left pane activates the
buttons in the right pane. |
 |
| The
HotDocs Author add-in for Word opens
overlaying Workspace Explorer when
you double-click on an existing template,
click New Template or select a template
and click Edit. |
| HotDocs
Author Add-in for Word |
| This
provides you the tools you need to author
your template. |
 |
| Then
select Field Editor under the HotDocs
Author tab to display the HotDocs
Field Editor in a right-hand pane. |
| HotDocs
Field Editor |
| Using
HotDocs Fields for changeable data
enables you to create templates for generating
individualized applications, proposals,
business contracts, medical forms, government
and court forms, etc. |
| The
HotDocs Field Editor makes it easy
to edit and publish templates using Amicus
variables (including custom fields). You
can also easily create your own variables. |
 Note: Using Amicus Attorney
variables saves time as your user will not
have to complete a HotDocs Interview.
 |
| Click
in the main screen area where you want to
add an Action (most commonly Add
a placeholder) to a template, then go
to the HotDocs Field Editor. |
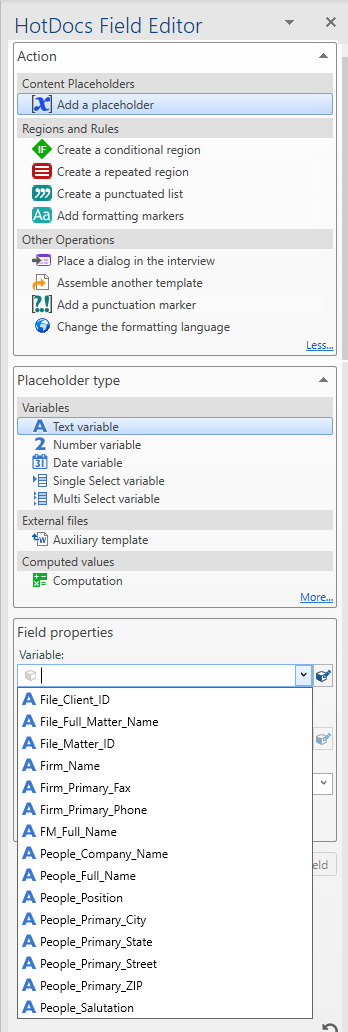 |
- Click
the drop-down arrow to select an Action.
Add a placeholder is the most
common action, but you can also select
from the list under Regions and Rules
or Other Operations.
|
- Then
click the drop-down arrow to select
a Placeholder type.
Auxiliary temple – Embeds the
content of another template within the
parent template's assembled document.
Computation – A type of component
that performs calculations or executes
other instructions within the template.
Selecting from the Variables list
is the most common placeholder type.
Your
choices for variables include:
Text variable – Represents an
unknown text value, for example [Employee
Gender].
Number variable – Represents
an unknown number value, for example
[Employee Social Security Number].
Date variable – Represents an
unknown date value, for example [Employee
Birth Date].
True/False variable – Represents
an unknown true/false value, for example
[Yes/No].
Single select variable – Represents
an unknown selection from a list of
values you define, such as a list of
the fifty states, for example [Employee
State].
Multi Select variable – Represents
an unknown selection or selections from
a list of values you define, such as
Spouse, Son, Daughter, Friend,
for example [Primary Emergency Contact
Relationship].
Table
variable – Represents one or more
rows of unknown values arranged into
columns whose names and types you define,
for example [Service, Category, Price].
|
- Then
select a Variable under Field
properties. Select from the drop-down
list if you are using Amicus variables
and go to Step 6.
|
| |
| |
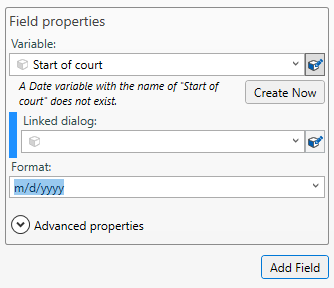 |
- To
create your own variable enter a name
in the Variable field and click
Create New. Select an option from
the Linked dialog if you would
like to repeat the variable, etc.
Select
a Format from the drop-down list.
|
 |
- Click
the drop-down arrow beside Advanced
properties if you wish to add more
details.
Unanswered
text - Enter the text you want to
replace a placeholder field with during
document assembly if the user leaves
the corresponding question unanswered.
Font
– Select a font from the dropdown list.
Pad answer to fixed number of characters
– Select this checkbox if you want
to pad the width, select an Answer alignment
or Pad character.
Preserve empty paragraph – Select
this checkbox if you want to add a Comment.
Click Add Field to add the new
variable to the drop-down list.
|
- Click
Add Field to add the action to the
template. Save the template when
you are finished editing or creating
a new template. You are returned to
the Workspace.
|
| Workspace |
When
you are ready for users to use your templates
to create their own customized documents,
select the template , then click  from the Workspace Explorer taskbar
to upload your template to HotDocs Advance.
 |
|
|
| - |
Document
Bundles 
New
options make it easy to package any documents on a Client
File to a ZIP file for easy sharing.. |
| |
| A
new option has been added to the File
Actions menu called Package Documents. |
| The
ZIP file maintains your folder structure,
so the recipient can see the layout as you
intended. |
 |
| Select
Actions > Package Documents...
to display a Select Documents dialog. |
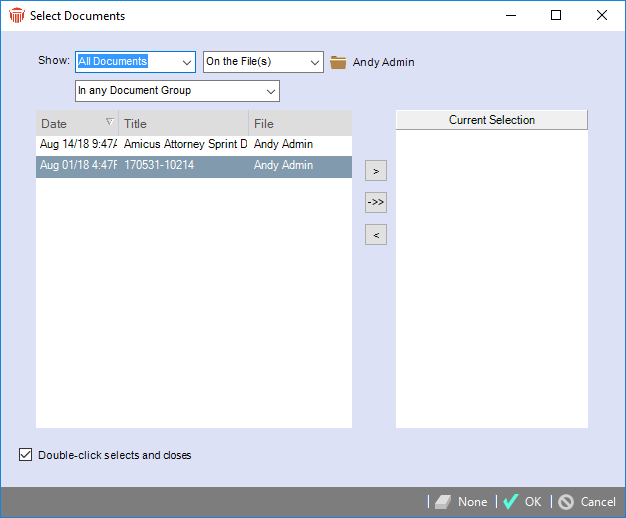 |
| Select
an option from the drop-down list in the
Show field to display your documents
in the main window. |
 Note: The options are All
Documents or My Documents depending
on your permissions.
 |
| Select
one or more documents and move them to the
Current Selection window. |
| Click
OK to display a prompt asking you to
choose a location to save your Compressed
(zipped) Folder. |
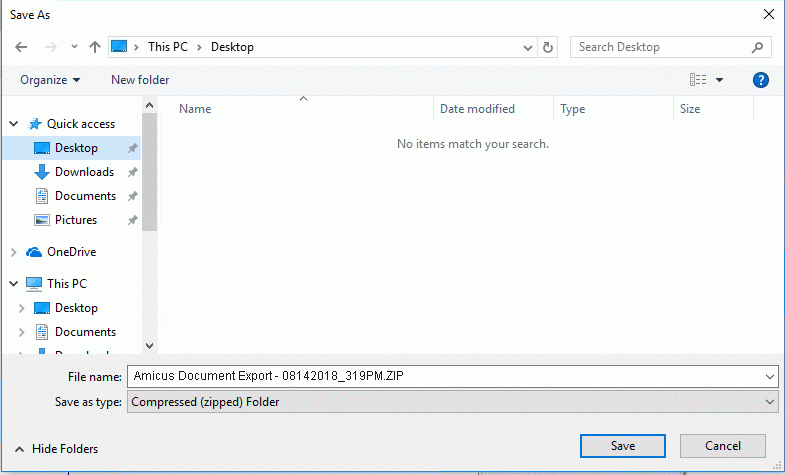 |
| A
progress bar displays showing how many documents
remain to be processed. To cancel this export
simply click Cancel. |
|
Although Amicus Managed mode allows
for virtual folders that are maintained
in the ZIP file this could result in a number
of nested folders with only one document
several layers deep. Only the current version
of a document will be included. |
|
|
| |
| It
is no longer necessary for the primary client
to pay invoices as we have expanded the
Portal Payment Options for APX (Abacus Payment
Exchange) so now All portal users
can add their own credit card or ACH information
and pay via the portal. |
| To
make invoices visible to all clients on
a file, simply click the Visible to clients
on the file who have portal access checkbox
in the Portal Sharing window and
click OK. |
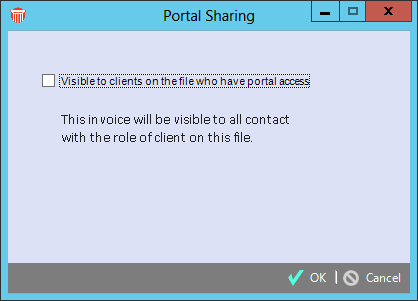 |
| In
the Client Portal the primary client,
as well as non-primary clients can use the
Payment Method associated with the
login user or add a Payment Method
to process a payment. |
.png) |
|
|
Note:
The Payment Method is not saved
when added by a non-primary client. However;
the Portal Activity log and report
is updated with the acitvity of the non-primary
client.
|
|
|
| |
| The
updating process has been streamlined to
make it easier for you to apply the Amicus
Attorney 20.5 update and all future updates. |
| The
firm administrator clicks Maintenance
- Updates under Firm Settings to
display the following window. |
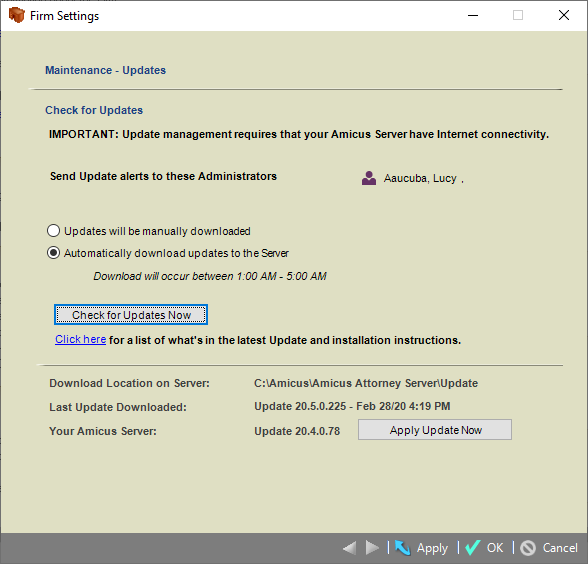 |
| Click
Apply Update Now. |
| If
an update to Amicus Attorney is ready to
apply the following prompt message displays. |
 |
| Clicks
Apply Now to apply the update. |
| When
triggered by your firm administrator, workstations
are automatically notified of a pending
update with an Alert message, and
logged out after 10 minutes. |
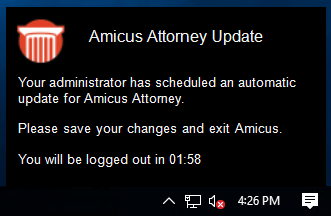 |
| Once
all users are logged out, the Amicus
Attorney Server is updated, followed
by the automatic update of all workstations. |
| The
new workstation update does not require
any elevated privileges. |
| Offline
workstations will be automatically updated
automatically when they reconnect to the
office network. |
 Note: Amicus Attorney 20.3
and earlier users will be able to take advantage
of this new feature on subsequent updates.
 |
|
|
| |
| A
new option is now available under Advanced
Settings in the General - Firm Settings
dialog to set a Preferred TCP Port
for network communications. |
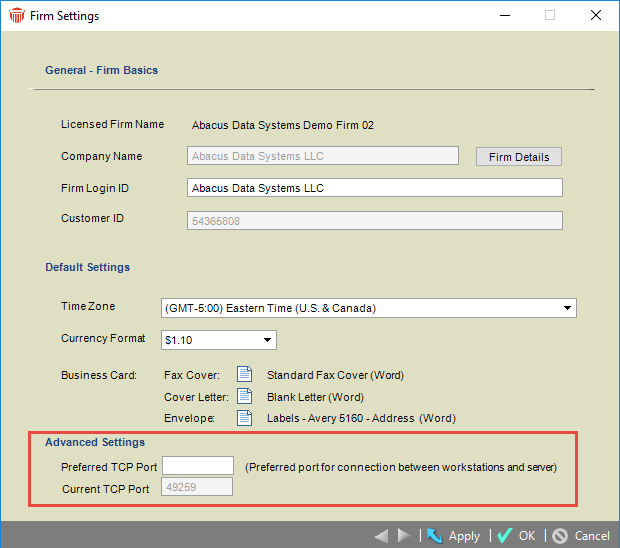 |
- You
will also see the Current TCP Port.
|
 Note: The new setting helps
to prevent competition with other applications
trying to use the same port.
 |
|
|
| |
|
A new feature provides easy access to
QB RDP (QuickBooks Remote Desktop Protocol)
session for Amicus Administrator
Users. |
|
In Firm Settings, select Time
> Accounting to display the
Time- Accounting System dialog to lauch
a QB RDP session |
| Check
Use Amicus Billing and select QuickBooks
(Billing) from the dropdown list in
the Select your Accounting System
field. |
| If
a Username and Password exists,
these fields are auto-populated. The fields
are blank if they have not previously been
saved for the firm. |
| Enter
or edit the RDP credentials and click
Apply or OK to save the fields
if they are valid. |
| Click
Launch QB RDP to display the RDP
login screen. |
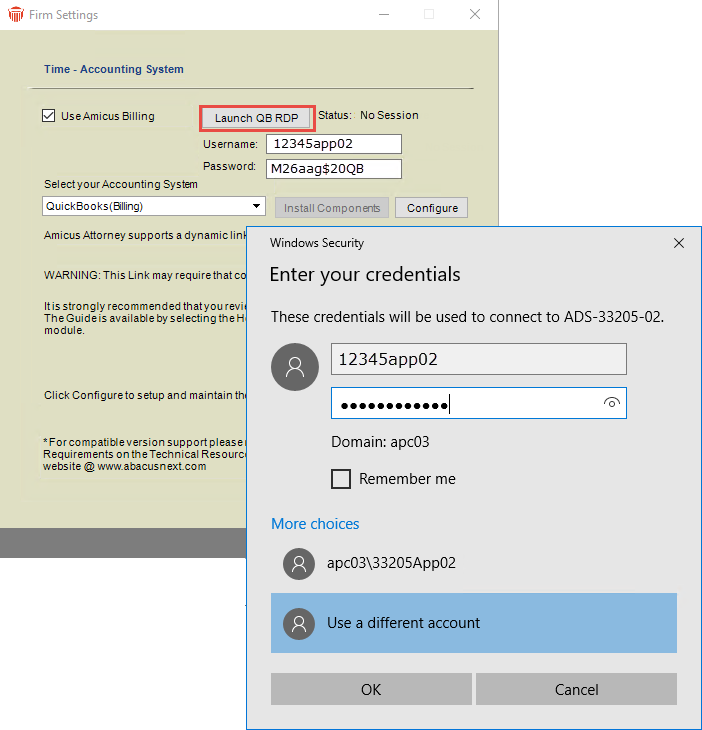 |
| The
Status (No Session or Session
Active) displays on the right side of
the Launch QB RDP button. |
| You
are prompted to enter your Username and
Password in the RDP login
screen. |
 Note: You can copy and paste
the credentials from the Time Accounting
System dialog.
 |
| Click
OK to activate the RDP session. |
| You
can now log into QuickBooks and manage your
customers, vendors, clients, inventory and
finances. |
| Locking
a QB RDP session |
| To
lock a QB RDP session, click the
Lock QBSession icon on the RDP
session desktop. |
 |
 Important: Do not logout of the RDP
session as this will disable the Amicus
- QuickBook link.
 |
| If
you double-click on the LockQBSession
icon the following prompt displays. |
 |
| Click
OK to return to Amicus Attorney. |
 |
| The
Status on the right side of the Launch
QB RDP button is updated to Session
Active. |
 Note: An Administrator can
launch the QB RDP session to perform
other tasks such as dismissing the QuickBoooks
modal window.
 |
| To
quickly test the connection, select Configure
from the Time - Accounting System
dialog to display the Configuration Wizard. |
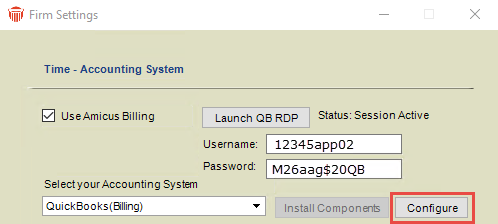 |
| Click
Step 1 Configure Data Source to display
the Accounting Profile Wizard. |
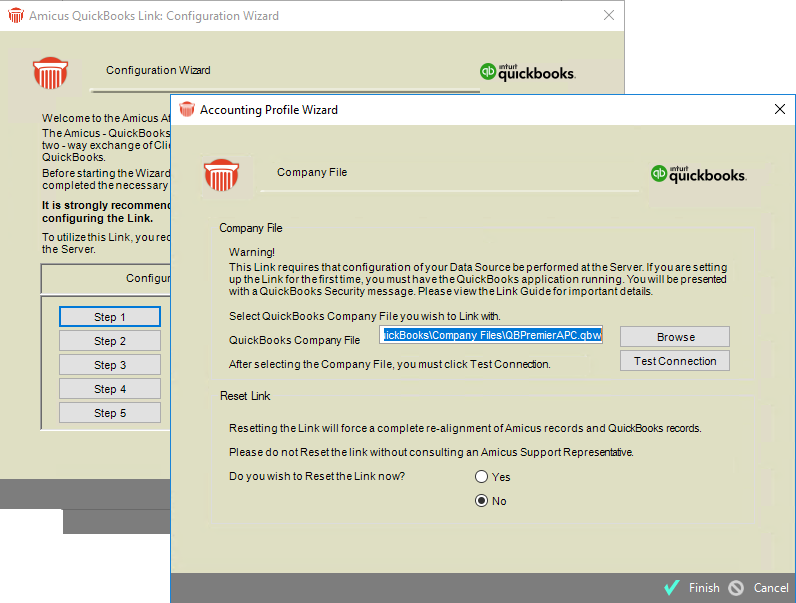 |
| Browse
to the QuickBooks Company File you
wish to link with if it does not display
in the field, then click Test Connection. |
| A
prompt message displays alerting you if
your connection has been lost. |
|
|
| |
| Amicus
Attorney has been updated to take advantage
of Google's improved verification on the
oAuth consent screen. |
 Note: Firms already setup
to synchronize Google Contacts &
Calendar won't notice any difference
unless they disable and reconnect.
 |
| Go
to Calendar & Contacts under
Links in Preferences to display
the Calendar and Contacts Integrations
dialog. |
 |
| Select
the Google radio button and click
Configure to launch the Amicus -
Google Link Configuration Wizard. |
 |
| Click
Step 1 Synchronization Settings to
display the Google Settings window. |
 |
| Click
Connect with Google to Sign in. |
 |
| Enter
an Email address or phone
number in the field provided, then click
Next. |
 |
| Enter
your password in the field provided,
then click Next. |
 |
| A
Verify it's you window displays.
Click Send to Get a verification code. |
 |
| A
message returns Amicus Attorney wants
to access your Google Account, click
Allow. |
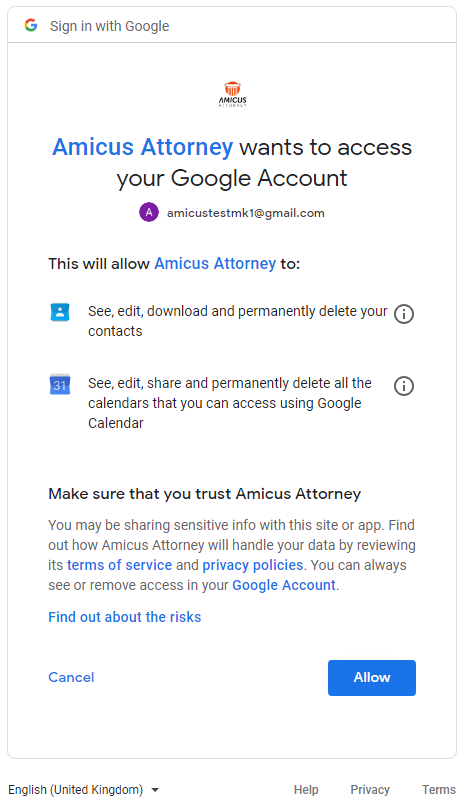 |
| A
prompt displays to notify you that synchronization
between Google and Amicus Attorney
was successful. |
 |
| Click
OK. |
|
|
| |
| A
major leap has been made in Amicus Anywhere
and the Client Portal to support
much greater customization options. |
| Custom
Records on Client Files can now
be shared in the Client Portal. This
includes the ability for your clients to
add new records. |
| Select
Office > Custom Pages and Records
to display the Custom Page / Record Management
window. |
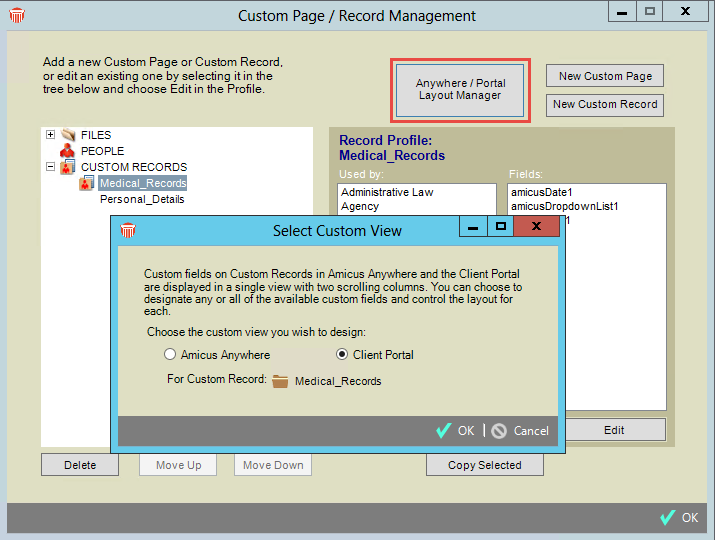 |
| Select
the records you wish to share from the tree
structure in the left pane and click Anywhere
/ Portal Layout Manager to display the
Select Custom View dialog. Select
a radio button for the custom view you wish
to design and click OK to display
the Custom Record Layout Manager. |
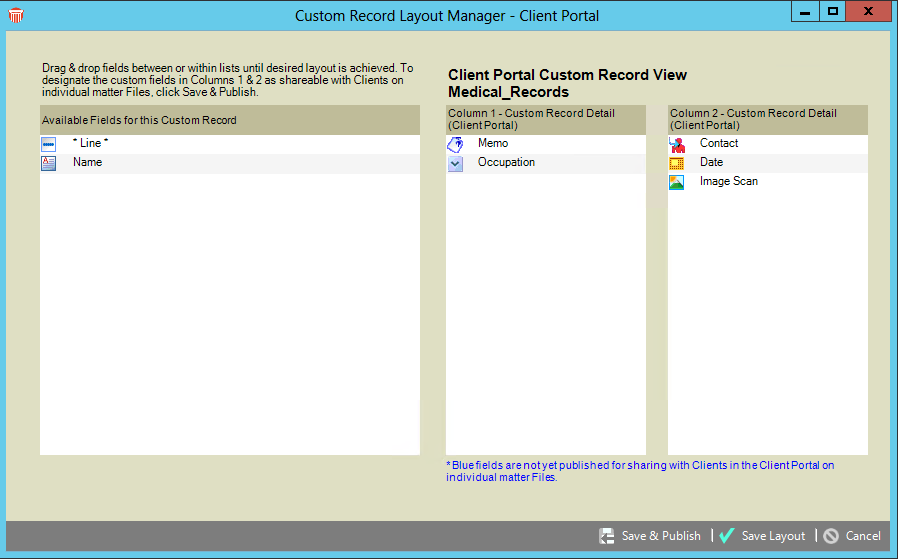 |
| Use
the designer to control the layout in the
Client Portal by dragging and drop
the fields you wish to share, then click
Save & Publish. |
| A
prompt displays notifying you that publishing
permits firm members to share the designated
custom field. |
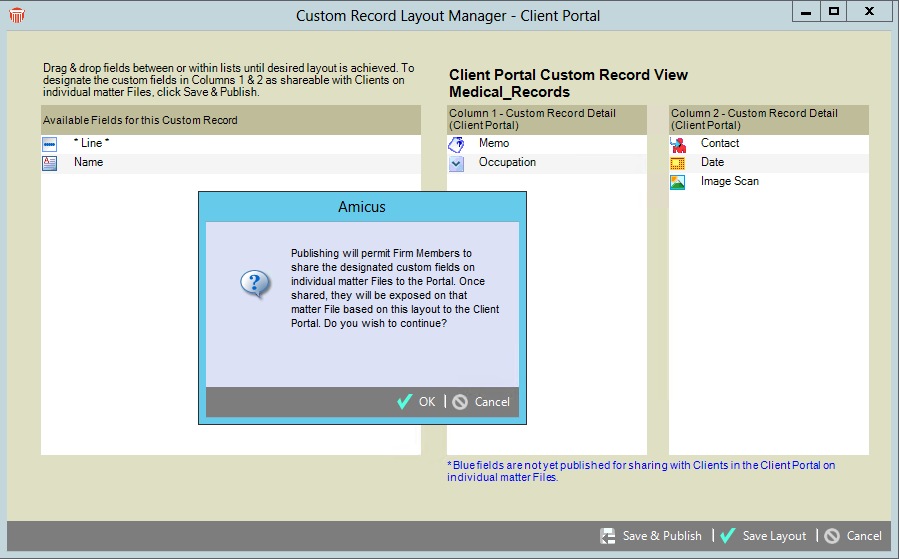 |
|
If you wish to continue click OK and
open the Client Portal to view the
shared records. |
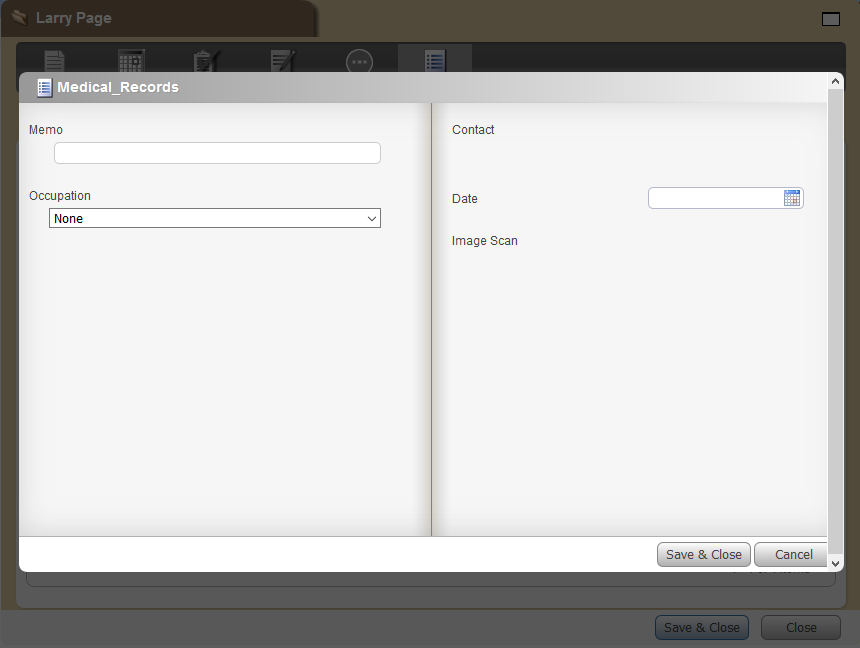 |
| This
can be controlled separately from Amicus
Anywhere. |
 Note: You also have the option
to keep files private.
 |
|
|
|
Amicus
Attorney 20.4 - June, 2019
We are excited to announce this release, which is packed
with new features, changes, and performance enhancements designed
to make your workflow more efficient and make it easier for you
to get paid.
| - |
Single
Sign-On (SSO) 
Administrators
can now enable SSO for their firm to allows firm members
to access Amicus Attorney, Anywhere and Mobile
App with one set of credentials. |
| |
 Learn by Video - Single Sign On
 |
| To
enable SSO for their firm, an Administrator
selects Office > Firm Settings in the
control panel, then Login Management under
the General tab to display the Login
Management/Single Sign On dialog. |
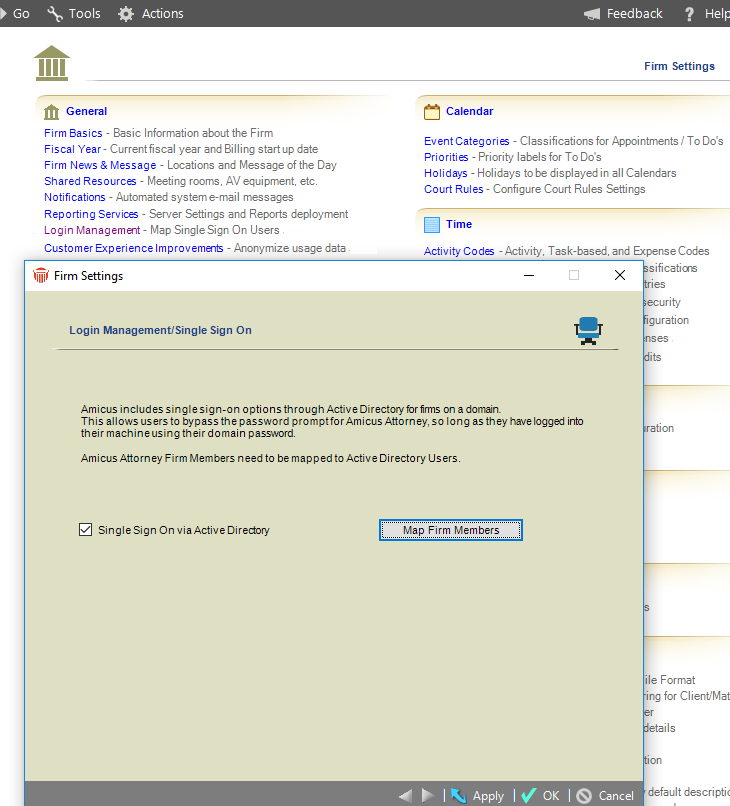 |
| The
Single Sign On via Active Directory checkbox
must be selected, then click Map Firm Members. |
| The
Mapping Firm Members to Active Directory Users
window displays. |
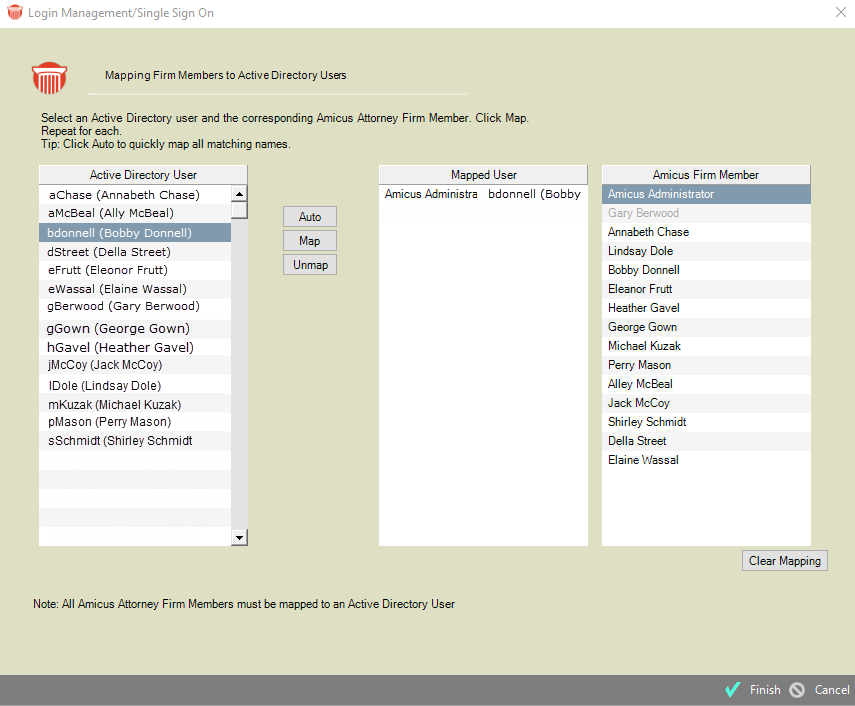 |
| To
map users, select an Active Directory User
from the column on the left and an Amicus
Firm Member user from the column on the right,
click Map. |
| The
user displays in the Mapped User column,
or click Auto to quickly map all matching
names. |
| Continue
mapping until all members in the Amicus Firm
Member column are mapped. The setup requires
all firm members to be mapped. |
 This feature is not available when a firm is not
on a Windows domain. (For example, when running
a Workgroup.)
 |
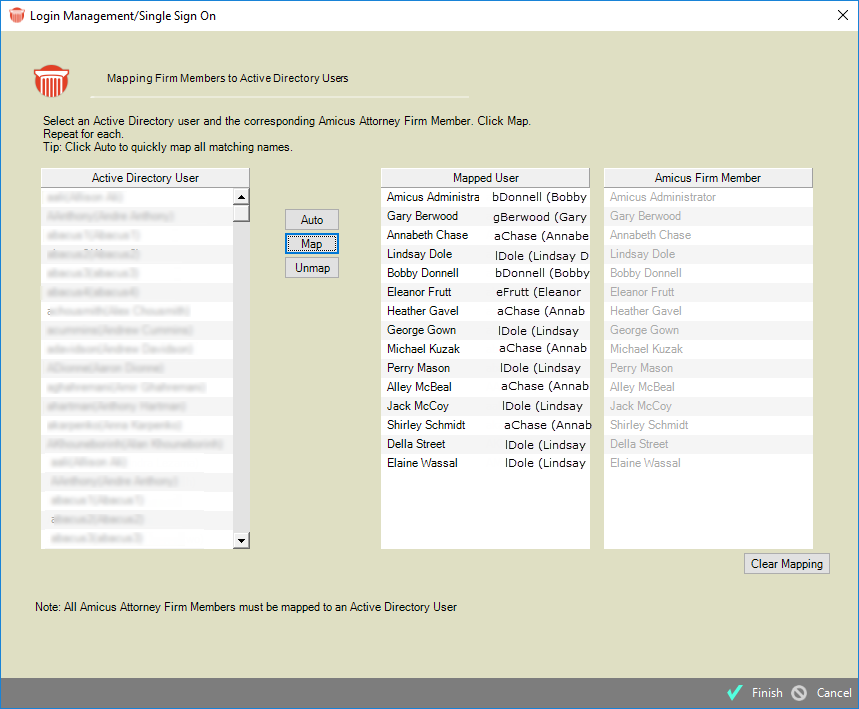 |
| The
firm members are now mapped and SSO is
enabled for the firm. As long as a firm member
is logged into their computer they won't have
to enter another password to access Amicus Attorney. |
| Firm
members that are using the SSO feature
must use the same password they use to log into
their computers to access Amicus Anywhere
and Mobile App. |
| Viewing
in the User Management window |
| To
view the new Active Directory User column
in the User Management window, go to
Administration > User Management under
Office in the control panel. |
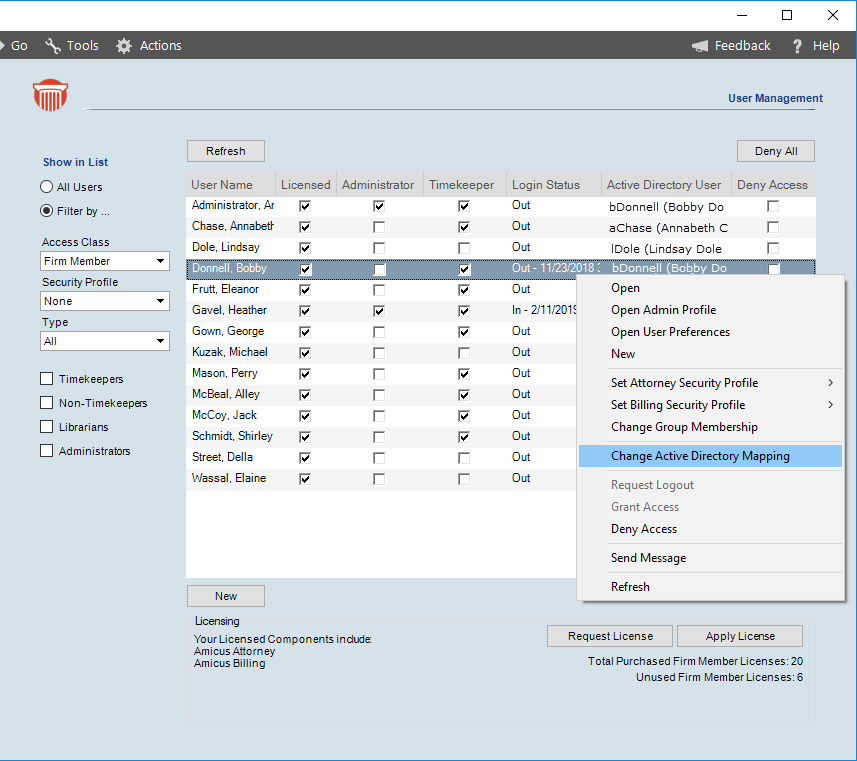 |
| Editing
the Active Directory User column |
| To
edit a user in the Active Directory User column,
select the user and right-click to display a pop-up
menu, select Change Active Directory Mapping
to display the Map Firm Members to Active Directory
dialog. |
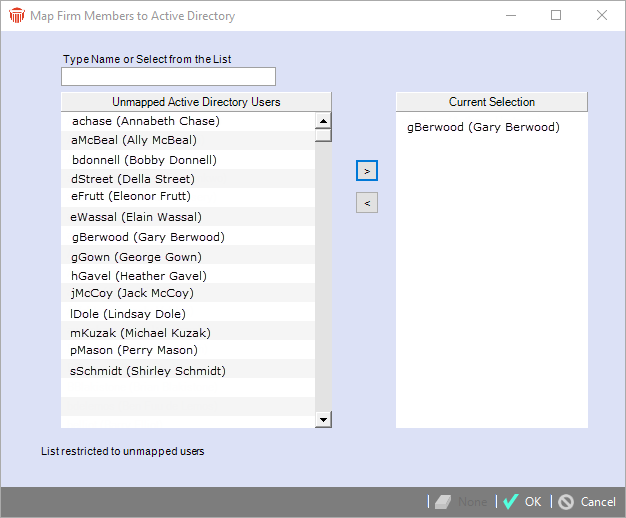 |
| Enter
a name in the Type Name or select from the
List textbox by typing or selecting from the
Unmapped Active Directory Users column and
clicking the right arrow in the middle to move
it to the Current Selection column. |
| When
SSO is enabled, firm members will not be prompted
to enter a separate password to access Amicus
Attorney as long as they are logged into their
computers. |
| Selecting
Start > Amicus Attorney or clicking
the Amicus Attorney icon on their desktop
displays the Preparing for Login... window. |
 |
| Followed
immediately by the License screen. |
 |
| Followed
by your default Login window. |
 Important: You are not permitted to reset
your login credentials when your firm is SSO
enabled.
 |
| In
the Preferences screen if you select General
> My Profile and click Edit a message
displays in the area where you usually reset your
password in the Office Access dialog. |
| Contact
your Administrator if you wish to reset your password,
as they are maintained through the Active Directory
available only to your Administrator. |
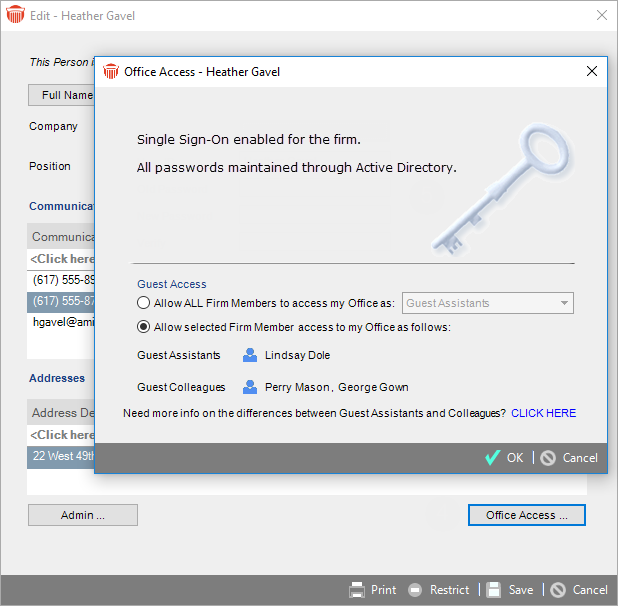 |
|
|
| - |
Pay
Now [Billing] 
Firm members
can now easily include a Pay Now link with emailed invoices
that allows the client to easily pay their bill by credit card. |
| |
 Learn
by Video - Pay Now
 |
| Pay
Now emails include an embedded URL that clients
can click and easily make an APX payment. They
are generated from the Finalize Bill screen
during the Create Bill process or from
the Billing module after the bill is created.
|
 To send a Pay Now request from the Billing
module, the firm must have APX enabled on the
general bank account.
 |
|
To
send an email with a Pay Now request
- Go
to the Firm Settings and select
Emailing Bills under the Billing
section to display the Billing - Emailing
Bills dialog.
- Select
the Cover Email format under the APX
URL Format tab.
|
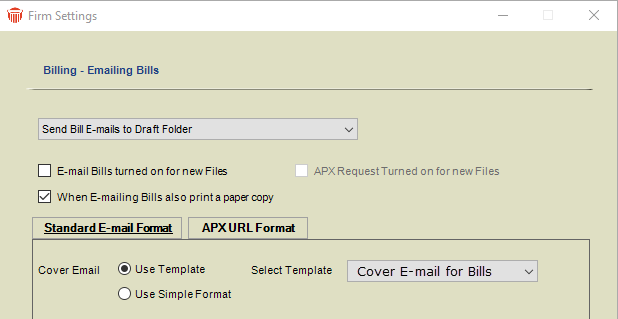 |
|
|
Check
that the templated defined in the Firm Settings
for APX-URL Format has the URL variable
included. If the URL is missing and you continue
the client receives a standard e-mail without
the Pay Now request.
|
|
To
create a Pay Now request when creating bill(s)
|
- Use
your current billing workflow to send the
bills to "Final" in your billing cycle.
- On
the create bill screen, select the bills you
would like to finalize.
- Click
on Print & Post to finalize your
bills.
- You
will be prompted with a list of the finalized
bills with options to send email and to include
a payment request.
- Click
on checkbox with the Pay Now request
icon for the bills you would like to send
an email with the payment request (embedded
URL).
- Click
on Proceed to continue.
- Emails
are sent to the draft folder or directly to
the client based on the email selection in
the Firm Settings
|
|
|
Use
the bill settings "Include APX Request for
Payment with email" to automatically include
a payment request when creating and emailing
bills.
|
| To
create a Pay Now request from the Billing module
|
- Select
the Billing module from the left navigation
pane in the BILLING view.
- Use
the filters on the left to get a list of invoices
you would like to send a Pay Now request
email.
- Select
one outstanding invoice (one without a payment)
or click on the checkbox to select multiple
invoices.
- Select
the add
 Pay Now payment request icon that becomes
available to generate the Pay Now request
email for each selected outstanding invoice
with an URL embedded in the email.
- Emails
are sent to the draft folder or directly to
the client based on the email selection in
the Firm Settings.
|
|
|
Pay
Now request uses the email address defined
on the file/matter Bill settings if this
was setup, otherwise it uses the primary email
address from the primary client on the file/matter.
|
| To
resend a Pay Now request |
- Select
the Billing module from the left navigation
pane in the BILLING view.
- Use
the filters on the left to get a list of invoices
with a Pay Now request.
- Select
an invoice or invoices (use the checkbox to
select multiple invoices) with a Pay Now
request.
- Select
Action > Resend Payment Request to
recreate and resend the email(s) with the
existing URL(s).
- Emails
are sent to the draft folder or directly to
the client based on the email selection in
the Firm Settings.
|
| A
Confirmation message displays. Click Yes
to confirm resending the Pay Now request
or No to return to the Billing module
without sending the Pay Now request. |
| To
delete a Pay Now request |
- Select
an invoice or invoices (use the checkbox to
select multiple invoices) with a Pay Now
request, the
 Delete icon becomes available.
- Select
the
 Delete
icon to delete the Payment Request(s). Delete
icon to delete the Payment Request(s).
- Click
Yes on the Confirmation message
to delete the select payment request.
|
| Receiving
a payment from a Pay Now request |
| When
a Pay Now request payment is successfully
completed by your client using the embedded link
from the email, the payment is automatically sent
to your client file in Amicus and a notification
email of the payment is sent to the responsible
lawyer on the file. |
| Viewing
a payment from a Pay Now request |
- Open
the client's file.
- Click
on Bills in the Billing view.
- Click
the '+' sign on the bill where the
payment was applied to list the payment record.
- Open
the payment record and perform void/refund
if necessary.
|
|
|
The
Pay Now link on the email is active for
90 days. After 90 days the link becomes invalid
and the client will be directed to contact the
firm for assistance. At this time, you will
be able to create a new Pay Now request
from the Billing module.
|
|
|
| |
| When
an APX Payment is accepted, but fails to clear
through the processor and a user selects VOID/REFUND,
APX will determine the status of the transaction.
If the transaciton is not voidable or refundable,
you will get a prompt to reverse the transaction
or cancel. |
|
|
An
APX transaction status is flagged as reversible
when the transaction fails to clear the
bank, or a client chargeback was lost by the
firm.
|
| The
transaction may not clear the bank for the following
examples: |
- The
card issuer does not recognize the payment
and is taking action to prevent the payment.
- The
cardholder may have insufficient funds.
|
|
|
| |
| The
APX Payment Method List report gives you
a listing of all the payment method groups by
client. |
| This
report allows the selection of a single client
or multiple clients. In addition, you have the
option to include or exclude expired payment methods. |
| The
APX Payment Method List report is available
to users with access to the Firm's Reports (users
with Amicus Admin access). |
| To
run the APX Payment Method List report: |
- From
the Office module on the ATTORNEY side,
select Firm Reports > People.
- Under
Advance Reports, select APX Payment
Method List.
- Click
on the client icon to select one or multiple
clients or leave it blank for all clients.
- Select
Yes or No to indicate if you
would like to include expired payment method.
- Click
on Run to generate the report.
|
 |
|
|
| |
| To
activate this option: |
- Go
to the Office module and click on Security
Profile.
- Select
the Billing Profile you would like
to edit.
- Click
on Billing > Action to display the
selection panel.
- Click
on Edit at the bottom right of the
screen.
- Click
on the checkbox beside Edit Time Entries
on Draft Bills.
- Click
on Save to save the changes,
|
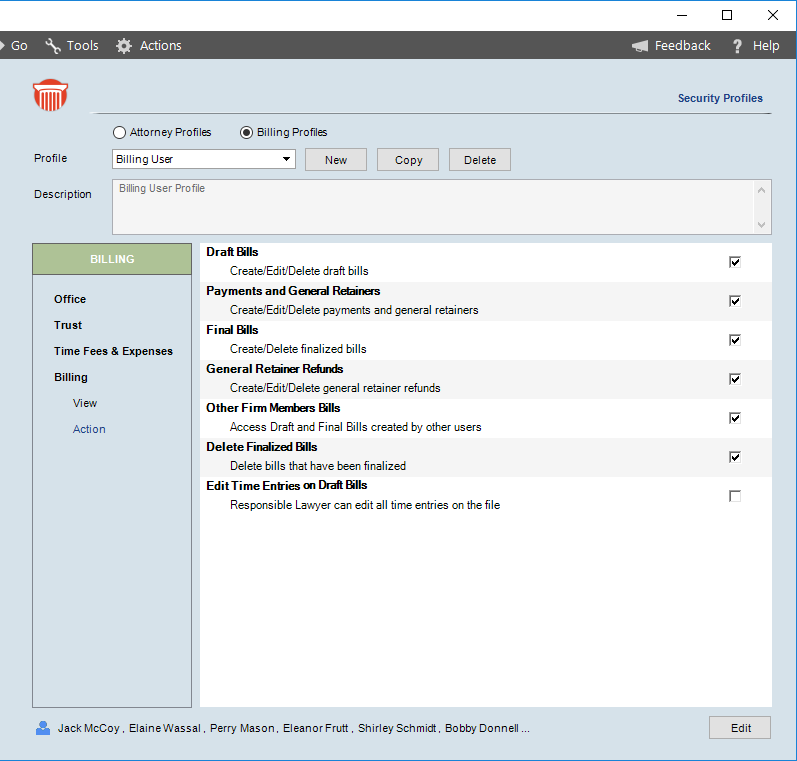 |
| A
user with this security profile can edit any time
entry on a file in Draft Bill when the user is
the responsible lawyer. |
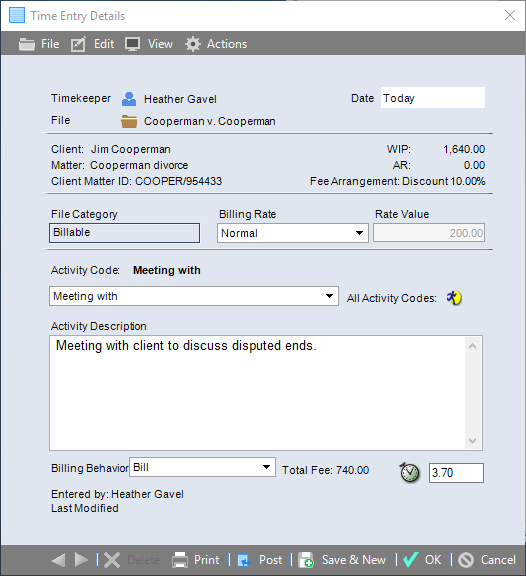 |
|
|
In the draft, a user is able to open the time
entry by double-clicking on the time entry from
the Fee tab or from the Print Preview
of the bill.
|
|
|
| |
|
The
UTBMS (Uniform Task Based Management
System) is a series of codes used to classify
legal services performed by a legal vendor in
an electronic invoice submission.
|
| The
list now includes codes from A112 to A128. |
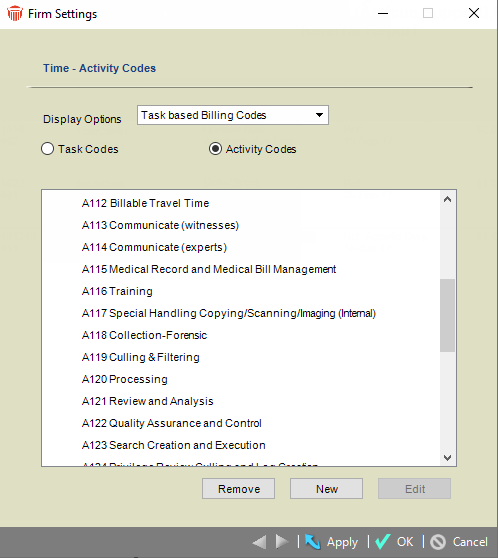 |
|
|
| |
| You
now have the ability to reprint bills after finalizing
the bills with the Print & Post. |
| To
reprint bill(s) |
- Go
to the Billing module and use the filters
in the left pane to display a list of bills
you would like to reprint.
- Use
the checkbox on the left of the displayed
list to select the bills you would like to
reprint.
|
 |
Click
the Print  icon in the taskbar to display the Output
dialog.
 |
 |
Select
the appropriate checkbox:
- Screen:
Displays the selected bills on the screen.
- Printer:
Sends the selected bills to the printer.
- Quick
Print: Uses the default printer without
prompting you to select a printer.
|
- Click
OK to reprint the bills.
- A
progress bar displays while the bills are
being printed.
|

|
The Reprint Bills feature will print/display
the original bill image saved when the bills
were finalized with the Print & Post
option. Bills without a bill image wil be skipped.
|
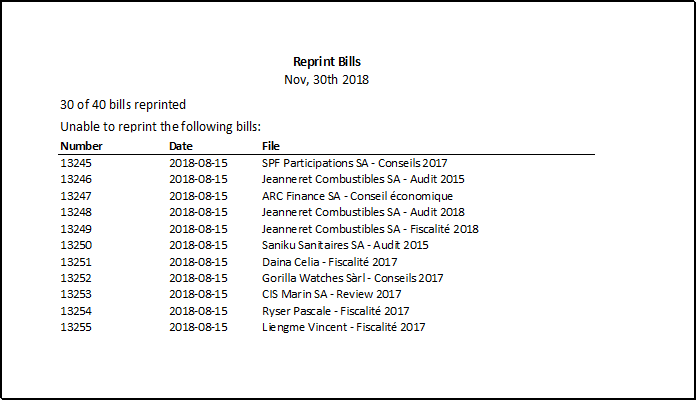 |
|
|
| - |
Referral
Report - [Billing] 
As referrals
are the leading way to get clients, the new Referral report
is handy to track how clients are being referred. |
| |
| To
access the Referral report, click on Firm
Reports in the control panel on the ATTORNEY
side and select BusinessPlanning from the
navigation bar. |
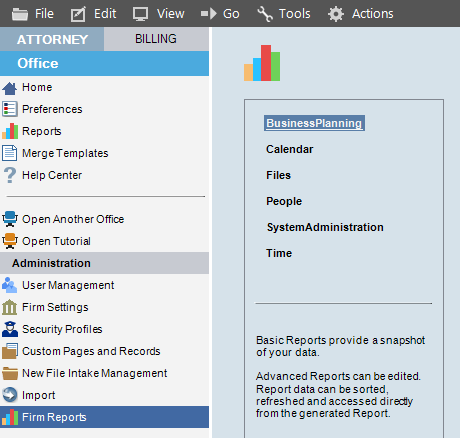 |
| Select
Referral Report from the list that appears
in the main screen to display a Referral Report
dialog. |
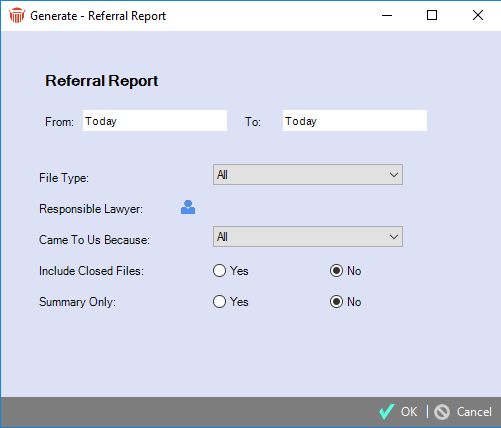 |
| Complete
the following optional fields to filter the parameters
of the report. |
- File
Open Date – Dates are auto-populated in
the From and To fields.
- File
Type
– Select a type from the pull-down
menu.
- Responsible
Lawyer
– Click on the person
 icon and select a person from the list.
- Came
To Us Because
– Select the source of your referral
from the pull-down menu.
- Include
Closed Files
– Check the appropriate radio button,
defaults to No.
- Summary
Only
– Click Yes to display the
summary only with no details, defaults to
No.
|
| A
report displays with Posted, Billed
and Paid fees. |
 |
|
|
| - |
Custom
Dashbaords [Admin] 
List Views
and Core Fields have been added to Custom pages.
The default preference can be set to automatically open a Custom
Page when the file is opened. |
| |
| People
on this File now act as links and are also
updated automatically if they are changed elsewhere
in Amicus Attorney for Representing, Represented
by and the Matter came to us Because
fields. |
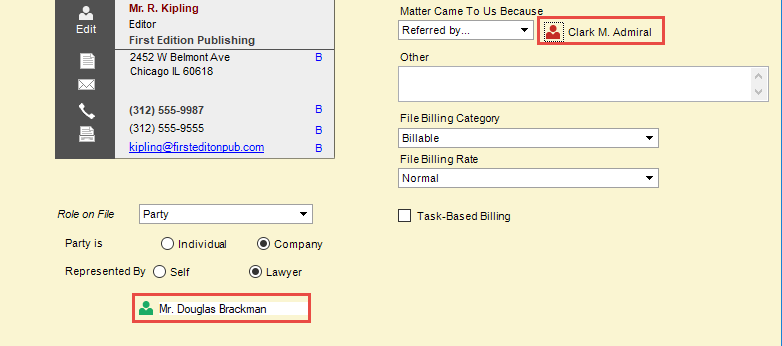 |
|
|
| |
| In
the left navigation pane select Calendar or
Tasks to display the corresponding filters. |
|
|
|
|
| - |
Date
Calculator 
Now, when
you select Tools > Date Calculator or the Show
Me the Date icon, the Date Calculator remains open
so you can do further calculations. |
| |
|
The
Date Calculator assists you in finding
a specific date that meets your criteria, or
in calculating the amount of time between two
given dates. For example, you may need to provide
supporting forms 30 business days after your
court date, you can use the Date Calculator
to find out the exact date.
|
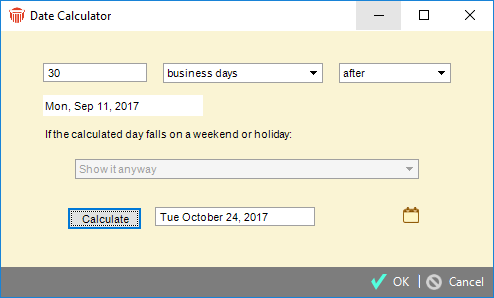 |
|
|
| - |
AbacusNext
Account Portal 
A new link
to the AbacusNext Account Portal now displays under the
Support tab in the Help Center. |
| |
| The
AbacusNext Account Portal allows users
to administer their account with the following
functionality: |
- Account
– Update Payment Information, Pay
and View Invoices, Update Company Information.
- Support
– Log Support Tickets, View Support
Tickets and History, Change the filter on
the list of existing tickets by status.
- Products
– View Products and APC (Amicus
Private Cloud) Server Details, Setup APC Client
Groups.
- Add/Update
Contacts
– Available for the Portal Manager
only (Portal Point of Contact (PPOC)).
|
| To
get started simply select AbacusNext Account
Portal under the Support tab or go
to https://portal.abacusnext.com
to display the following Sign-in window:
|
 |
| Enter
your Email and Password, then click
LOGIN. |
|
|
| You
can grant access in the Portal by selecting Contacts
> set the Role to one of: |
- Portal
Manager = Full Access.
- User
= Access to their own cases and profile,
products, able to view company information.
- Account
User = Access same as User, plus they
can see all Invoices, and Make a Payment.
- None
= no access to portal.
|
|
|
| |
|
Amicus
Attorney provides a Document Assembly
feature that enables you to assemble documents,
based on Document Merge Templates,utilizing
information from your Amicus database. In addition,
Amicus Attorney provides an E-mail Merge
feature that enables you to generate e-mail
messages based on E-mail Merge Templates.
|
|
Each
Amicus Merge Template references a word
processor template that generally contains both
unchanging text and Merge Variables.
These Variables are placeholders for the text
that is automatically supplied from various
Amicus records such as Files, People,
Calendar, and Time Entry when
you assemble a particular document or e-mail.
Amicus Attorney comes with several Merge Templates
for a variety of purposes—you can use them as
they are, edit them, or create your own Templates.

|
|
|
| - |
Amicus
Anywhere 
The Amicus
Anywhere calendar now has Week and Month views. |
| |
|
Resetting
the Client Portal password
|
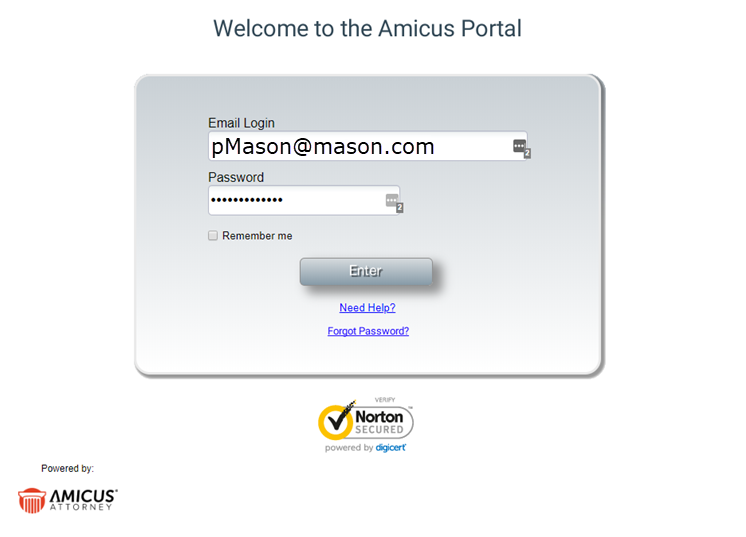 |
| If
a client forgets their Client Portal password
they can reset it by clicking the Forgot Password?
link and entering their Email Login
in the dialog that displays. After selecting Submit
a password reset email is sent to their inbox.
|
- The
client can click on the URL provided
in the email and enter a new Password.
|
| Opting
in/out of Email Notifications in the Client Portal
|
| Clients
invited to the Client Portal can now opt in/out
of email notifications as items are shared by
the firm. |
| From
the Home window of the Client Portal select
Options to display the My Profile
dialog. |
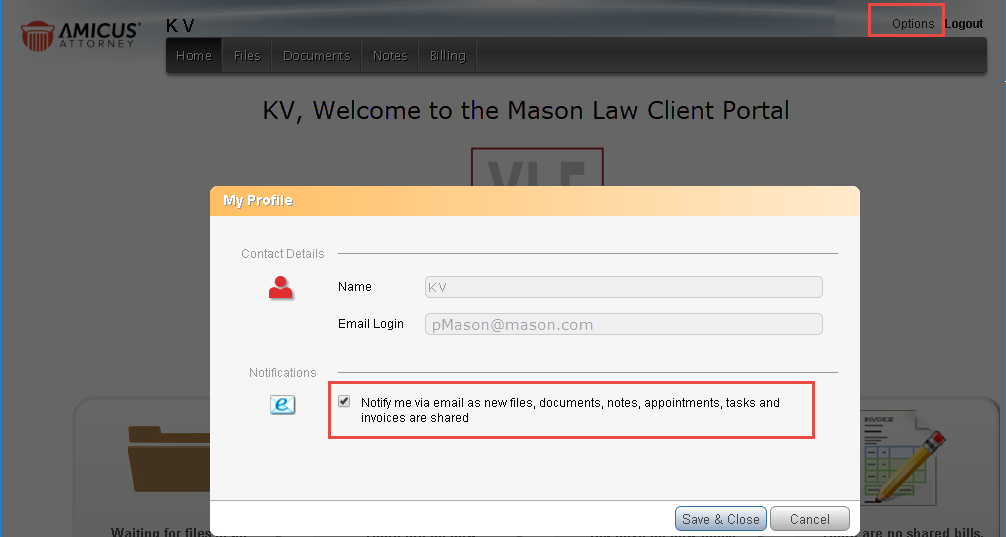 |
| Select
the checkbox under Notifications to be
notified via email as new files, documents, notes,
appointments, tasks and invoices are shared or
deselect the checkbox to opt out of being notified. |
|
|
| |
| All
or some of the Custom Fields on the Custom
Pages for each File Type can be made
shareable. |
| In
the Custom Page views, asterisks mark the
Custom Fields that are shared. |
 |
| Clicking
the Portal icon at the top of any Custom
Page view displays the Portal Custom Fields
dialog that lists all custom fields available
for sharing with clients on the matter File who
have been granted Portal access. |
 |
| When
the File is shared, clients with Portal access
to it will be able to see and edit these shared
Custom Fields—in the two-column More
view of File Details in the Portal. |
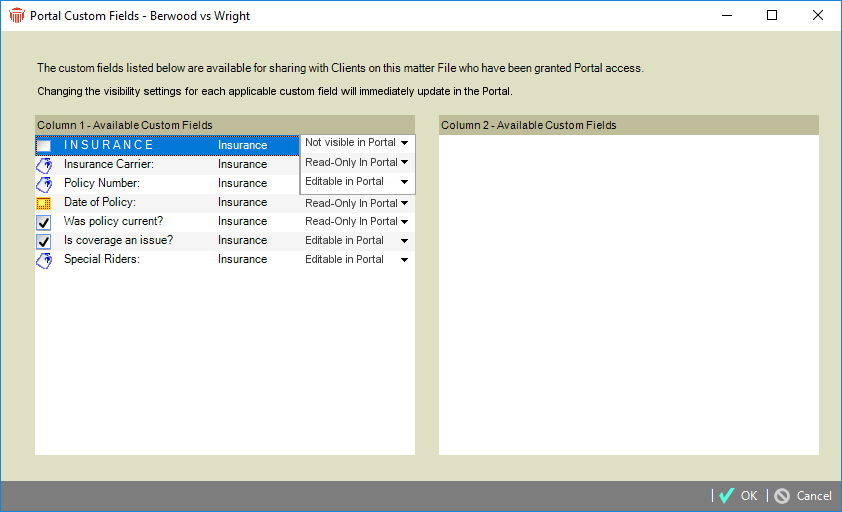 |
|
To
change the visibility settings select another
option from the pull-down menu on the right-hand
side of the Available Custom Fields column.
- Not
visible in Portal
- Read-Only
in Portal
- Editable
in Portal
|
|
|
Lookup
and Graphic type Custom fields are not editable
by clients.
|
|
|
Amicus
Attorney 20.3 - January, 2019
We
are happy to announce the release of Amicus Attorney 20.3. There
has been quite a lot of exciting changes since our last update.
This update has a number of database enhancements to improve performance
and other features as requested by our users. Please keep your suggestions
coming, by going to the Help Center, clicking Suggestions/Feedback
under the Contact Us tab or click the Feedback
icon to the left of the Help in the Amicus Menu Bar.
| - |
User
Preferences 
Amicus Administrators
can now change most User Preferences for other firm members. |
| |
| Firm
members have always been able to update their
own preferences, but we have now added a feature
that lets Amicus Administrators make changes for
all firm members. This is ideal for enterprise
and small firms alike as it allows for easier
setup of new firm members. In the past, Administrators
were limited to just changing User Billing
Rates. Now Administrators can do so much more.
|
|
To
change a User Preferences access the
Modify User Preferences window.
|
| Go
to User Management under Administration
in the left navigation pane to see a list of users
for your firm. |
| Right-click
on a user and select Open User Preferences
from the pop-up menu that appears to go straight
to the Modify User Preferences window.
|
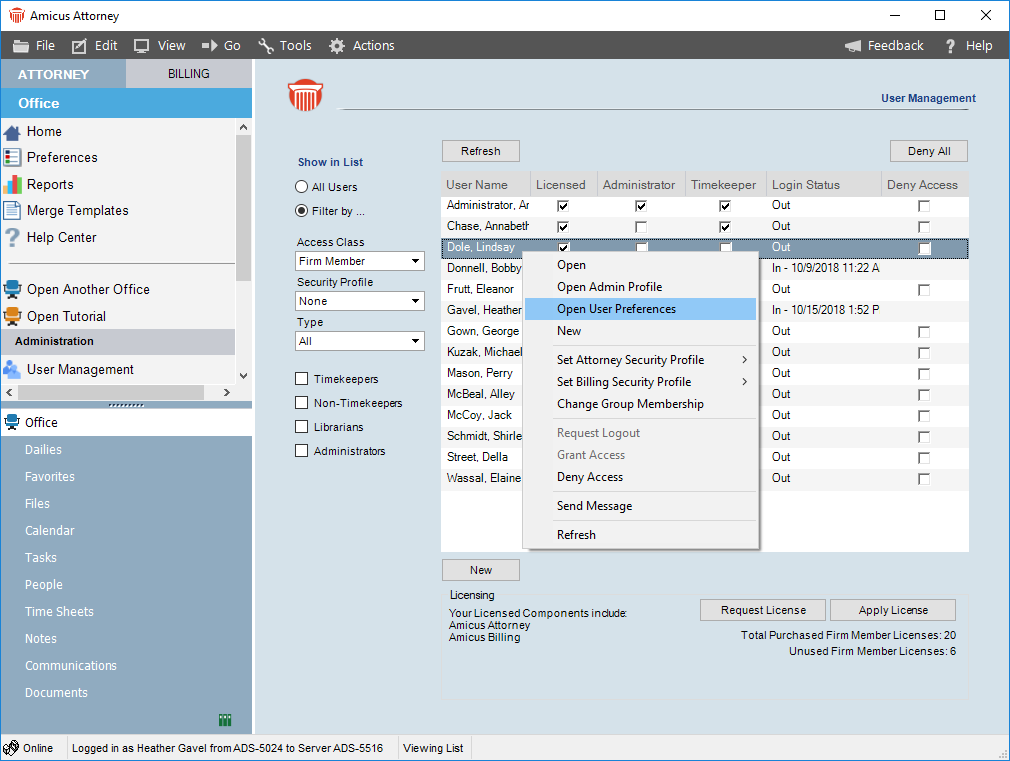 |
|
You
can also select Open from the
pop-up window, or click on a name to open the
Edit - Profile dialog, then click Admin
to open the Administration Profile, select
User Preferences from the left-hand
navigation pane and click Modify User Preferences
on the main screen.
The
Administration Profile can also be opened
by selecting Open Admin Profile in the
pop-up window.
|
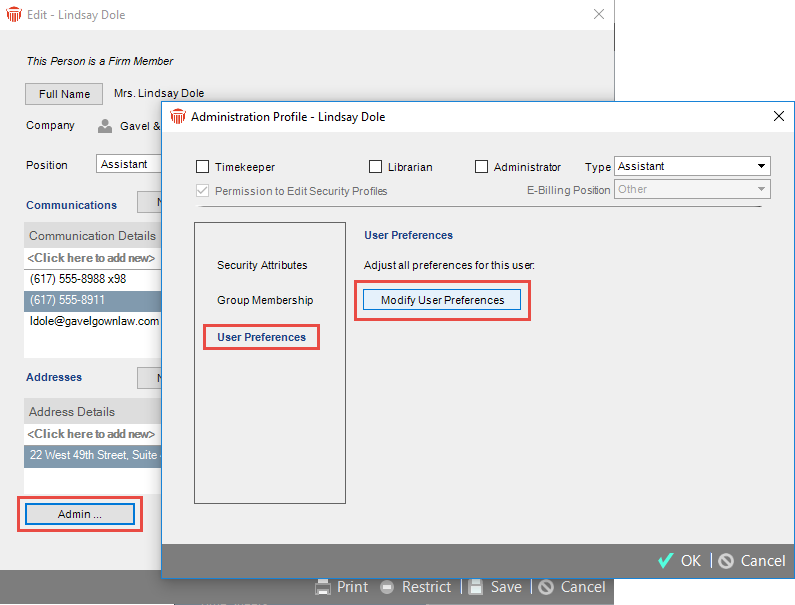 |
| The
Modify User Preferences window displays. |
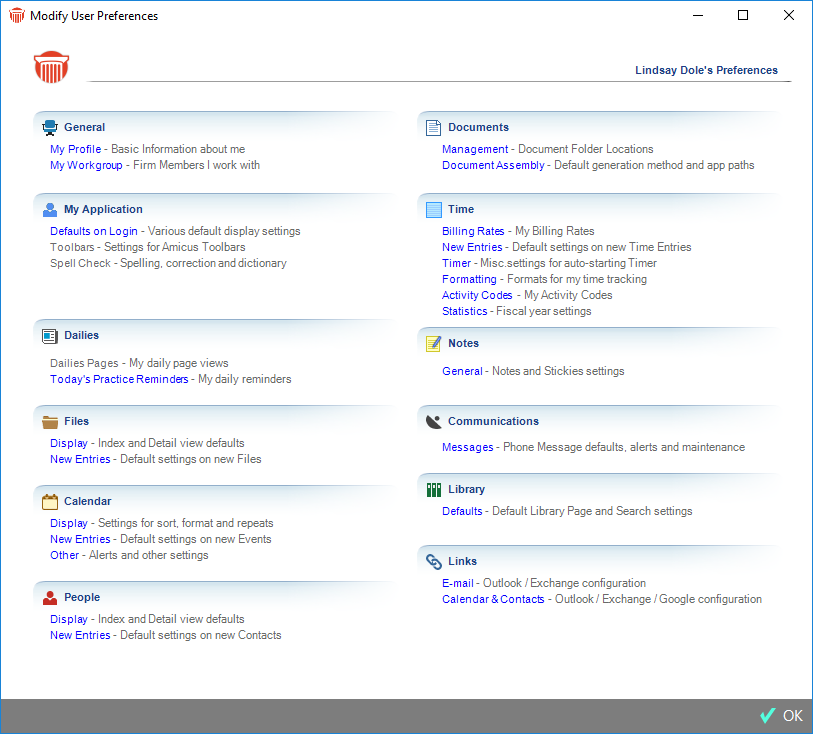 |
| An
Amicus Admistrator can modify User Preferences
for all firm members, except for the preferences
under My Application and Dailies tabs.
Administrators can even setup Calendar,
Email and Contact link options, aside from
the actual initialization that still needs to
be done from the firm member's workstation. |
|
|
| - |
Email
Improvements 
A completely
refactored Outlook link allows for more seamless integration. |
| |
|
The
updated integration includes dozens of performance
improvements and optimizations based on feedback
from users. Outlook is indispensable in today's
law offices and the integration with Amicus
Attorney is now more responsive than ever as
a result of the refactoring.
|
| There
is now a setting to honour Outlook settings such
as requests to send a Read and Delivery
Receipt notifications. You can set a preference
in Outlook to be notified when recipients receive
and open your emails. Amicus Attorney can now
honor these settings. This can be enabled by individual
firm members as a part of the email link setup. |
| Go
to Preferences and click on E-mail under
the Links tab to display the Outlook
/ Exchange E-mail Link window. |
 |
| Click
Step 1 to display the Outlook E-mail
Link window with the new Delivery &
Read Receipt section at the bottom of the
Email - Basics page. |
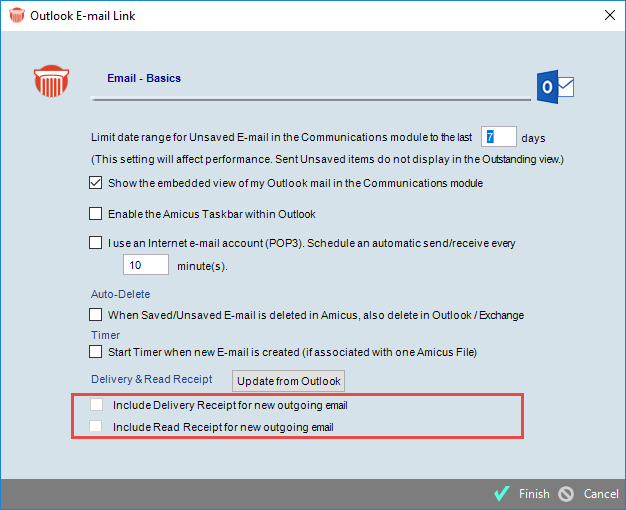 |
| Click
the Update from Outlook option to import
your Outlook settings. The checkboxes then reflect
the status and all outgoing email messages will
then observe the settings, Click Finish in
the footer to complete the process. |
|
|
| - |
Outlook
Embedded View 
With this
update you will notice a much improved Tree View in the
left pane of the Embedded Outlook view. |
| |
|
As
part of the email integration you can enable
the Embedded Outlook view right in your
Communications module. This lets you
see exactly what is going on in Outlook without
ever having to leave Amicus Attorney. The larger
Tree View takes advantage of all of your
screen real estate so you can see more at a
glance. We have also improved the filtering
so only email-related folders are visible.
|
 |
|
|
| - |
Document
Assembly 
Greater granularity
has been added with significantly more People on File
variables. |
| |
|
Now
you are able to enter a vendor and select a
billing behavior for client expenses. Entering
the vendor in the To field on the Client
Expense Details dialog allows your client
to know to whom the payment was made, along
with what the expense was for based on the Description.
|
| Billing
Behavior on the Client Expense Details
dialog allows you to track non-billable client's
expenses. The Billing Behavior selections
are the same as what is currently available on
the Time Entry dialog. |
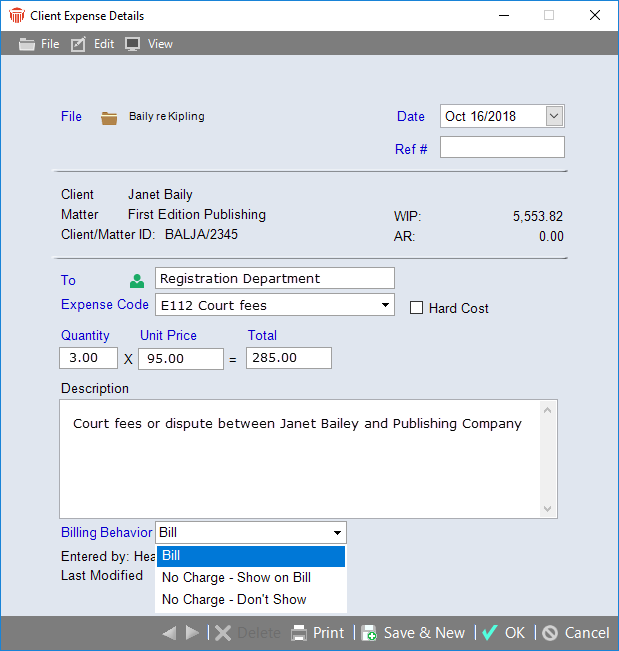 |
| A
To field and a Billing Behavior field
with a drop-down menu now display on the Client
Expense dialog. |
| •
Enter the vendor in the To field. |
| •
Select a Billing Behavior from the drop-down
menu. The options are Bill (default), No
Charge - Show on Bill and No Charge - Don't
Show |
|
|
| |
|
You
now have the capability to turn on Amicus
Billing at your convenience.
|
| When
you upgrade your Amicus license to include
Billing, you can continue to integrate
with your current billing system. You may want
to complete your current billing cycle before
activating Amicus Billing. |
| When
you are ready to make the transition from your
prior billing system to Amicus Billing go
to your Firm Settings and select Accounting
to activate the Billing wizard. |
| The
Billing wizard takes you through a series of simple
steps to prepare your database for Amicus Billing. |
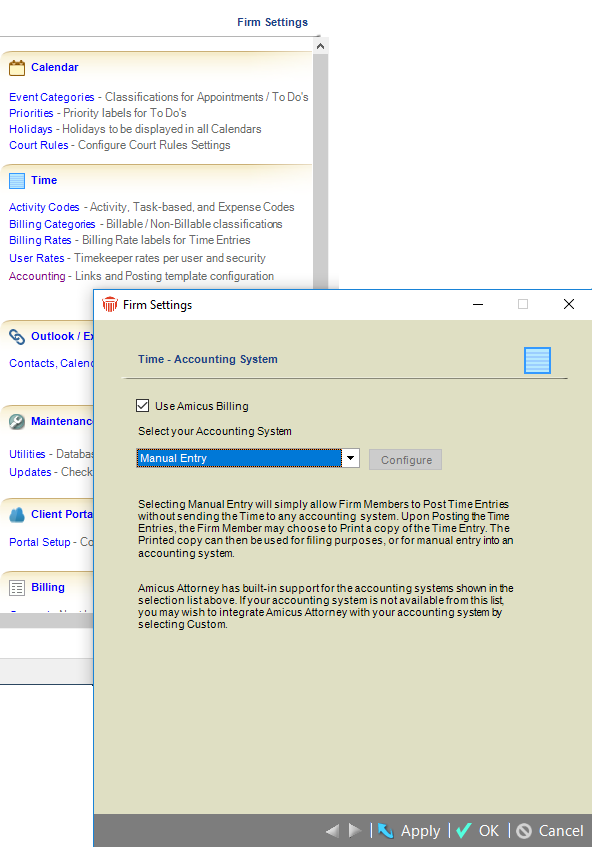 |
| A
Use Amicus Billing checkbox has been added
to the Time - Accounting System dialog. |
| •
When unchecked the Billing wizard will
not run automatically when a Billing license
is applied for the first time. |
| –
Your integration selection with other third party
billing software remains active. |
| •
If checked the Select your Accounting System
dropdown list consists only of Manual Entry
and QuickBooks. |
|
|
| |
|
Time/Fees
and Expenses captured by other supplemental
software such as "Equitrac Print Management"
Software can be imported into Amicus and updated
to the appropriate file.
|
| Access
to importing of Time/Fees and Expenses are available
on both the ATTORNEY and BILLING views of the
Office module. |
| You
can control access to importing Time/Fees
and Expenses in the Billing Security
profile. |
| Select
Actions in the main menu bar to display
a drop-down list, click Import and select
either Time/Fees or Expenses from
the pop-up window that appears. |
 |
| If
you select Expenses the Import - Expenses
dialog displays: |
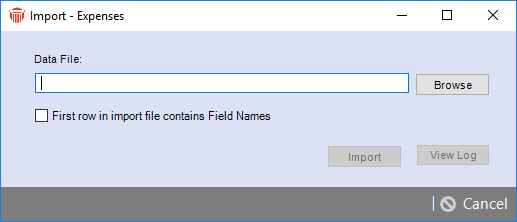 |
| If
you select Import - Time/Fees the Import
- Time and Fees dialog displays: |
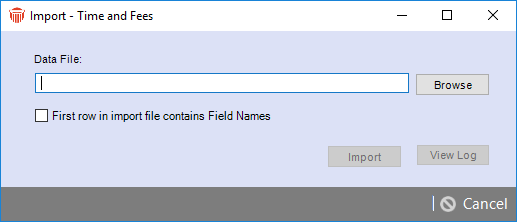 |
| Check
the First row in import file contains Field
Names if the first row of the CSV contains
a header. |
| Enter
the path and name of the CSV file you would like
to import into the Data File field or click
Browse to browse to the location of the
CSV file. |
| Select
Import to start importing the Time/Fees
or Expenses into Amicus. |
| Use
the View Log button to view the results
of the import. |
| Records
that are unable to be imported are listed in the
log an saved in a separate file (Failed_Import.CSV).
You can make corrections as needed and re-import
these records. |
| Standard
import profiles are shipped for Time/Fees
and Expenses. However, you can configure
your own Profile to fit your needs (see the
Billing Administrator Help). |
| Here
is a list of the acceptable Amicus fields |
|
Time
and Fees
- Date
*
- Client
ID *
- Matter
ID *
- Short
Filename
- Duration
- Amount
*
- Description
- Lawyers
Initials *
- UTBMS
Task Code
- UTBMS
Activity Code
|
Expenses
- Date
*
- Client
ID *
- Matter
ID *
- Short
Filename
- Quantity
- Unit
Amount
- Amount
- Description
- Tax
1
- Tax
2
|
| *
Mandatory Fields, all others are optional |
|
|
Note:
UTBMS Task and Activity codes are required
on all time entries for Task Based Billing. If
the file is UTBMS enabled, then both the Task
code and UTBMS activity code should be on the
import record for these files. Otherwise the record
is treated as an exception and "Task Base Billing
- Missing Task/Activity codes" displays when a
user selects "View Log". |
|
|
| |
|
The
Transfers tab on the Create Bills
dialog now includes an APX - Credit Card
/ ACH section. Here you can Add an
APX payment or select from the drop-down menus
if the APX payment is already on file.
|
| APX
payments are allowed on single, consolidated and
split billing. |
| Creating
a bill and applying a payment allows for greater
efficiency. Below is an example of a Consolidated
bill with an APX payment applied. |
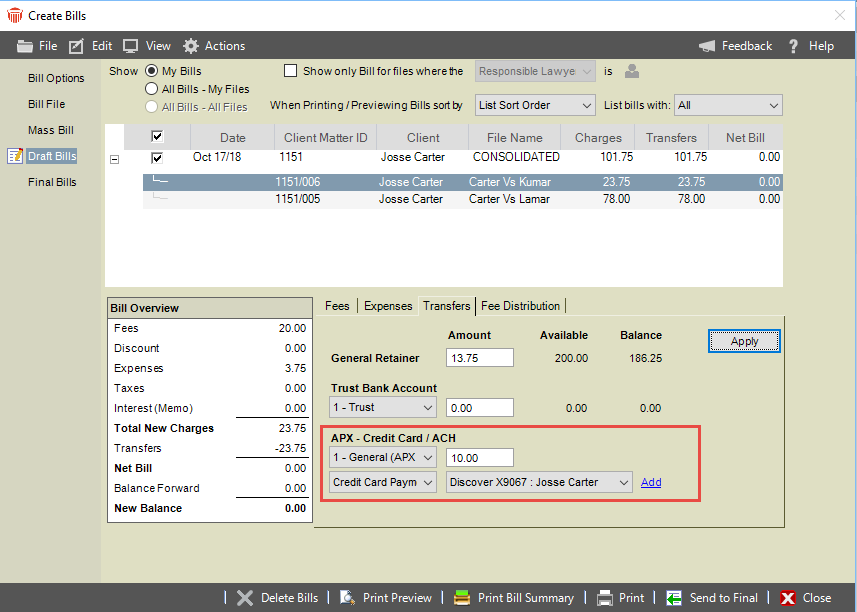 |
|
|
| - |
APX
- Bill Summary Report 
The Bill
Summary report has been updated to include the APX payment
option in the Payment amount field. |
| |
|
The
Billing Summary report provides you with
a summary list of the bills you currently have
in draft or final.
|
| We
have updated this report to include APX payments
in the CurrentTransfers and Payments
fields. This allows you to see the APX payment
in the Payments column. |
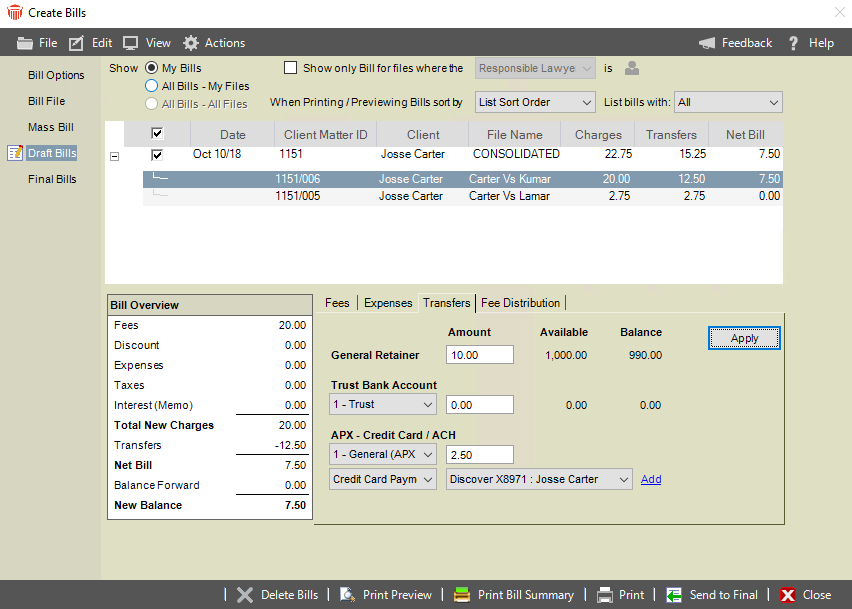 |
| Below
is a Bill Summary report combining the
above APX payment with a General Retainer
payment in the Payments column. |
 |
|
|
Amicus
Attorney 20.2.0.0 - May 10, 2018
With this release
we are bringing you some great new feature and a new App listed
in the App Store & Google Play to provide you
with the convenience to use Amicus Attorney from ANY device ANYWHERE!
| |
 |
You
will be able to download the App from the App
Store for iOS devices or from Google Play for
Android.
With
the Mobile App you will always have easy access
to your Client Files and to view and manage
phone calls, time entries and notes. The app
also helps to make sure nothing slips through
the cracks with friendly prompts to help you
record the details of your calls and to make
sure you remember to do time entries for your
calls and email. You can even work offline when
you aren’t connected to the internet with automatic
synchronization when you reconnect.
|
 To
enable the app you must be licensed for Amicus
Anywhere. Enter your existing credentials. To
enable the app you must be licensed for Amicus
Anywhere. Enter your existing credentials.
|
 |
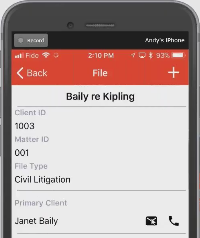 |
We
will now take you through a quick walkthrough
to introduce some of the features of the Amicus
Attorney Mobile App.
A
Recent Files link displays on your main
Navigation screen. Click this link to view a
list of files that you have been working on.
You
can open any of these files and see basic details
about the matter from the palm of your hand.
You will also be able to see the Primary
Contact and any other contacts on the file.
Beside
each contact are icons to easily place a phone
call or send them an email.
|
| You
can also drill down by clicking on the contact’s
name to see all of their phone numbers and email
addresses. |
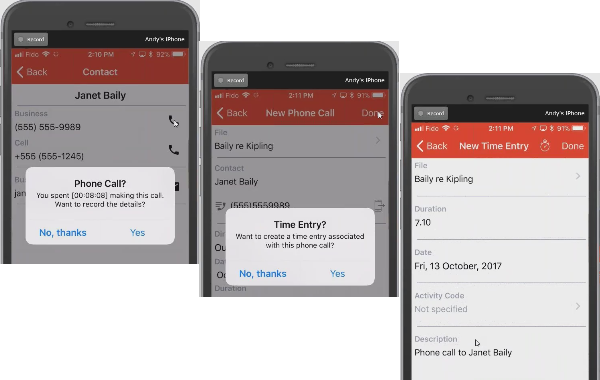 |
We
have added some helpful prompts to make sure
you record the details of all your calls. After
you make a call to a contact on a file you receive
a prompt with the amount of time you spent making
the call.
If
you would like to record the details.
Click
Yes and a phone call record appears with
the relevant details already filled in. Make
whatever edits you like, then click Done
at the top. You will then see a further prompt
asking you if you would like to create a time
entry associated with the phone call?
Click
Yes to display a New Time Entry screen.
The Duration and Description fields
are filled out with information from the prior
screen.
Make
edits to the fields or add an Activity
or Task Code if you wish. Click Done
to record the Time Entry.
|
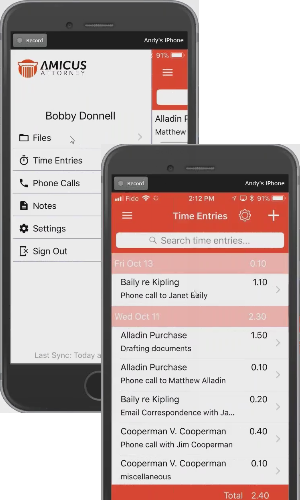 |
If
you go back in the Navigation and select Time
Entries the new time entry you recorded
displays at the top.
You can use filters to display only Time
Entries within a certain criteria such as
Date, Posted and Unposted Entries. The list
includes any recent time entries whether they
were created on your phone or back in Amicus
Attorney.
Click
the Notes option to add notes to a file
so that they are accessible to other Firm Members
in the future. The Notes module on your
device lists any recent notes based on the filters
you have selected.
This
is also true for the Phone Calls module
where you can see any of your incoming or outgoing
Phone Calls based on the filters you
select. The newly created Phone Call
would appear at the top of the list, but you
will also see any of your recent phone calls.
|
 |
To
learn more about the Amicus Attorney Mobile
App click the new link under the Documentation
heading in the Amicus Help Center.
Selecting
Office > Help Center in the navigation
list displays the Help Center view.
|
|
|
| - |
Email

We have updated
the look and feel, as well as the functionality of our email
within Amicus Attorney. |
| |
|
|
Dynamic
resizing allows you to use the entire screen’s
real estate.
A
collapsible More… link has been added
to expand the email and see more details.
|
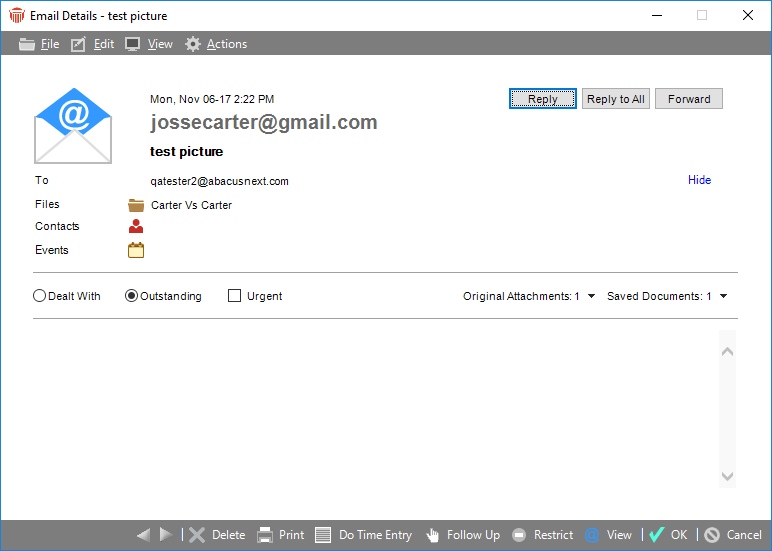 |
An
Events option has been added to the expanded
email allowing you to easily link events to
your emails.
The More… link changes to Hide when
the details of the email are expanded.
The
More…/Hide state is remembered between
sessions.
|
|
|
| - |
Client
Portal Billing Module 
A Billing
module has been added to the Client Portal, which is easily
accessible from the Home Page of the Client Portal. |
| |
|
The
introduction of the Billing module in
the Client Portal makes payments easier for
your clients.
 This
feature is only available to firms who have
access to Amicus Billing. This
feature is only available to firms who have
access to Amicus Billing.
The
Billing tile displays how many invoices
are outstanding. This means it will be the first
thing that your clients see upon logging into
the Client Portal. The new Billing module
is also accessible from the menu bar.
|
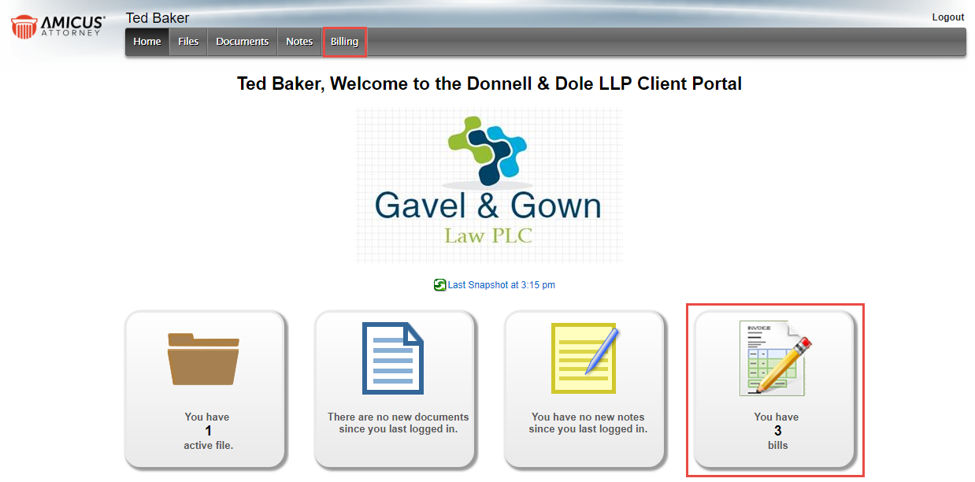 |
|
You
can share both paid and unpaid invoices with
your clients. Each shared invoice will display
an Invoice Number, Date and the
Total amount billed per invoice. The amount
is net of write up/down and includes fees, expenses,
taxes, and interest (if posted as AR).
Payments
will list the Date, Payer (Received
from), and the Account.
Your
clients can view and pay invoices directly in
the Client Portal via credit card and ACH.
APX
for Credit card, as well as E-Checks or ACH
payment processing is a payment solution that
uses a single platform to process Credit Card
and ACH payments within Amicus Billing so you
get paid quickly.
Mousing
over the Billing tile changes the text to “Show
me my bills”. |
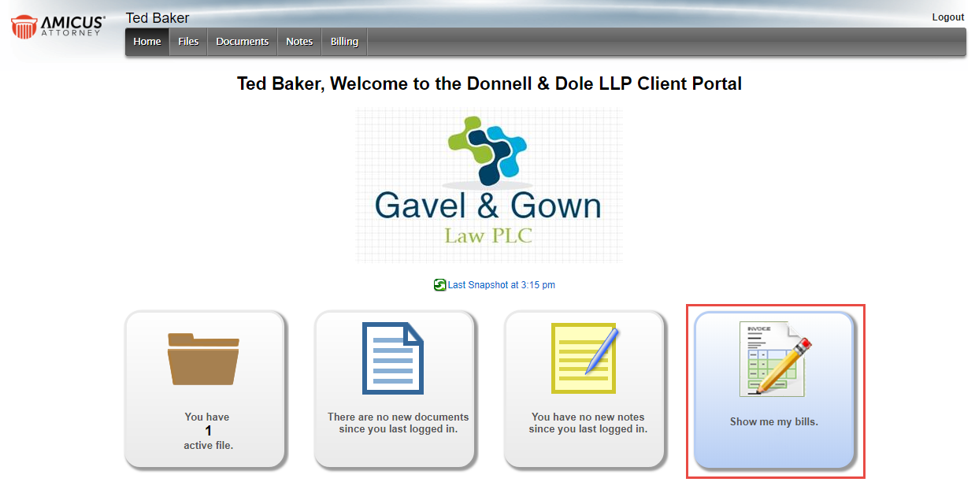 |
| To
opent the Client Portal Billing module
and view all shared files, click on the Bills
tile or the Billing option on the menu
bar. |
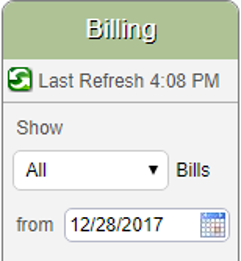 |
The
list of invoices displayed in the Billing
module can be filtered using the controls in
the left pane.
You
can choose to Show All, Outstanding
or just the Paid invoices.
The
“from” field defaults to the start for the current
month, but you may use the calendar controls
to change this date.
Invoices
are sorted by date starting with the more recent
invoice. There is no “To” option as the current
date is always used when displaying the invoice
list.
|
 |
| Clicking
on a tab at the top of Billing module performs
one of the following actions: |
 |
Opens
the selected file and defaults to the “Document”
selection of the “File Details” screen. This tab
is disabled when an invoice is not selected. |
 |
Opens
a PDF of the selected bill. This tab is disabled
when an invoice is not selected. |
 |
Displays
the invoice history including the billed amount
and payments. This tab is disabled when an invoice
is not selected. |
 |
Displays
the invoice payments when a row has been selected.
When an invoice has not been selected a dialog
displays with a list of all payments of shared
invoices. |
 |
Enabled
only when the firm is APX enabled. This
option allows your client(s) to take advantage
of APX services.
Client(s)
can make payments by clicking on this tab and
adding a Payment method even if there is no
invoice to be paid. Void or Refund must be done
at the firm level.
Overpaying
a bill or entering a negative amount is not
permissible. Partial payments or choosing to
pay multiple bills at the same time is acceptable.
|
 Note:
The defaults in the Billing-side of Amicus
Attorney control the payment allocation and the
firm settings of “Payment Hierarchy.” Note:
The defaults in the Billing-side of Amicus
Attorney control the payment allocation and the
firm settings of “Payment Hierarchy.” |
| You
are notified after a client makes a payment in
the Client Portal. Open a matter and go to
Admin > General in Amicus-ATTORNEY or BILLING
to select a distribution option. You can choose
to have an email sent Nightly or Immediately to
the Responsible Lawyer or to assigned Firm Members. |
| In
addition to the email notification, a sticky note
is sent to the Responsible Lawyer. |
| After
you receive notification that a payment has been
made to the Client Portal you may want to get
a report on the payment along with other portal
activities by going to Office > Reports
> Client Portal. |
| Select
My New Client Portal Changes – Date Range
to display a dialog box. Use the calendar controls
to select a Start Date and use the current
date for the End Date. A report displays
that includes bill payments made in the Client
Portal for the selected date range. |
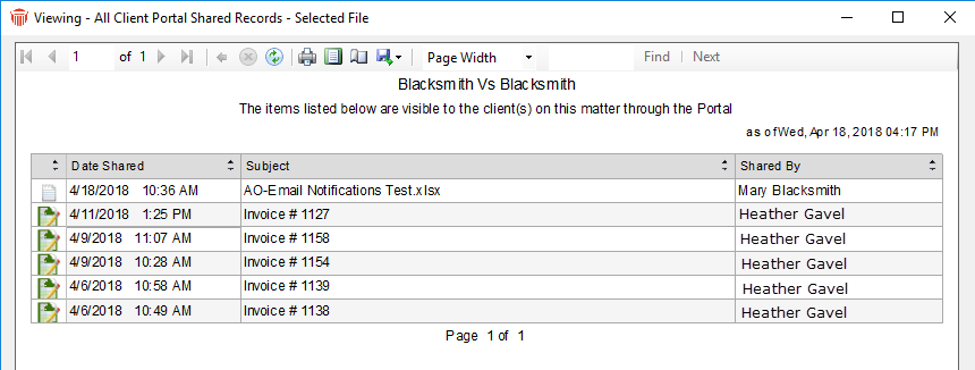 |
| When
a payment is applied to multiple invoices, the
displayed payment amount shows the amount applied
to each invoice. |
| In
the File Index you can also click View
Recent Client Portal Activity to run the report
My New Client Portal Changes – Date Range
for today’s date. |
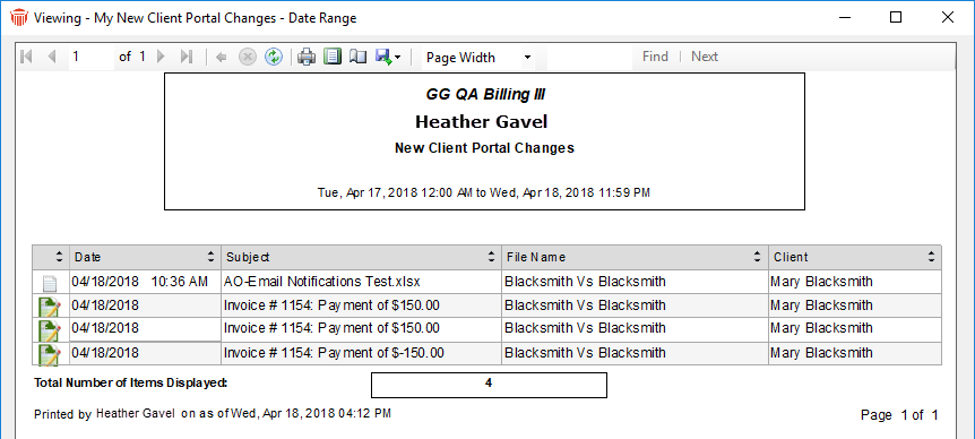 |
|
|
| - |
UpVote

The UpVote
feature makes it easy for you to submit suggestions, discuss
the suggestions and vote on suggestions from other users. |
| |
|
The
Amicus
menu bar at the top of windows provides access
to the tasks, features, and tools appropriate
for that window. To the left of the Help is
a new Feedback
option.
|
 |
| Clicking
on
Feedback opens the Feature UpVote page.
Post suggestions that other users can vote on.
Review recent suggestions and add your vote to
features that you would like to see implemented
in future releases of Amicus Attorney. |
| The
Feature
UpVote page can also be accessed by clicking
Suggestions/Feedback under the Contact
Us tab in the Help Center. |
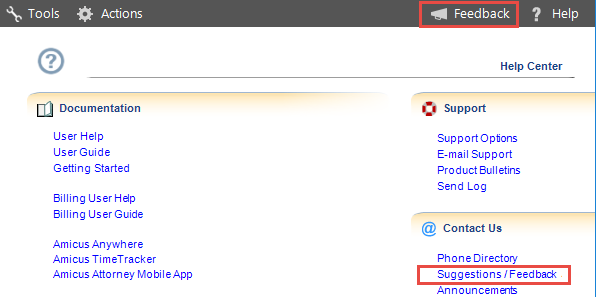 |
| Customer
feedback is important to us as we want to know
what we do well, as well as how we can improve
your experience with Amicus Attorney by focusing
on the features you need. |
|
|
| |
| The
broadcast message may include notices about upcoming
training sessions, new product updates or other
notifications. |
|
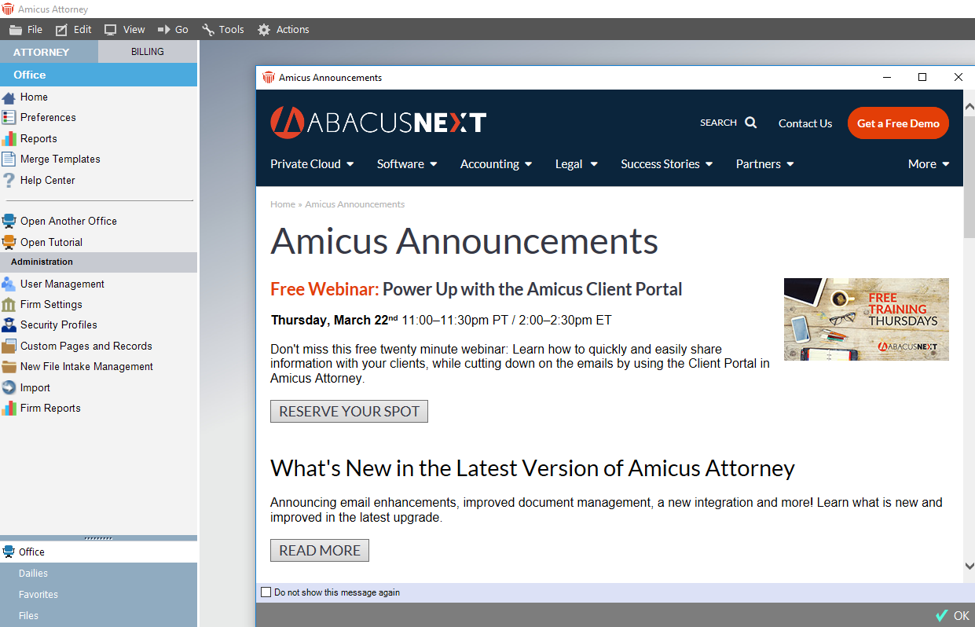
|
|
|
| |
|
Task/Activity
Codes with Uniform Task-Based Management
System (UTBMS) codes on precedent items ensures
that the proper Task/Activity Codes are
always selected.
|
| The
codes are passed to the resulting Time
Entry ensuring that the correct code is being
used regardless of which Firm Member is assigned
to a resulting event. This also makes it easier
to find the corresponding billing code when creating
a Time Entry. |
| The
Task/Activity Codes option is only shown in
the Event Details window when an existing
precedent is being edited. |
 Task/Activity Codes cannot be pre-defined
when an event is created manually from a Task
list or Calendar.
 |
| Editing
an Existing Precedent to define task-based billing
codes |
|
To
modify an existing precedent, open a file and
select an item under Events in the left
navigation pane.
|
 |
|
Select
Use Precedent or Actions > Precedent
> Use from the menu bar to display all
existing precedents.
|
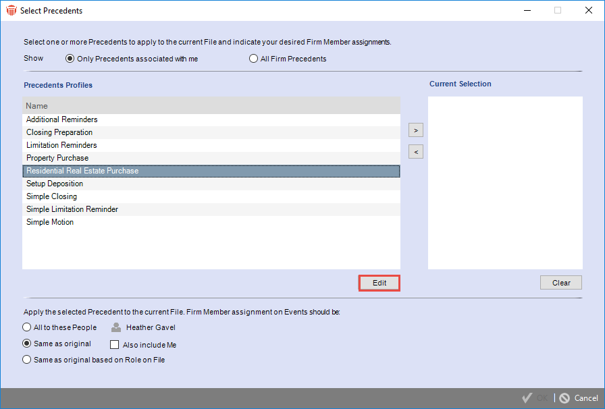 |
|
Select
a precedent, then click Edit to display
the Precedent Profile dialog, then double-click
on an item to display the Event Details
window.
|
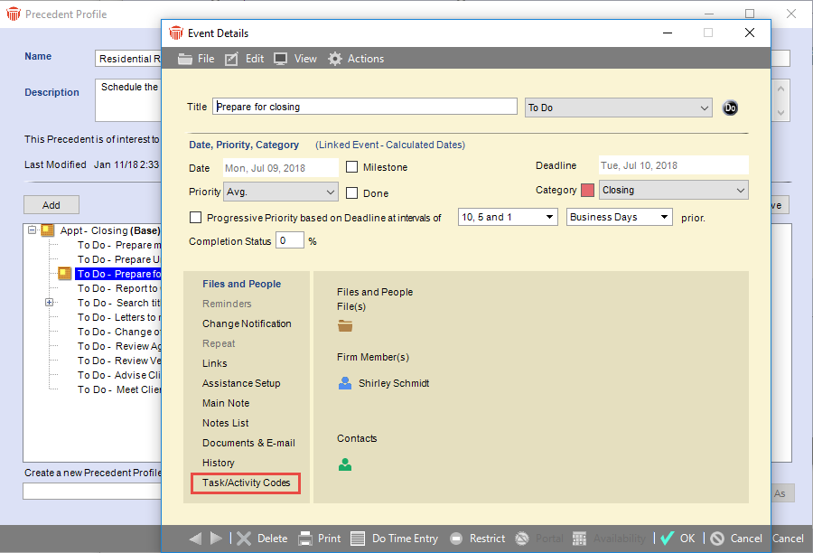 |
-
The new Task/Activity Codes option
displays at the bottom of the list in the
left-hand column.
|
| Viewing
Events created from a precedent without preset
Task/Activity Codes |
|
In
the Event Details screen, click on the
Task/Activity Codes option in the left
pane to populate the right pane with a Preselect
Task-Based Billing Codes for Time Entry
dialog:
|
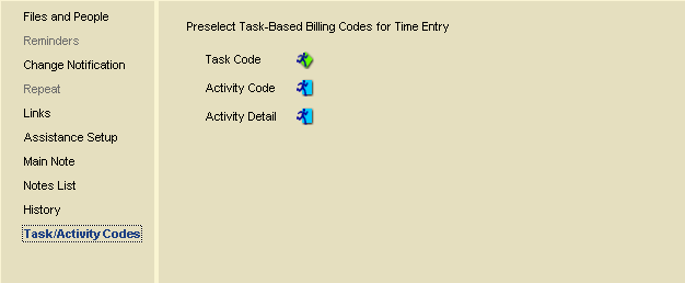 |
|
Click
on the icon beside Task Code to display
the Select Task-Based Billing Task Codes
dialog. The Codes display in a tree folder
in the left-hand column. Expand a folder by
Clicking the + (plus symbol) or double-clicking
a parent folder. Click the – (minus symbol)
to collapse a folder.
|
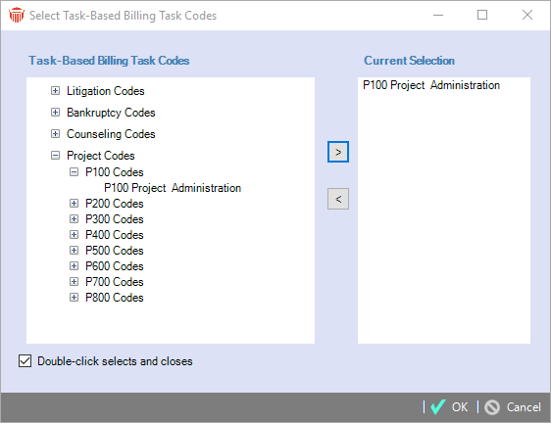 |
- Double-click
on an item or select it and click the right
arrow to move it to the Current Selection
window. Click OK to return to the Event
Details screen.
|
|
Follow
the same procedure to select an Activity
Code and Activity Detail.
|
 Note:
Since both the Task and Activity Code values
need to be sent to the resultant Time Entry,
they need to be preselected together on the
Event Details window. Note:
Since both the Task and Activity Code values
need to be sent to the resultant Time Entry,
they need to be preselected together on the
Event Details window. |
| As
the Activity Detail is optional you can
save without selecting a code for this field. |
|
After
the Task-Based Billing Codes have been
selected the Event Details screen displays
with the selected codes beside their icons.
|
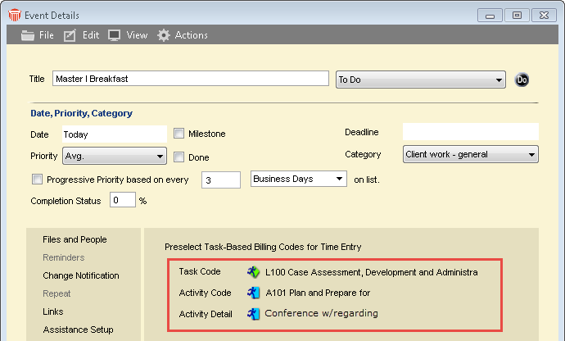 |
| Creating
a Time Entry |
| Clicking
Do Time Entry in the footer of the Events
Details window displays the Time Entry
Details dialog.where selected values are automatically
passed to the Time Entry created from the
event. |
|
Event with Task-Based Billing Codes |
Prefilled Details passed to Time Entry |
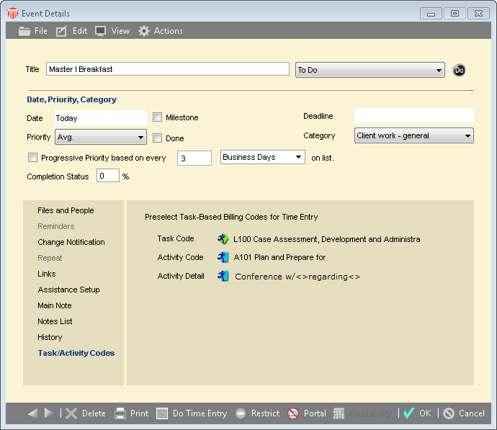 |
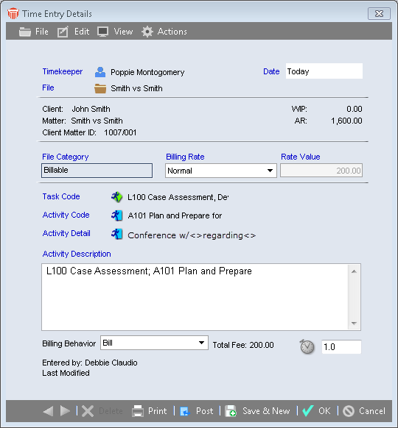 |
- Firm
Members can further modify the fields in the
Time Entry dialog including the Task Code,
Activity Code and Activity Detail.
|
| Using
Time Entry Assistant |
| The
Time Entry Assistant helps make sure that
time entries are created for all billable actions
by passing predefined Task and Activity
Codes to Time Entries. |
|
Select
Tools > Time Entry Assistant to launch
the Time Entry Assistant.
|
 |
|
Select
an item from the window and click Do Time
Entry to display the Time Entry Details
dialog.
|
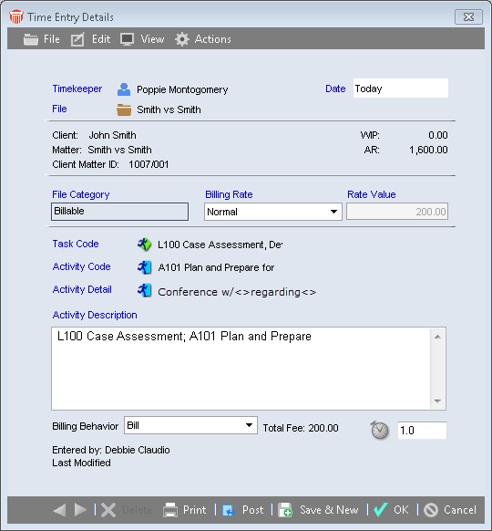 |
- The
Task Code, Activity Code and optionally
the Activity Detail are preset based
on the settings defined in the Event Details
window. Make any further changes as necessary.
|
|
Click
OK to create the corresponding Time Entry.
|
| Using
Time Saver |
| Time
Saver speeds up the creation of Time Entries
by silently using the default settings without
showing you each one. |
|
Select
the appropriate time entries in the Time
Entry Assistant window, then right-click
to display a shortcut menu or click Time
Saver in the footer to create the time entries.
|
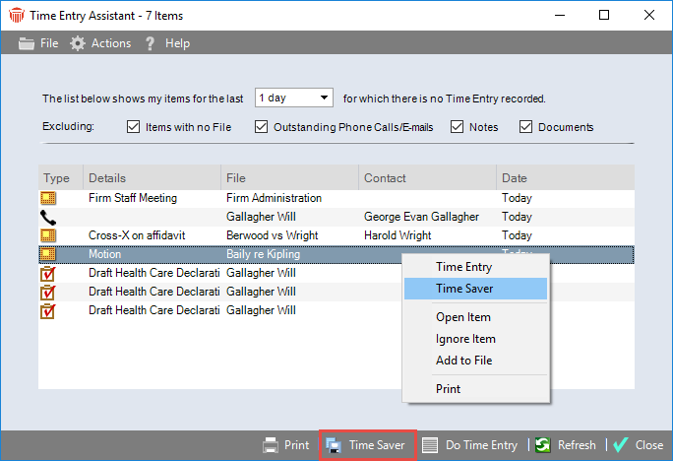 |
|
A
prompt displays indicating that the time entries
have been saved along with instructions on how
to view and edit them separately in the Time
Sheets module.
|
-
Additional prompts may appear when multiple
time entries have been created from the same
matter, such as a prompt asking if they should
be merged.
|
| Overriding
a Code Set |
| Sometimes
Code Sets may not match as they are often
setup on the Event before it was associated
with a Matter. |
| In
the event of a mismatch, the Task Codes
belonging to the Code Set selected on the
Matter overrides the Code Sets on
the Event. |
|
When
there is a Task-Based Code mismatch the following
prompt displays to make this clear:
|
|
Click
OK to close the prompt.
|
|
Review
the newly created time entries to add the Task
and Activity Codes as necessary by going
to the BILLIING-side, and selecting
Admin > Accounting from the left menu.
|
|
Ensure
that Task-Based Billing is enabled, and
select the appropriate Code Set from
the dropdown list.
|
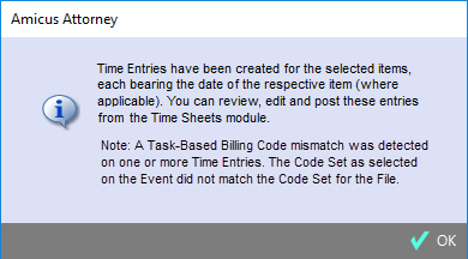 |
| Viewing
Time Entries |
|
Navigate to the Time Sheets module to see
all the newly created Time Entries. Open
an entry to view the Time Entry Details. |
 |
| The
Task, Activity Codes and Activity
Detail are preset based on the settings defined
on the event. |
| Viewing
Events created from a Precedent without preset
values |
| If
you run a Precedent and open an event that does
not have predefined values for the Task / Activity
Codes the option is hidden on the Events
Details dialog. |
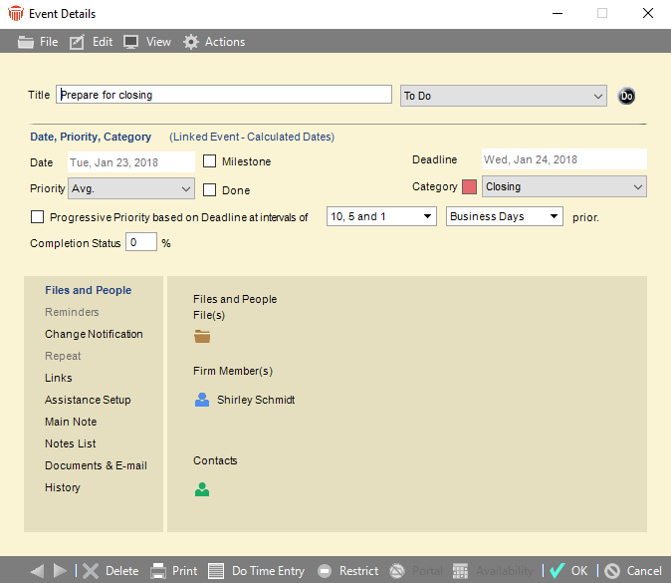 |
-
The Task / Activity Codes option is
hidden in the left pane if Task & Activity
Codes were manually created in the Tasks
or Calendar module.
|
 Note:
The only time the Task / Activity Codes
option is visible is if the values have been set
from the Precedent Editor. Note:
The only time the Task / Activity Codes
option is visible is if the values have been set
from the Precedent Editor. |
| Printing
Events |
| The
Predefined task-based billing codes are not included
when printing events as this information is only
valuable when it is passed to the relevant Time
Entry. |
| Using
Precedent Variables |
|
Precedents now allow for the use of variables
in Event Titles and Main Notes.
This helps distinguish between multiple precedents
with identical workflows when there is only slight
changes to terminology. Using Precedent variables
reduces the number of precedents you need to create
by allowing you to customize the text whenever
a precedent is run. |
 Note:
There is no limit to the number of variables
that can be included in a specific precedent,
and a Firm Member can use the same variables multiple
times on different events. Note:
There is no limit to the number of variables
that can be included in a specific precedent,
and a Firm Member can use the same variables multiple
times on different events. |
| Adding
Variables to an existing precedent |
| At
execution you are now prompted to fill in the
appropriate text in place of variables that can
be inserted into the Event Title and Main
Note on events in the precedents. |
| The
easiest way to set this up is to modify an existing
precedent to include variables. |
| To
modify an existing precedent: |
|
Open
a file and select an item under Events
in the left navigation pane. Select Use Precedent
or Actions > Precedent > Use
from the menu bar to display all existing precedents.
|
 |
|
Select
a precedent, then click Edit to display
the Precedent Profile dialog.
|
- Double-click
on an item to open the Event Details
window.
|
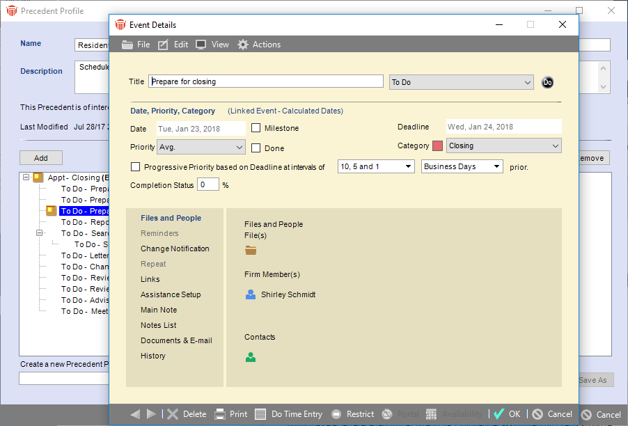 |
 Note:
Variables are anything enclosed within two double
angle brackets. Note:
Variables are anything enclosed within two double
angle brackets. |
|
The text is used as default content to ensure
smooth assembly. For example, we have inserted
<<Witness X>> into the
Title and Main Note field. |
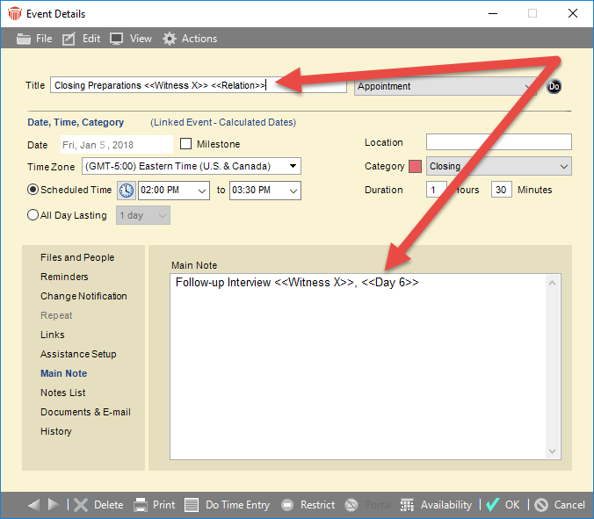 |
|
Click
OK to close the Event Details
and return to the Precedent Profile.
|
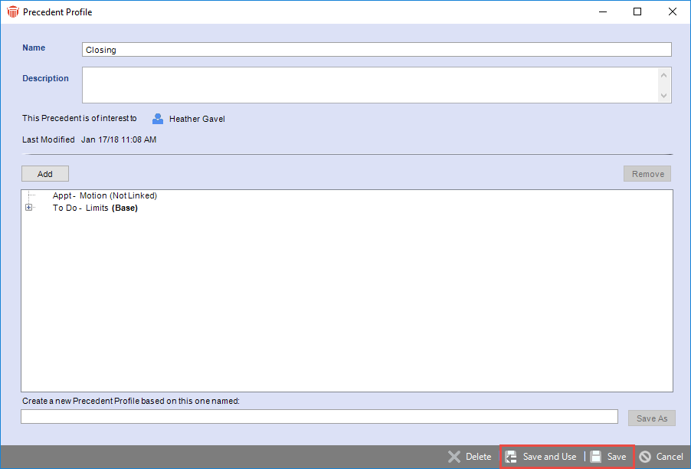 |
-
Click Save or Save & Use
to save the changes.
|
|
Running a Precedent containing
variables |
| When
you run a precedent with 1 or more variables a
2-part wizard displays prompting you to enter
alternate text on the 1st pane and prompting you
to select the appropriate dates on the 2nd pane. |
|
Select
an item, click Use Precedent or Actions
> Precedent > Use from the menu bar
to display the Select Precedents dialog.
|
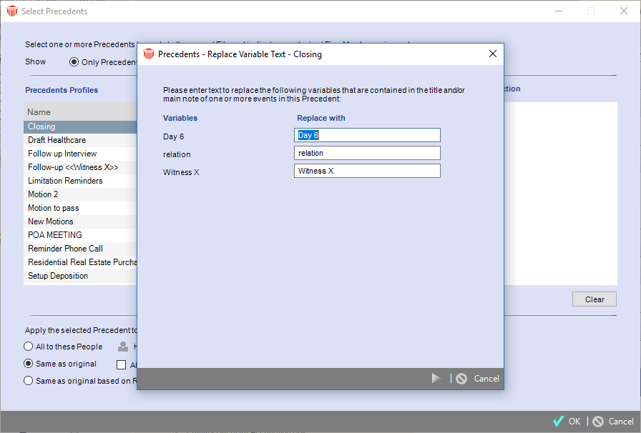 |
-
The 1st pane of the wizard appears on top.
|
|
Replace
the Variables with relevant text in the
fields under the Replace with column
beside its corresponding Variable. For
example, we have replaced Witness X in
the Variables column with Witness
3.
|
 |
 Note:
The textboxes under the Replace with column
can only be left blank if the entire Title
field is not denoted by a variable as Events
cannot be saved without a title. Note:
The textboxes under the Replace with column
can only be left blank if the entire Title
field is not denoted by a variable as Events
cannot be saved without a title. |
- Click
the Next arrow to display the 2nd pane
which is the Date selector prompt.
|
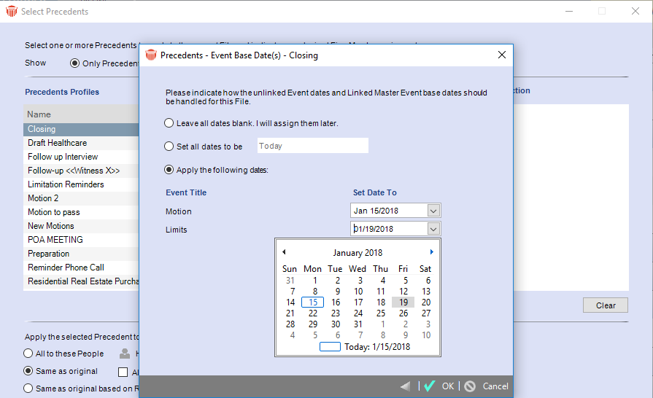 |
|
Select one of the following radio buttons: Leave
all dates blank. I will assign them later,
Set all dates to be, Apply the following
dates (Select dates by clicking in the corresponding
fields to use the calendar controls.)
|
|
Click
an option in the footer. The Back arrow
returns you to the 1st pane and Cancel aborts
the procedure. Clicking OK creates the
events. The text entered in the Replace with
column on the 1st pane appears in place
of the Variables and the Date
field is replaced with the date selected from
the calendar controls on the 2nd pane.
|
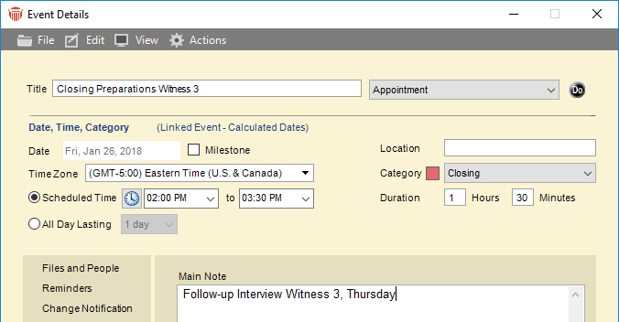 |
| Using
Multiple Variables |
| You
can include as many unique variables as you want
in events that make up the Precedent. |
| You
are only prompted once when the Precedent is run
for variables that are included in multiple places
as identical variables are treated as a single
entity during the replacement process. |
| Scroll
bars appear as necessary if a Precedent contains
more variables than can be listed on a pane. Fields
are sorted in alphabetical order from A to Z. |
| Running
a Precedent without Variables |
| When
you run a Precedent that does not contain variables
the prompt for replacement text does not appear.
You will see the single pane to select dates. |
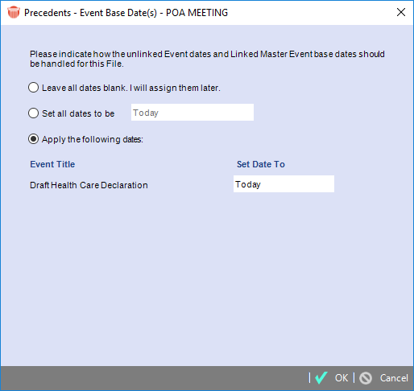 |
-
The Back arrow does not appear since
there is only one pane.
|
|
|
Troubleshooting
For
more information on Abacusnext Products and Services and
to sign-up for our regular training webinars please visit us at
www.abacusnext.com.
If
you require assistance with our products, please contact Technical
Support
for assistance at 1-800-472-2289, locally at 416-977-6633 or send
us an email at support@abacusnext.com.
|


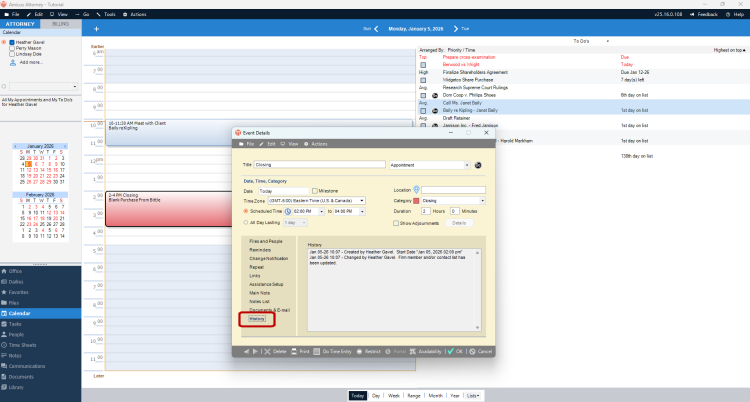


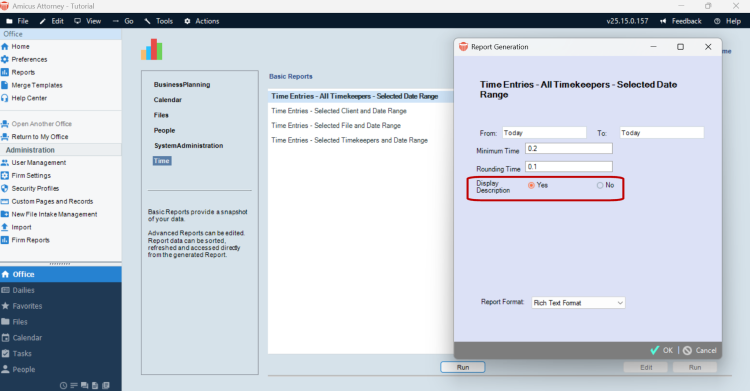


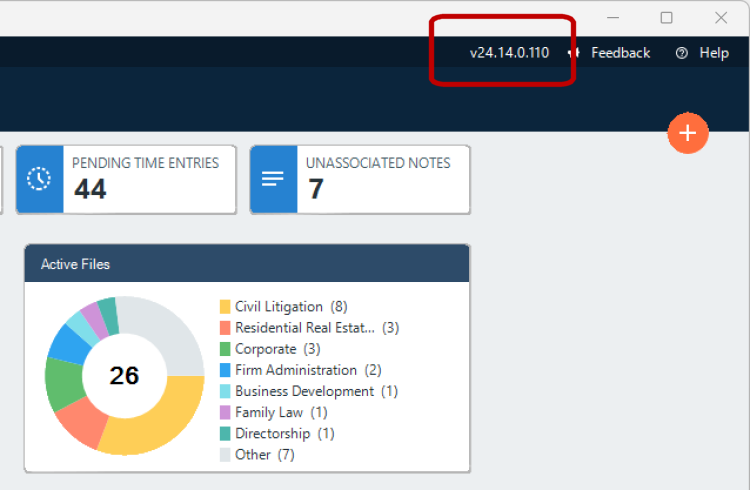
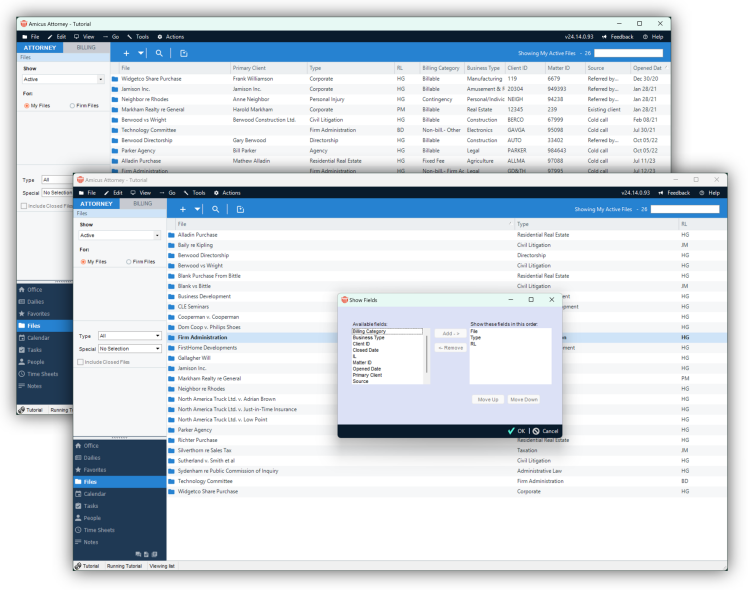


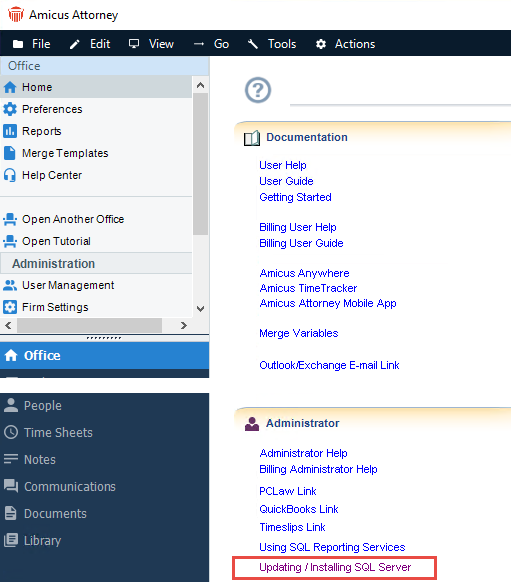
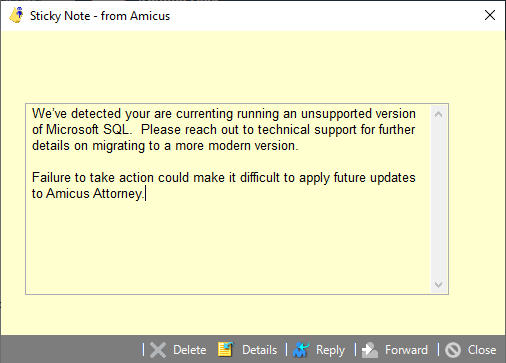
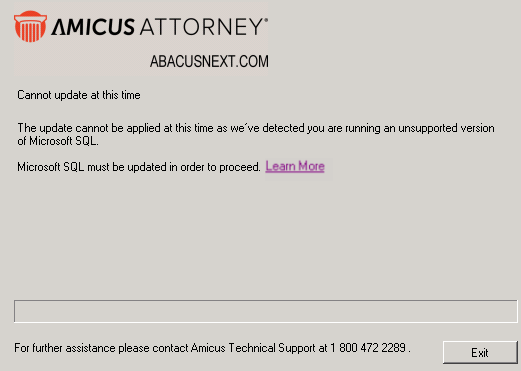


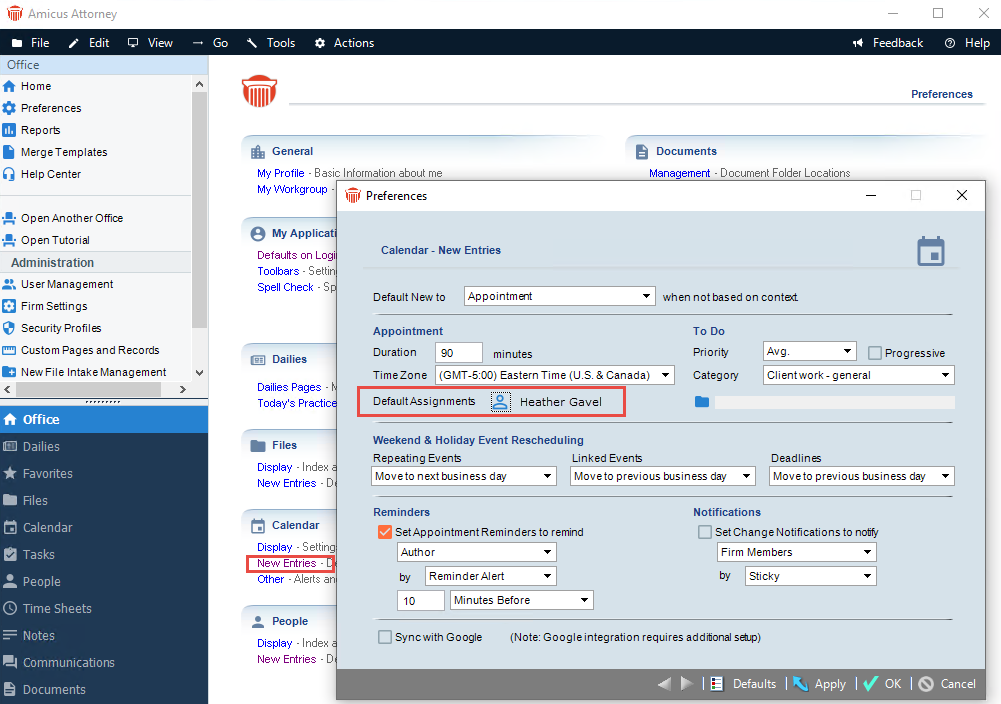

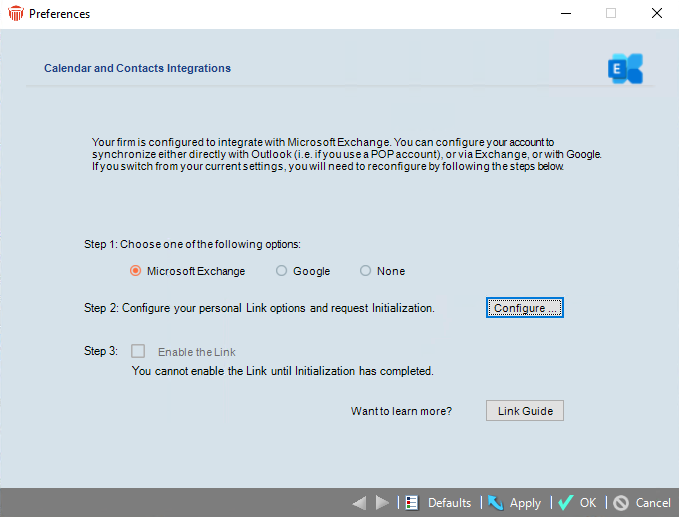

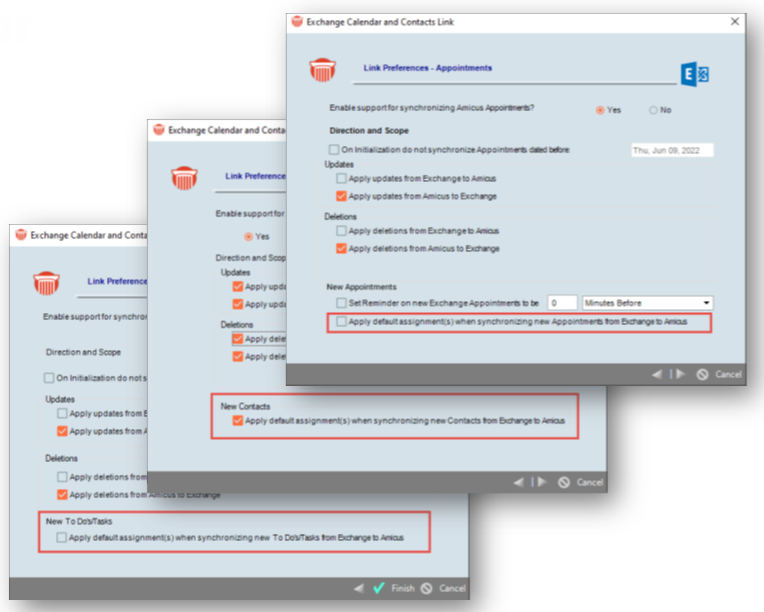


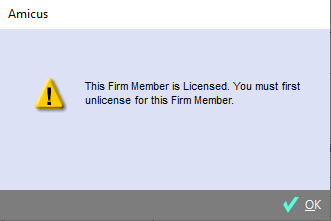
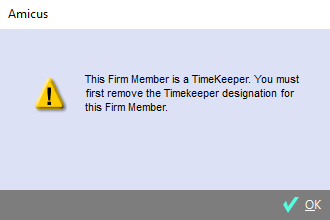
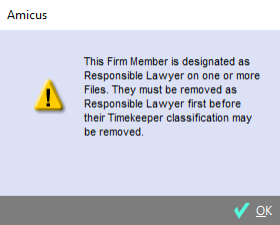
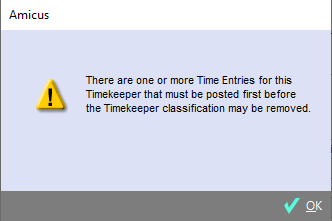

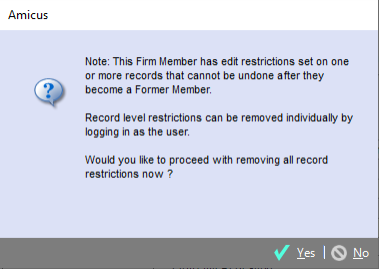


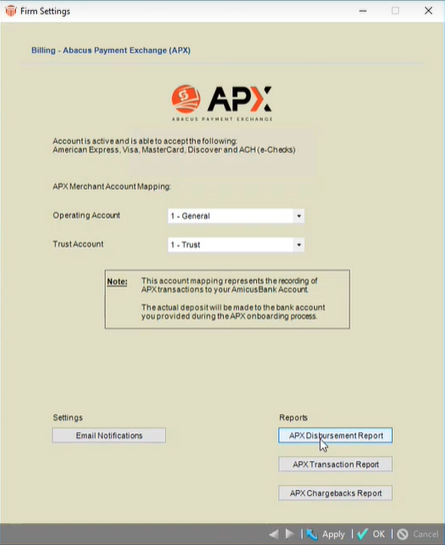
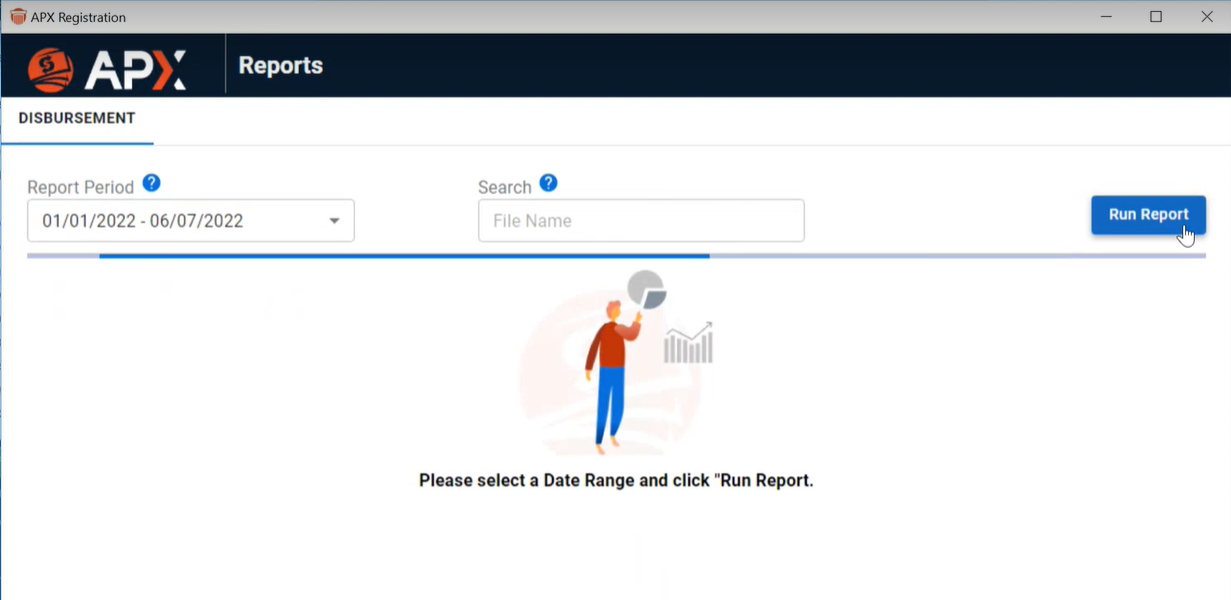
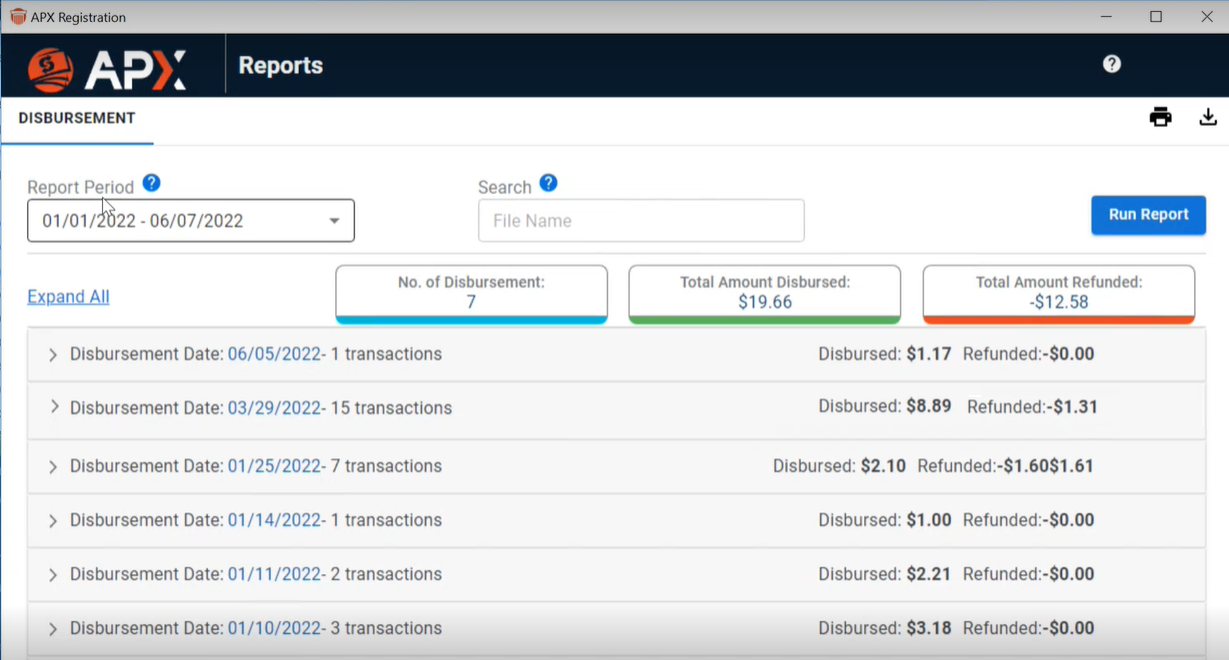
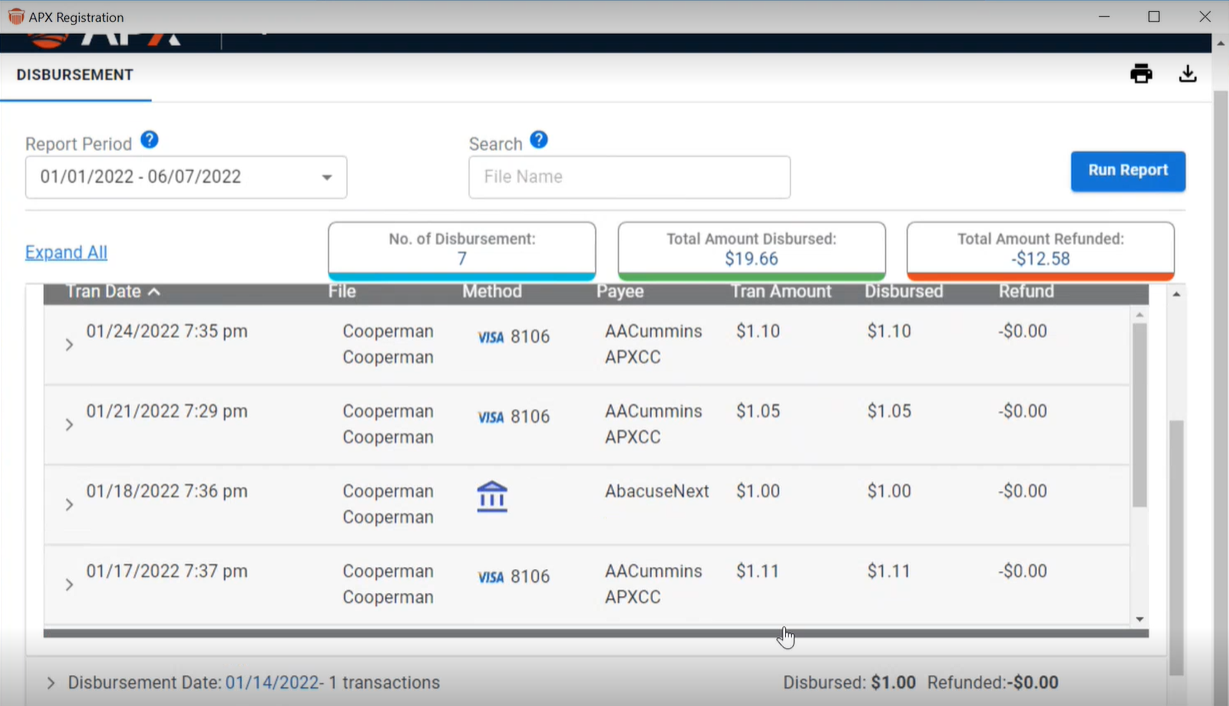
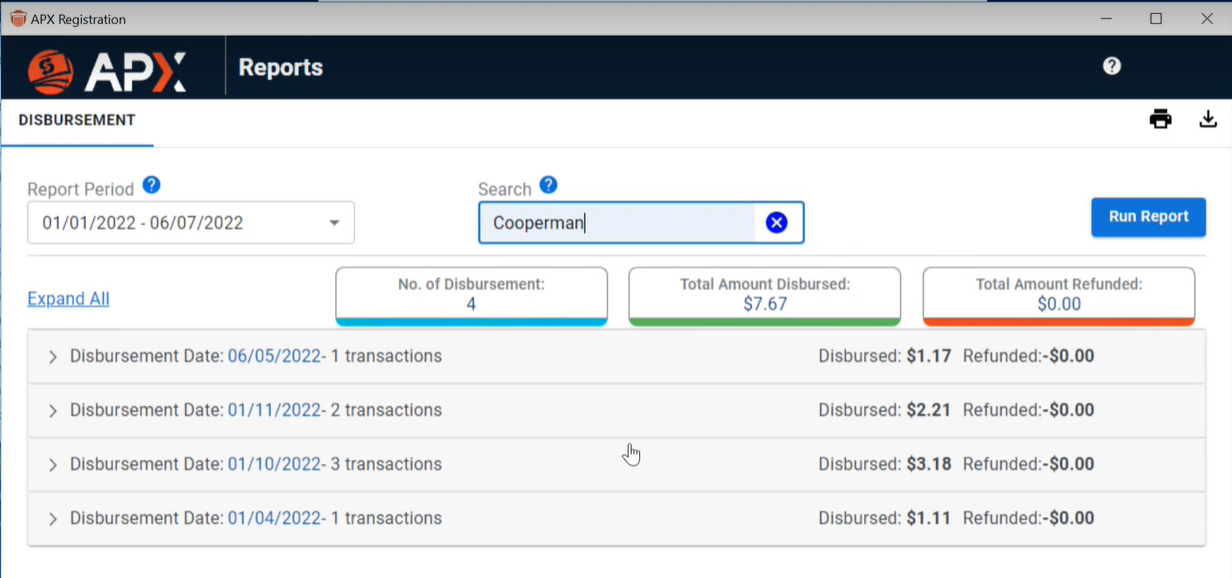
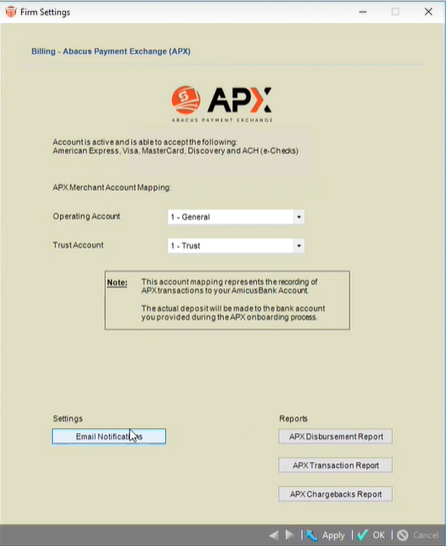
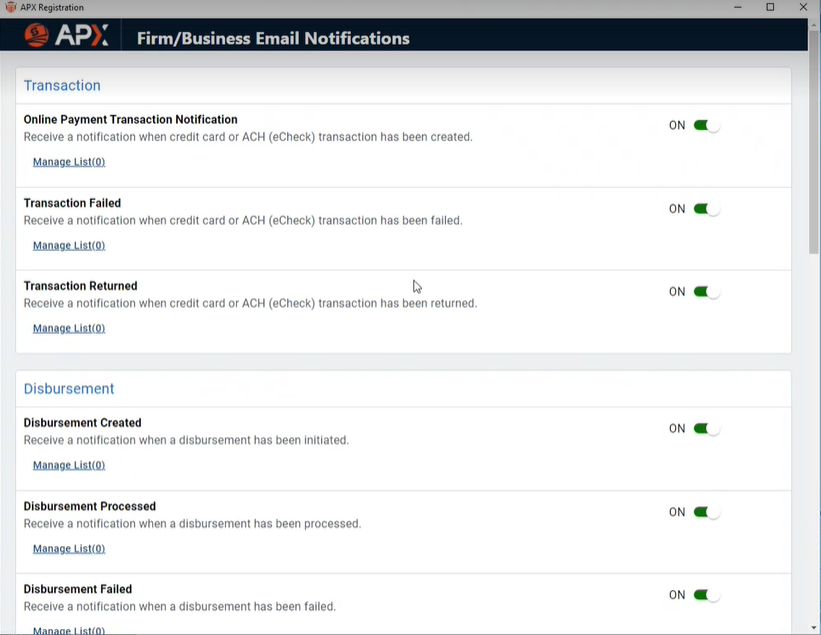

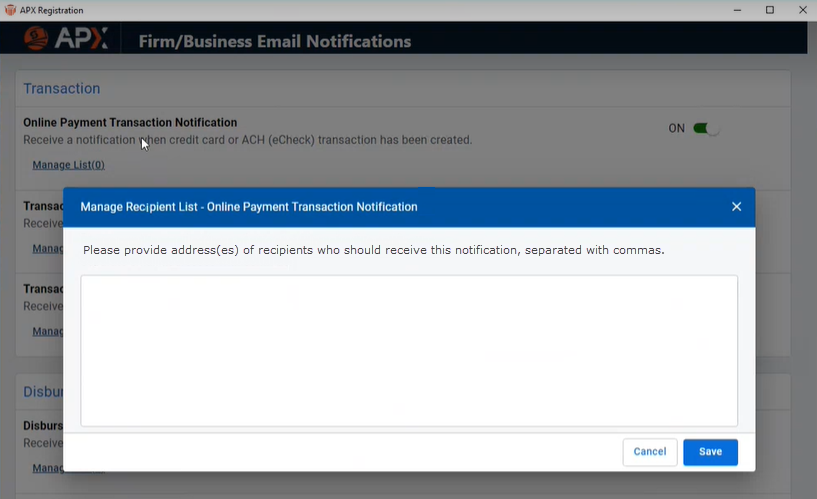

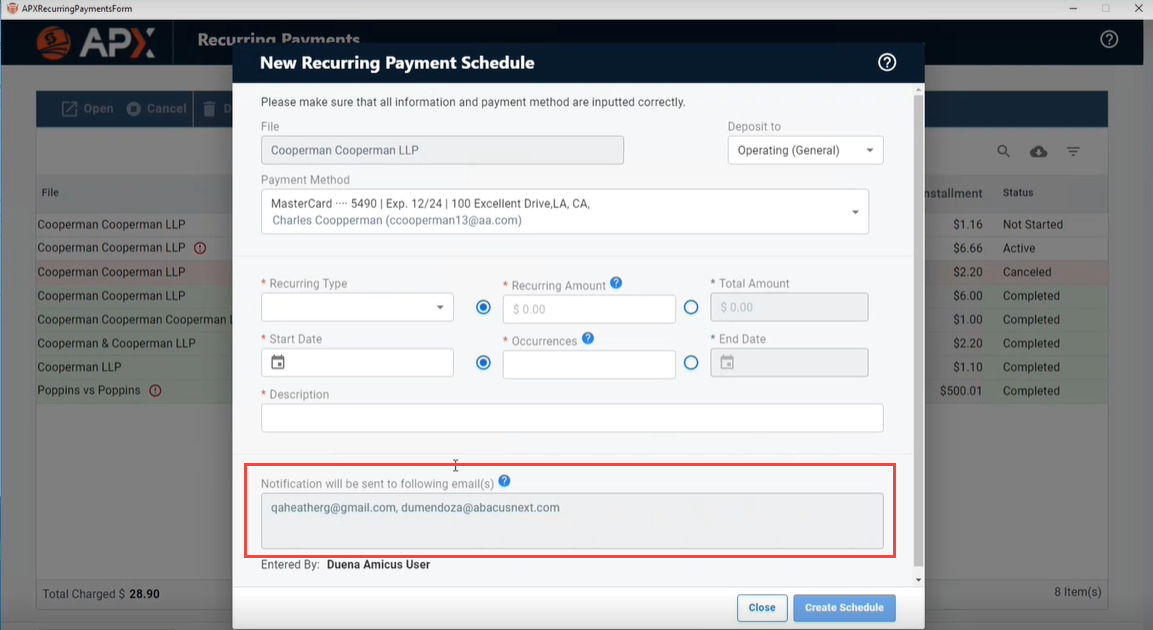
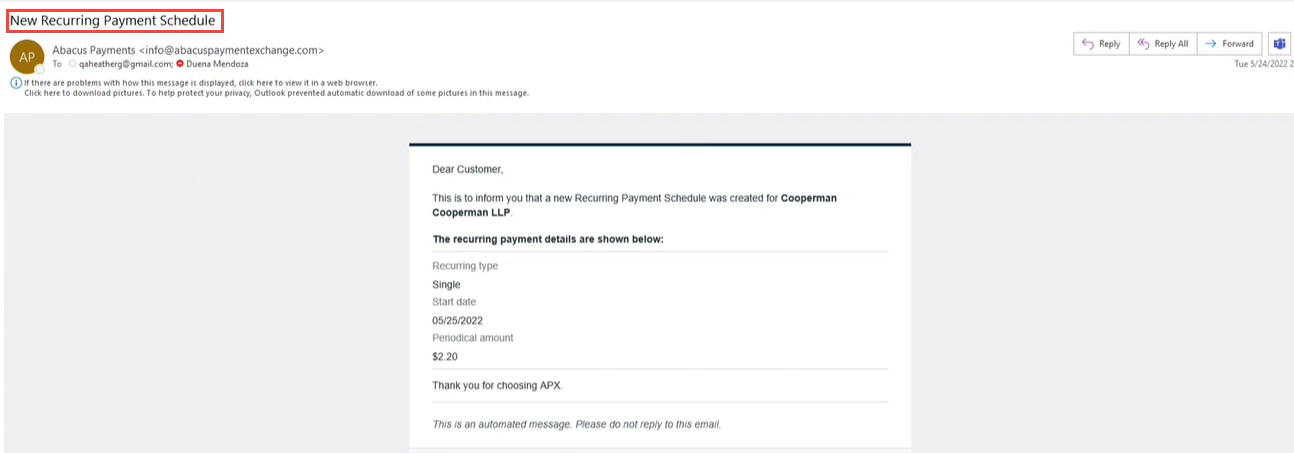


 Click Continue to add a bank account.
 Click
OK to add the bank account.


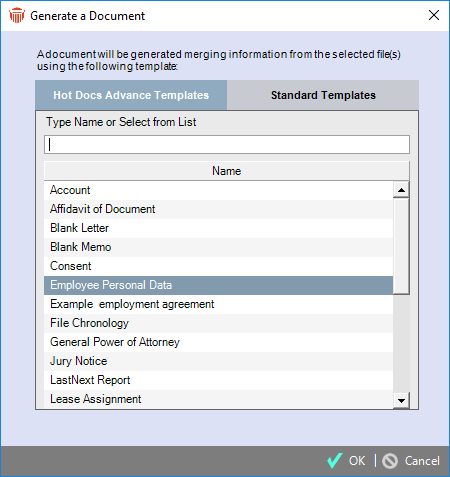
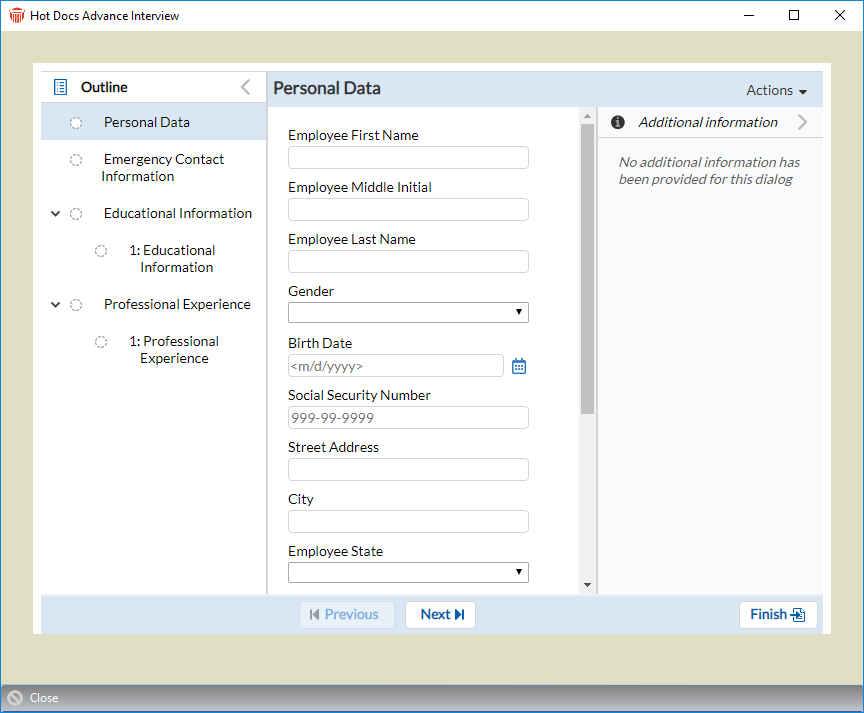


.png)
