Files > Adding a File > Providing Basic Information for a New File
 Providing Basic Information for a New File
This topic covers:
Default information
Edit the default information in the New File dialog as appropriate. The Intake Form might have multiple pages, and can include different fields depending on the File Type you choose. The basic fields always shown are Short File Name, Primary Client, File Type, Billing Category, and File Billing Rate.
Fields shown in red with an asterisk are required fields—you must enter a value.
 |
Note: The fields included in the New File Intake pages can be customized for your firm. If you do not see the appropriate items, ask your Administrator to edit the Intake Page. |
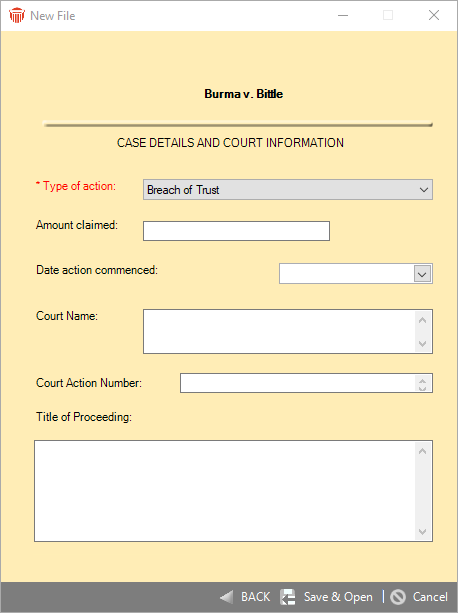
For example, the New File Intake Form for a new Civil Litigation File could be designed to have two pages, as follows:
Short File Name
Edit the short name for the File in the Short File Name box. This name is like a nickname for the File, and should be as simple and memorable as possible. It must be unique across all Files.
For example, you may have a File in which the client is "Business Hardware Company of Eastern New York" and the matter is "re HiTek Information Services Inc." While that is the full name of the File for all accounting and other official purposes, it is not how you would think of the File. To you, the File is "BH re HiTek"—this can be its Short File Name.
In other words, you can assign each File a Short File Name that fits how you refer to it. If you remember Files by their numbers, then use those as Short File Names. Amicus accommodates whichever approach you are comfortable with.
Whenever a list of your Files is displayed, the Short File Name is the name that is displayed. However, the Full Client Name, and Full Matter Name, and Short File Name are shown where necessary (for example, in a Time Entry), so it does not matter how casual your Short File Names are.
Primary client
To specify the primary client on the File, click the People Select button and select the relevant Contact. If the Contact already has a Client ID, it will be automatically assigned to the File.
 |
Tip: If a Firm Member is also a client of the firm, we recommend that you create a separate Contact record for them with a different E-mail Address and, where possible, a differentiated Name (e.g. "John A. Doe" is a Firm Member and "Jonathon Alexander Doe" is a Contact). This will avoid improper record matching via third-party links (Outlook/Exchange E-mail Link in particular), and if they later leave the firm and are designated a Former Firm Member, their Contact record remains unaffected by that change. |
File Type
To specify the type of File, select a type in the File Type list box. The File Type indicates a category of Files—e.g. "Criminal", "Family Law", and "Taxation". When you use the Files Index, you can use the File Type information to control which Files are listed. File Type can also affect the available Custom Pages and Document Groups.
Billing Category
To specify the Billing Category for the File, select a category in the Billing Category list box. Assign "Contingency" in Files for which an amount based on the judgment/settlement will be charged to the client. If you assign "Fixed Fee", enter an amount in the box to the right.
File Billing Rate
To set a Billing Rate for the File, select a rate in the Billing Rate (or Time Tracking Rate) list box. If none of the listed rates are suitable, you can select "Other" and type an hourly rate in the box to the right.
|
Note: Individual Firm Members who are Timekeepers may set their own Billing Rate for the File, in the profile section below their Business Card in the File Details window. |
Other fields
Enter values for additional fields that appear, as appropriate.
When you are finished entering basic information
You may save the new File in either of the following ways:
-
Click Save & Close to go on to other work.
-
Click Save & Open to continue. A New File dialog appears first if any intake actions are defined in the Intake Forms (see below). Otherwise the File Details dialog for the new File opens directly — you may then view the details, and add more People and/or other facts to the File, if you wish. For more information, see People on a File and Using other facts about a File.
|
Note: If a dynamic Accounting Link is enabled Save & Close is not available. (e.g. PCLaw, QuickBooks, Timeslips, etc.) or if any intake actions are defined. |
Performing intake actions
Upon clicking Save & Open, an additional New File dialog might appear, prompting you to perform certain actions such as creating a standard letter to the Client requesting a Retainer. Or perhaps, if opening a new Real Estate File, you might be prompted to apply a Precedent that automatically sets up a series of appropriate To Do's and Appointments on the File.
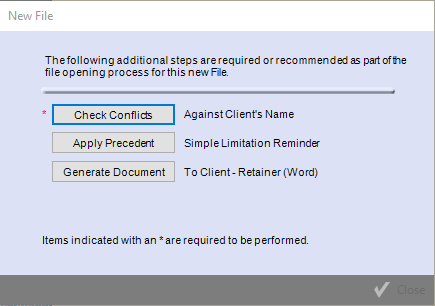
To perform the actions, simply click the corresponding buttons, which might include:
-
Check Conflicts—Opens the Check Conflicts dialog with the Full Name of the Primary Client automatically filled in. If you did not assign a Primary Client to the new File, this Action does not need to be completed.
-
Apply Precedent—Opens the Use Precedent dialog in order to apply the indicated Precedent, creating a series of appropriate Events on the File.
-
Generate Document—Generates a single document based on the Document Merge Template indicated.
Actions marked with an asterisk are required.
When finished performing actions on the new File, click Close. The File Details dialog for the new File opens. For more information, see People on a File and Using other facts about a File.
|
Note: The actions defined for File Intake Forms can be customized for your firm for all new Files and/or for Files of a particular File Type. If you do not see the appropriate actions, ask your Amicus Administrator to edit the Forms. |
Related Topics