Adding Intelligence > Working with Precedents > Using Precedent Variables
 Using Precedent Variables
Precedents now allow for the use of variables in Event Titles and Main Notes. This helps distinguish between multiple precedents with identical workflows when there is only slight changes to terminology.
Using Precedent variables reduces the number of precedents you need to create by allowing you to customize the text whenever a precedent is run.
 |
Note: There is no limit to the number of variables that can be included in a specific precedent, and a Firm Member can use the same variables multiple times on different events. |
This topic includes:
Adding Variables to an existing precedent
At execution you are now prompted to fill in the appropriate text in place of variables that can be inserted into the Event Title and Main Note on events in the precedents.
To modify an existing precedent:
-
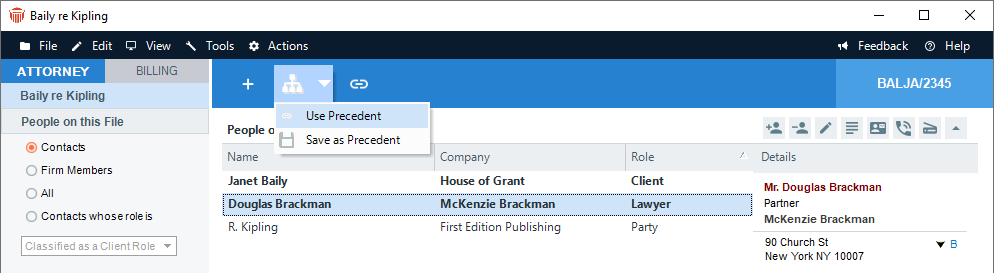
Open a file and select an item under Events in the left navigation pane. Select Use Precedent or Actions > Precedent > Use from the main menu.
-
The Select Precedents window displays showing all existing precedents.
-
-
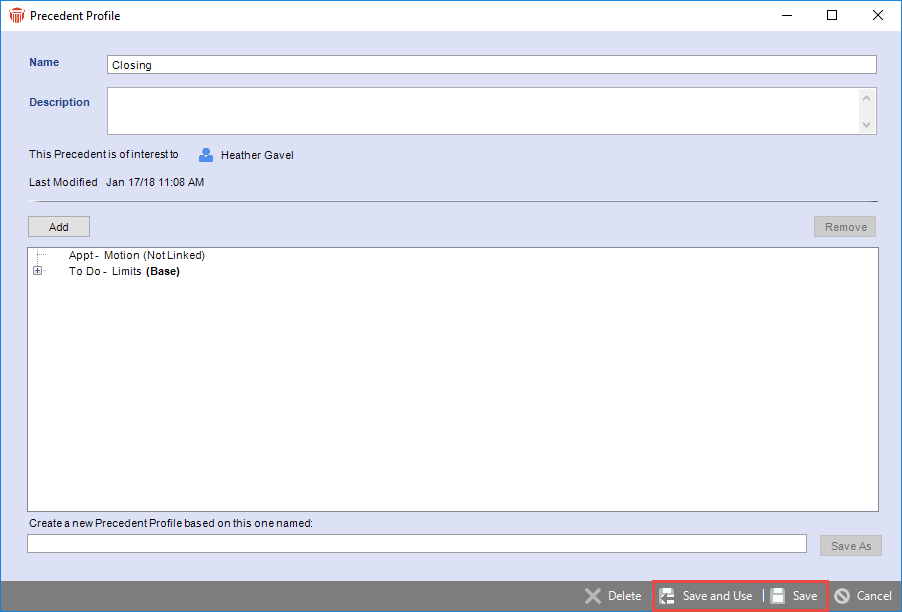
Select a precedent, then click Edit to display the Precedent Profile dialog.
-
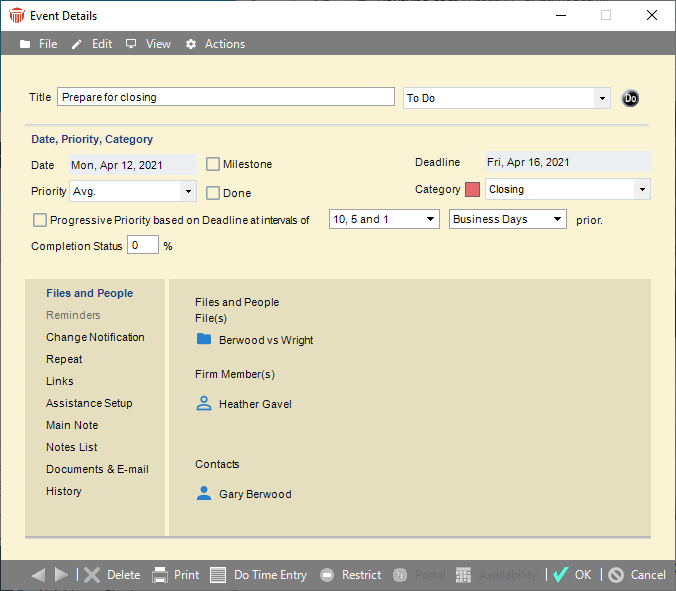
Double-click on an item to open the Event Details window.
-
-
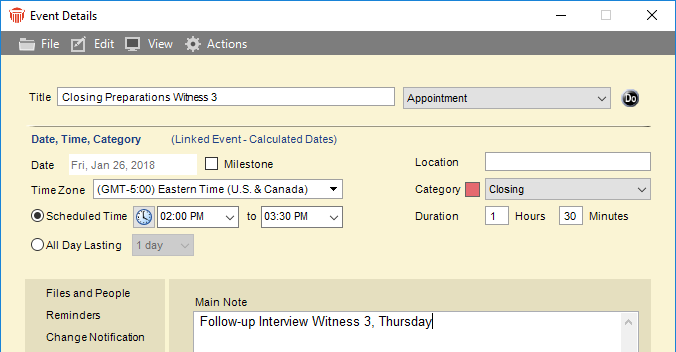
You can now include variables in both the Title and the Main Note textboxes.
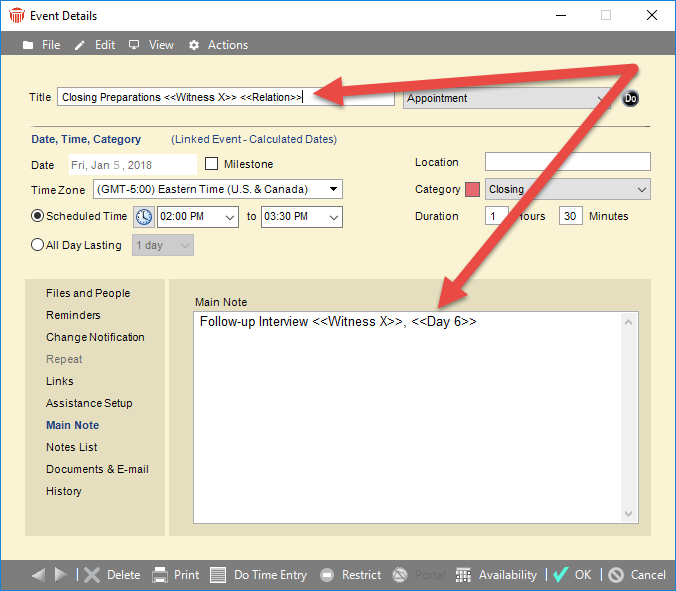
Note: Variables are anything enclosed within two double angle brackets. The text is used as default content to ensure smooth assembly. For example, we have inserted < > into the Title and Main Note field. -
Click OK to close the Event Details and return to the Precedent Profile.
-
Click Save or Save & Use to save the changes.
-
Running a Precedent containing variables
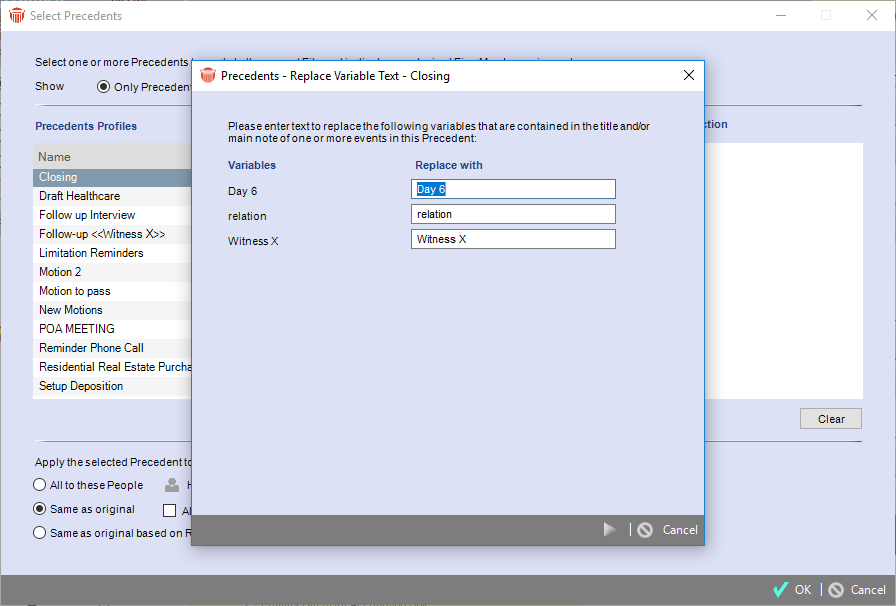
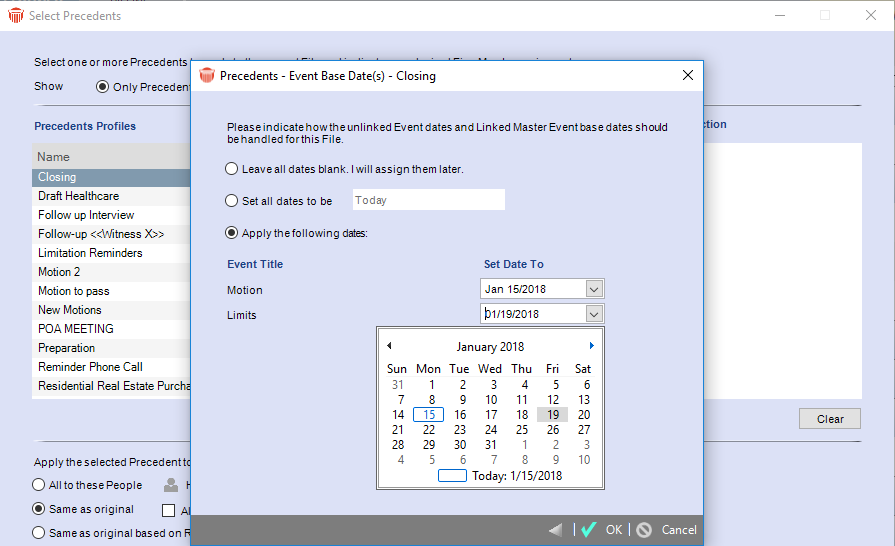
When you run a precedent with 1 or more variables a 2-part wizard displays prompting you to enter alternate text on the 1st pane and prompting you to select the appropriate dates on the 2nd pane.
-
Select an item, click Use Precedent or Actions > Precedent > Use from the main menu to display the Select Precedents dialog.
-
The 1st pane of the wizard appears on top.
-
-
Replace the Variables with relevant text in the fields under the Replace with column beside its corresponding Variable.
Note: The textboxes under the Replace with column can only be left blank if the entire Title field is not denoted by a variable as Events cannot be saved without a title.

The text entered in the Replace with column on the 1st pane appears in place of the Variables and the Date field is replaced with the date selected from the calendar controls on the 2nd pane.
-
Click the Next arrow to display the 2nd pane which is the Date selector prompt.
-
Select one of the following radio buttons
-
Leave all dates blank. I will assign them later
-
Set all dates to be
-
Apply the following dates
-
-
Select dates by clicking in the corresponding fields to use the calendar controls.
-
Click an option in the footer:
-
The Back arrow returns you to the 1st pane and Cancel aborts the procedure.
-
OK creates the events.
-
The text entered in the Replace with column on the 1st pane appears in place of the Variables and the Date field is replaced with the date selected from the calendar controls on the 2nd pane.
-
Using Multiple Variables
You can include as many unique variables as you want in events that make up the Precedent.
You are only prompted once when the Precedent is run for variables that are included in multiple places as identical variables are treated as a single entity during the replacement process.
Scroll bars appear as necessary if a Precedent contains more variables than can be listed on a pane. Fields are sorted in alphabetical order from A to Z.
Running a Precedent without Variables
When you run a Precedent that does not contain variables the prompt for replacement text does not appear. You will see the single pane to select dates.
- The Back arrow does not appear since there is only one pane.
Related Topics