Customizing the Database > Designing New File Intake Forms > Managing Actions
 Managing Actions in New File Intake Forms
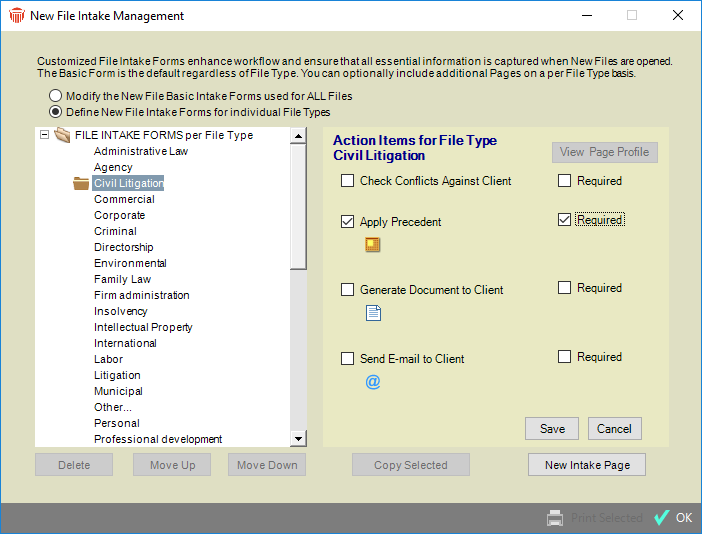
Actions may be configured for the Basic Form and also for one or more File Type-Specific Forms. The Actions available are:
-
Check Conflicts—Opens the Check Conflicts dialog with the Full Name of the Primary Client automatically filled in. If you did not assign a Primary Client to the new File, this Action does not need to be completed.
-
Apply Precedent—Opens the Use Precedent dialog in order to apply the specified Precedent, creating a series of appropriate Events on the File.
-
Generate Document—Generates a single document based on the Document Merge Template specified.
-
Send E-mail—Opens a blank e-mail message dialog based on the E-mail Merge Template specified, with the Primary Client's primary e-mail address in the To field and the Short File Name in the Subject field.
Note the following:
-
Actions are configured for an entire Form, not for any particular Pages of the Form.
-
Each Action can be specified only once for a particular new File intake event sequence. For example, it is not possible to assign Precedent A to the Basic Form and Precedent B to a File Type-specific Form, nor can Precedents A and B be both assigned to a single Form.
-
If a particular Action is selected on the Basic Form, it will be automatically selected on all File Type-specific Forms. For example, if the Generate Document Action is selected on the Basic Form, it will appear in the New File wizard for all new Files—this Action cannot be excluded or changed for any specific File Types.
-
If the Apply Precedent, Generate Document, or Generate E-mail Action is selected on any File Type-specific Forms, that Action cannot be changed from the Basic Form.
 |
Tip: Regardless of whether the Check Conflicts Action is selected on any File Type-specific Forms, you can automatically clear that Action from all File Type-specific Forms by first selecting it on the Basic Form and then clearing it there. |
Configuring Actions
To configure Actions for New File Intake Forms, go to the Office module and choose New File Intake Management on the navigation list. The Management dialog appears, from which you can choose to configure Basic or File Type-specific Forms.
- For the Basic Form, select "All File Types" in the navigation list at the left, or select a particular Basic Page and click View Action Items at the right.

- For a File Type-specific Form, select a File Type in the navigation list at the left, or select a particular File Type-specific Page and click View Action Items at the right.
-
To set Actions, click Edit at the right and then select the desired checkboxes in the list of available Actions at the right and make all selections where necessary (e.g. select a Precedent).
-
To make an Action required, select its Required checkbox at the right.
-
When finished, click Save.
Related Topics
