Customizing the Database > Customizing Time Entry codes > Working with Activity Groups
 Working with Activity Groups
If you wish, you can create Activity Groups for organizing your Activity Codes, and customize them to conform exactly to the way your firm organizes its practice.
You can create as many Activity Groups as you wish. You can also create subgroups—that is, you can create Activity Groups within another Activity Group, if appropriate.
Grouping Activity Codes lets you have as many Activity Codes as you need, without requiring users to scroll up and down a long list every time they need to select one.
To add or edit an Activity Group:
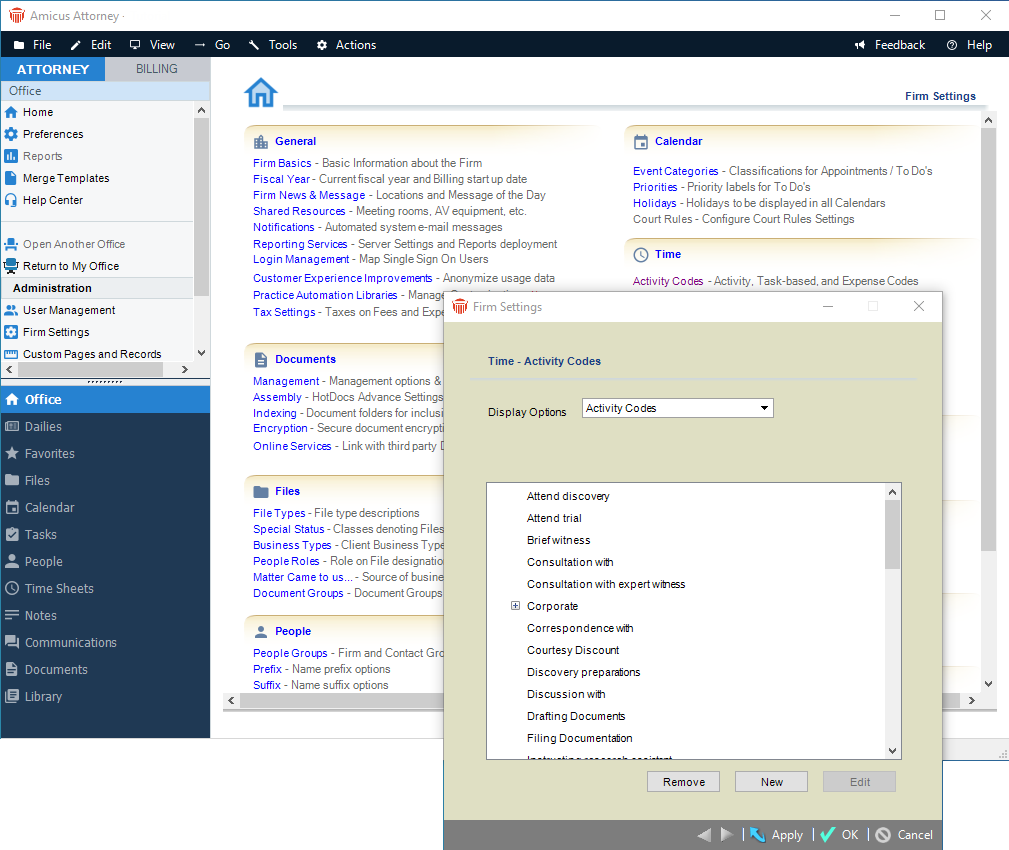
- Go to Office > Firm Settings, click ActivityCodes under the Time heading.

-
Select Activity Codes in the list box at the top.
-
Select an Activity Group or an Activity Code:
-
To add a new Activity Group, select the Activity Code above which you want the new Activity Group inserted, or select the Activity Group into which you want the new Activity Group added. Then click New.
-
To change the details of an existing Activity Group, click that Activity Group in the list, and then click Edit.
-
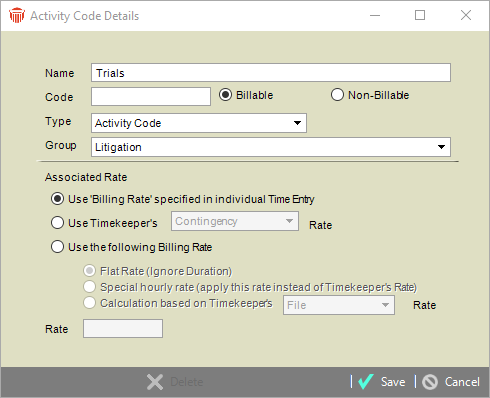
The Activity Codes Details dialog appears.

-
Type or change the name of the Activity Group in the Name box.
-
If necessary, select Activity Code Group in the Type box.
-
-
If you wish, select a different parent Activity Group in the Group list box. To make the Activity Group not part of any other Activity Group, select "None".
-
Click OK.
-
Activity Groups have a plus or (-) minus sign shown to the left of them in lists.
-
Deleting an Activity Group
To remove an Activity Group, select it in the Activity Codes list, click Edit, and then click Delete in the Activity Code Details dialog that appears.
 |
Warning: Deleting an Activity Group also deletes all of the Activity Codes it contains. |
Related Topics
