Getting Started > Entering Startup Balances
 Entering Startup Balances
Billing Users and Billing Supervisors can enter Startup Balance transactions for each File as applicable.
This topic covers:
These transactions contribute to the balances as of the Startup Date.
Unbilled Time and Fees
From the BILLING-side select Actions > Startup Balances > Unbilled Time Entries from the dropdown menu to display the Select Files dialog. Use the arrow button to move files into the Current Selection window and click OK to display the Time Entry Details dialog.
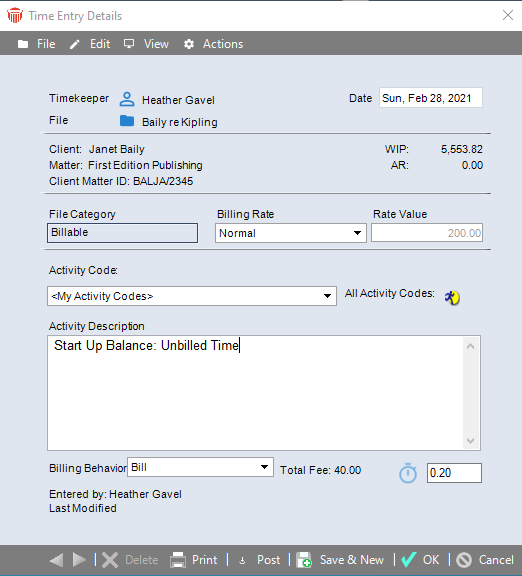
Select from the dropdown menus or enter the following Time Entry Details:
-
Date
-
Billing Rate
-
Rate Value (if necessary)
-
Activity Code (optional)
-
Billing Behavior
-
Duration
-
Activity Description
Click Post in the footer (If necessary you can edit the entry later.)
Once posted, these transactions affect the WIP Hours and Fees balances on the Files.
 |
Tip: If you do not need a lot of detail for a File, consider entering a single "Flat Fee" Time Entry rather than entering several hour-based Time Entries. |
For more information, see the "Creating Time Entries" topic under "Time, Fees, and Expenses" in the Amicus Billing User Help.
Unbilled Client Expenses
From the BILLING-side select Actions > Startup Balances > Unbilled Expenses from the dropdown menu to display the Select Files dialog. Use the arrow button to move files into the Current Selection window and click OK to display the Client Expense Details dialog.
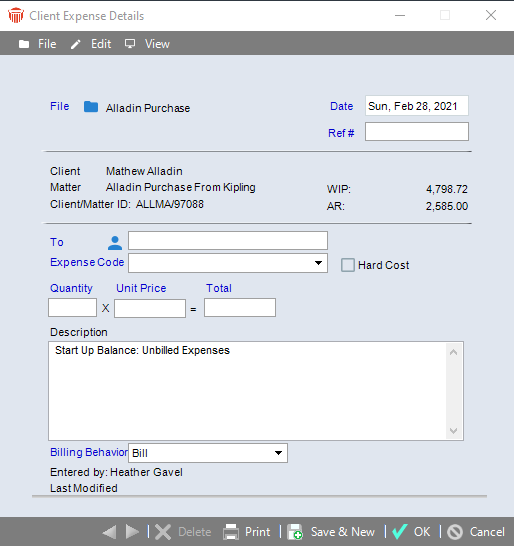
Click on the File icon to add more files
Select from the dropdown menus or enter the following Expense Details:
-
Date
-
Expense Code (optional)
-
Hard Cost flag (optional)
-
Total (or Quantity)
-
Tax (if enabled and applicable)
-
Description
Click OK. Or, if you wish to immediately enter another Expense Entry, click Save & New. (If necessary you can edit the entry later.)
These transactions affect the Posted Expenses and WIP Expenses balances on the Files.
|
Tip: If you do not need a lot of detail for a File, consider entering a single lump sum Expense Entry rather than entering several specific Expense Entries. If your firm charges taxes, you might need to create two Expense Entries: one for untaxed expenses and one for taxed expenses (assigned a taxable Expense Code). |
For more information, see the "Creating and working with Expense Entries" topic under "Time, Fees, and Expenses" in the Amicus Billing User Help.
Trust Balances
From the BILLING-side select Actions > Startup Balances > Trust from the dropdown menu to display the Select Files dialog. Use the arrow button to move files into the Current Selection window and click OK to display the Trust Receipt dialog.
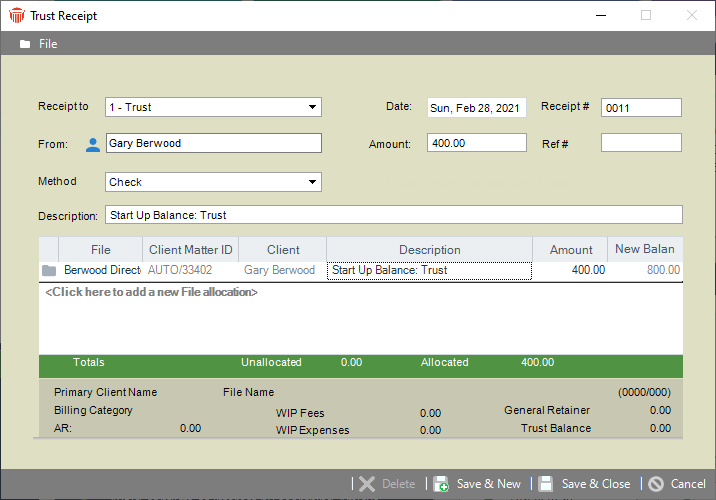
Select from the dropdown menus or enter the following Trust Receipt Details:
-
A Receipt # for Trust on a Client's Open Billable File(s).
-
Trust Bank Account
-
Receipt Number (optional)
-
Date
-
Client
-
Amount
-
Payment Type
-
Check Number (optional)
-
Description
-
File allocation (optional, if the Client has multiple Files)
Click Save & Close. Or, if you wish to immediately enter another Trust Receipt, click Save & New.
If necessary, you can afterward edit these Trust Receipts from the Trust list in File Details or the Receipts list in the Trust module.
|
Tip: Rather than entering several Trust Receipts on a File, consider entering a single Receipt to cover the Trust balance as of the Startup Date. |
For more information, see the "Receiving Trust" topic under "Trust" in the "Amicus Billing User Help".
General Retainer Balances
From the BILLING-side select Receive Payment in the Navigator section of the Home screen or select Actions > Startup Balances > General Retainer to display the Select Files dialog. Use the arrow button to move files into the Current Selection window and click OK to display the Receive Payment dialog.
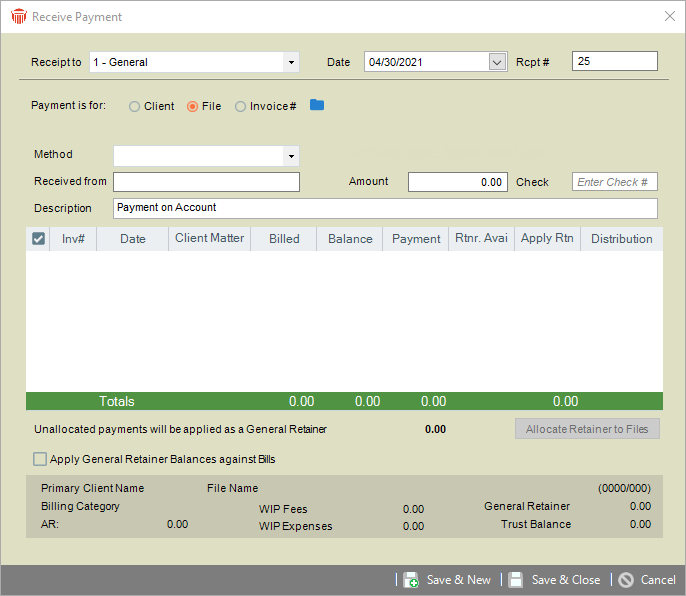
Enter the Receive Payment details:
-
Select from the dropdown menus or enter the following:
-
A Receipt # for General Retainer on a Client's Open Billable File(s).
-
General Bank Account
-
Date
-
Receipt Number (optional)
-
Amount, Payment Method
-
Check Number (optional)
-
Description
-
File allocation (optional, if the Client has multiple Files)
-
Click Save & Close. Or, if you wish to immediately enter another Payment Receipt, click Save & New.
|
Tip: Rather than entering several Trust Receipts on a File, consider entering a single Receipt to cover the General Retainer balance as of the Startup Date. |
For more information, see the "Receiving Client Payments" topic under "Billing" in the "Amicus Billing User Help".
Accounts Receivable
From the BILLING-side select Actions > Startup Balances > Accounts Receivable to display the Select Files dialog. Use the arrow button to move files into the Current Selection window and click OK to display the Accounts Receivable Start Up Balances dialog.
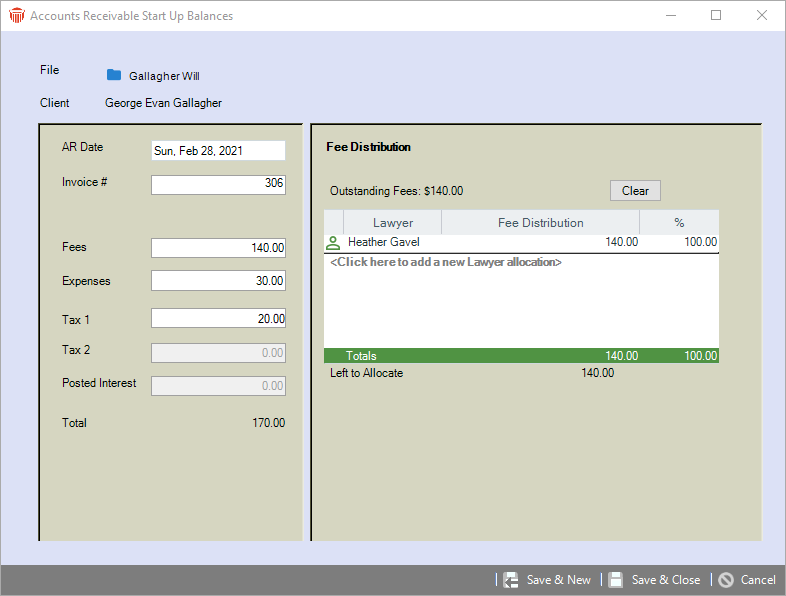
Enter the following Accounts Receivable details:
-
File
-
AR Date
-
Invoice Number (preferably the Number of the oldest outstanding Bill for the Client)
-
Outstanding Fees
-
Outstanding Expenses, Taxes (if any)
-
Posted Interest (if any)
-
Fee distribution
Click Save & Close or Save & New.
A Bill with the specified Invoice Number is automatically posted to enter the balances.
If necessary, you can later delete the corresponding Bill (and undo the balances) from the Billing Index, provided that no payments or write ups/downs have since been made against the Bill.
|
Tip: If a File has multiple outstanding bills, you may enter either a single set of lump sum balances or separate sets of balances for the different bills (to facilitate aging). |
Related topics:
