Customizing the Database > Customizing lists > Setting User Rates
 Setting User Rates
For each individual Timekeeper, you can select their Billing Rate labels and set the corresponding Rate Values. You can also optionally allow Timekeepers to change their own settings. If permitted, they can perform this task in their Preferences dialog.
Before setting Timekeeper Rates, you will first need to customize the list of available Billing Rate labels. For more information, see Time Entry lists customization.
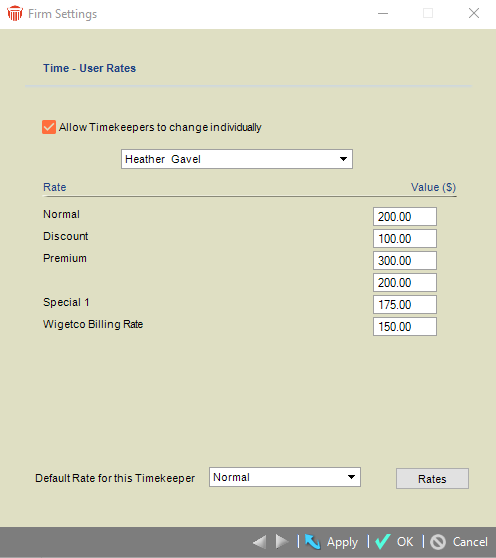
- To set Timekeeper Billing Rates, go to Office > Firm Settings, and click User Rates under the Time section to display the Time - User Rates dialog.

-
In the Timekeeper list box, select the Timekeeper whose Rates you wish to enter or change. Rates currently set for this Timekeeper will appear in the list below.
-
To add or remove Billing Rates for this Timekeeper, click Rates next to the Timekeeper's name. The Select Billing Rates dialog appears with the Current Selection list showing the Billing Rate labels currently assigned. Add or remove items in this list as required and click OK. The list of Billing Rates for this Timekeeper will have been updated to reflect your selection.
-
To edit a rate value, select a Rate in the list, and type the Value. Repeat these steps for all Billing Rates assigned to the Timekeeper.
-
To set a Default Rate for the Timekeeper, select one of the Billing Rates available in the list box at the bottom.
-
If you wish to give Timekeepers the ability to change their own Billing Rates, click the checkbox provided at the top.
-
When you are finished, click OK.
 |
Note: You must set a Default Rate for each Timekeeper, and provide a Rate Value for each Rate label assigned. |
Related Topics
