APX (Abacus Payment Exchange) > APX Recurring Payments
 APX Recurring Payments
Learn by Video – APX Recurring Payments
APX Recurring Payments allow you to schedule future payments from your clients using credit card or ACH predefined intervals.
The following APX Recurring Payment Schedules can be defined:
| Payment Schedule type | Number of occurrences | Date/Day (for 1st payment) |
| Single* | 1 | Specified date |
| Weekly | n | Day of week |
| Bi-Weekly | n | Day of week |
| Monthly | n | Day of month |
| Semi-monthly | n | 1st and 15th or 15th and EOM |
| Quarterly | n | Day and month selection |
* Use the Single payment schedule for postdated credit card or ACH payment.
APX Recurring Payment schedules are associated with open billable file/matter. Amicus allows you to create, delete, and cancel an APX Recurring Payment schedule for both the General Bank Account and Trust Bank Account.
The APX Recurring Payment schedules process APX payments based on the defined recurring period. The schedules are set up by your Firm Administrator and are available only after APX has been configured for your firm. See Setting up APX.
Multiple payment schedules can be created for the same file.
This topic covers
- Requirements
- Creating a New Payment Schedule
- Editing a Payment Schedule
- Payments
- Cancelling a Recurring Payment
- Deleting a Recurring Payment
- Viewing an APX Recurring Payment
- Email Notifications after Receipt of Payment
Requirements
- Firms must have the BILLING-side enabled.
- Firms must be APX enabled.
- Billing Supervisors will have full access to APX Recurring Payments.
- Billing User access will be based on the user's access to Receive Payment and Trust Receipt.
This feature can be accessed from:
- The Action menu of the File Details, Billing and Trust modules.
- Or, the Recurring Payment Schedule Icon on File Details, and Billing and Trust modules.
Creating a New Payment Schedule
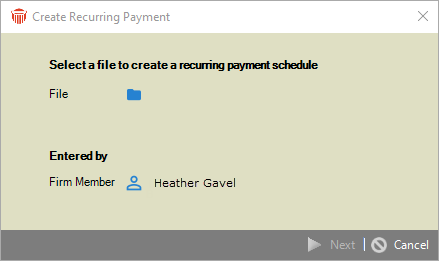
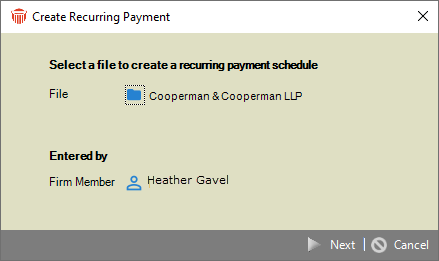
To create a New Payment Schedule:
- Click Next to display the New Recurring Payment Schedule.
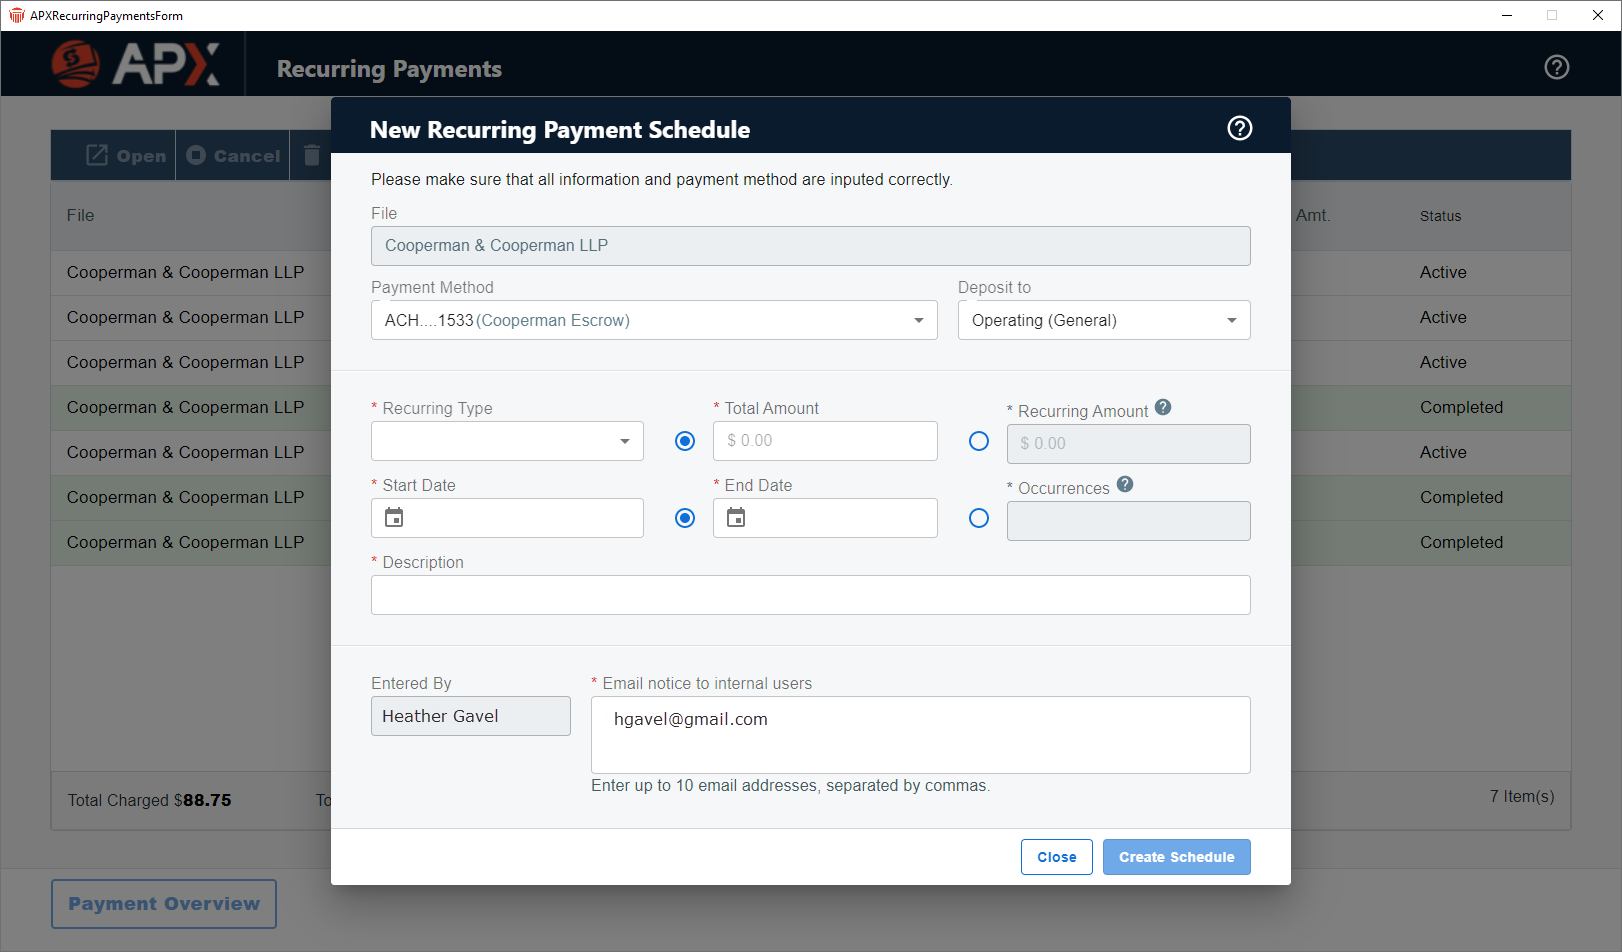
- Complete the following fields:
- The Payment Method field is populated if the primary client on the selected file has a default payment method. Keep the default or select an alternate from the dropdown menu if the primary client has multiple payment methods.
- Select either Operating (General) or Trust from the dopdown menu in the Deposit to field.
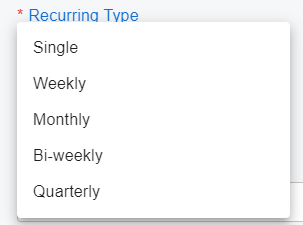
- Select a Recurring Type from the dropdown menu.
- Enter an amount in the Total Amount field or the Recurring Amount field. APX will calculate the amount for the other field.
- Select a date from the calendar controls in the Start Date.
- Select the End Date from the calendar controls or a value in the Occurrences field. APX will calculate the value for the other field.
- Enter a description of the New Payment schedule in the Description field.
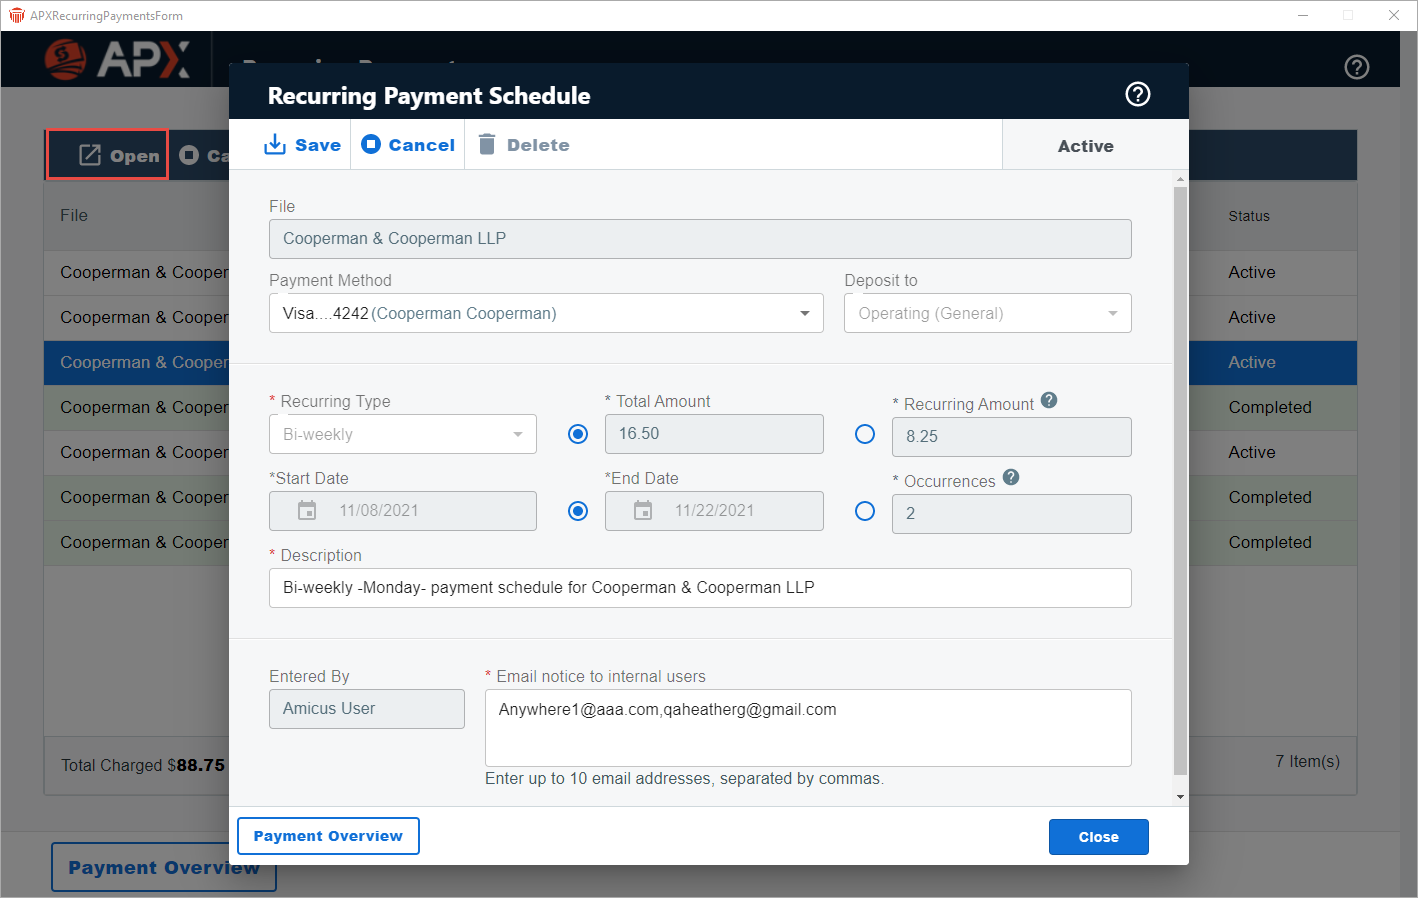
- The Entered By field is populated with the name of the firm member creating the New Recurring Payment Schedule.
- The Email notice to internal users is populated with the email of the firm member creating the New Recurring Payment Schedule. You can also enter up to 10 email addresses, separated by commas.
- The Payment Method field is populated if the primary client on the selected file has a default payment method. Keep the default or select an alternate from the dropdown menu if the primary client has multiple payment methods.
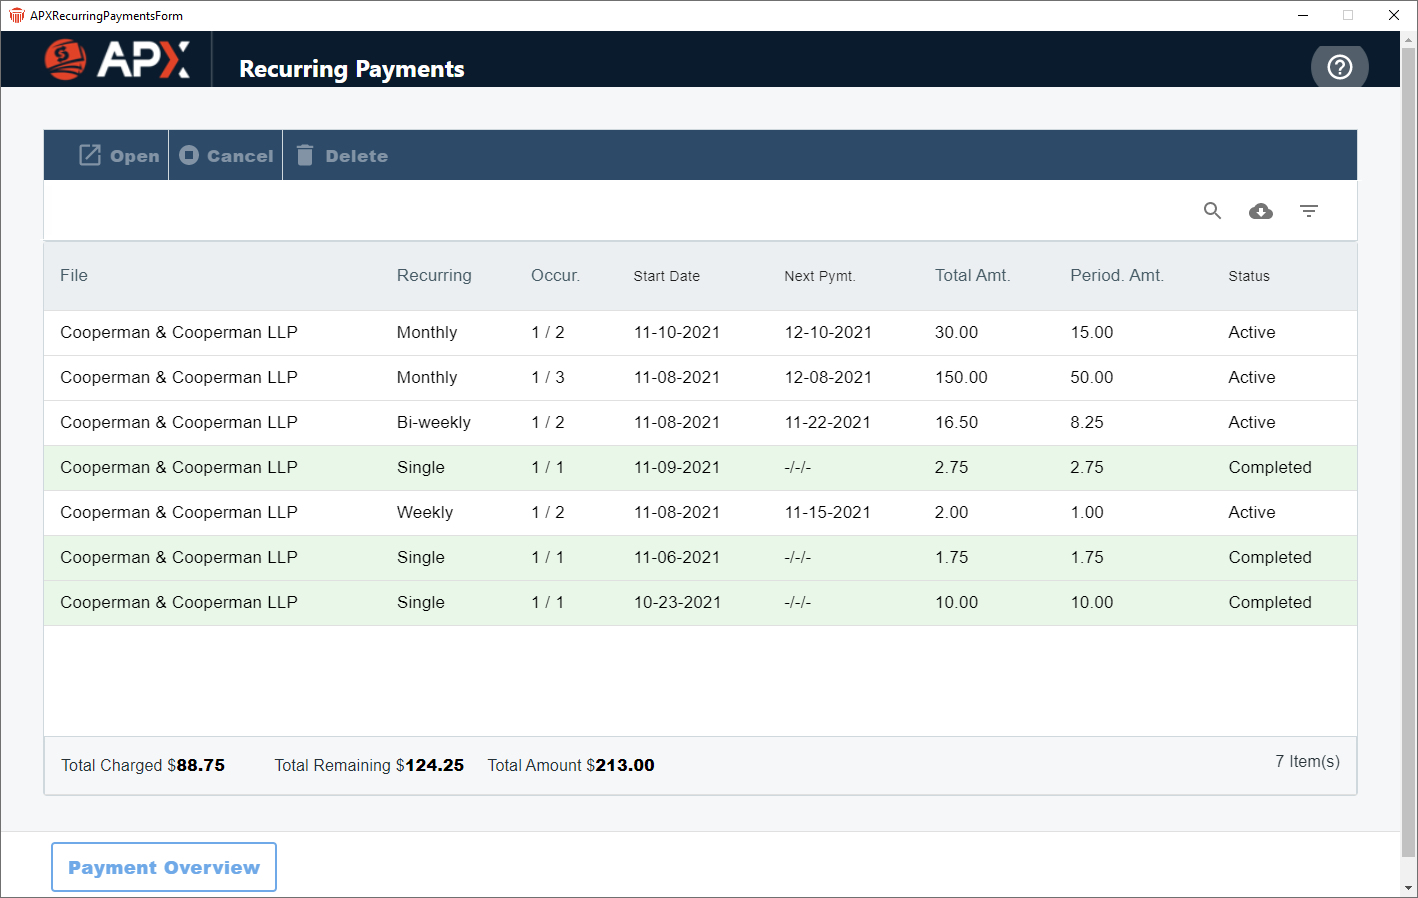
- Click Create Schedule. The Recurring Payments window displays with the newly created payment schedule.
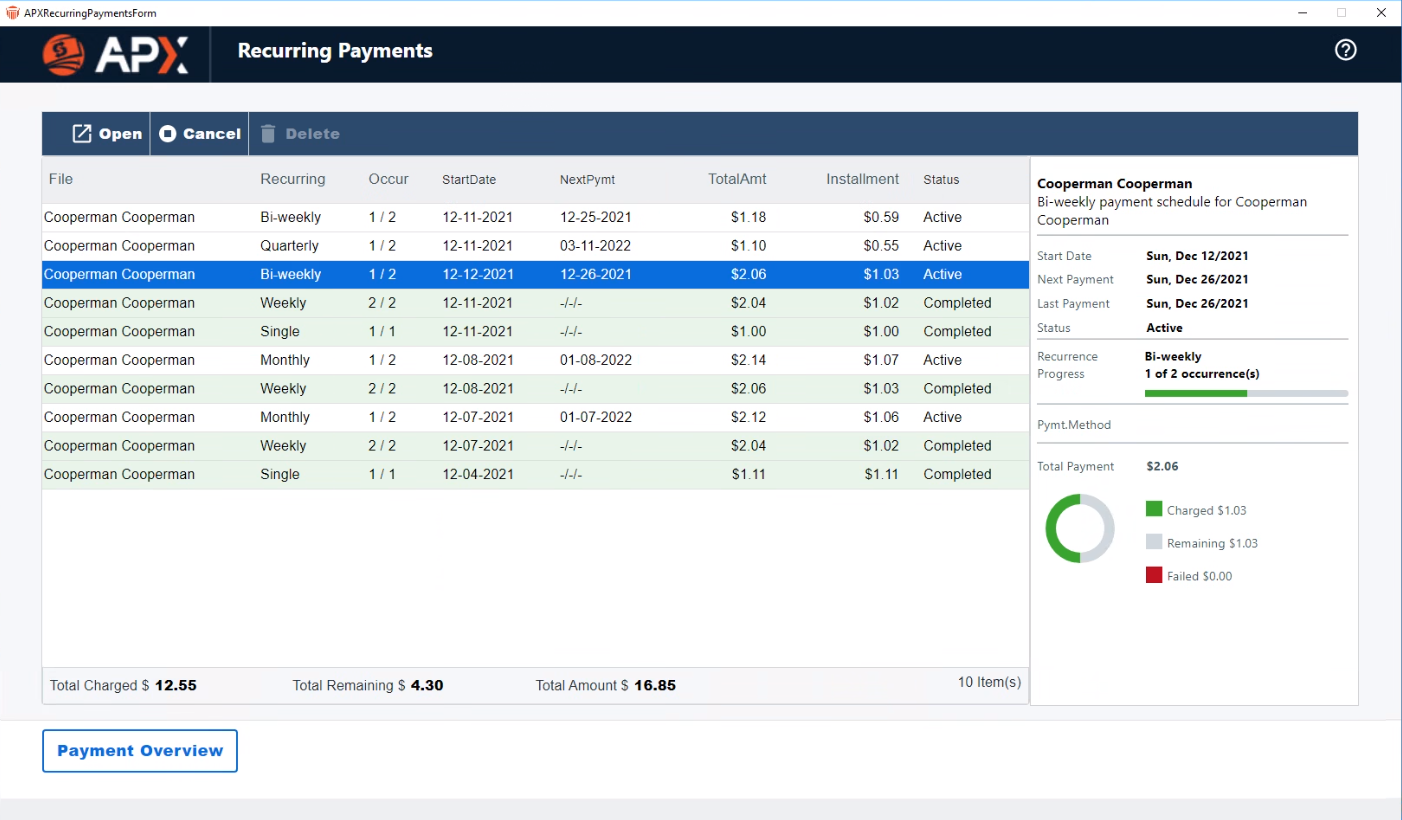
- Click the X at the top right of the Recurring Payments window to return to the Billing module.
 |
Notes:
|
Editing an APX Recurring Payment
You can open an APX Recurring Payment schedule dialog and change the description, payment method and email address.
To edit a Recurring Payment Schedule:
-

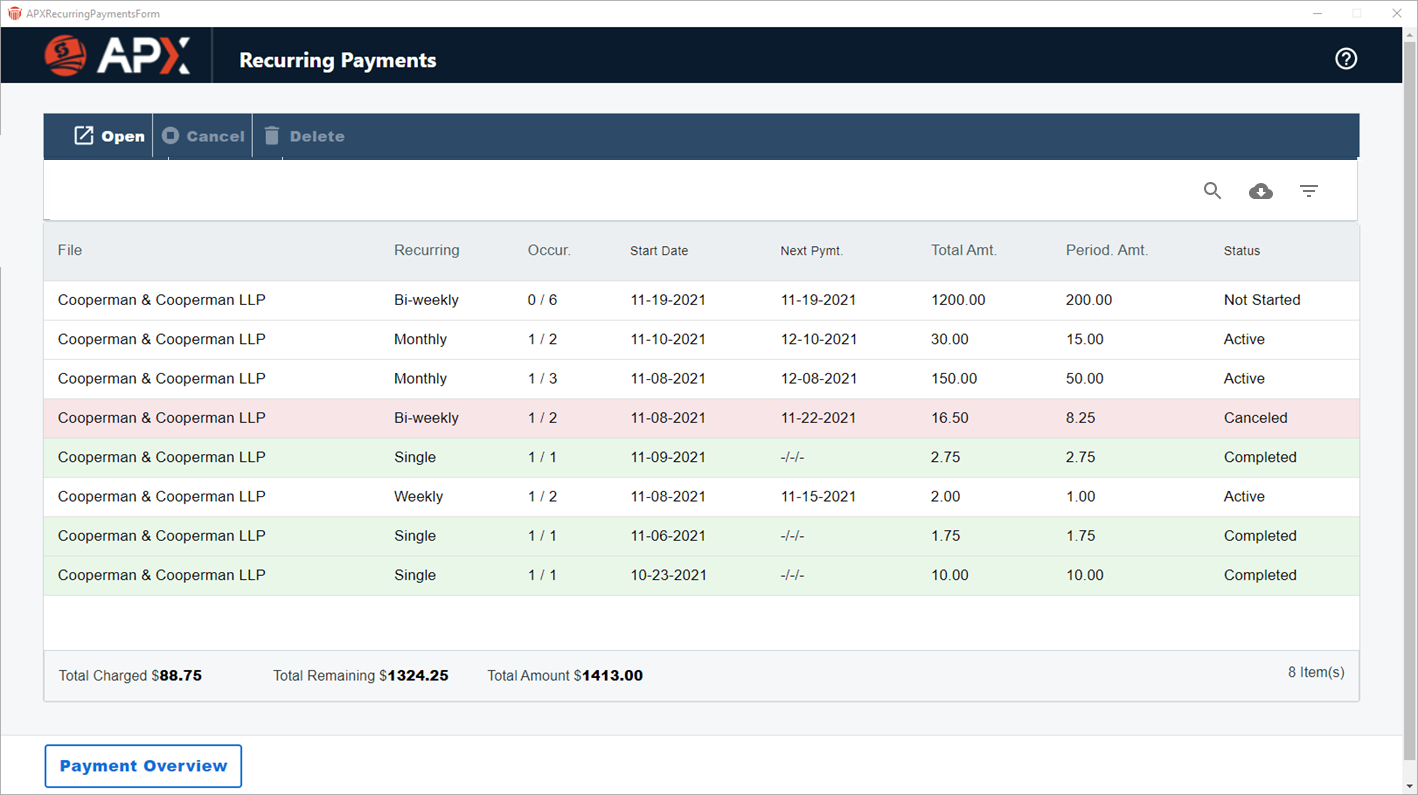
Note: When selecting Recurring Payment from the File Details, the existing Recurring Payment schedule associated with the current file displays. However; selecting Recurring Payment from the Billing and Trust modules will list Recurring Payment schedules for all files.
- Click in the Payment Method field and select another option from the drop down menu to change the payment method. You may also click in the Description field and enter a new description or click in the Email notice to internal users to enter a new email. The other fields are non-editable.
Payment Overview
- Click Payment Overview to view your Recurring Payments for the selected file.
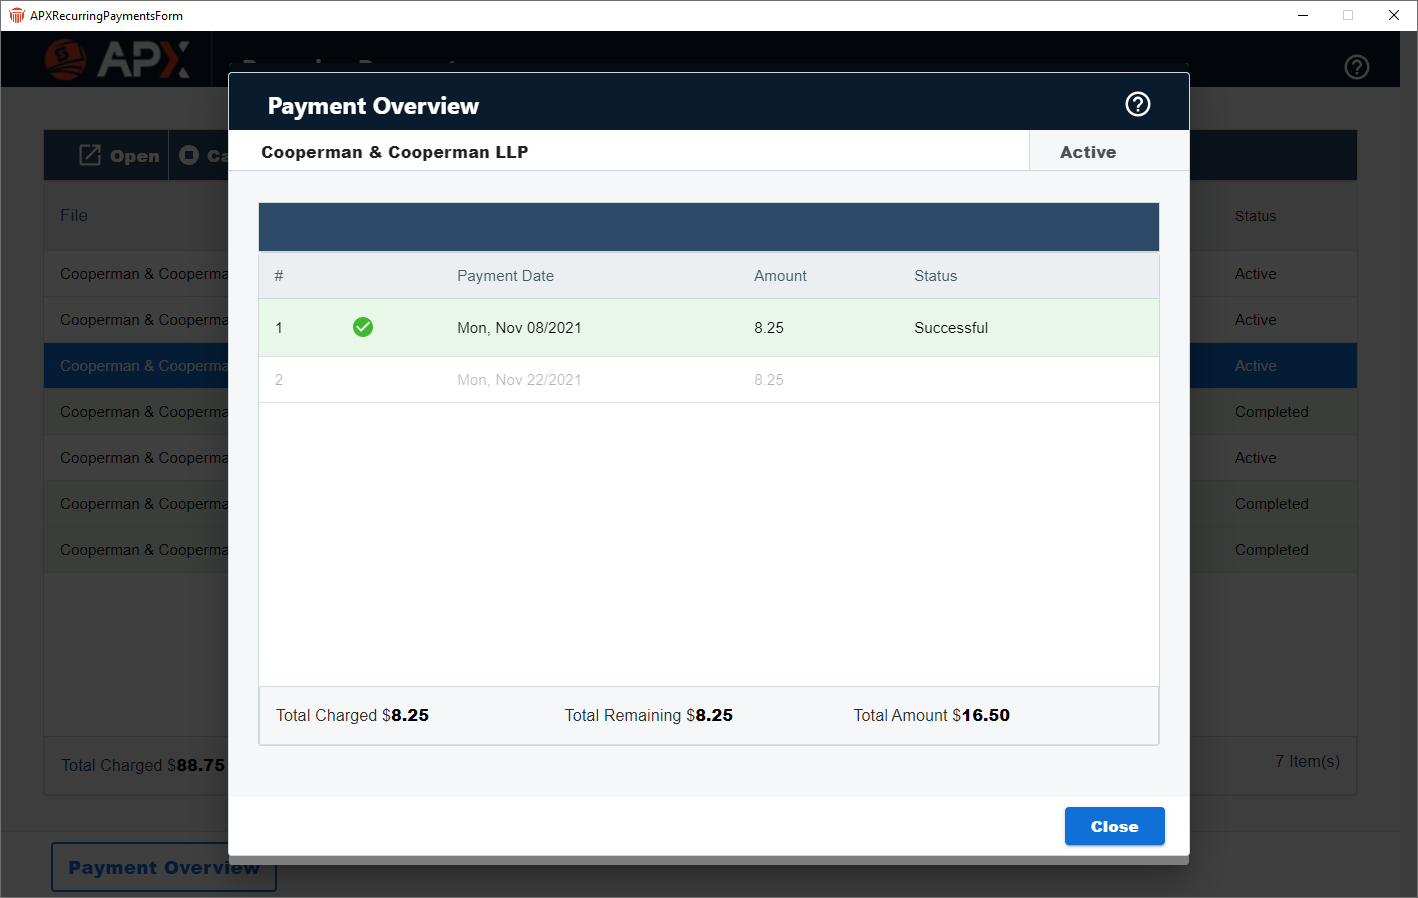
- Click Close to return to the Recurring Payment window
Cancelling an APX Recurring Payment Schedule
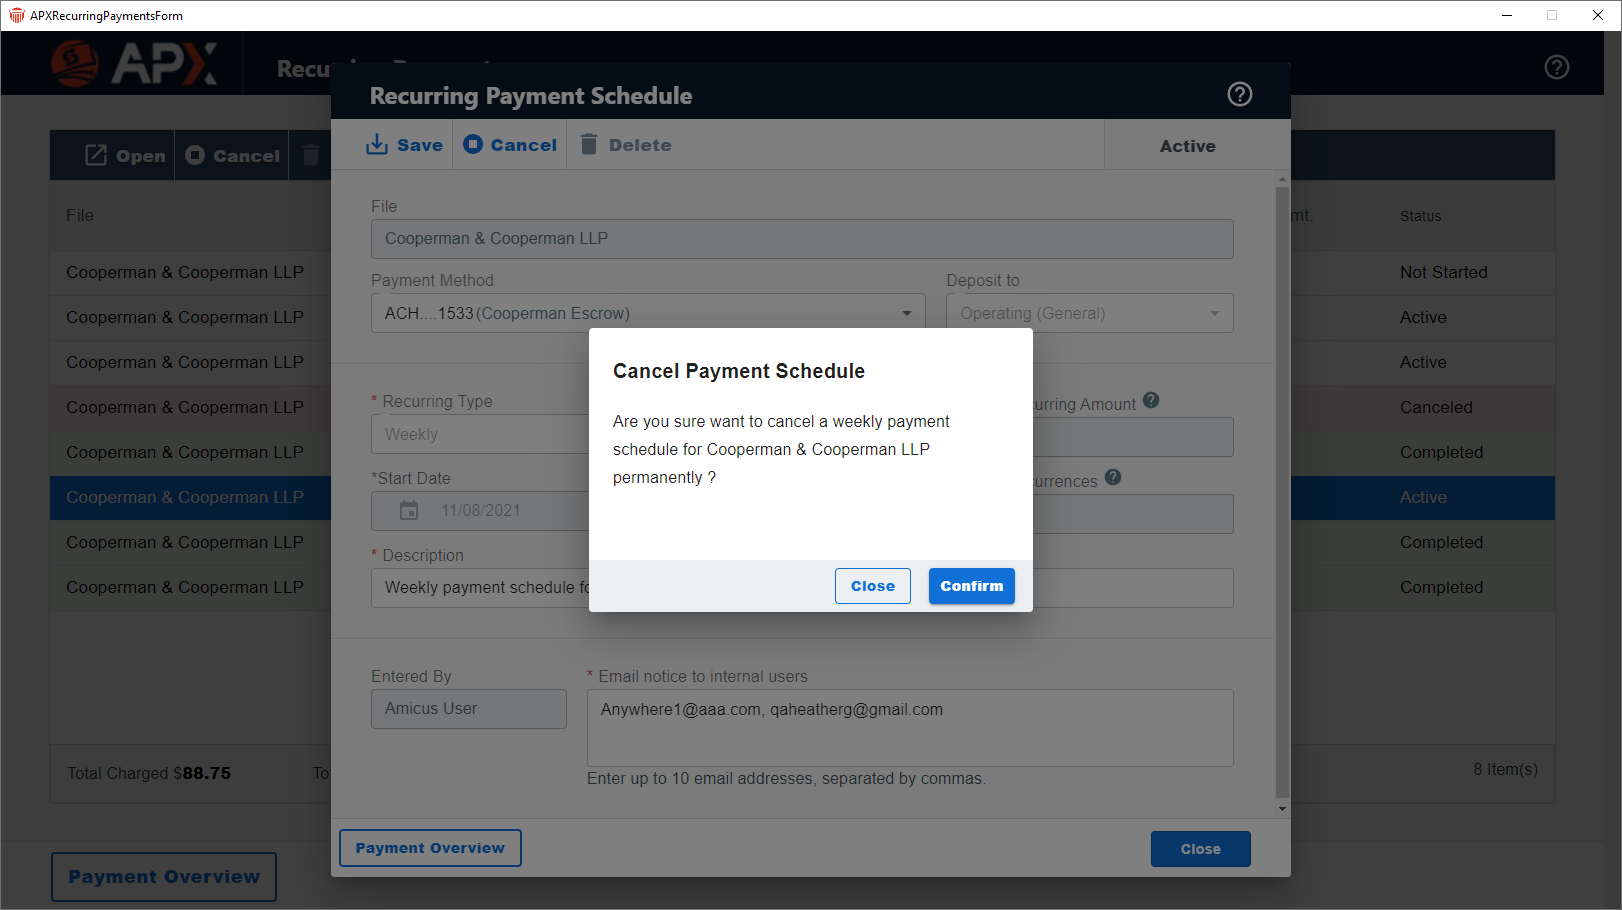
You can cancel an APX Recurring Payment schedule up until the day before the process date.
| Note: The payment schedule is permanently canceled. To resume a payment schedule you must Create a New Payment Schedule |
Deleting an APX Recurring Payment
| Note: An APX Recurring Payment schedule can only be deleted prior to the selected Start Date or if there are currently no successful payments on the schedule. |
To delete a Recurring Payment Schedule:
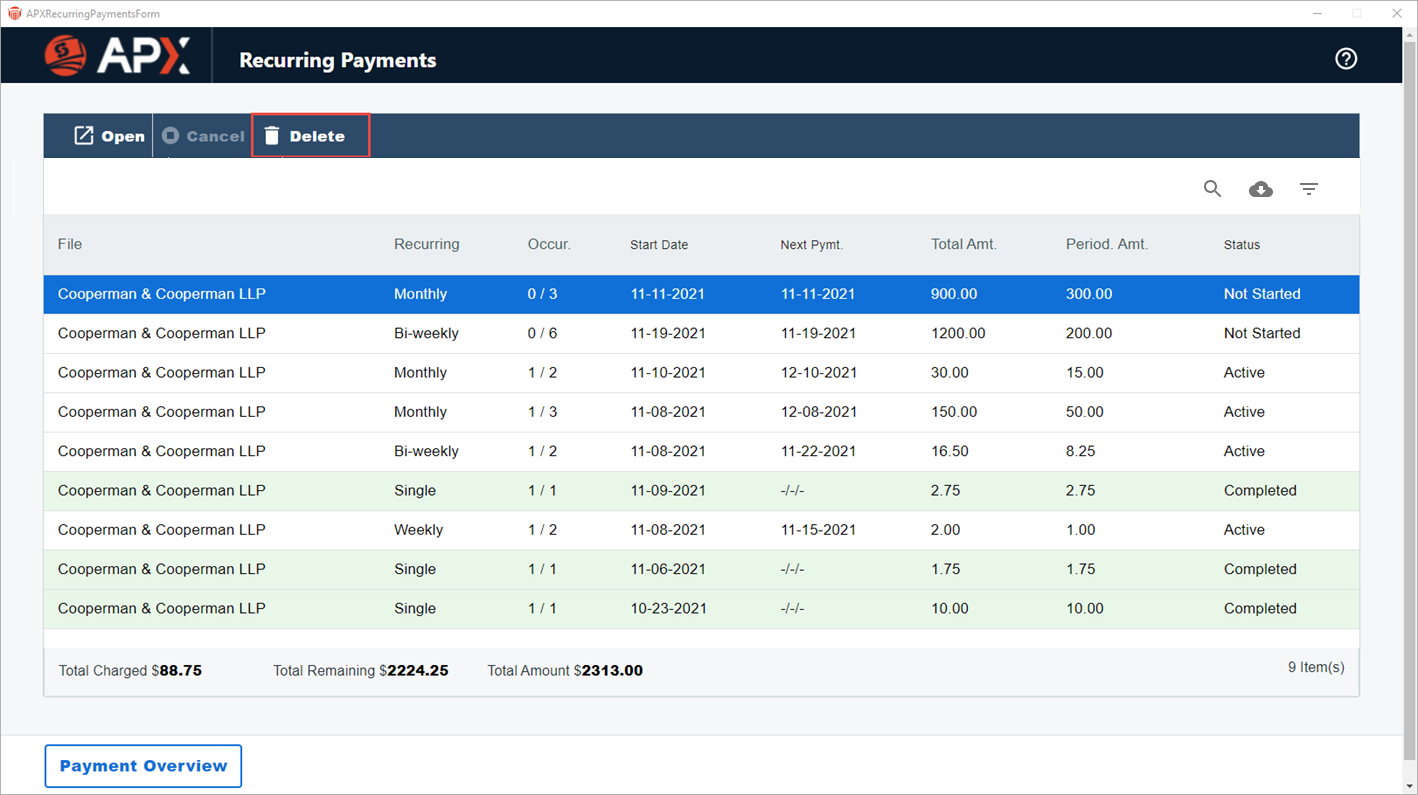
- Select the Recurring Payment schedule you wish to delete and click Delete in the taskbar. A prompt displays asking if you are sure you want to delete the payment schedule.
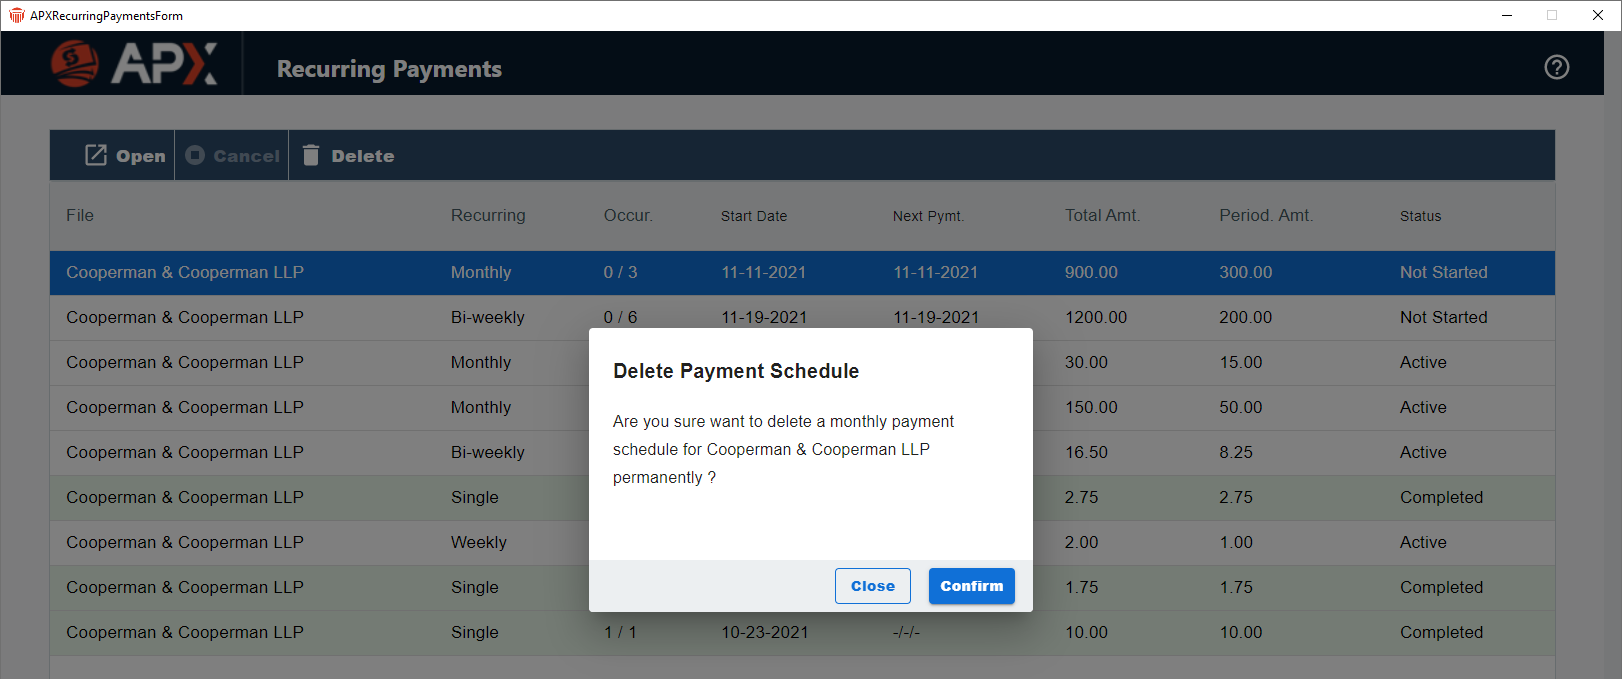
- Click Close to cancel the deletion and return to the Recurring Payments window or Confirm to delete the payment schedule.
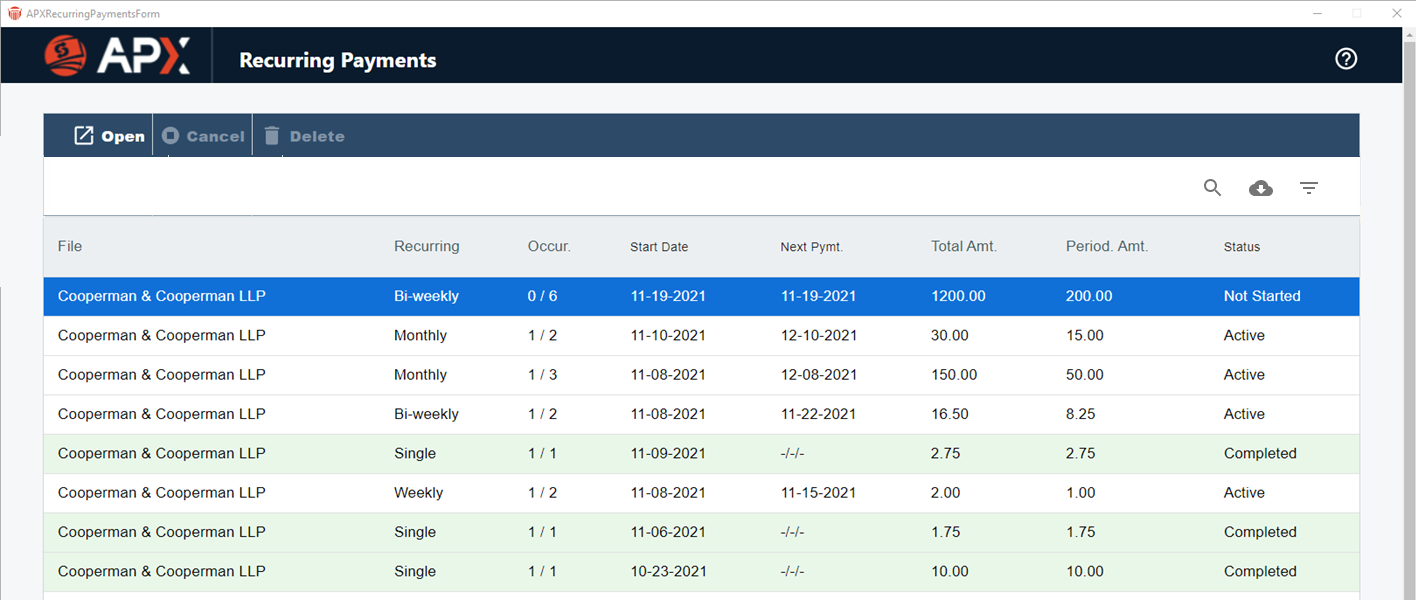
- The APX Recurring Payment schedule is deleted from the list of current Recurring Payments.
Viewing an APX Recurring Payment
Payments from a Recurring Payment Schedule are posted to the associated files/matters as an APX payment.
Recurring payments posted to the General Bank Account are recorded as Receive Payment (if the payment was applied to invoice(s)) or as a General Retainer if it was not applied to an invoice.
Recurring payments posted to the Trust Bank Account are recorded as Trust Receipts.
Double-click the transaction to open it and view the Recurring Payment.
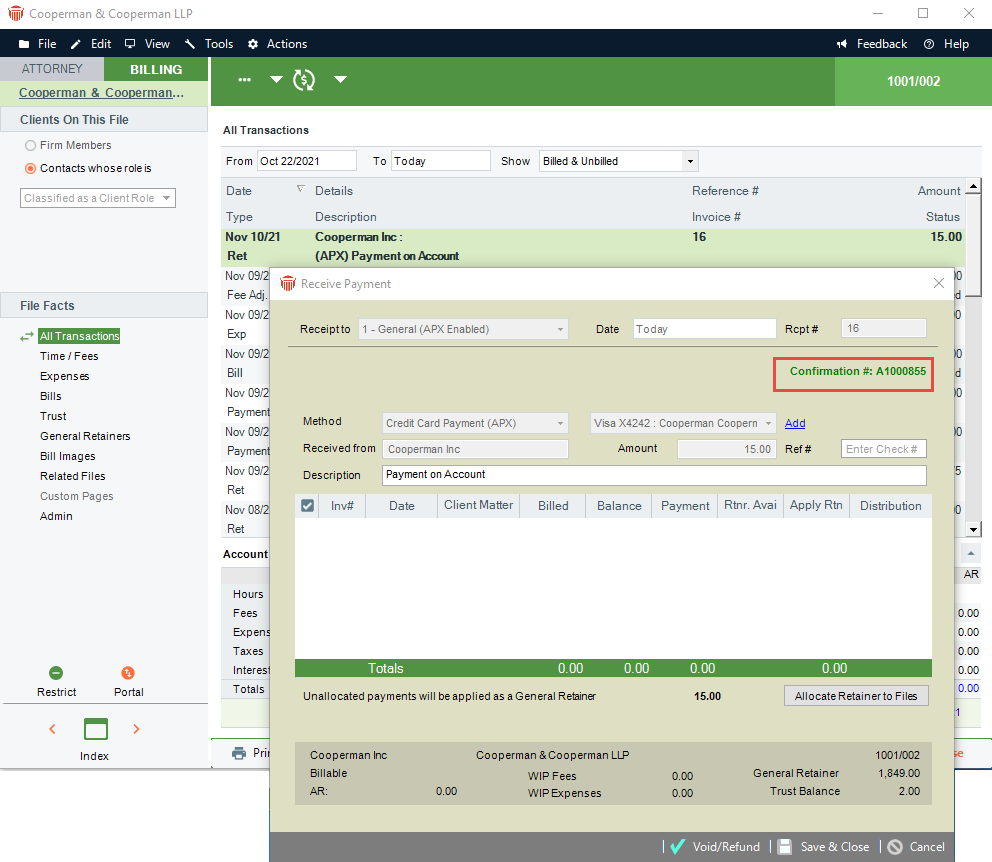
The APX payment transaction is displayed with the confirmation number of the APX payment.
| Note: This Recurring Payment is an APX transaction and can be Voided or Refunded. |
Email Notifications after receipt of payment
An email notification is sent to the customer's email that contains receipt of payment.
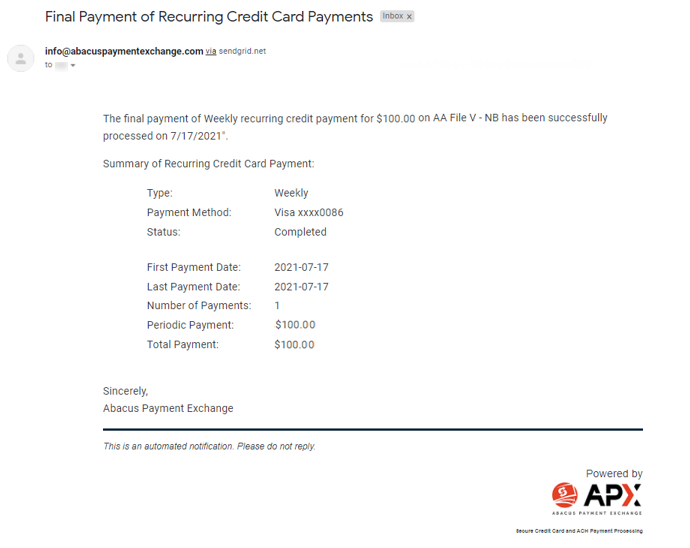
An email is also sent to the firm member after the final payment of Recurring Credit Card Payments is received.
