Library > Working with Pages > Adding Details to the Library Page
 Adding Details to the Library Page
Whenever a new Page is created, the Library Page Details dialog will be displayed so that you can enter information about your new Page.
This topic covers:
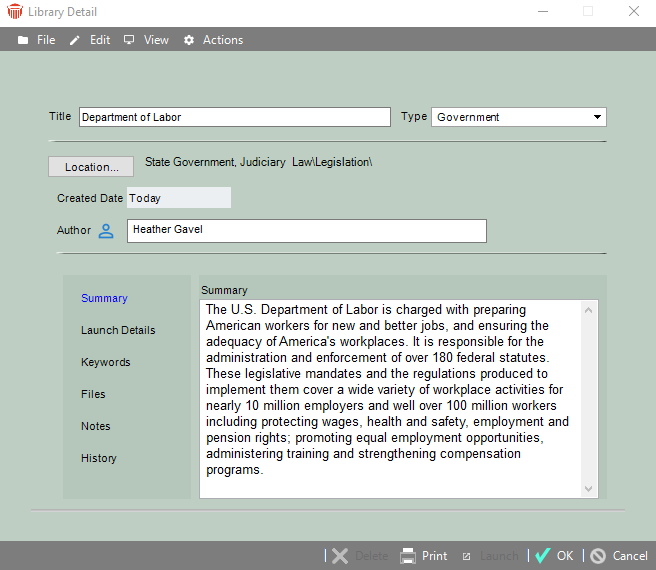
Adding Basic Details
Page Title
In the Title box, type a title for your Page. This information can be used in Library Searches.
Page Type
Characterize the nature of the Page by selecting a Page Type in the Type list box. This information can be used in a Search Restriction to filter the results of an Advanced Search. Page Types are a fully customizable list. For more information, see Customizing the Firm Library.
Page Location
You have the option to select the location in the Library where you would like to place the Page.
Click Location to display the Page Location dialog. It displays the structure of the Sections in the Library. Pages are not displayed. You can use the Page Location dialog to browse through the Library's Sections to select the location where you want to place your Page.
 |
Note: Only Librarians can add new Pages to the Firm Sections of the Library. A Non-Librarian can only add Pages to his or her Personal Sections or to the Firm Unshelved Materials Section, or Sections contained therein. Librarians will place Pages contained within the Firm's Unshelved Materials Section in appropriate locations within the Firm Sections. |
Date and Author
You can specify a Date and Author for the Page. Both the Date and Author may be used in restricting (filtering) Library Searches. The default date is the date when the Page was created. By default, the Author is the Firm Member who created the Page. If you want to add or edit an Author, click the Select People button, or type the name in manually.
Associating a Resource
In the Library Pages Details dialog, you can associate a Resource with a Page by assigning a path or URL to the Page.
To associate a Resource with a Page, choose Launch Details on the navigation list in the Library Page Details dialog.
Accessing a Resource via a path or URL
If identifying a web address as a Resource, type or paste the URL in the Path/URL text box.
If attaching a computer file document as a Resource, identify the place in which the document is stored. Although computer files can be stored anywhere accessible to you (on your own workstation or your firm's computer network), we recommend that you store them in a location on the firm's network (set up by your Amicus Administrator and configured for indexing), especially if this is a Firm Library Page. In general, type the location in the Path/URL text box:
-
If Documents are User-Managed—We recommend that you store the computer file in the \LIBRARY subfolder of the Shared Location—click the Path/URL button to open a dialog in which you can browse to the item, select it, and click Open. Or, if UNC paths are utilized at the firm, type the place in the Path/URL text box (e.g. \\Alaska\SharedDocuments\LIBRARY\abdg92.doc).
-
If Documents are Amicus-Managed—We recommend that you store the computer file in the Library Resources location set up by your Amicus Administrator, and identify the item using its UNC path (e.g. \\Alaska\SharedDocuments\LIBRARY\abdg92.doc).
Paid Services
To indicate that the Resource accessed by the Page charges a fee for its use, select the This Is A Paid Service checkbox in the Launch Details section. This designates the Page as a Paid Service for the purposes of the Paid Services Log. For more information on this Log, see Paid Services.
Adding a summary
You have the option of providing important information about the Page by entering it in the Summary box in the Library Page Details dialog. This information will be displayed in the Page Summary panel when you select the Page from the Navigation panel. You can also make use of the Summary when you do a Library Search.
To type a description, choose Summary on the navigation list in the Library Page Details dialog.

Then type or paste in information about the Resource in the Summary box.
Assigning Keywords to the Library Page
Keywords are an additional way to improve the results of your Library Searches.
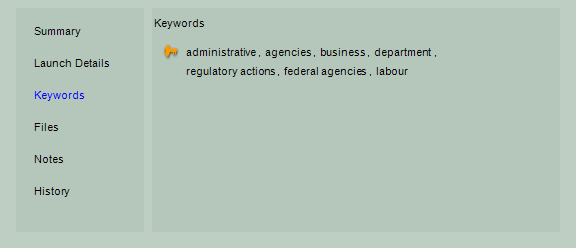
To select Keywords for a particular Page, choose Keywords on the navigation list in the Library Page Details dialog.
Click the Select Keywords icon in the Keywords view. The Select Keywords dialog appears.
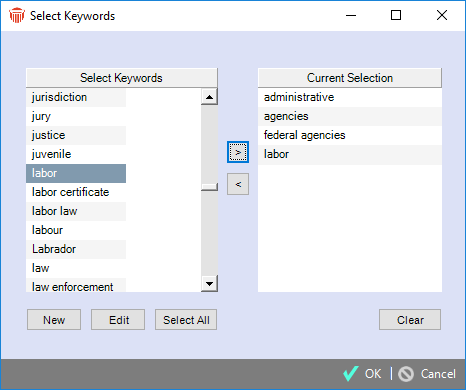
Select one or more Keyword in the Keywords box, and click the > button.
Click OK. The selected Keywords appear in the Keywords view of the Library Page Details dialog.
Adding new Keywords
From the Select Keywords dialog, you can also add new Keywords to the existing list of Keywords.
Click New. The New Keyword dialog appears.
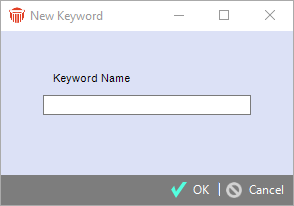
Type the name of the Keyword in the Keyword Name box.
Click OK. The Keyword appears in the Select Keywords box in the Select Keywords dialog.
Editing Keywords
From the Select Keywords dialog, you can edit existing Keywords that appear in the Select Keywords box.
Select the Keyword in the Keywords box.
Click Edit. The Keyword dialog appears with the text of the selected Keyword highlighted.
Edit the Keyword. Then click OK.
Making Notes
You can add Notes to Library Pages while you are working in the Library.
To add a Notes to a Library Page, choose Notes on the navigation list in the Library Page Details dialog.
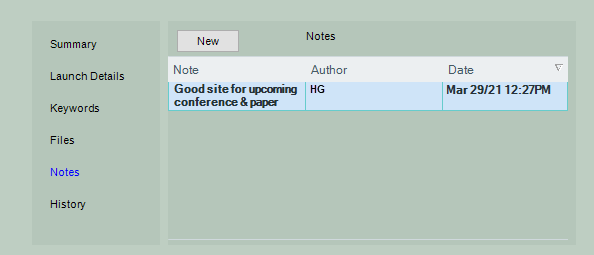
The Notes view shows the Notes for the current Page. For each Note, you can view the details of the Note, the name of the person who wrote the Note, and the date on which the Note was created.
Working with a Note
To open a note for editing directly within the Notes list, click in the text of the note. When you are finished, click elsewhere.
To edit the full details of a note, double-click in the Author/Date column at the left. The Note Details dialog appears. Make your changes and then click OK. For more information, see Working with Notes.
To add a new Note, click New. To delete a note, select a note in the list and click Delete or press the <DELETE> key.
Related Topics
