Adding Intelligence > Working with Precedents > Creating a new Precedent from scratch
 Creating a new Precedent from scratch
To create a new Precedent "from scratch", complete the following steps.
-
Open the File Details window for a suitable File, and display the Events brad view.
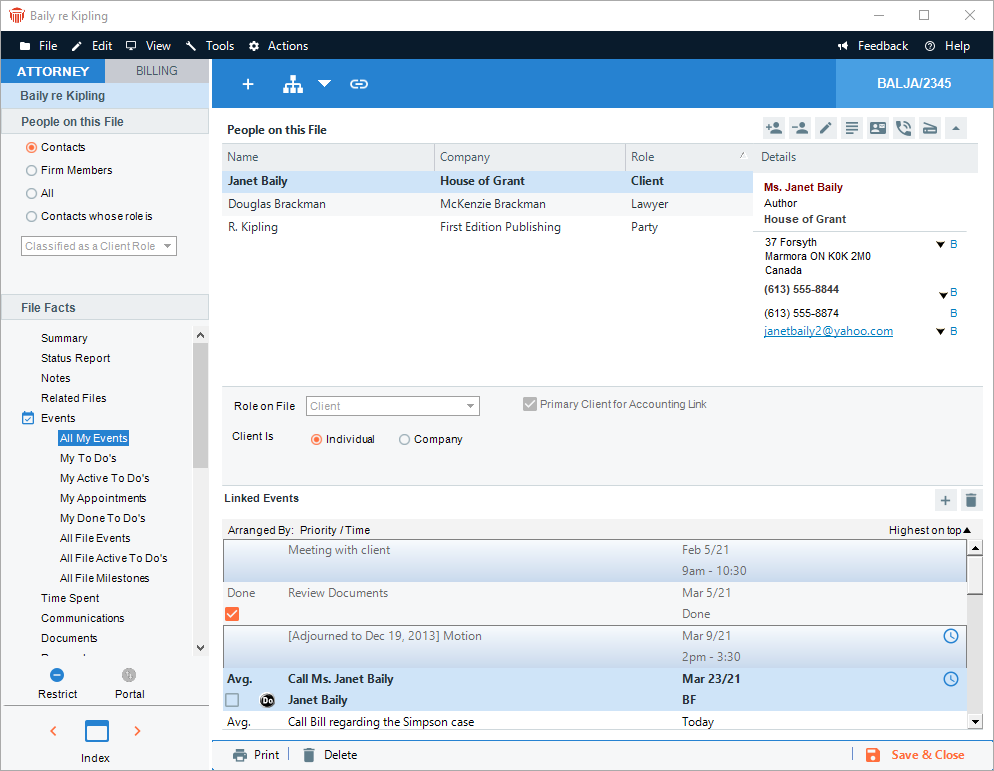

Tip: Ensure that the Firm Members on the File have been designated a Role on the File that is appropriate to the File Events they are assigned to.
-
Select the Events you want included, click Precedents, and choose Save As Precedent in the shortcut menu that appears.
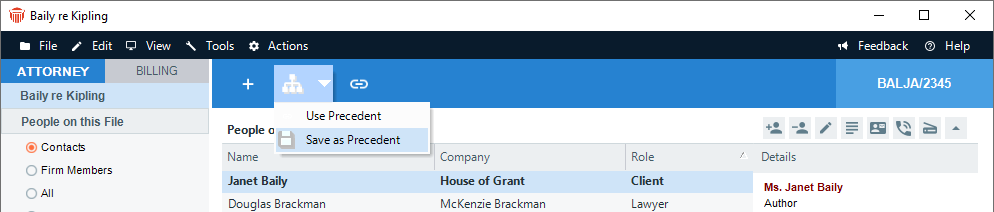
The New Precedent dialog appears.
-
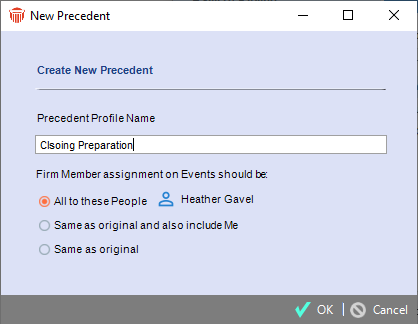
Type a unique name for the Precedent—e.g. "Attend in Court".
-
Select an option to specify who should be assigned to each of the Precedent Events:
-
Firm Members listed next to the first option—by default, this is you, but you can click the Select People button to change the list
-
Firm Members assigned to the original Event, plus yourself
-
Only the Firm Members assigned to the original Event.
-
-
Click OK.
-
If any of the selected Events is a Linked Event, and you have not selected all of the Events that are linked to it, then a dialog appears, asking you whether you want the other Events included. If you click Yes, all Events in the chain are included. If you click No, only the Events you selected are included, as unlinked Events.
-
The Precedent Profile dialog appears.
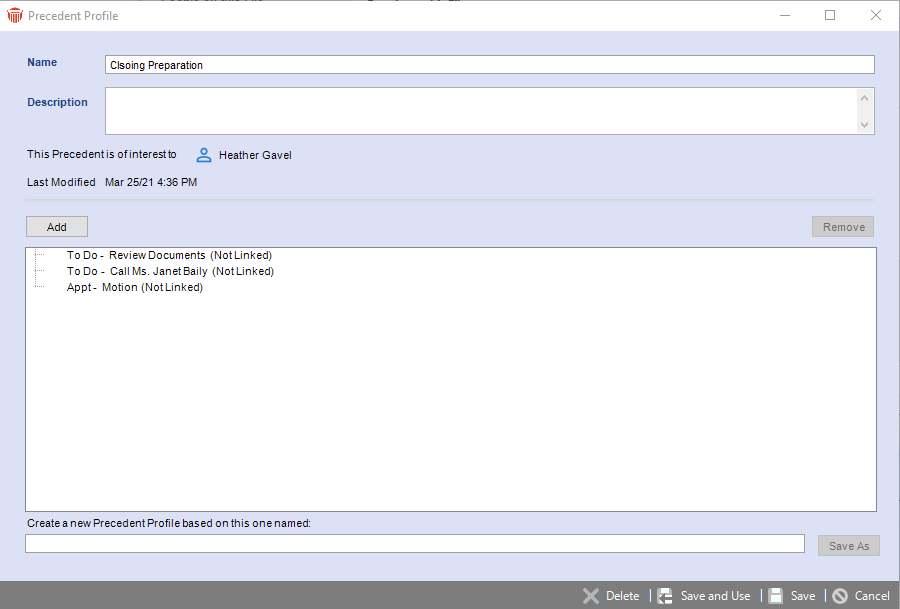
If you wish, you can enter a description of the Precedent and change the list of Firm Members assigned to the Precedent.
You can also add Events to the list and remove Events. To edit an Event, select it, right-click on the list, and choose Open in the shortcut menu that appears.
For each Event, the list shows the type of Event, the Event Title, the initials of assigned Firm Members and the Firm Member Roles associated with the Event. Unlinked Events are noted in parentheses as "Not Linked".
Linked Events show other information:-
The first Master Event in a chain of Linked Events is noted in parentheses as "Base".
-
Dependent Events are shown indented under their Master Event, connected by a dotted line, with the following details in parentheses:
-
For an Appointment: how its scheduled date is related to the Master Event (e.g. "+2 days)
-
For a To Do: how its scheduled start date (e.g. "+1 day"), and its Deadline, if any, (e.g. "DL + 11 days"), are related to the Master Event.
-
-
When you are finished editing the Precedent Profile, click Save.
Details of a Precedent Event
When a File's Events are added to a new Precedent, some Event details are automatically adjusted to accommodate the new purpose.
-
The Done status, Completion status, File assignments, Contact associations, associated Notes, History, Restrictions, and Client Portal sharing are all cleared.
-
The linking information is maintained only if you included all the Events in its chain.
-
For Repeating Events, only the "master" Event and the number of occurrences set in your preferences are included in the list.
-
Other details that are maintained include elements such as the Scheduled Time and Duration of Appointments, the Priority of To Do's, Reminder settings, Change Notification settings, Intelligent Assistance (DO buttons), the Milestone status, and the Main Note.
-
Firm Member* and Contact Roles on the current File are stored. For example, if the Event was originally assigned to one or more Firm Members who have a "Paralegal" Role on the current File, that Role is saved for the Event. This information may optionally be used when the Precedent is applied later to determine assignments.
-
If your Precedent was created prior to Firm Member Roles on Precedent Events being introduced in Amicus (Version 2015), you can update your Precedent to add that information—see Updating an existing Precedent to include Firm Member Role information.
Related Topics