Customizing the Database > Designing Custom Fields, Pages, and Records > Exposing Custom Fields
 Exposing Custom Fields in Amicus Anywhere & Client Portal
For the convenience of Amicus Anywhere and Client Portal users, you can make Custom Fields on Files available. For each File Type, individually choose which Custom Fields will be available for display and editing in Amicus Anywhere and/or the Client Portal. Amicus provides you with the flexibility of exposing a unique set of fields for Amicus Anywhere (for a File Type) and making them shareable to the Client Portal (for the same File Type).
For example on the Civil Litigation File Type, you could have all of the Custom Fields display in Amicus Anywhere. You could have a subset or different set of Custom Fields marked shareable to the Client Portal and, for each individual File, Firm Members will choose which particular Fields to share.
Exposing Custom Fields to the Client Portal is a great way to gather client intake information on a matter. The data is entered directly into Amicus without the need for double entry, and is immediately available.
For details about enabling those secure, remote access features, see Providing Amicus Anywhere and TimeTracker access to users, and Setting up the Client Portal.
This topic covers:
Layout for Amicus Anywhere - design and publish
Layout for Client Portal - design, publish, and share
Layout for Amicus Anywhere - design and publish
In Amicus desktop, the Custom Fields on Files are displayed on one or more Custom Pages. In Amicus Anywhere, the display is simplified in a single page with two scrollable columns.
Before you begin, you'll need to have designed Amicus Desktop Custom Pages for the File Type you're interested in.
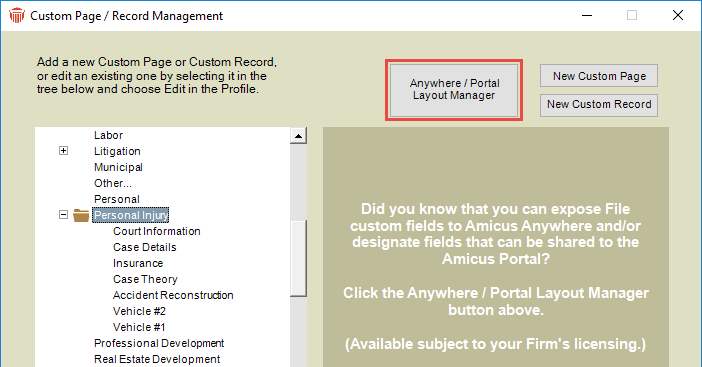
In the Custom Page/Record Management dialog, select "FILES"
at the left and click the Anywhere/Portal Layout Manager
button at the top center.
 .
.
Or, in the Toolbar of the Custom Page Designer
for a File Custom Page, click the Anywhere/Portal
Layout button.
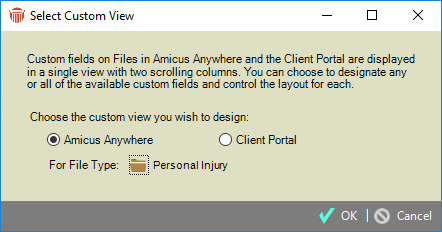
Choose Amicus Anywhere and the File
Type.
If your Amicus Anywhere Layout is currently empty,
you're prompted to have all Fields for the File Type automatically added to the Layout based
on the order they appear in the desktop. This is a quick way to populate
Anywhere with Custom Fields
for the File Type selected. (You have the opportunity
of removing any prior to publishing the view.)
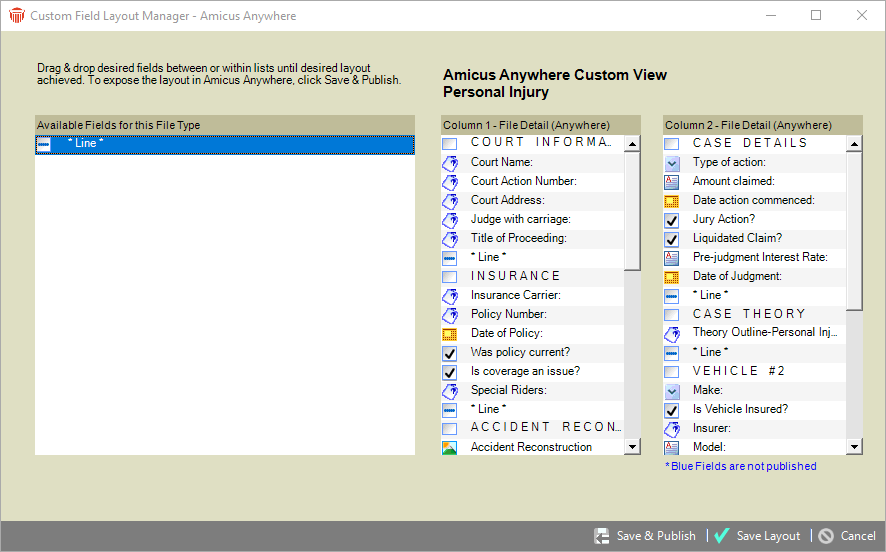
The Custom
Field Layout Manager for Amicus Anywhere
opens.
The Custom Fields currently defined on any of
the Custom Pages for the File
Type are available for placement in Column 1 or Column 2 of the
Custom view.
Select one or more Fields in the Available
list at the left and drag-and-drop them to the desired position in either
of the Column lists. You can also move Fields
between the Column lists, and within a list.
When finished selecting and arranging Fields, you can:
Copy Layout to Portal: This will copy this Amicus Anywhere Custom view's layout to the corresponding Client Portal Custom view (command available only if Client Portal Custom view's layout is empty). This can save you time and effort.
Save Layout: This will simply save this Custom view layout, without publishing its changes.
Save & Publish: This will save this Custom view layout, and publish it. Firm Members will see the changes when they next open File details in Amicus Anywhere.
Notes
If a Custom Field Label is renamed, it's automatically changed in the Custom Field Layout Manager and published to Amicus Anywhere.
If a Custom Field is deleted, or removed from all Custom Pages for a File Type, it's automatically removed from the Custom Field Layout Manager and Amicus Anywhere.
Line Custom Field—add divider lines wherever desired.
Appointment and To Do Lookup type Custom Fields— contents are shown but not editable in Amicus Anywhere.
Graphic type Custom Fields—contents are shown but not editable in Amicus Anywhere.
Frame type Custom Fields—not available in Amicus Anywhere.
Amicus Anywhere screen
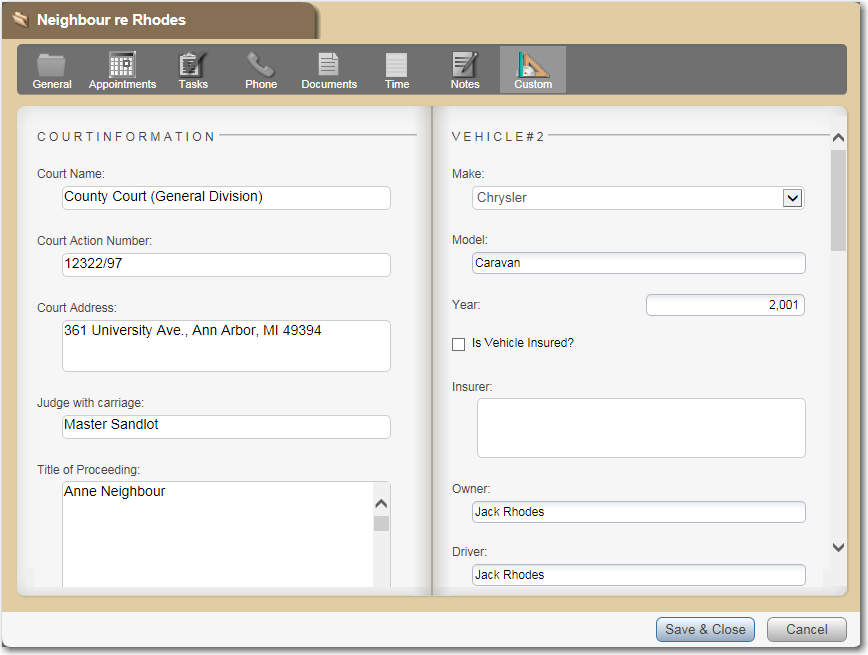
In Amicus Anywhere, the Custom view of File Details
might appear as follows:
Layout for Client Portal - design, publish, and share
In Amicus desktop, the Custom Fields on Files are displayed on one or more Custom Pages. In Client Portal, the display is simplified in a single page with two scrollable columns.
Before you begin, you'll need to have designed Amicus Desktop Custom Pages for the File Type you're interested in.
In the Custom Page/Record Management dialog, select "FILES"
at the left and click the Anywhere/Portal Layout Manager
button at the top center.

Or, in the Toolbar of the Custom
Page Designer for a File Custom Page,
click the Anywhere/Portal Layout button.
Choose "Client
Portal" and a File Type.
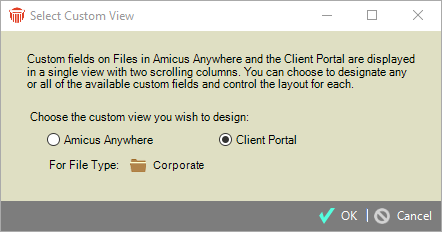
The Custom Field Layout Manager for Client
Portal opens.
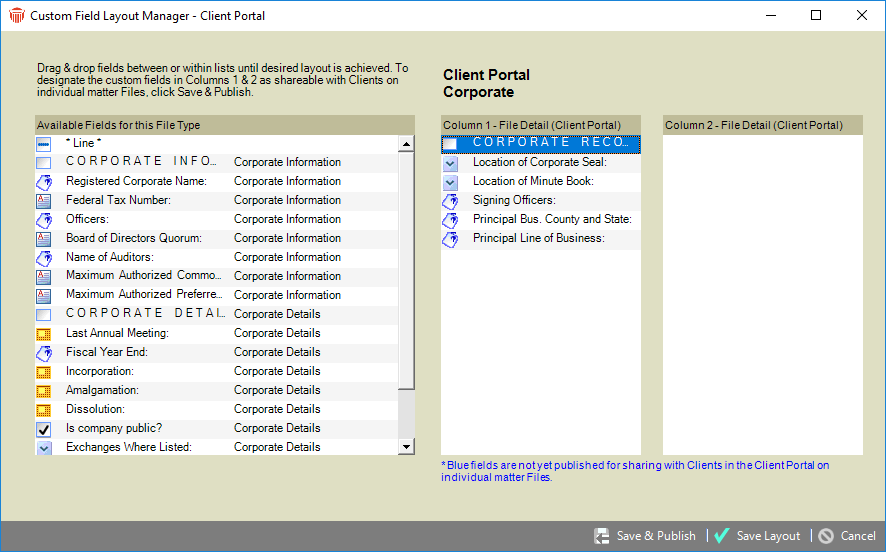
The Custom Fields currently defined on any of
the Custom Pages for the File
Type are available for placement in Column 1 or Column 2 of the
More view.
Select one or more Fields in the Available
list at the left and drag-and-drop them to the desired position in either
of the Column lists. You can also move Fields
between the Column lists, and within a list.
When finished selecting and arranging Fields, you can:
Save Layout: This will simply save this Custom view layout, without publishing its changes.
Save & Publish: This will save this Custom view layout, and publish it. Firm Members will see changes when they next open File details in the desktop. The Fields are merely made shareable—Clients will not see them automatically.
From the Custom Page view of each individual File at the desktop, a Firm Member will choose which of the shareable Fields they want shared to the Portal. For details, see the "Sharing Files and items with Clients" topic in User Help.
 |
Notes: Custom Field Label size—For Custom Fields that might be shared to the Client Portal, ensure that their Labels are wide enough to accommodate the asterisk that will be shown in desktop File Details to indicate they've been shared. See Designing a Custom Page or Record. If a Custom Field Label is renamed, it's automatically changed in the Custom Field Layout Manager and published to the Client Portal. If a Custom Field is deleted, or removed from all Custom Pages for a File Type, it's automatically removed from the Custom Field Layout Manager and the Client Portal. Line Custom Field—add divider lines wherever desired. Lookup type Custom Fields (Appointment, To Do, People, Files, and Firm Members)—contents are shown but not editable in Client Portal. Graphic type Custom Fields—contents are shown but not editable in Client Portal. Frame type Custom Fields—not available in Client Portal.
|
