Customizing the Database > Designing Custom Fields, Pages, and Records > Designing
 Designing a Custom Page or Record
This topic covers:
Designer dialogs
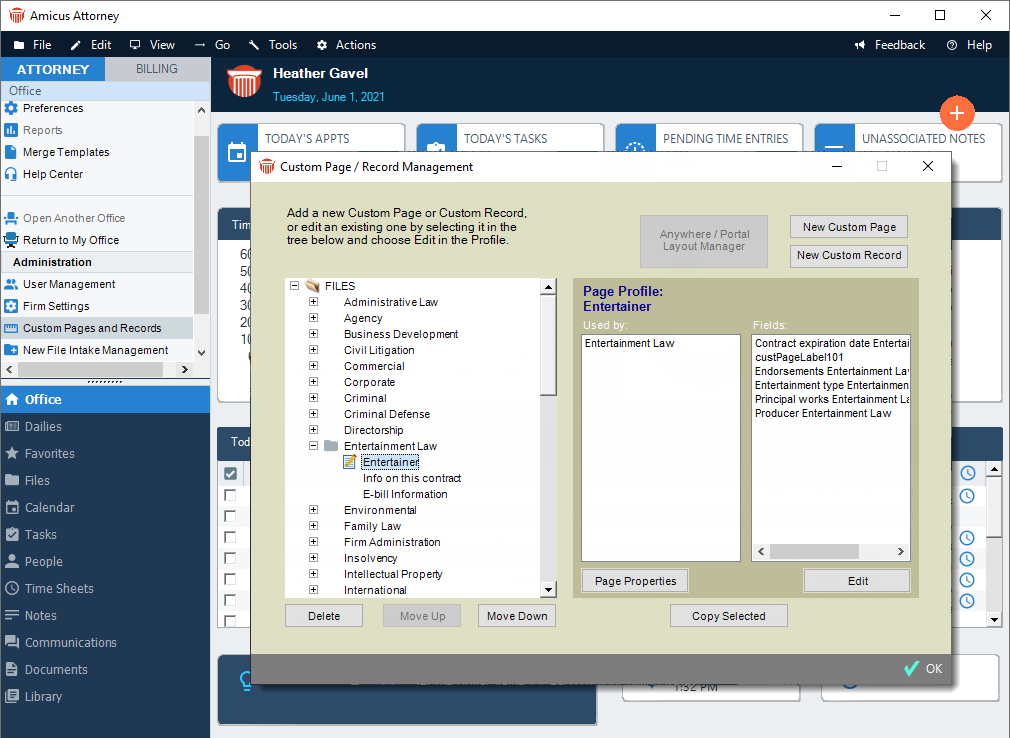
When you select Custom Pages and Records from the control panel to create or edit a Page or Record, the Custom Page / Record Manager dialog appears.
For example, the view for designing a custom page for an Entertainer might have the following appearance.
The Designer for File Pages, People Pages, and Records are all similar and can be edited using the same methods.
Screen resolution
To design Custom Pages and Records effectively, your monitor should be set to the lowest resolution employed by your users—e.g. if they use 1024 by 768 pixel or higher displays, you should design at 1024 by 768 pixels. If you design at too high a resolution, some Custom Fields might be hidden from some users unless they scroll to them.
Designing a Page for use in Files and People
If you are designing a Page for both Files and People, note that the workspace for Files is shown in the designer dialog. Any Fields you place in the lower half of the workspace will be hidden from view in People Pages unless the user scrolls down to them.
Adding Fields
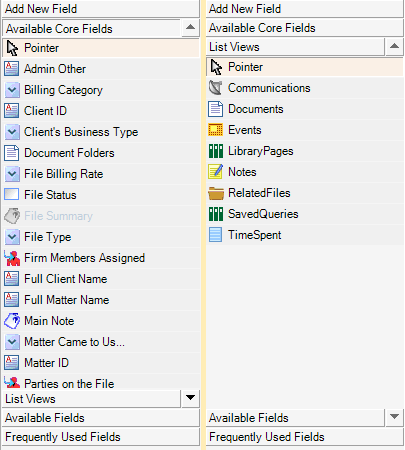
The control panel at the left displays the fields that can be added to the Custom Page:
Add New Field—all available types of new Fields.
Frequently Used Fields—previously defined Fields that have been designated as "frequently used" to make them available for quick selection.
Available Core Fields—all previously defined Core Fields.
List Views — all list views that can be added.
For example, to display a list of all existing Fields rather than the types of new Fields that may be added, click the Available Core Fields or List Views from the navigation pane.
Adding an existing Field
To add an existing Field to the Page or Record, display the list in the navigation pane and then drag the name of the field from the list and drop it in the desired position in the main screen.
 |
Note: You may add the same Custom Field to multiple Custom Pages, but it will represent the same, single data Field across those Pages—if a user changes the information in that Field on one of the Pages, it will change in the other Pages as well. |
Creating and adding a new Field
To create a new Field and add it to the Page or Record, display the Define New Fields list in the control panel and then either double-click the desired Field Type in the list (Text, Memo, Drop-down List, etc.) or drag it to the right and drop it in the desired position. The default name of the new Field is the Field Type followed by a number. To change this and other attributes of the Field, right-click on the Field and choose Show Custom Properties on the shortcut menu that appears—for details, see Custom Field Types.
For example, the view for designing a Custom Page might have the following appearance.
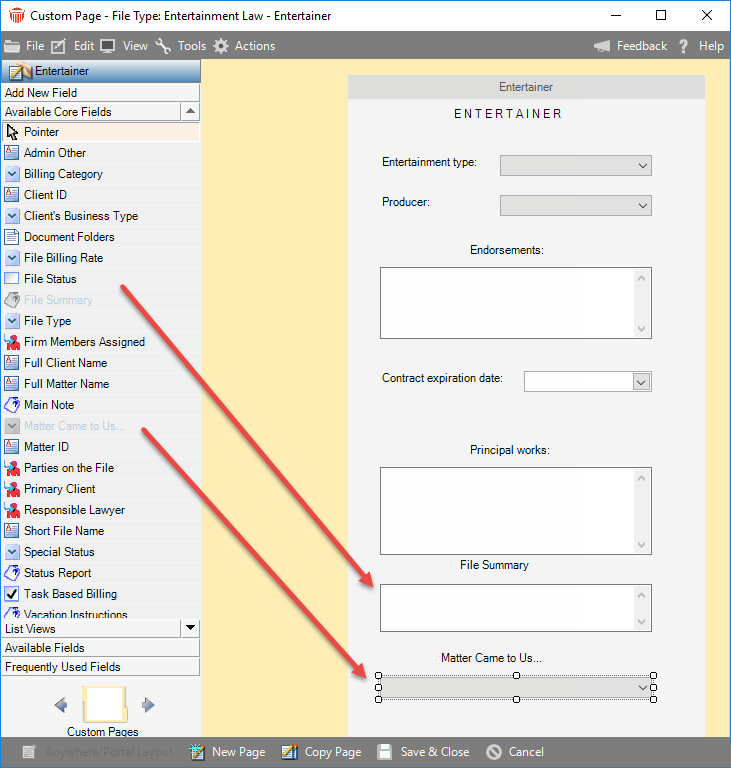
Moving and resizing Fields and Labels
By default, Custom Fields are assigned a Label. A Field and its Label are separate elements—you can move, or resize one without the other.
To move a Field or Label, select it in the view and drag it to its new position.
To resize a Field or Label, select it in the view. Then select a graphic handle and drag it to increase or decrease the size.
Multiple Fields and Labels may be selected and then moved or resized together.
 |
Tip: For a Custom Field that might be shared to the Client Portal, ensure that its Label is wide enough to accommodate the asterisk that will be shown in the desktop File Details to indicate it's been shared. |
Deleting Fields
To delete one or more elements from a Page or Record design, select them from the layout in the Designer dialog and then either right-click and choose Delete or press the <DELETE> key. Deleting a Field's Label also deletes the Field, and vice versa.
A Field can be deleted from one Page or Record design while remaining available for use on other Pages and Records.
 |
Warning: Deleting a Field from a Page or Record removes it and results in loss of access to any data that has been entered by users in that Field on that Page or Record. |
|
Tip: Before attempting to delete a Field that might be in use, ensure that all users have logged out of Amicus Attorney. This allows a more comprehensive check on whether a value has been assigned in any Files or People records. |
Deleting a Field globally
To delete a Field globally, first ensure that it is not in use on any Page or Record designs, and then select it in the list of Available Fields in the Designer dialog, right-click, and choose Delete.
Other functions
From the Custom Designer view, you can also display and edit the following:
Attributes of a Field—for more information, see Custom Field Types.
Properties of a Page or Record—for more information, see Editing the properties of a Custom Page or Record.
Navigating to another Custom Page or Record
To quickly display design details for the next or previous Page or Record, click an Arrow button at the bottom of the control panel.
Related Topics
