Calendar > Week View
 Week View
This topic covers:
Displaying the week view
To display the Week view, open the Calendar module and click Week at the bottom.

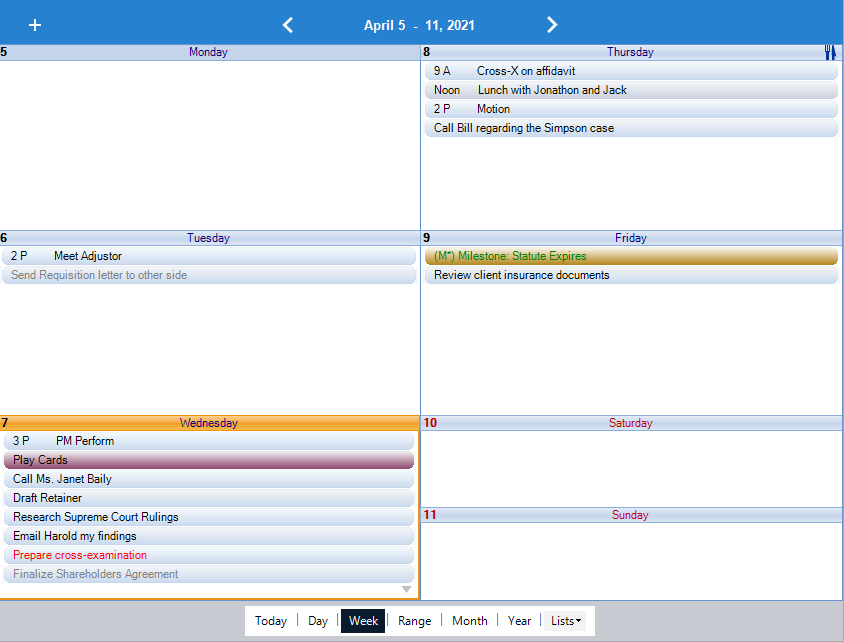
The Events as currently filtered are shown for the week indicated in the heading near the top of the window.
You can use the Week view to review Events for the week, to find and modify an Event, to create a new To Do or Appointment, and to reschedule Events.
Each day box shows that day's Events.
If the day is a Red Letter Day (i.e. one you created or one to which you are assigned) or a Holiday, that Event Title is shown in red italics.
Many Events on a day
If there are more Events on a day than can be shown in the day box, a Down Arrow icon is shown at the bottom right. You can click this icon to go to the Day view for that date.
Navigating in the Week View
To display the Events for the previous or next week, you can click the Right or Left Arrow buttons next to the date range at the top of the view.
To display the Events for any range of 1 to 30 days, select those days in the navigation calendar in the control panel.
Working with the Week View
You can add and change Events in the Week view of the Calendar.
Changing the details of an Event in the Week view
To see and modify the details of any Event, double-click the Event. In the Event Details dialog that appears, make the desired changes, and then click OK.
Adding a new Event in the Week view
To create an Event on a particular day, double-click an empty spot in that day box. For more information, see Adding an Appointment with basic information and Adding a To Do with basic information.
Rescheduling an Event in the Week view
To reschedule an Event, drag it from its current position and drop it onto another day box. Or, drag it and drop it onto another date in a navigation calendar in the control panel.
Copying an Event in the Week view
To copy an Event, click the Event to select it, and then press and hold down the <CTRL> key while you drag it onto the desired date in the navigation calendar in the control panel at the left. In addition, you can copy an Appointment by selecting it and then dragging it to a different day box. When you drop the Event, a copy is scheduled on that date, while the original remains in place.
Related Topics
