Time > Time Entries
 Time Entries
This topic covers:
Creating a Time Entry
This is the basic way to create a Time Entry:
-
Select File > New > Time Entry from the main menu in any module.

-
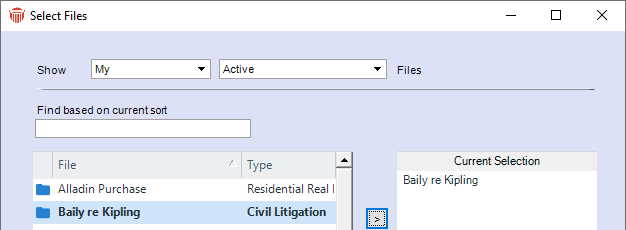
Select the relevant file from the Select Files window. The Time Entry Details dialog displays.

-
Type a short description of what you were doing and the amount of time it took.
Amicus Attorney completes everything else for you. If you want to create a special type of Time Entry, you can change the details where appropriate.
Alternatively, you can click the Show Timer button in the Amicus Floating Toolbar. For more information, see Timing an activity.
Creating a Time Entry based on a record
Amicus Attorney provides a number of convenient ways of creating Time Entries with most of the details already filled in. This minimizes the amount of work you have to do.
You can create a Time Entry based on a record by:
-
Clicking the Time Entry icon next to an Appointment that has already taken place, in the Calendar Day view
-
Clicking the Time Entry icon included in a list item (or selecting the item in a list, right-clicking, and choosing Time Entry)
-
Clicking the DO button for an Event (if Intelligent Assistance for the Event has been set up to create a Time Entry)
-
Marking a To Do as Done
-
Clicking the Time Entry icon in the Event Details dialog for an Appointment or To Do
-
Clicking the Do A Time Entry button in a Communications Details dialog
-
Right-clicking anywhere on a list of Time Entries and choosing New in the shortcut menu that appears
-
Clicking the New button in a Time Spent view of a File Details window
When you create a Time Entry using one of these methods, a Time Entry Details dialog appears with all of the available details already filled in. For example, when you complete a Phone Call, Amicus Attorney knows what you were doing, who you called, what File the Phone Call relates to, and how long the Phone Call took. These details will be filled in for you when you do the Time Entry for that Phone Call.
If you create a Time Entry by selecting items in a list (e.g. Appointments), right-clicking, and choosing Time Saver, the entries are created immediately, without opening Time Entry Details.
Creating a Time Entry from scratch
You can start with a blank Time Entry Details dialog by:
-
Clicking New in the Unposted view in the Time module
-
Clicking New in a Time Spent view in a File Details window
-
Selecting any item in a list of Time Entries, right-clicking on the list, and choosing New on the shortcut menu that appears
-
Clicking the New Timer button on the Windows Floating Toolbar, and then clicking the Time Entry Details button.
Complete the fields after the Time Entry Details dialog displays.
Creating a Time Entry for someone else
You can create Time Entries for another Firm Member who is a Timekeeper:
-
Simply select the Firm Member in the Timekeeper field of Time Entry Details. (If you are not a Timekeeper, you must select one in the Select People dialog that appears first when you create a new Time Entry.)
-
If you are in another Firm Member's Office as a Guest Assistant, and you record the time spent performing a task by creating a Time Entry, that Firm Member will by default be assigned as the Timekeeper on the Time Entry.
Related Topics
