Notes > Working with Notes
 Working with Notes
This topic covers:
Creating a Note
The simplest way to create a Note is in the Notes module. To access the module, click Notes in the navigation pane.
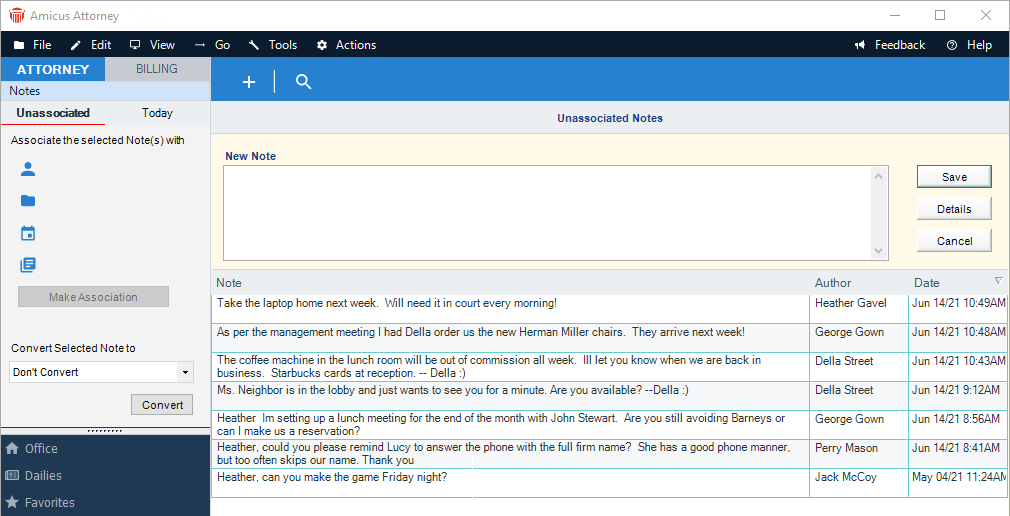
In the Notes module, a blank New Note is always available for you to add a Note. Enter your text in the New Note box.
If you wish to associate the Note with another record, select an option from the Convert Selected Note to dropdown list to convert the Note into another record type.
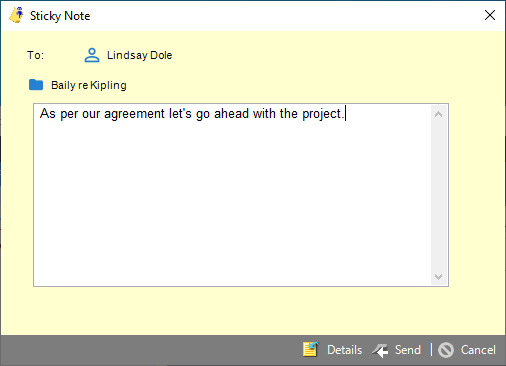
To send the Note as a Sticky to someone click the Add icon on the taskbar to display the Sticky Note dialog.
Or, click Details at the right to display the Note Details dialog. Complete the fields and click OK. For more information, see Notes Details dialog.
Otherwise, click Save.
Other ways of creating a Note
You can also create a Note from any Notes list in the Files, People, Calendar, and Library modules. You can:
-
Click Add above a Notes list
-
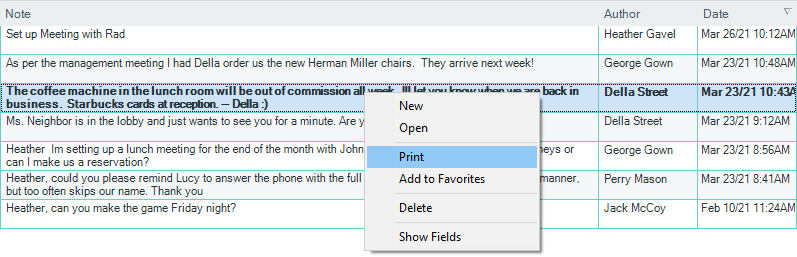
Right-click on a Notes list and choose New on the shortcut menu that appears
The Notes list
The contents of Notes are conveniently shown in the Notes lists.
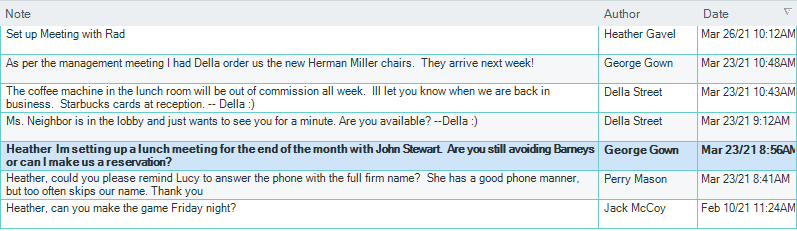
You can sort the list by original author or creation date by clicking the corresponding column heading.
Editing the text of a Note in a list
To edit Note directly within a Notes list, click the text of the Note.
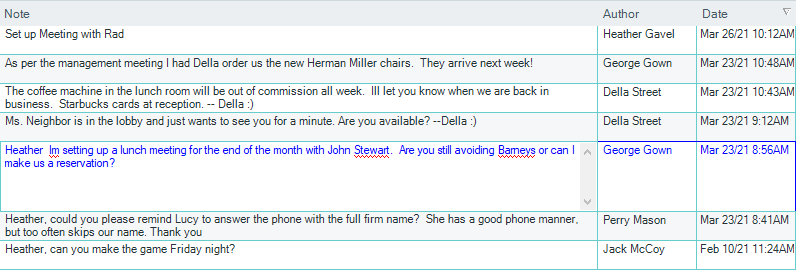
Type your changes in the box. If you wish, you can insert a Time Stamp. You can use Spell Check to ensure your text is spelled correctly. When you are finished, click another area of the Notes list.
Selecting a Note in a list
To select a Note in a list, click in the Author/Date column.
Associating Notes from the Notes module list
From the list, a Note may be associated with Files, People, Events, and/or Library Pages. For more information, see Associating a Note with other records.
You can quickly associate one or more Notes directly from the list in the Notes module, without having to open the Note Details dialog.

To associate Notes, select them in the list, then click a Select icon in the control panel, then select the specific records in the corresponding Select dialog. When you are finished specifying all the associations, click Make Association in the control panel.
Because the Notes are now associated with other records, they immediately disappear from the Unassociated view in the Notes module and appear in the Notes lists of the associated records.
Converting unassociated Notes from the Notes module list
A Note may be converted into a Phone Call, Phone Message, Time Entry, To Do, Appointment, E-mail, or Library Page. For more information, see Converting a Note to another record.
You can quickly convert one or more unassociated Notes directly from the list in the Notes module, without having to open the Note Details dialog.
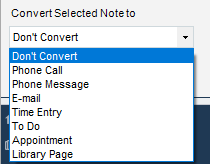
To convert unassociated Notes, select them in the list, select a new record type in the Convert Selected Notes list box in the control panel, and then click Convert. Fill in any additional details in the new record dialogs that appear.
When a Note has been converted, it immediately disappears from the lists in the Notes module.
Printing Notes in a list
You can print your list of unassociated Notes by choosing File > Print from the main menu. Or, select one or more items in a Notes list, right-click on the list, and then choose Print on the shortcut menu that appears.
Deleting a Note in a list
To delete one or more Notes, select them in a Notes list, and then choose Delete or Actions > Delete Note from the main menu, press the <DELETE> key, or right-click on the list and choose Delete on the shortcut menu that appears.
You can set a preference to have unassociated Notes deleted automatically after a specified number of days.
Note Details dialog
The Note Details dialog displays when you double-click in the Author/Date column to the left of a Note in a list, or when you single-click next to a Note to select it and then click Open from the shortcut menu that appears. The dialog also displays when you click Details to the right of the New Note box at the top of the list.
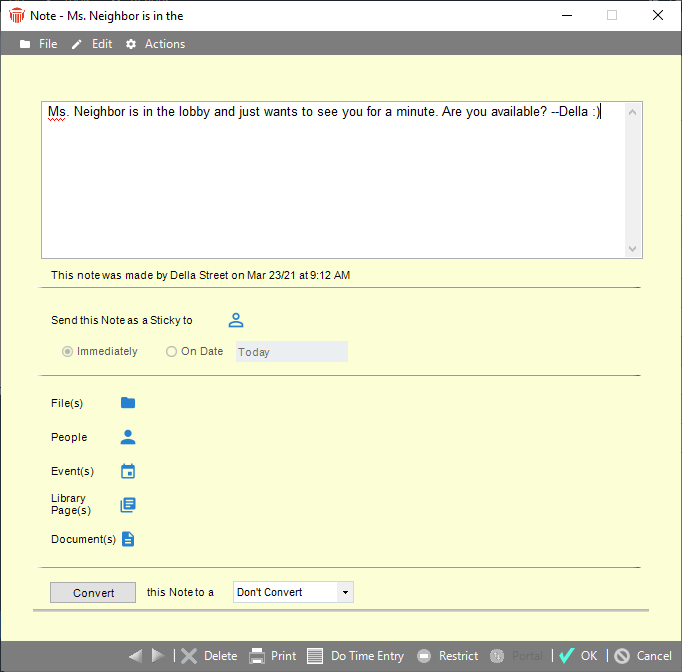
In the Note Details dialog, you can:
-
Edit the text of the Note
-
Send the Note as a Sticky to a Firm Member—see Sending a Note as a Sticky
-
Associate the Note with Files, People, Events, a Library Page, and Documents—see Associating a Note with other records
-
Convert the Note to another type of record—see Converting a Note to another record
-
Print or delete the Note
-
Do a Time Entry
-
Share access to the Note with Clients—see below
-
Restrict access to the Note—see below
Sharing a Note with Clients
If the Client Portal feature is enabled at your firm, a Note may be shared with Clients on the Note's File. And Clients may add new Notes to the Files they have access to. See Sharing information via the Client Portal.
Restricting Access to a Note
Your unassociated Notes are shown only to you, in your Amicus Office. However, an associated Note is generally available to all People on the associated record. If you wish, you can restrict an associated Note.
You might also find it convenient to restrict an unassociated Note before converting it into another record type because the Restrictions are carried over.
To restrict a Note, click the Restrict button in the footer of the Note Details dialog. Select the desired options in the Restrictions dialog that appears, and click OK. The no-entry image on the Restrict button turns red.
To unrestrict a Note, click the Restrict button. Clear the options in the Restrictions dialog, and click OK. The no-entry image on the Restrict button turns black.
For more information, see Setting record access restrictions.
Related Topics